How to Clear Unwanted Files on Your Laptop in Windows 10?
Your room would be filled with junk for the lack of timely cleaning. So is your laptop. Junk files are often neglected because we have no idea when and where they are created in our system. Accumulating junk files will affect your laptop's performance and take up space on your hard drive so that you might not be able to install important applications and Windows updates. Therefore, mastering the right methods to clear unwanted files on your laptop is a necessity. (This post takes Windows 10 for example.)
What are junk files?
Firstly, you need to have an idea about what junk files are. Typically, they can be divided into these categories:
Temporary Files: these files store interim data when you running or completing a task. They are needed to help your laptop run smoothly when you are using programs or applications.
Temporary Internet Files: these files play a role of browser cache when you use Microsoft Internet Explorer. They store pictures, text and other multimedia content, which allows you to visit these websites faster next time.
Downloaded Program Files: these files are created whenever you install any application or program. They take up lots of memory space unnecessarily and can be deleted safely. For example, you can delete any installer files on your system once you've installed the downloaded program.
Thumbnails: a thumbnail is a compressed preview image used as a placeholder for full sized multimedia content. It might take some time to open the image again if you delete these preview files.
Recycle Bin: this is where the files you delete stored. Check what's in your Recycle Bin before you empty it in case you need these files again in the future.
Now let's jump into the action part. There are Microsoft built-in tools and third-party software you can choose from.
Part one: Microsoft Built-in Tools
A-Disk Cleanup
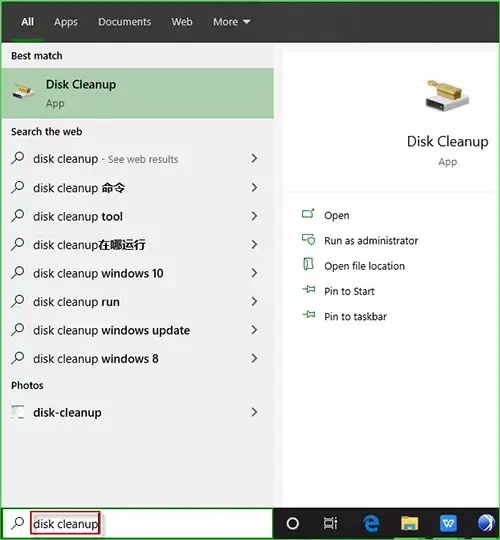
1. Search for Disk Cleanup in the Start Menu and open it.
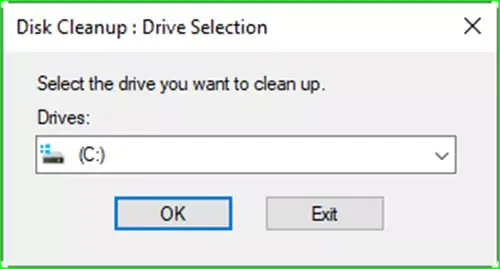
2. Select the drive you want to clean up. (By default it is C drive)
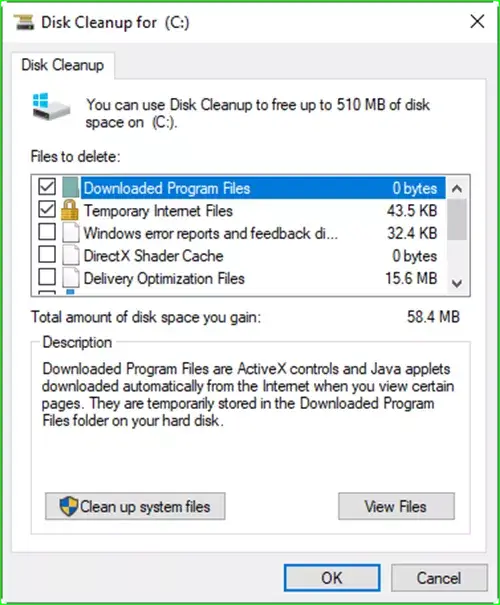
3. Wait a few minutes and it will scan and list out several categories of files you can delete.
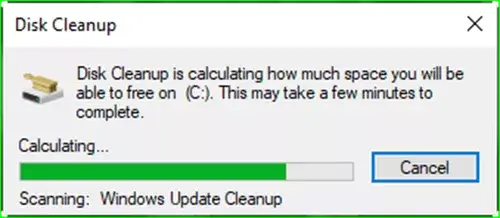
4. Tick the check box of which files you want to delete and click OK.
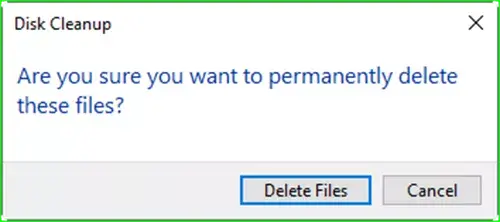
5. A window will appear to confirm your actions. Just click Delete Files.
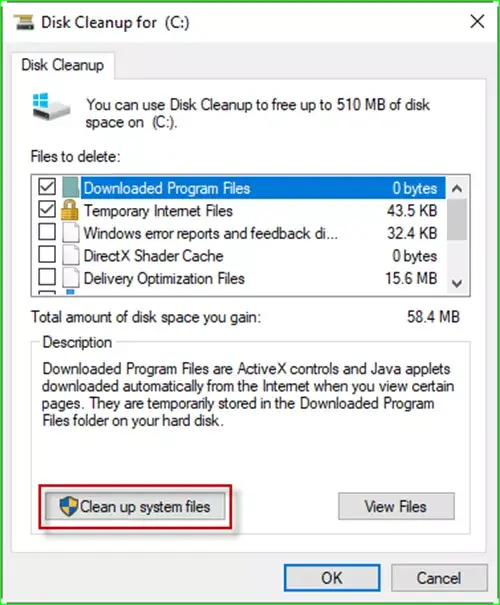
* * * Not all files you want to delete appear in the Disk Cleanup Menu. Go to "Cleanup system files" at the left bottom of the Disk Cleanup window to access them.
1. Click Clean up system files and select the drive you want to clean up.
2. Click More Options. Here you can see System Restore and Shadow Copies.
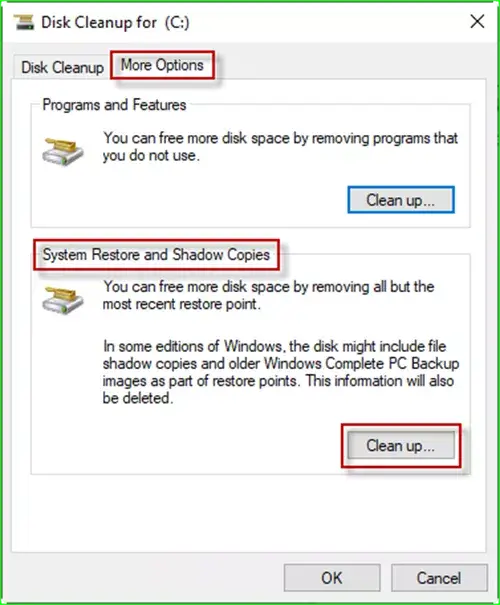
3. Select Clean up and wait a few minutes to complete.
B-Storage Sense
Another built-in tool is Storage Sense.
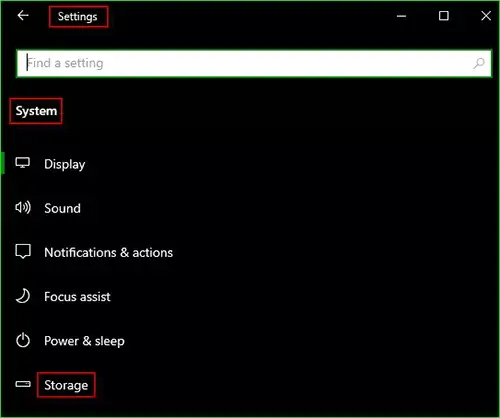
1. Right click Windows logo key and select Settings > System > Storage.
2. Click Temporary files under Local Disk(C:) section.
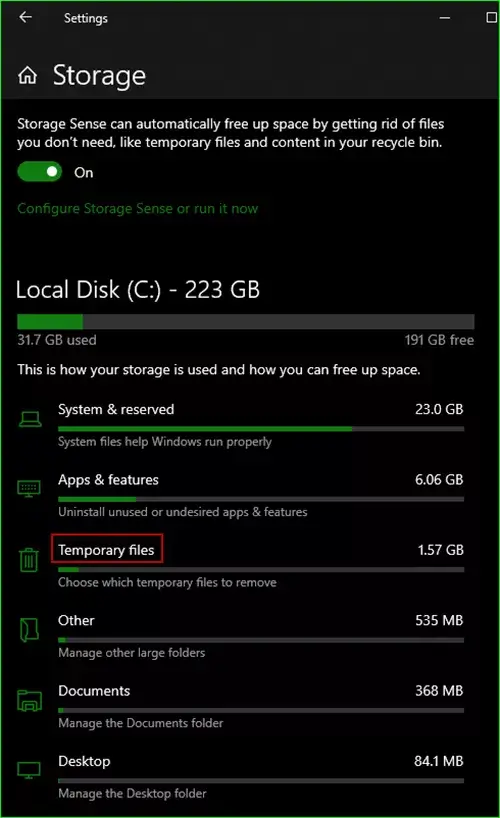
*** Sometimes the Temporary files would be hidden, you can select Show more categories.
3. Wait a moment for Windows scans the unwanted files and apps.
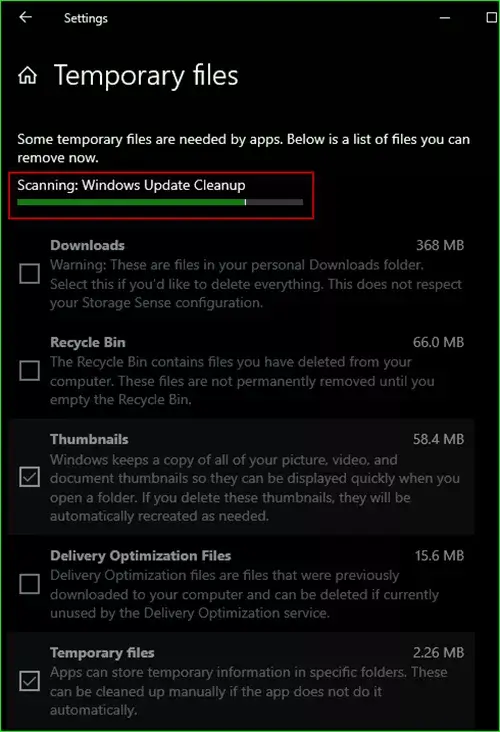
4. Tick the check box next to the files you want to delete and click Remove files.
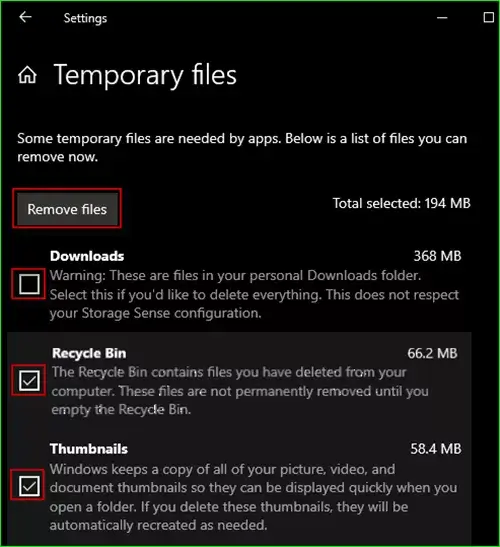
*** You need to scroll down and tick those items aren't selected by default like Recycle Bin. If you have no idea whether those files are safe to remove or not, you can read the description listed below each item. This also applies to Disk Cleanup.
Disk Cleanup or Storage Sense?
Storage Sense is more preferable than Disk Cleanup for it can automate the process by enabling some features. Follow these steps to make it run automatically.
1. Right click Windows logo key and select Settings > System > Storage.

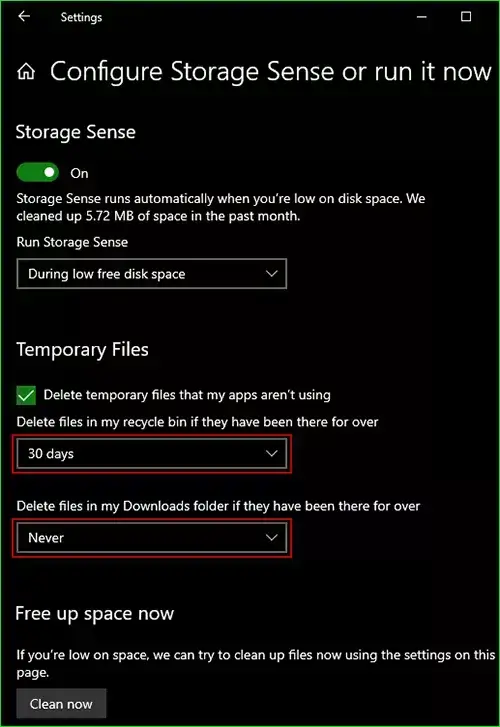
2. Click Configure Storage Sense or run it now under the Storage.
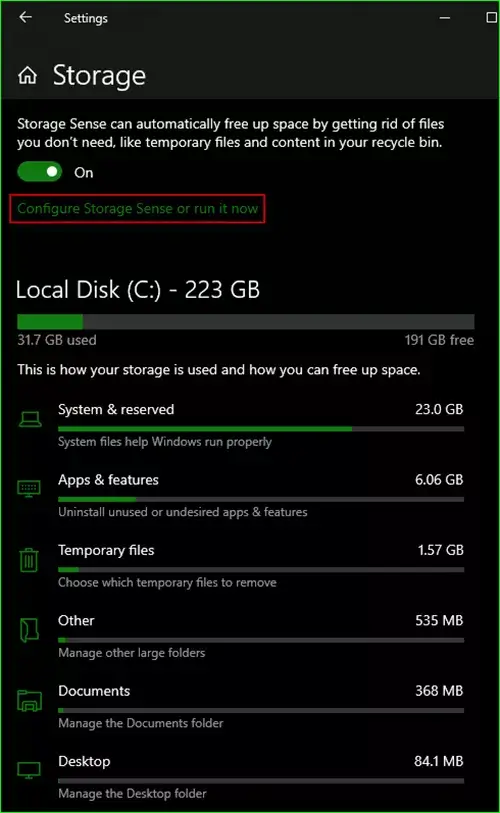
3. Turn on Storage Sense toggle switch. And choose how often you want Storage Sense to run. (During low free disk space is recommended.)
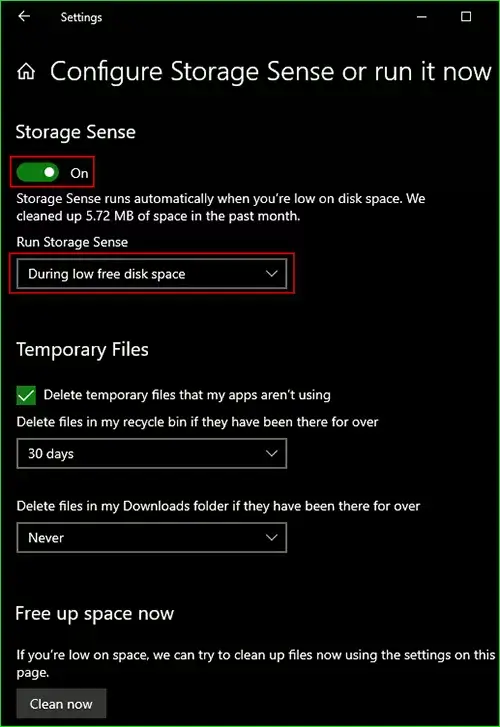
4. Under Temporary Files section, tick the box next to the Delete temporary files that my apps aren't using.
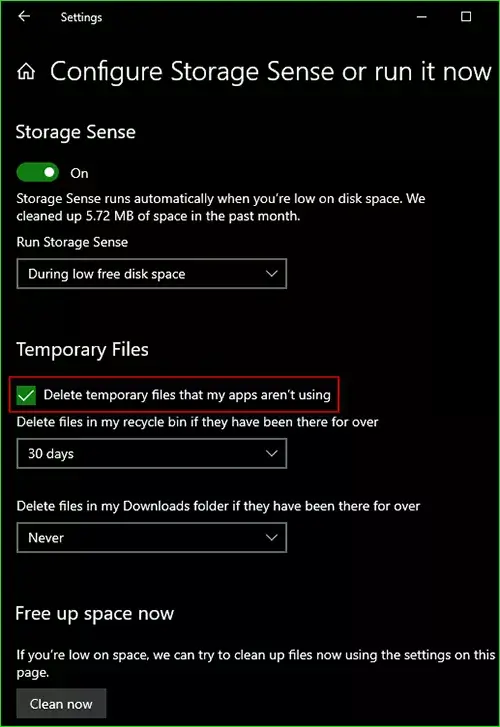
5. You can set the corresponding time intervals to delete files in your recycle bin and Downloads folder under Temporary Files section, too. Storage Sense will run automatically at the specified schedule after you complete these steps.
Part two: Third-party Software
System Genius
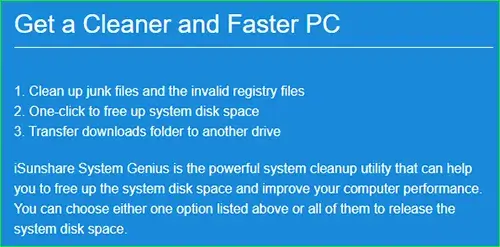
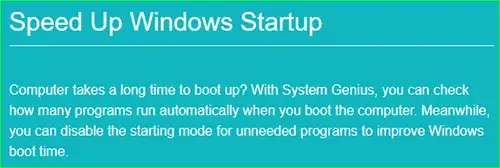
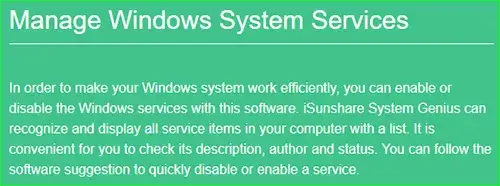
Besides those two built-in tools mentioned above, you can also try this third-party software: System Genius. I recommend this for its superior performance:
How to check the storage usage on the laptop?
Knowing which files are taking up the most storage on your laptop makes you clear what data you need to clean up. You can do these to view the storage usage on your laptop:
1. Right click Windows logo key and select Settings > System > Storage.

2. Click Show more categories under Local Disk(C:) section.
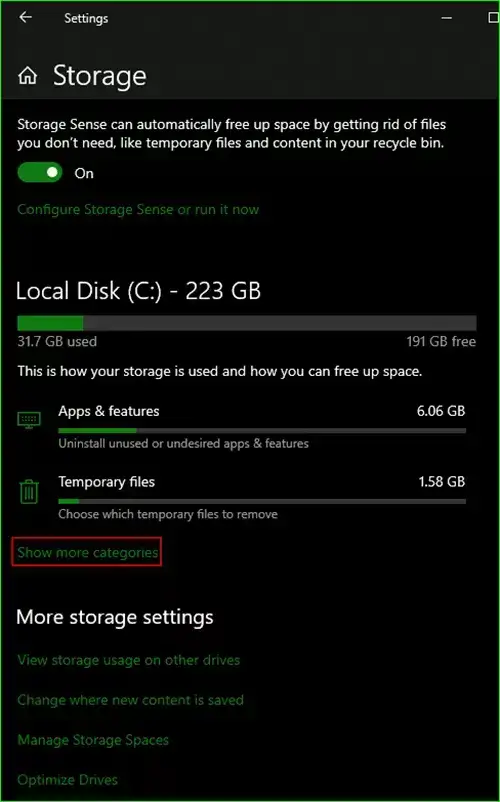
3. Here you can check how the storage is being utilized.
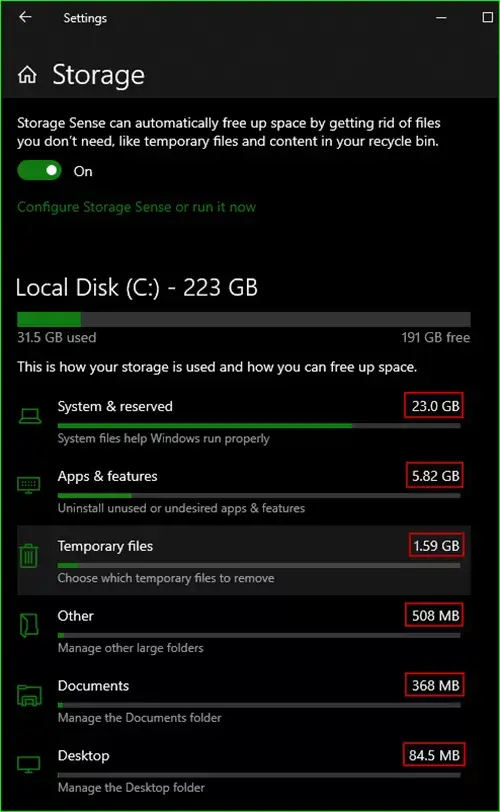
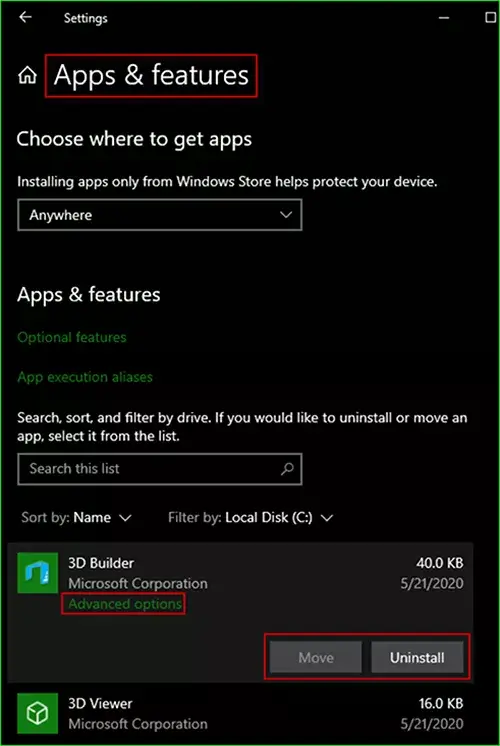
4. Select each category to see more details and change corresponding settings to free up space.For example, you can see how much space apps and features is taking by clicking Apps & features. Here you can move or uninstall unused or undesired apps and features by selecting it from the list. Advanced options enables you to operate more actions on the apps and features.
What should do if deleting important files accidentally?
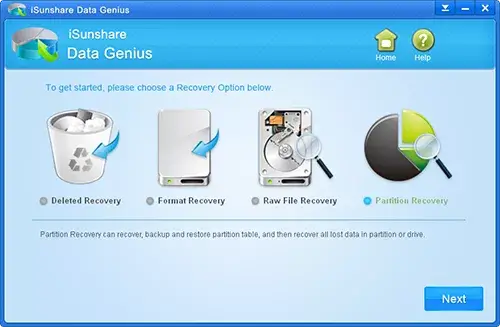
During the cleaning process, it is possible to delete important files by accident. Is there any chance to recover these files without any risk? Data Genius is worth a try. It has powerful data recovery ability with four data recovery patterns. What's more, it is free and easy to use.
Important:

After completing these steps, you will release significant amount space for your hard drive, which allows your laptop to run faster and make room for important applications and Windows updates.


