How to Enable the Old Context Menu in Windows 11 Without Third-Party Software
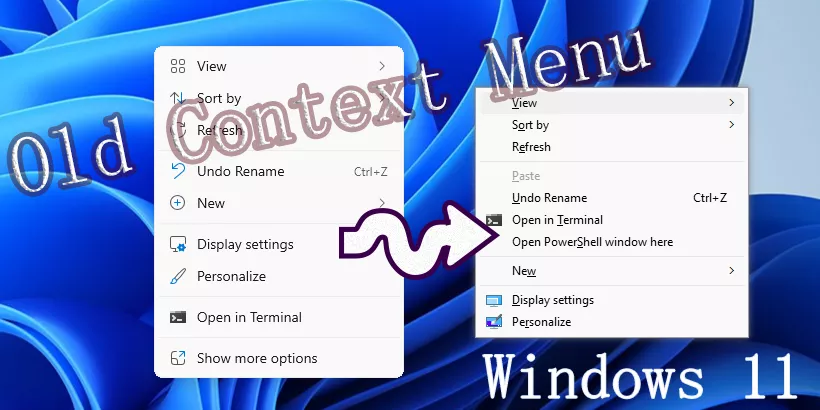
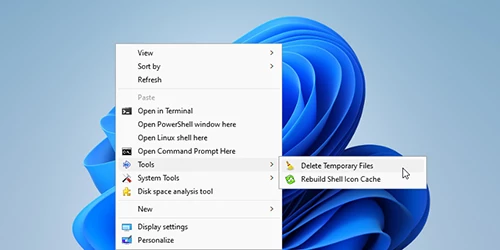
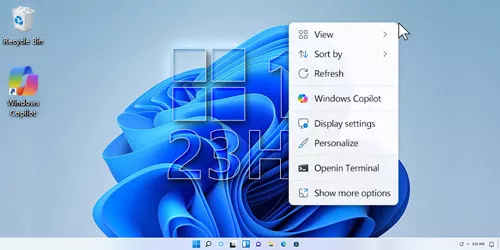
Windows 11 introduced a redesigned interface with a modern and sleek look. However, not every change has been well-received by users. One example is the new right-click context menu, which now requires users to click "Show more options" for the full list of commands. If you're frustrated by this additional step and want to restore the classic context menu, you're in the right place!
This post will walk you through 4 effective methods to bring back the old context menu in Windows 11. Whether you prefer Command Prompt, PowerShell, Registry Editor, or a simpler ".reg" file method, you'll find a solution here. Let's dive in!
1. Enable the Old Context Menu via Command Prompt
Command Prompt provides a quick way to bring back the old context menu by modifying the registry. Here's how to do it:
Step 1: Press Win + R, type cmd, and hit Enter.
Step 2: Run the following command:
reg add "HKCU\Software\Classes\CLSID\{86ca1aa0-34aa-4e8b-a509-50c905bae2a2}\InprocServer32" /f
Step 3: Press Ctrl + Shift + Esc to open Task Manager.
Step 4: Go to the Processes tab, find Windows Explorer, and click Restart.
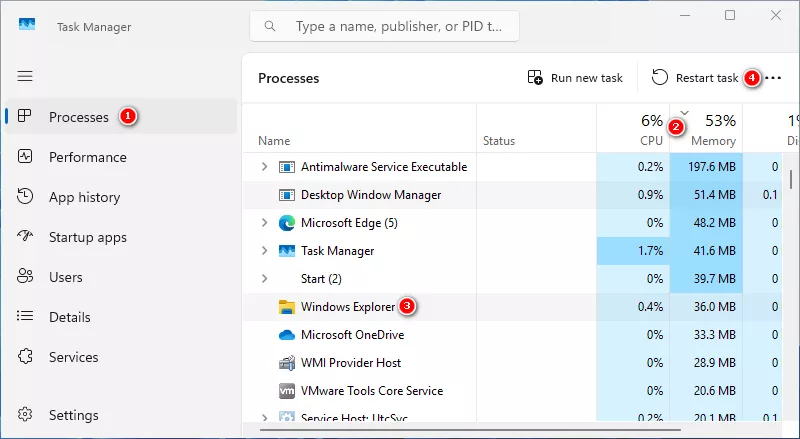
Now, your context menu should revert to the classic style!
To restore the default menu later, use this command:
reg delete "HKCU\Software\Classes\CLSID\{86ca1aa0-34aa-4e8b-a509-50c905bae2a2}" /f
2. Enable the Old Context Menu Using PowerShell
If you prefer PowerShell, you can achieve the same result with it.
Step 1: Open PowerShell with administrator privileges. (Right-click the Start menu and select Windows Terminal (Admin)).
Step 2: Run these commands:
New-Item -Path "HKCU:\Software\Classes\CLSID\{86ca1aa0-34aa-4e8b-a509-50c905bae2a2}\InprocServer32" -Force | Set-ItemProperty -Name "(Default)" -Value ""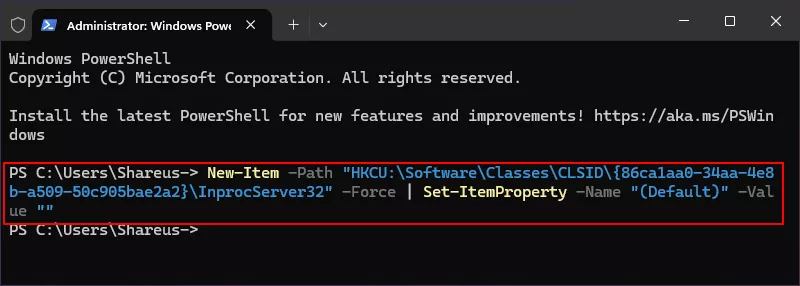
Stop-Process -Name explorer -Force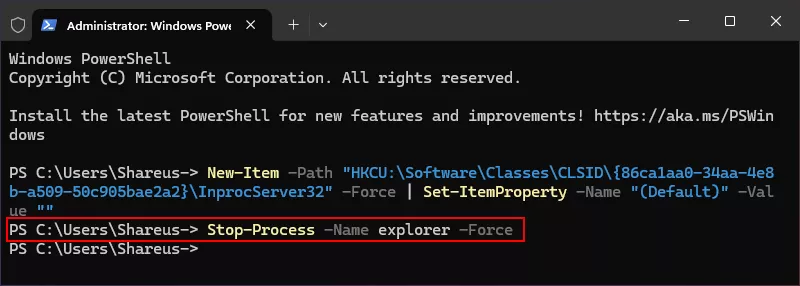
Use the following script to revert to the new menu:
Remove-Item -Path "HKCU:\Software\Classes\CLSID\{86ca1aa0-34aa-4e8b-a509-50c905bae2a2}" -Recurse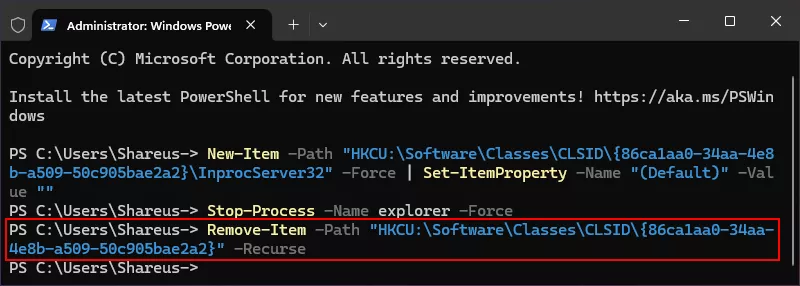
If you're managing multiple PCs, you can save these scripts as .ps1 files and deploy them across devices.
3. Use Registry Editor to Restore the Old Menu
If you're uncomfortable with command-line tools, you can use the Registry Editor for a more visual approach.
Step 1: Press Win + R, type regedit, and press Enter.
Step 2: Go to:
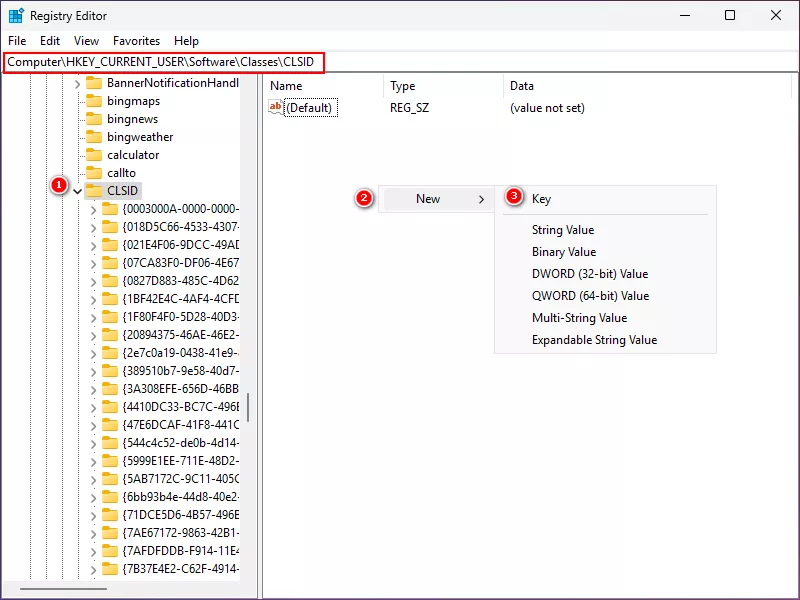
Computer\HKEY_CURRENT_USER\Software\Classes\CLSIDStep 3: Right-click the CLSID folder, select New > Key, and name it: {86ca1aa0-34aa-4e8b-a509-50c905bae2a2}
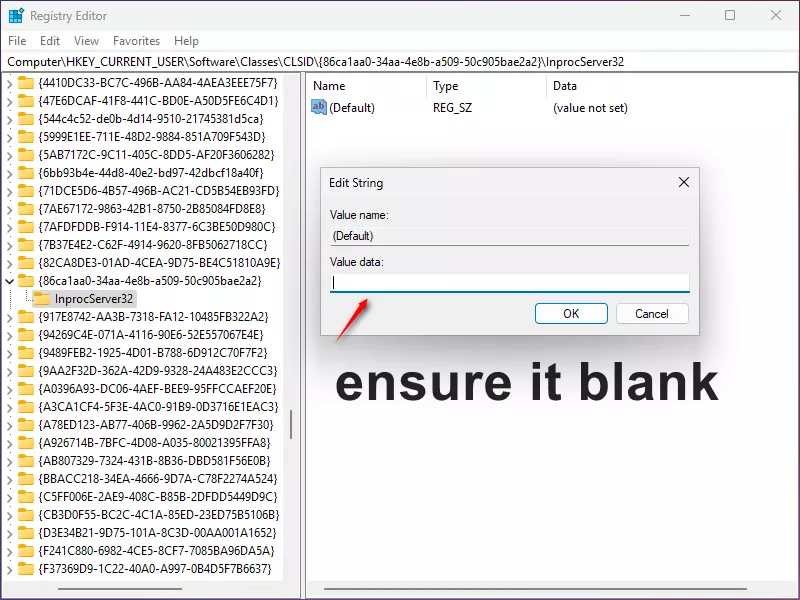
3.1: Inside this key, create another subkey named InprocServer32.
3.2: Double-click the Default value and leave the value data blank.
Step 4: Follow the same steps as above to restart Explorer.
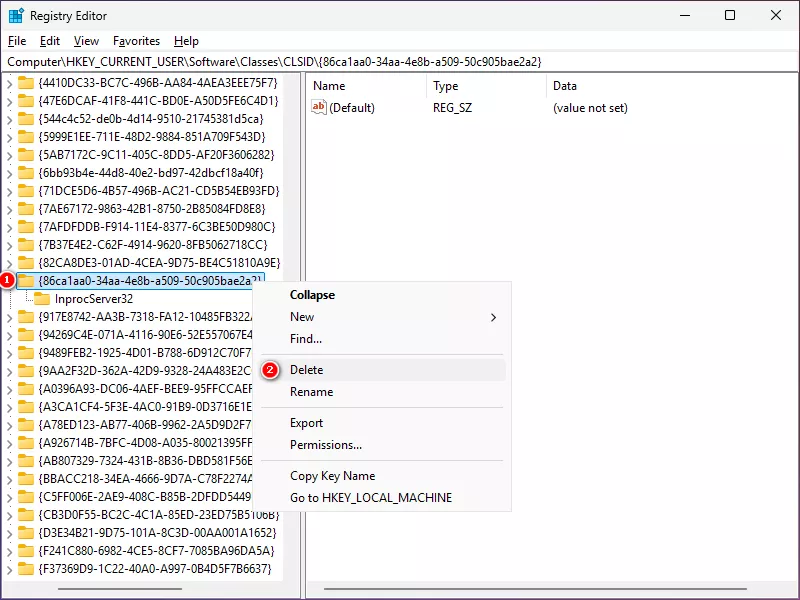
To undo the changes:
Simply delete the {86ca1aa0-34aa-4e8b-a509-50c905bae2a2} key.
4. Enable the Old Context Menu Using a .reg File
This method is perfect if you want a quick and shareable solution.
Step 1: Open Notepad and paste the following content:
Windows Registry Editor Version 5.00
[HKEY_CURRENT_USER\Software\Classes\CLSID\{86ca1aa0-34aa-4e8b-a509-50c905bae2a2}\InprocServer32]
@=""
Step 2: Save the file with a .reg extension (e.g., EnableOldMenu.reg).

Step 3: Double-click the file and confirm the changes to your registry.
Step 4: Restart Windows Explorer for the changes to take effect.
Use this content to create a separate .reg file for reverting:
Windows Registry Editor Version 5.00
[-HKEY_CURRENT_USER\Software\Classes\CLSID\{86ca1aa0-34aa-4e8b-a509-50c905bae2a2}]
Bonus Tips:
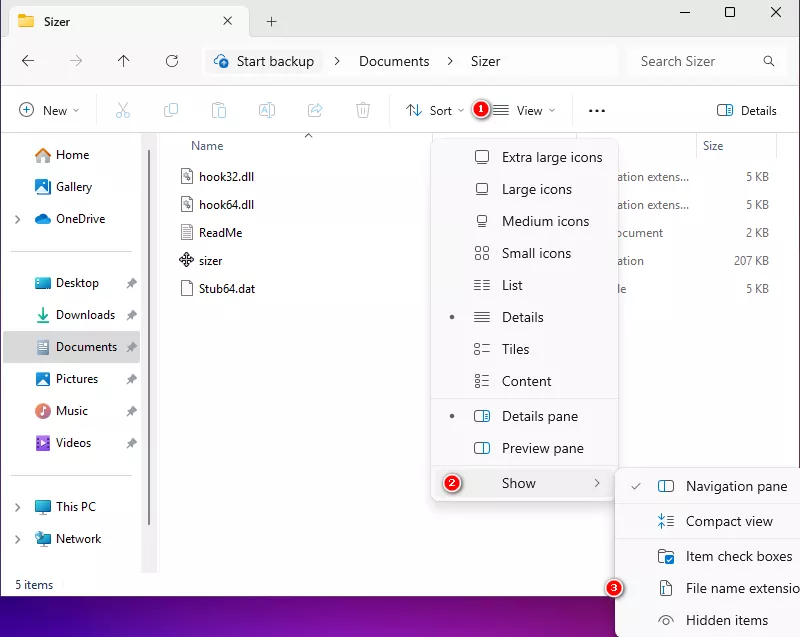
If you cannot see file extensions, enable them first:
Step 1: Open Windows Explorer.
Step 2: Go to View > Show > File name extensions.
Summary
This guide presented 4 practical methods to enable the old context menu in Windows 11. Whether you prefer Command Prompt, PowerShell, Registry Editor, or .reg files, each approach offers a simple way to restore the classic right-click menu.
Choose the method that suits you best and say goodbye to the "Show more options" frustration!
If you found this guide helpful, share it with others who may face the same issue. Happy customizing!


