How to Remove OneDrive from File Explorer in Windows 11 (Easy Guide)

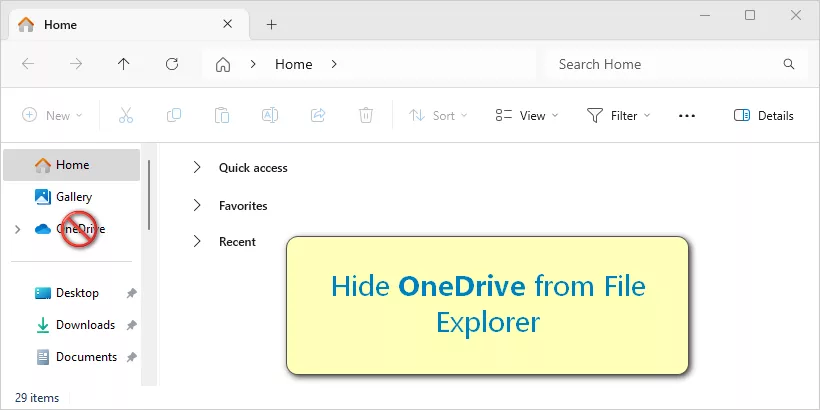
OneDrive is a built-in cloud storage service in Windows, offering seamless file backup and synchronization across devices. While useful, its icon in the File Explorer's navigation pane may be unnecessary for some users who prefer accessing it through the taskbar icon or client app. This guide will show you how to remove the OneDrive icon from File Explorer in Windows 11 for a cleaner, more streamlined interface.
1. Understanding the Role of OneDrive in File Explorer
The OneDrive icon in the File Explorer sidebar provides quick access to your cloud storage, making it easy to view, upload, and manage files directly from your local directories. This integration is convenient for users who frequently interact with their OneDrive folders. However, if you already have other methods to access OneDrive—such as using the taskbar shortcut or the OneDrive app—you might find the File Explorer icon redundant.
This guide will walk you through a method to hide the icon while keeping OneDrive installed and functional.
2. Removing OneDrive from File Explorer
While you can uninstall OneDrive entirely, many users might prefer to keep it on their system while simply hiding its icon from File Explorer. To achieve this, we’ll modify the Windows Registry. Follow these step-by-step instructions.
Step 1: Open the Registry Editor.
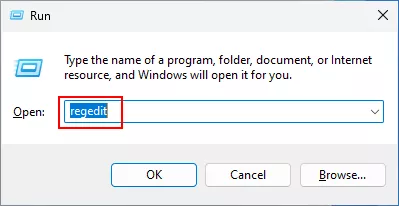
- Press Windows + R to open the Run dialog box.
-
Type "regedit" and press Enter.

- If prompted by User Account Control(UAC), select Yes to proceed.
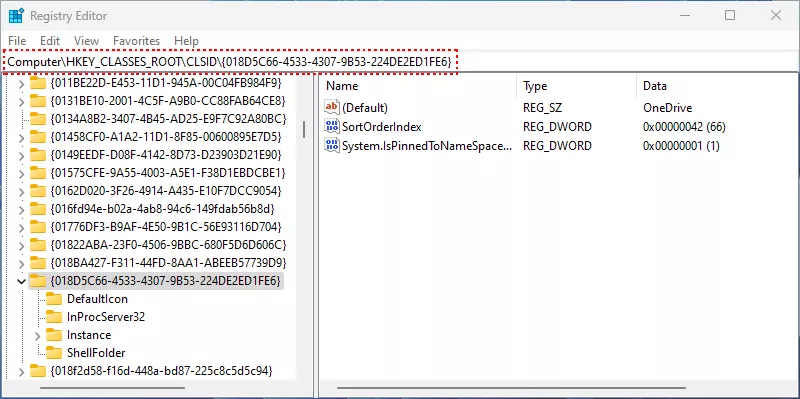
Step 2: In the Registry Editor, go to the following path:
Computer\HKEY_CLASSES_ROOT\CLSID\{018D5C66-4533-4307-9B53-224DE2ED1FE6}Tip: Copy and paste the above path into the Registry Editor’s address bar for quick navigation.

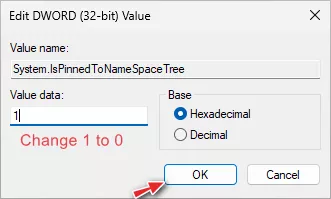
Step 3: In the right pane, double click on the entry named "System.IsPinnedToNameSpaceTree", then change the value from "1" to "0" and click OK.

Step 4: Press F5 to refresh the Registry Editor.
Step 5: Restart File Explorer by opening Task Manager (press Ctrl + Shift + Esc), finding "Windows Explorer", and selecting "Restart".
After completing these steps, the OneDrive icon will no longer appear in File Explorer’s navigation pane, but you will still be able to access the OneDrive client from the taskbar or start menu.
3. Restoring OneDrive to File Explorer
If you decide later that you want the OneDrive icon back in File Explorer, you can easily reverse the change:
Step 1: Open the Registry Editor using "regedit" as described earlier.
Step 2: Navigate back to the same path:
Computer\HKEY_CLASSES_ROOT\CLSID\{018D5C66-4533-4307-9B53-224DE2ED1FE6}Step 3: Double-click on "System.IsPinnedToNameSpaceTree", then change the value from "0" back to "1" and click OK.
Step 4: Refresh the Registry Editor with F5, and restart the File Explorer.
The OneDrive icon will reappear in File Explorer, allowing you to resume easy access to your cloud files from the navigation pane.
4. Summary
Uninstalling OneDrive is the simplest way to remove it from File Explorer, but modifying the Registry offers a more refined solution. This method allows you to hide the icon without losing access to OneDrive's features, making it an ideal choice for users who want a tidier File Explorer. Plus, the process can be easily reversed if you change your mind. Give this method a try to personalize your Windows 11 experience according to your needs.
By following these steps, you can maintain a streamlined interface while keeping the flexibility of OneDrive's cloud storage.


