How to Fix a Corrupted USB Drive without Formatting on Windows 10
When USB drives go corrupted, we're usually told to re-format that USB drive in order to make it usable again. On the one hand, it's the easiest way to recover the USB drives. On the other hand, however, it may result in permanent data loss that we can't afford. Therefore, it's critical for USB users to learn how to repair a corrupted USB drive without formatting on Windows 10 or in other word, fix a corrupted USB drive without losing data.
We'll see through four parts in this article:
When probably do we need to reformat our USB flash drive?
We may choose to reformat USB flash drive when:
USB drive holds bad sectors and displays "disk needs to be formatted."
"Please Insert Disk into Removable Disk."
USB drive shows 0 bytes or "folder is empty."
The virus has infected the flash drive and corrupted the files in it.
"USB Device Not Recognized or Malfunctioned."
"You need to format the disk before using it."
What may cause USB flash drive corruption?
There are various causes, and here, we just name a few:
Virus and malware attack to the partition table.
Bad sector generates in the flash drive.
Internal file system errors.
Improper or accidental formatting of flash drive.
Drive letter conflict.
Damaged partition table.
How to Fix a Corrupted USB Drive without Formatting in Windows 10?
Solution 1: Try other USB ports.
Try to connect USB flash drive to other USB ports of computer. Meanwhile, make sure that you've updated and backed up files.
Solution 2: Enable or update USB driver.
Open Control Panel, choose Hardware and Sound, and then hit Device Manager in the Devices and Printers.
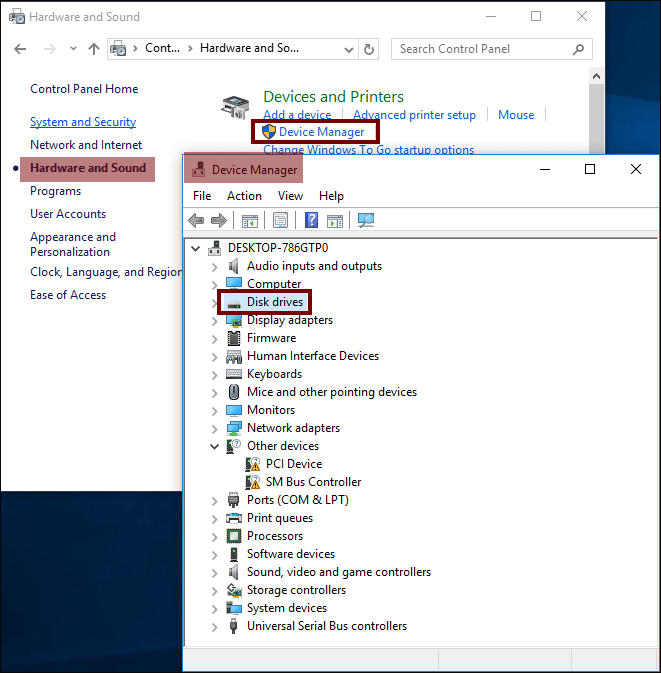
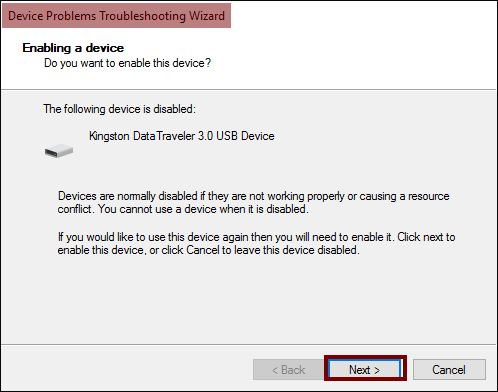
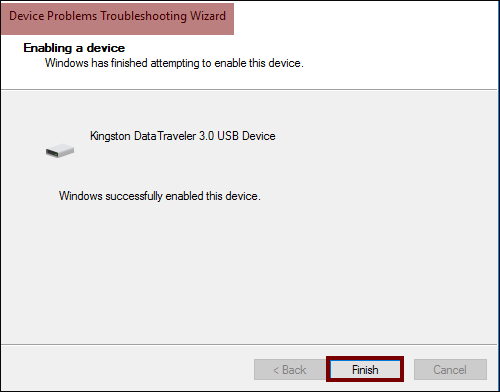
Extend Disk drives list. Double-click the arrow of USB drivers and hit Enable Device.
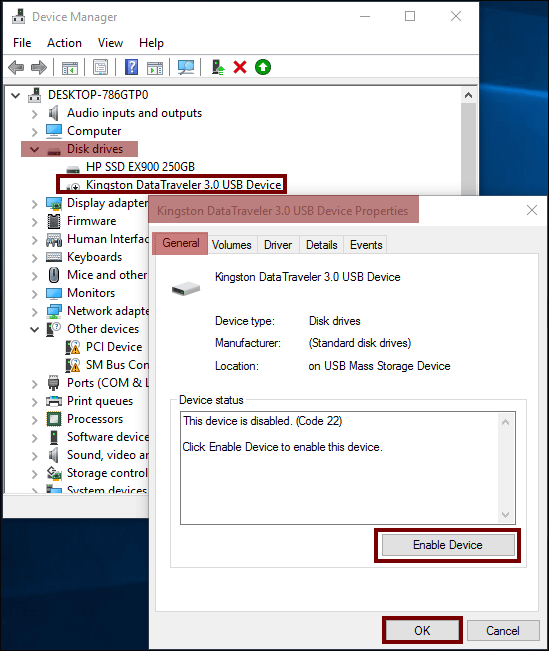
Click Next and Finish.
Solution 3: Change USB driver letter.
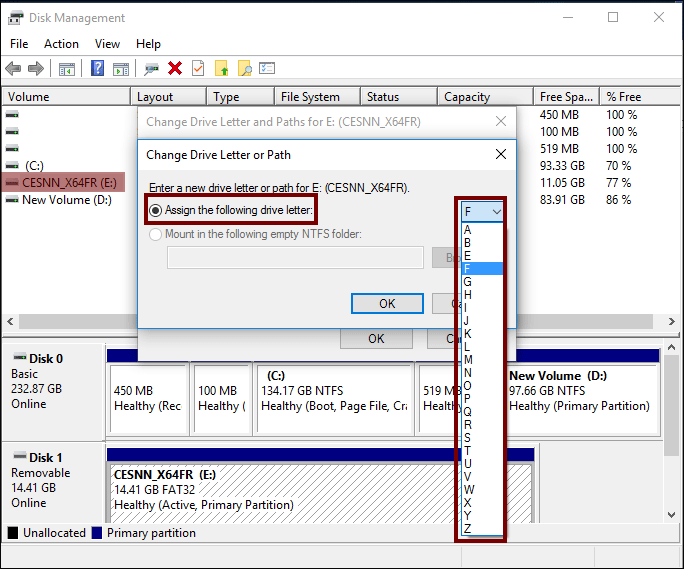
Check if the corrupted USB drive has a correct drive letter, if not, assign one to it.
1. Open Disk Management via one of two ways below:
(1). Right-click Start icon and choose Disk Management.
(2). Press Win + R to open Run window and input diskmgmt.msc.
2. Right-click the corrupted USB drive and select Change Drive Letter and Paths…
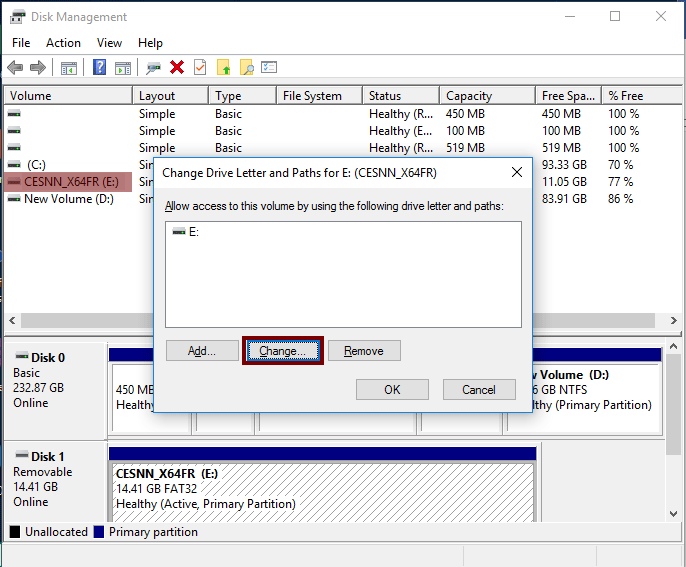
Assign the new letter to USB driver and complete the process.
Solution 4: Run CHKDSK command.
Press Win + R, and then input "CMD" in the pup-up windows.
Input "chkdsk e: /f /r /x" and press "Enter". You should replace "e" with the drive letter of your corrupted flash drive.
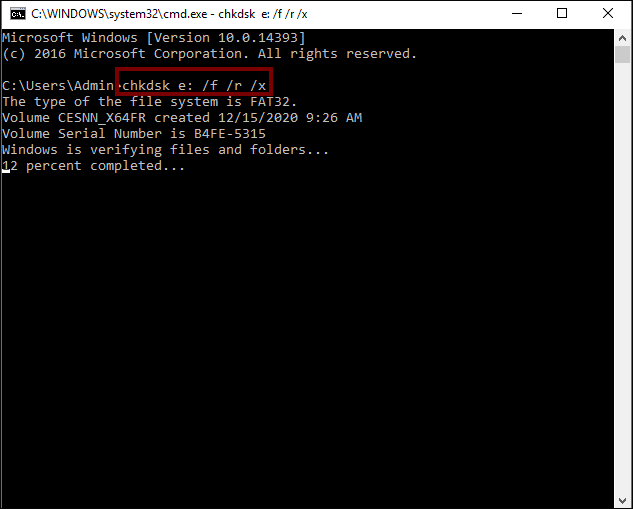
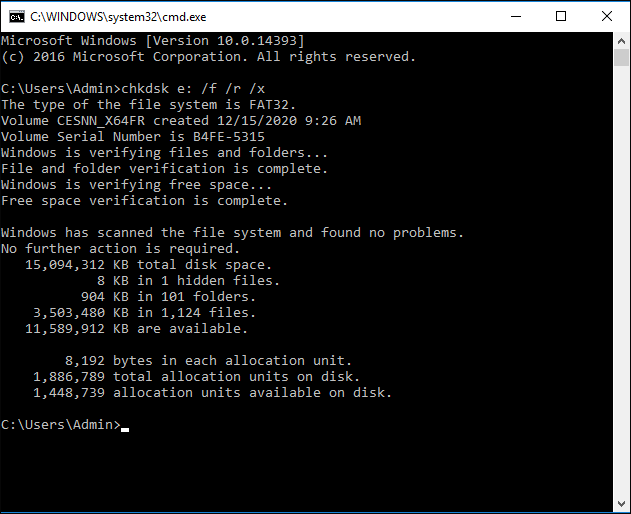
Note: If you get the message reporting "CHKDSK cannot run because the volume is used by another process. Would you like to schedule this volume to be checked the next time the system restart? (Y/N)," please type "Y" on the keyboard to make the flash drive to be checked the next time the system restarts.
Since there is no problem, I just type exit to leave this window.
But if you receive a message saying that "chkdsk is not available for raw drives", try solution below.
Solution 5: Fix corrupted USB with disk check utility.
Go to My Computer/This PC. Right-click USB drivers and then choose Properties.
Go to Tools tab, and then click Check.
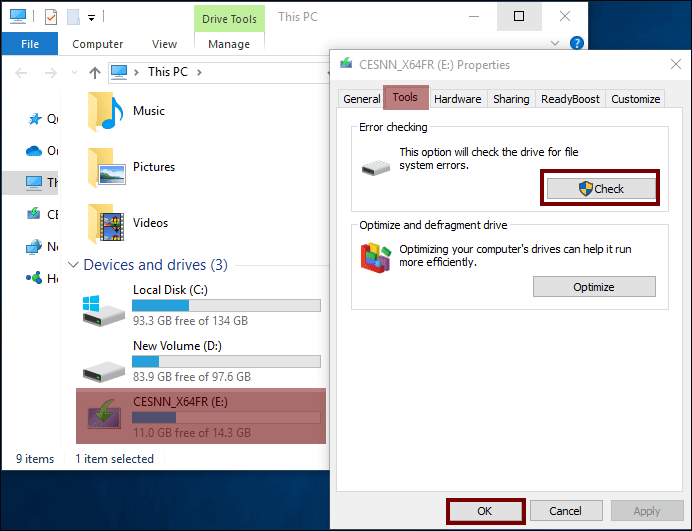
Enable Automatically fix file system errors and Scan for and attempt recovery of bad sectors.
Hit Start and wait up recovery process.
Other: Try to recover data by software
1. DiskGenius
If the disk partition is corrupted, DiskGenius is a right tool for this case.
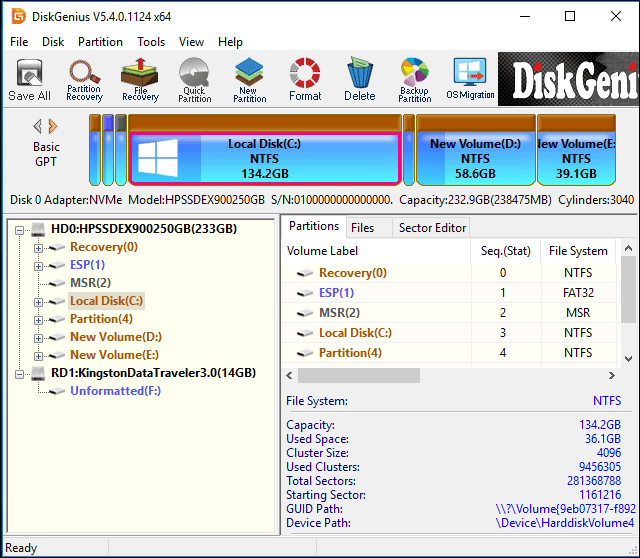
Insert the USB drive into computer, and click Partition Recovery to start recovery.
2. BitGenius
Or you're worried about data in the USB drive, then it's time for you to really need reformatting the USB flash drive. But luckily, you don't have to afford any data loss. You can recover the lost data from the USB drive using some expert data recovery tools like BitGenius.
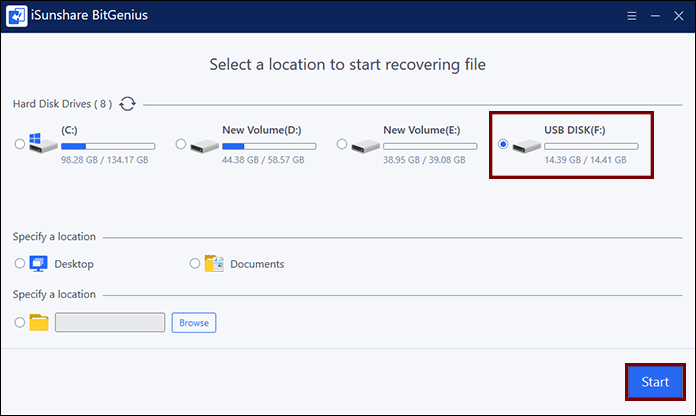
Step 1: Plug your USB into computer. Open BitGenius. Select the USB driver. Click "Scan".
The scanning process is going to take a while. Please wait patiently.
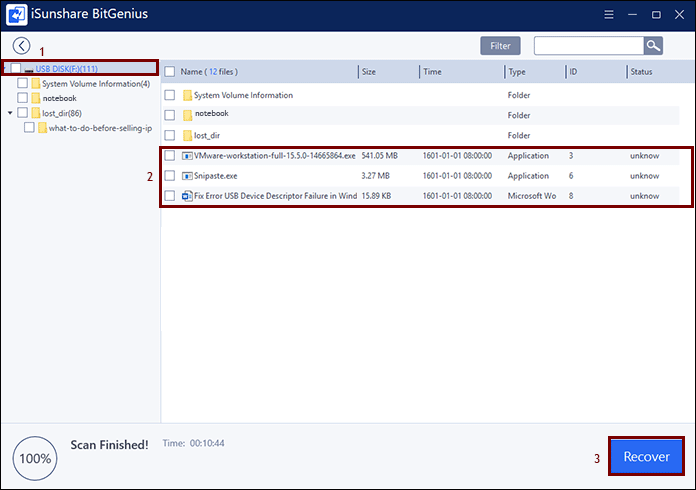
Step 2: After scan finished, on the left there is the catalog of the USB drive in which you can find the file you want to regain. Check-select them and click Recover.
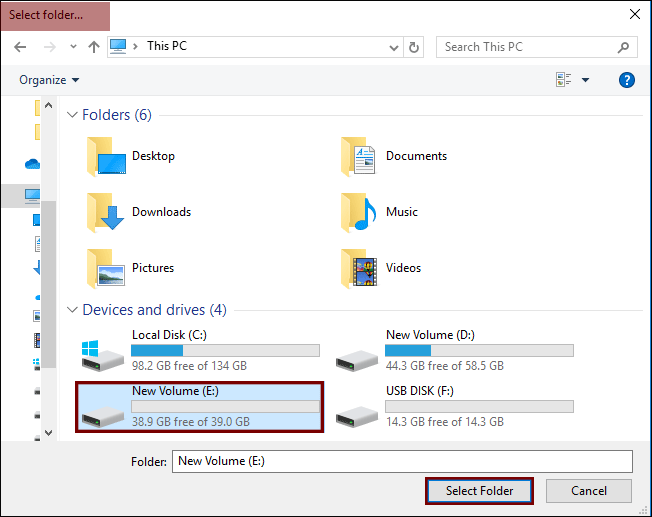
Then choose a folder for BitGenius to restore the files.
Note that you can't choose the USB drive - it doesn't allow you to recover files to the original path.
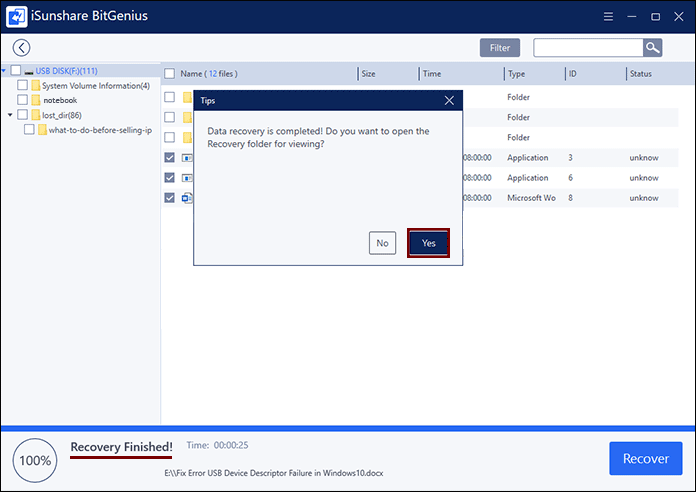
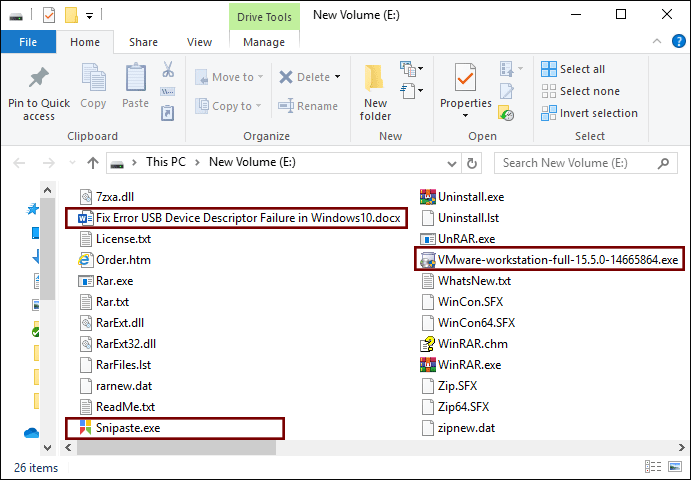
Step 3: After Recovery process, you can click Yes in the pop-up Tip window to check out all the files just got recovered.
