How to Move VMware Virtual Machines to Another Host
How do I share the virtual machine with others and use a virtual machine shared by others? It is essentially a question of how do you move the virtual machine to another computer. The general idea is to copy the files needed to run the virtual machine to another computer, and then run the virtual machine after some simple configuration. I will introduce it in how to move VMware virtual machines to another host. Let's get started now.
1. Prerequisites
You will need to do these preparations first.
1. Prepare a Removable media(a USB flash or hard drive) for transferring files between computers.(You can also transfer files through cloud storage services like Google Drive or OneDirve.)
2. Try to install the same version of VMware software on the computer on which the virtual machine will later run as the version used during the initial creation of the virtual machine. This can prevent potential compatibility issues.
3. Shut down the virtual machine before backing up. If possible, delete all snapshots taken in the start or pause state to prevent potential conflicts.
Attention: The hardware configuration of the two computers should not be too different. If the difference is too large, the virtual machine may not start properly.
2. Solutions
There are three ways to move a virtual machine to another pc, which are "export and import", "clone", and "directly copy VM files to another pc". All of these methods can be broken down into two steps, the first step is to acquire the necessary files for running the virtual machine, and the second step is to move these files to another computer. I will show you how to do it one by one.
Way 1: Use export and import feature to move VM
You can export the virtual machine through export feature provided by VMware Workstation Pro. The specific steps are as follows.
Step 1: Select the virtual machine you want to move.
Step 2: Export the virtual machine to the USB flash drive or other location through File -> Export to OVF. Wait patiently for the export process to complete.
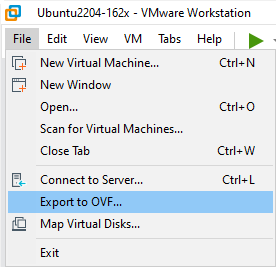
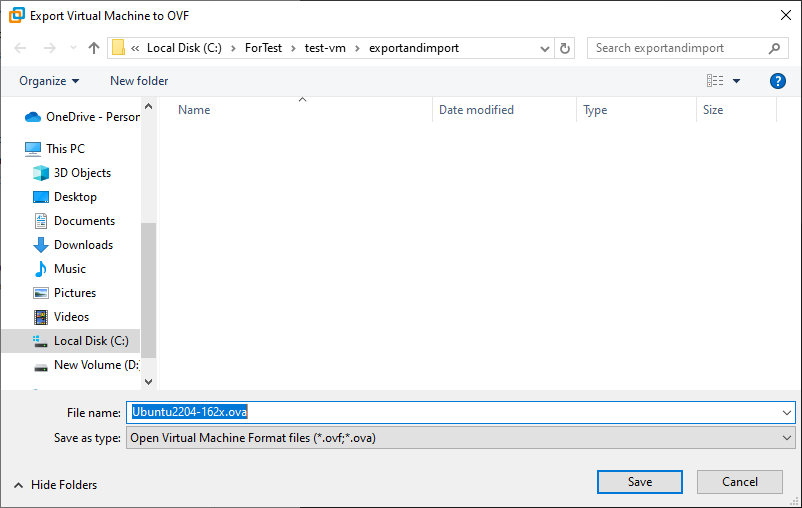
Tip: When you export it, you can change the file suffix to .ova, which can save all files into one file for easy transfer.
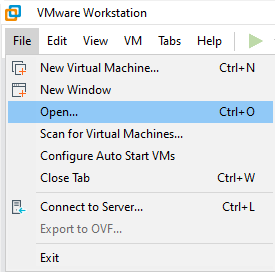
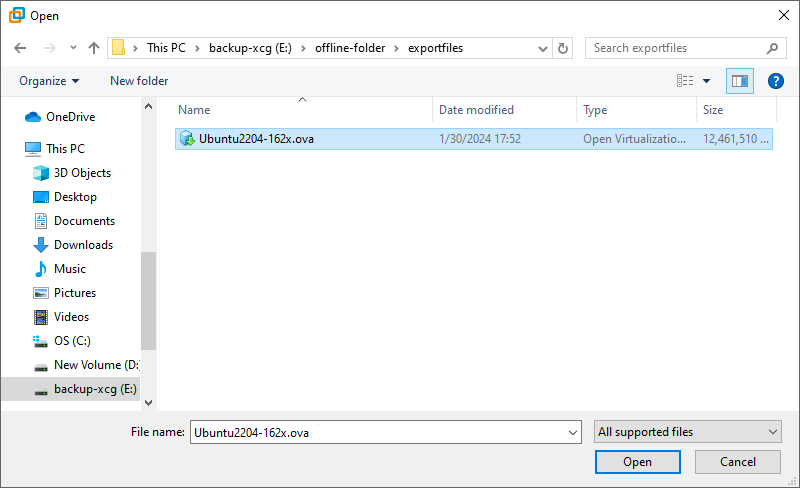
Step 3: Open VMware Workstation Pro on another computer, and select File -> Open.
Step 4: Navigate to the location where the exported files is stored, then select the ova file, click Open.
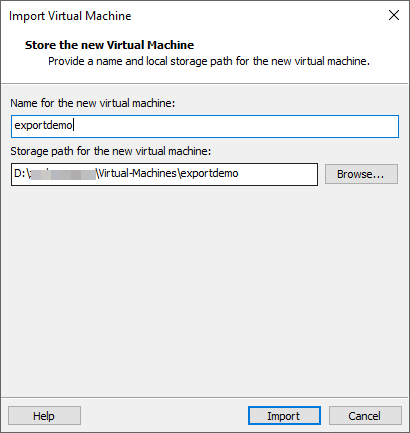
Step 5: Name the virtual machine in the Import Virtual Machine Window that pops up. When you input the name, the storage path will be generated automatically. If you want to store it in another location, change it to your specified location.
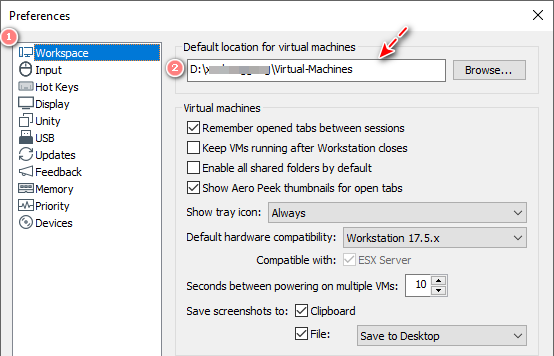
Note: Storage path default is your default location for virtual machines, which concatenates with the name you input. You can change the default location for virtual machines through Edit -> Preferences. Then specify the desired storage location for virtual machines by navigating to the Default location for virtual machines option under the Workspace tab.
Step 6: Click Import, and wait for it to complete.
Step 7: Now you can use the virtual machine in VMware on your new computer.
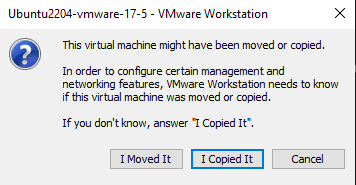
Tip: Select I Copied It if you are asked. VMware will generate a new UUID and MAC address for this virtual machine to prevent network conflicts in this manner. You can find more details in Copying a Workstation virtual machine from one location to another (2030609). If you do not plan to use the virtual machine in its original location in the future, you can also select I Moved It.
Note: If it can't start, try to adjust the configuration of this virtual machine to suit your computer.
Way 2: Directly copy all files to move VM
This method does not require additional operations to generate VM files. But if you store some files(such as ISO image file) reside outside of the VM directory, you may need to make sure they are copied as well.
Step 1: Choose the virtual machine you wish to relocate.
Step 2: Right click and select Open VM directory to open VM directory.
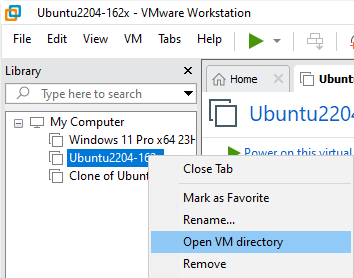
Step 3: Copy all the files to the USB flash drive. If the ISO image file is not in the VM directory, remember to copy it too.
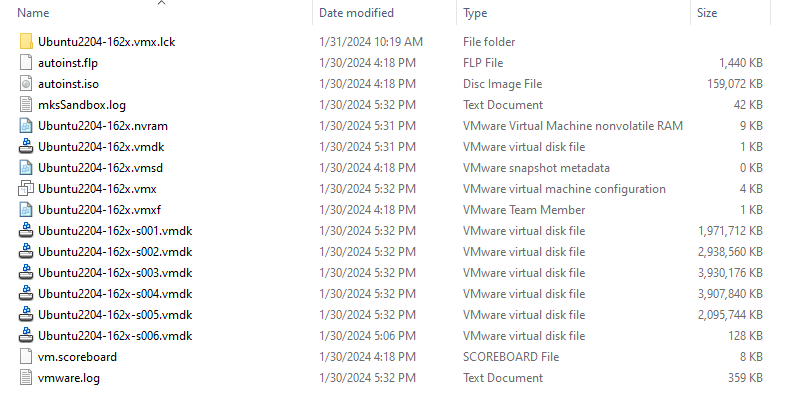

Tip: If you don't want to transfer the ISO image file, you can modify the corresponding settings of VM later.
Step 4: Transfer all files you copied to another computer.
Step 5: Launch VMware on another computer, then select File -> Open to open VM.
Step 6: Navigate to the path of the VM files, select the file whose suffix is .vmx in the Open window.
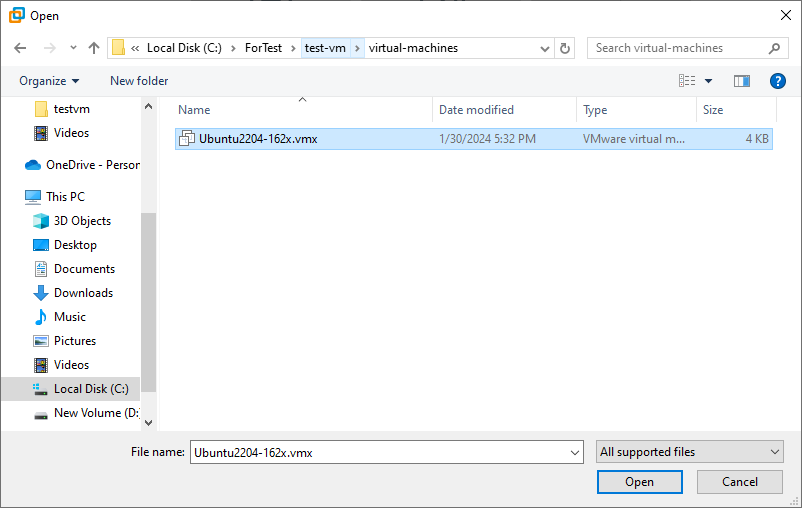
Step 7: Modify the settings of the virtual machine. In general, you need to change the ISO image position to the current actual location.
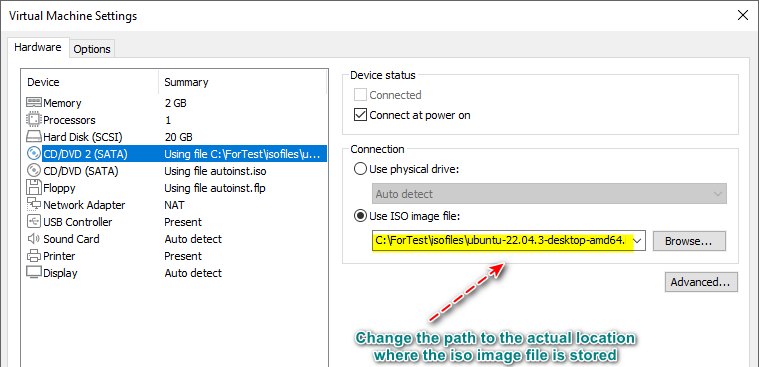
Note: In order not to be affected by the ISO file, you can choose "Use physical drive" option and untick the "Connect at power on" checkbox. Alternatively, removing the CD/DVD 2(SATA) device is also available.
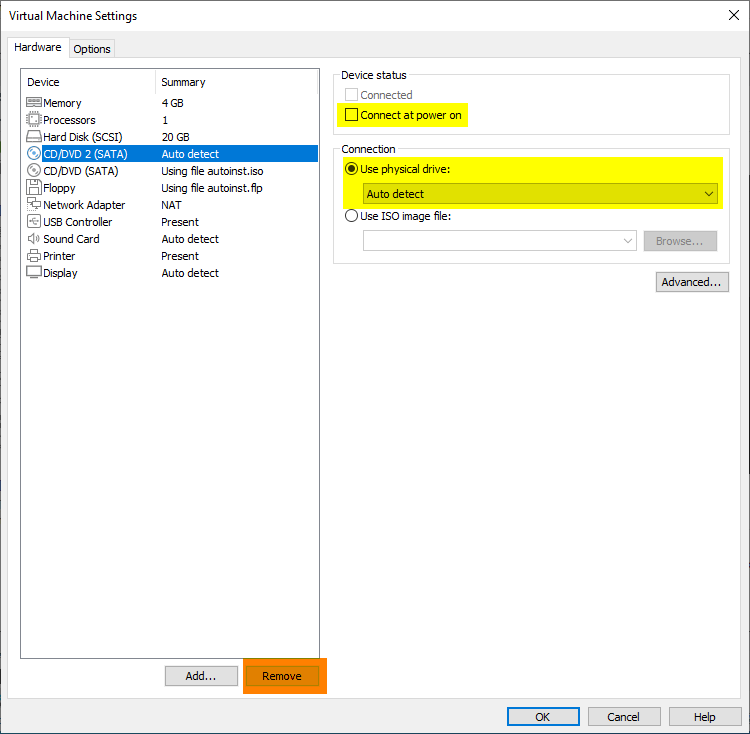
Step 8: Now you can power on this virtual machine in VMware on another computer.
Way 3: Use clone feature to move VM
This way will generate a clone of your virtual machine.
Step 1: Select the virtual machine in the Library.
Step 2: Right click it and select Manage -> Clone to clone this machine.
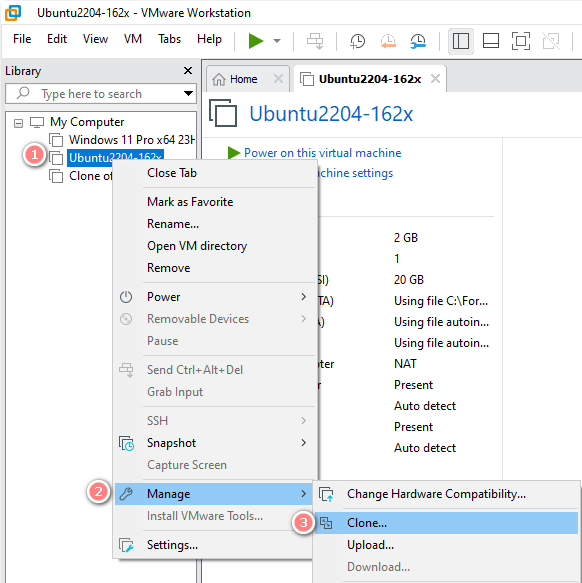
Step 3: Follow the prompts of Clone Virtual Machine Wizard.
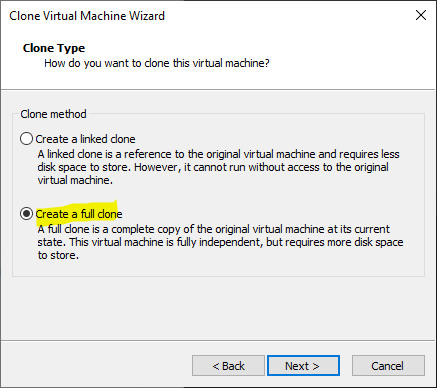
Step 4: Select Create a full clone at step "Clone Type".
Step 5: Change the storage location to the USB flash drive at step "Name of the New Virtual Machine".
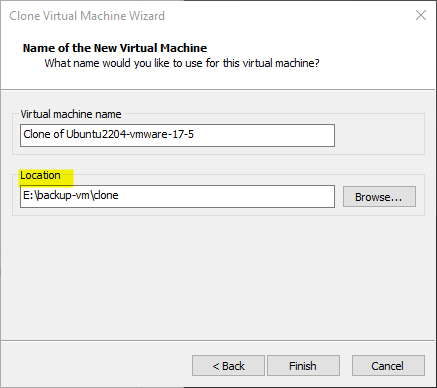
Step 6: Click "Finish" and wait for the cloning to complete.
Step 7: Open the virtual machine on a new computer by performing the same operations as above.
3. Summary
This article demonstrates three methods for transferring a virtual machine between computers. All these methods need to transfer files between computers. Furthermore, it's important to note that the process of exporting and importing can be time-consuming.
Finally, my level of recommendation is: Directly copy all files > Export and import > Use clone feature.
P.S. You can store the virtual machine on a USB flash drive, allowing you to easily access it across multiple devices. However, you also need to consider whether the read and write performance of the USB flash drive can meet your requirements, or opt for a high-speed solid-state USB flash drive.


![[Guest OS: Windows 10/Linux(Ubuntu)] How to Expand VM Disk Space in VMware Workstation](../img/computer/guest-os-windows-10-linux-ubuntu-how-to-expand-vm-disk-space-in-vmware-workstation/guest-os-windows-10-linux-ubuntu-how-to-expand-vm-disk-space-in-vmware-workstation-m.webp)


