Password Encryption - Your USB Drive Guardian
As a portable media device, USB drive is of key importance in storing and transferring data, including your personal information, company's confidential documents, images, videos and etc.
While we enjoy the convenience of USB drive, however, we also face the risk of data leakage, no matter the drive is lost by accident or corrupted by virus. For corrupted USB drive, you may recover files from it, if USB drive is lost, what you can do is setting a password to encrypt it in advance to prevent data leakage.
Thus, in this article, I'll demonstrate you some effective solutions to encrypt your USB drive with password, which can effectively help you. Here we go.
Solution 1: Password encrypt USB drive with BitLocker on Windows
BitLocker (or BitLocker Drive Encryption), a Windows built-in tool, enables users to password encrypt everything on the USB drive in Windows operating system, protecting data from theft or unauthorized access.
Regrettably, BitLocker isn't available for all Windows OS. If you want to know whether your Windows OS supports this tool or not, check it's official document: BitLocker.
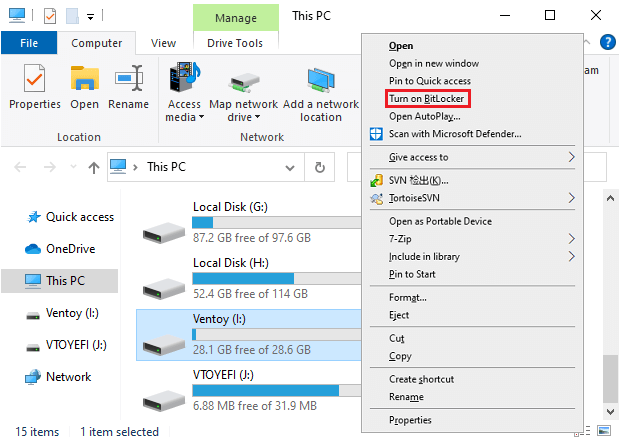
Step 1: Right-click on the USB drive you inserted, select Turn on BitLocker.
Step 2: Check "Use a password to unlock the drive", and enter your password twice below, then click Next to go on.
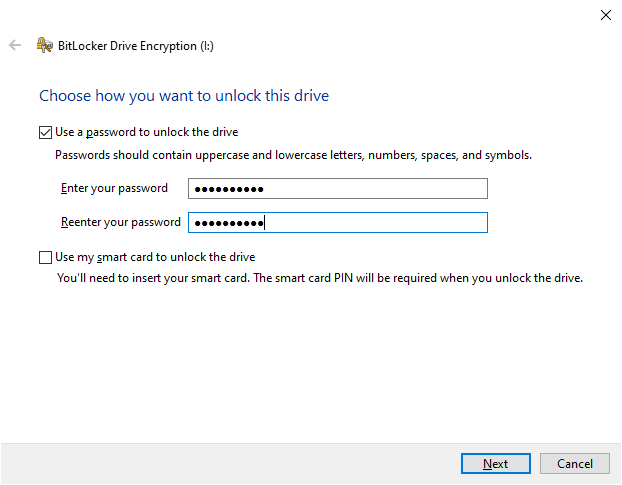
Step 3: Select a way to back up your recovery key, then click Next.
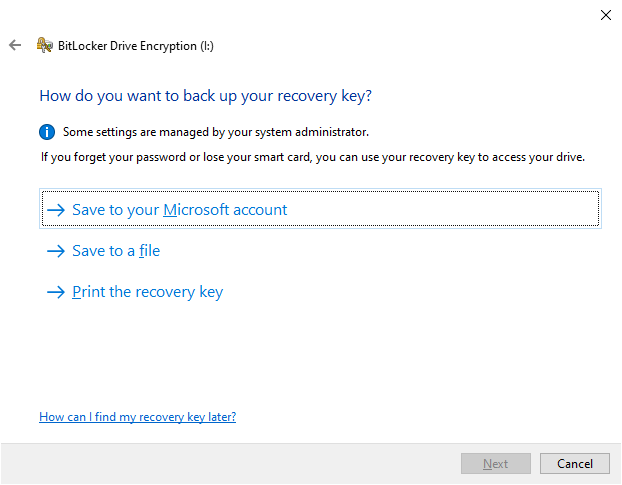
Step 4: Same to the step 3, choose an option you prefer and click Next.
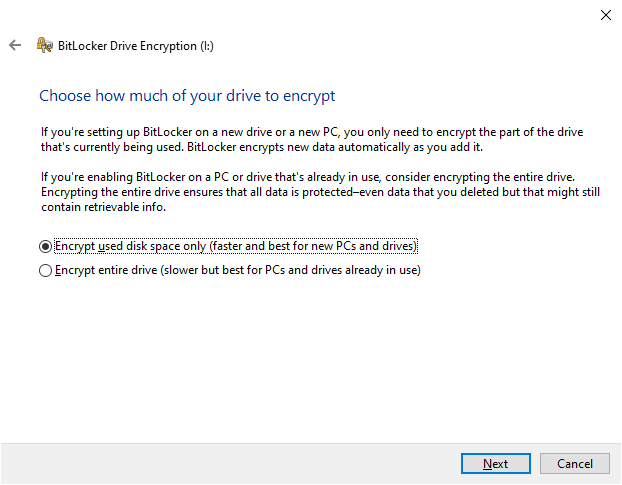
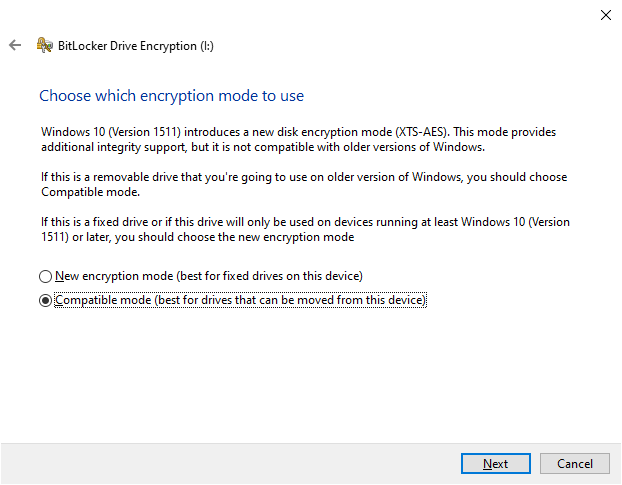
Step 5: Select "Compatible mode" and click Next.
Step 6: Click Start encrypting.
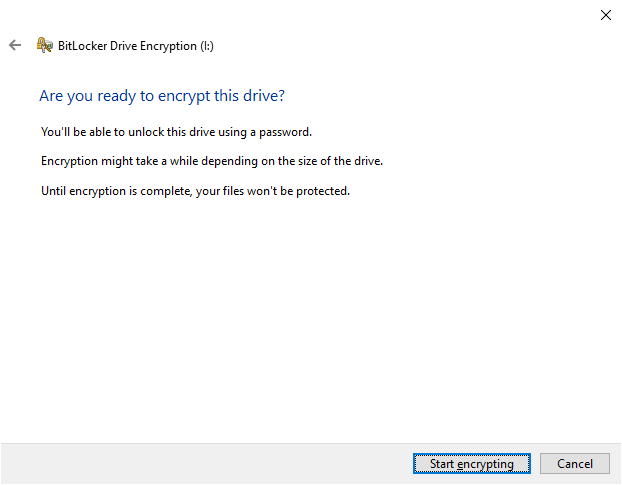
Step 7: Wait for the encryption to complete. When you are prompted with "Encryption is complete", click Close to exit.
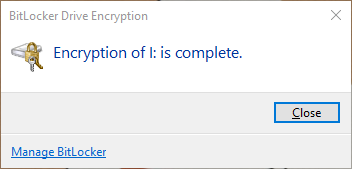
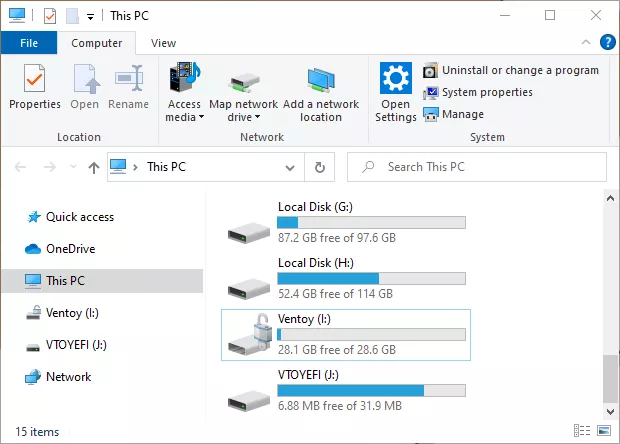
Now, you can see a lock on your USB drive, which means the encryption is successful.
Solution 2: BitLocker on Mac
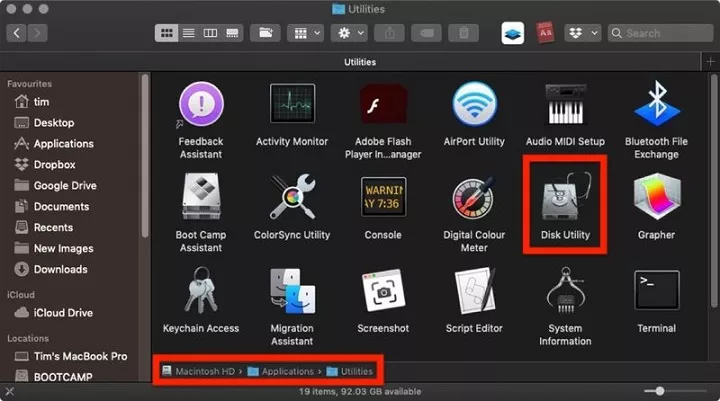
Step 1: Plug your USB drive into computer. Launch Disk Utility, located on your Mac in Applications/Utilities.
Step 2: On the left side, click View and select Show All Devices.
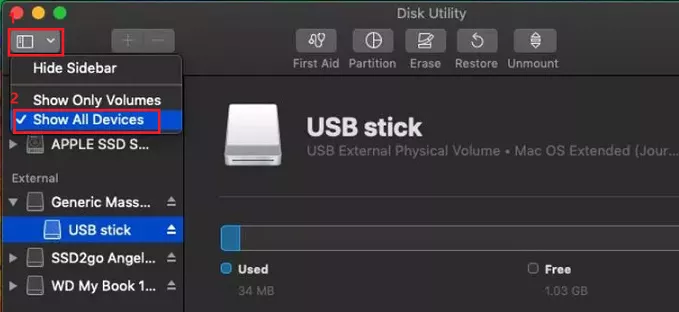
Step 3: Select your USB flash drive in the sidebar by clicking its top-level device name.
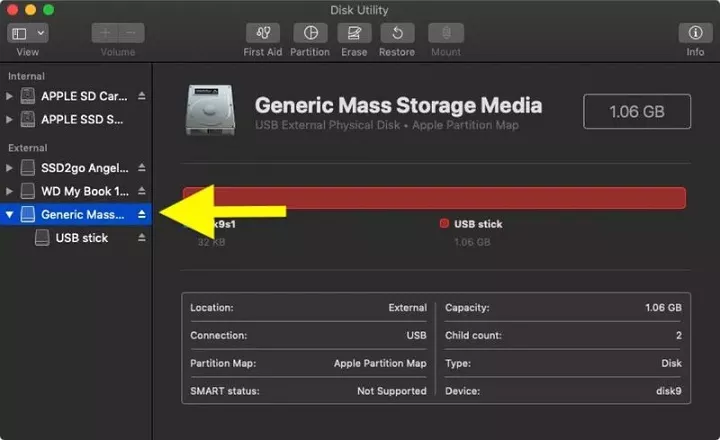
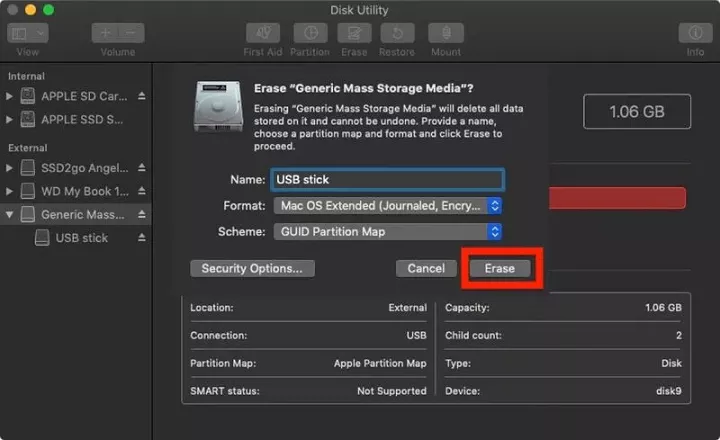
Step 4: First click Erase button in the toolbar, and give your USB drive a name. Second, click Scheme dropdown menu and select GUID Partition Map. (It's important to do this first before the next step, otherwise you won't see the encryption option in the Format dropdown.)
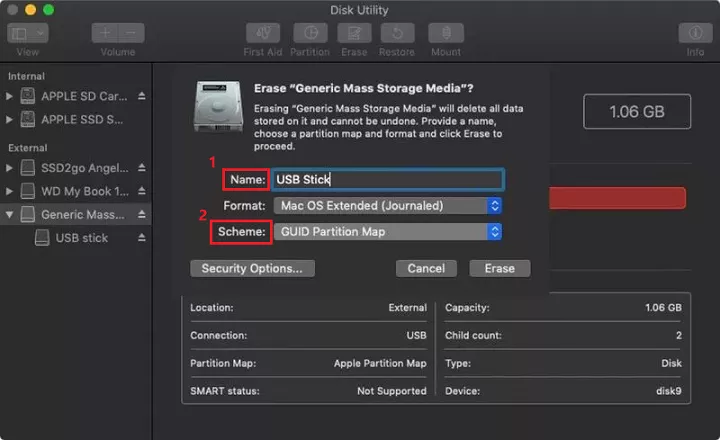
Step 5: Click Format dropdown menu and select Mac OS Extended (Journaled, Encrypted).
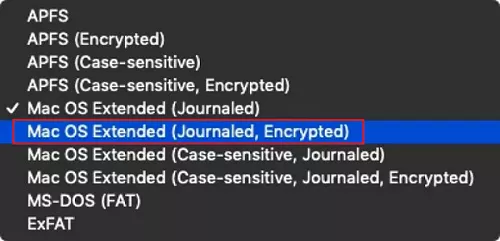
Step 6: Now click Erase to bring up a new dialogue box. Enter your new password, enter it once more to verify, including a Password hint if necessary, then click Choose.
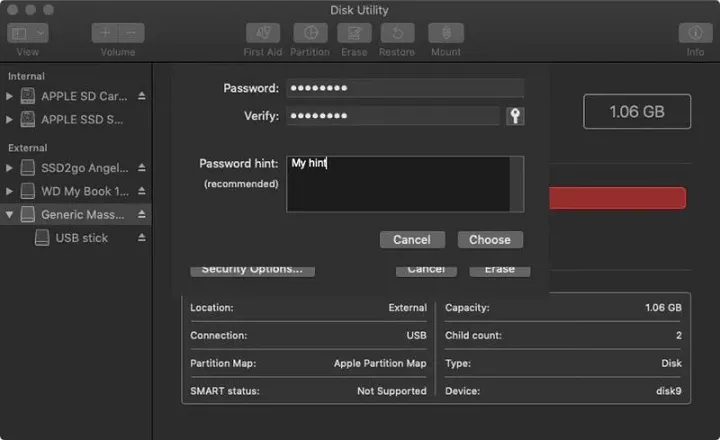
Step 7: Click Erase again, and wait for your disk to be formatted and encrypted.
Solution 3: Use professional tool to password encrypt USB drive
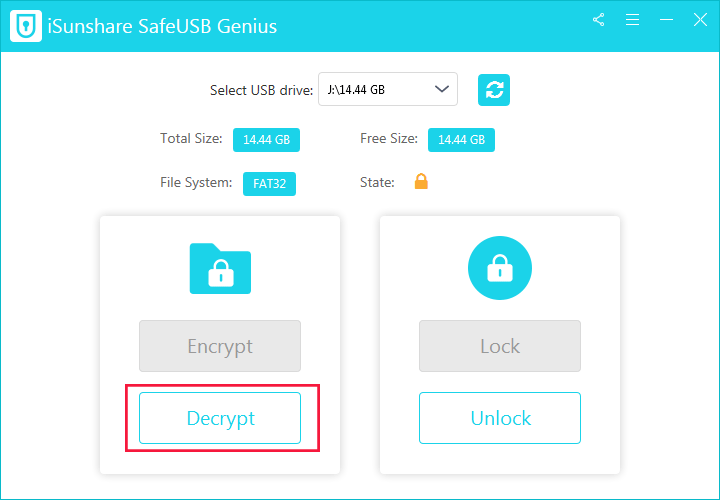
iSunshare SafeUSB Genius can help you safely and quickly password protect the USB drive in seconds. It allows you to encrypt, decrypt, lock, and unlock your USB drive within simple clicks without BitLocker. To password protect the USB drive, you need to download and install iSunshare SafeUSB Genius on your Windows computer at the very first time.

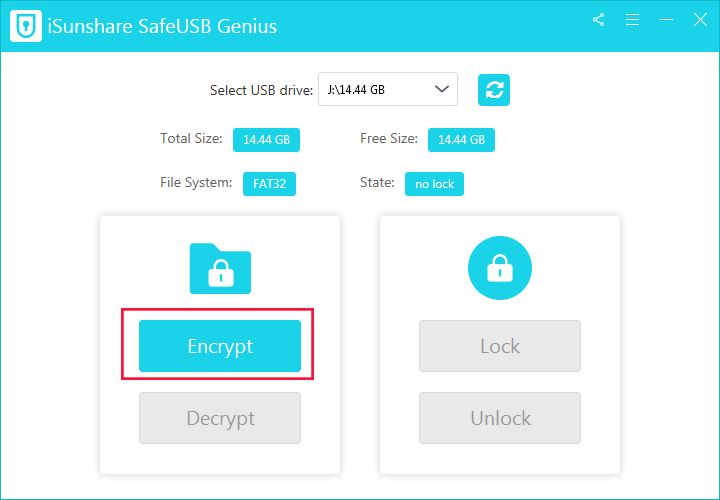
Step 1: Launch the software and plug your USB drive into your PC, and the software will automatically detect the information of your USB drive. Then click on Encrypt button to start.
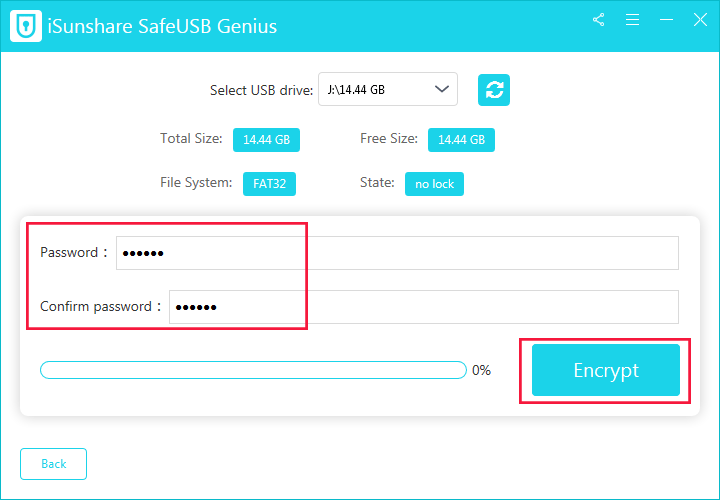
Step 2: You need to set up a password of at least 6 digits or letters and enter it twice. After that, click Encrypt to start encrypting your USB data.
Step 3: Soon, your USB drive has been successfully encrypted. Click OK in the following pop-up dialog box to end the encryption.
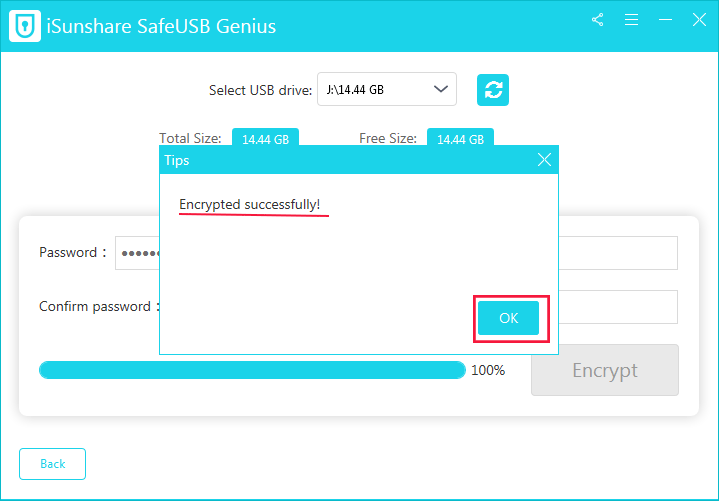
Now only the correct password can access to the USB drive. Moreover, iSunshare SafeUSB Genius can create a virtual disk for you to manage your files stored in USB drive, which can protect your USB drive in an extremely-high security.
If you think it is unnecessary to password protect the USB drive, you can click Decrypt in the Home page and decrypt it with your password.
