Perfectly Change Hard Drive Without Reinstalling Windows OS

April 13, 2023
You feel like changing your system disk to another hard drive (HDD or SSD) in the same computer because of the shortage of C drive space and a long computer boot time. Being struggling with backing up an abundance of data and personal settings, however, most people are unwilling to reinstall a new Windows Operating System.
Therefore, a solution for changing hard drive without reinstalling Windows OS is preferred by a bunch of people. Now, I will introduce to you step-by-step tutorial for migrating OS to another hard disk.
Part 1: Preparation
OS: Windows 11 pro
Tools: CloneGo

Note: There is no need for TPM and Secure boot detection if copy and paste OS to another hard drive directly.
Part 2: Way on changing hard disk without reinstalling Windows OS
Step 1: Download CloneGo from official website and locate it in the root directory of D drive.
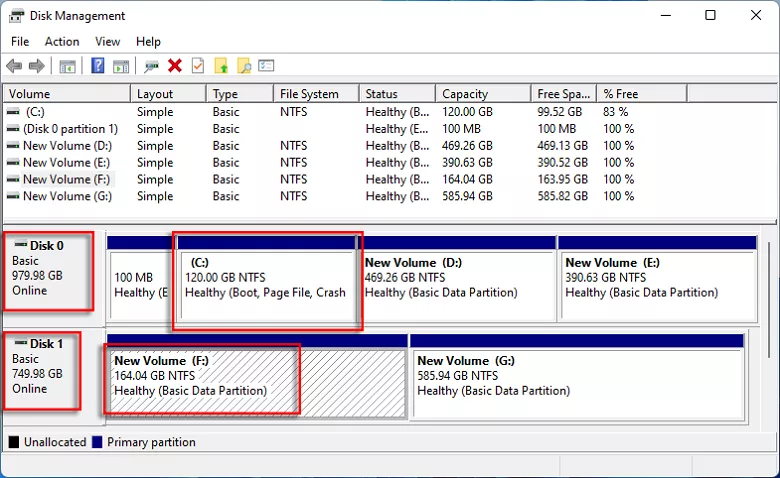
Step 2: Right-click on Win icon and select Disk Management.

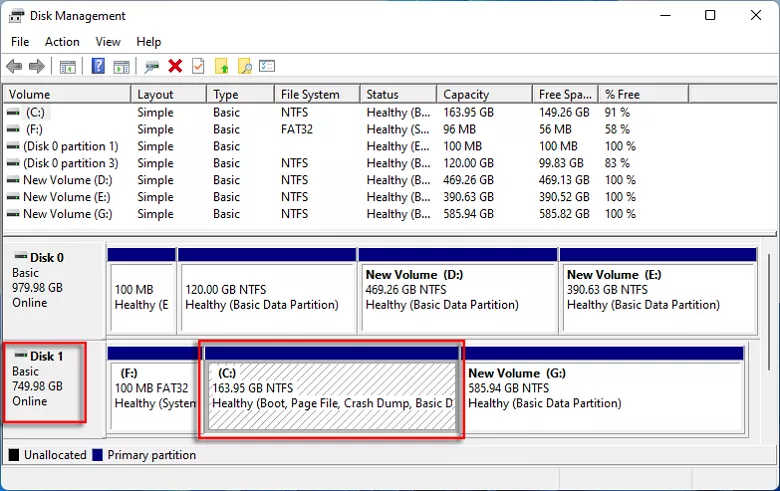
Step 3: In Disk Management window, you are given disk information that C drive (system disk) is on Disk 0, and partition F is on Disk 1.
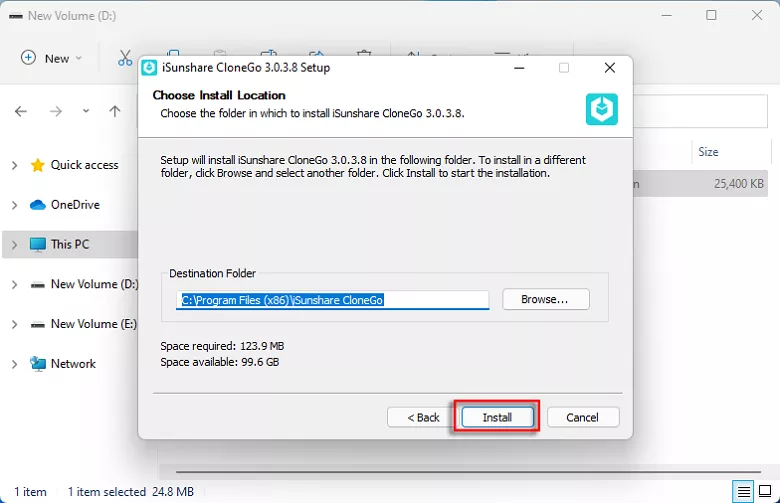
Step 4: Navigate to CloneGo application from D drive, then double-click on it to install. (The Install Location should be set as following instance.)
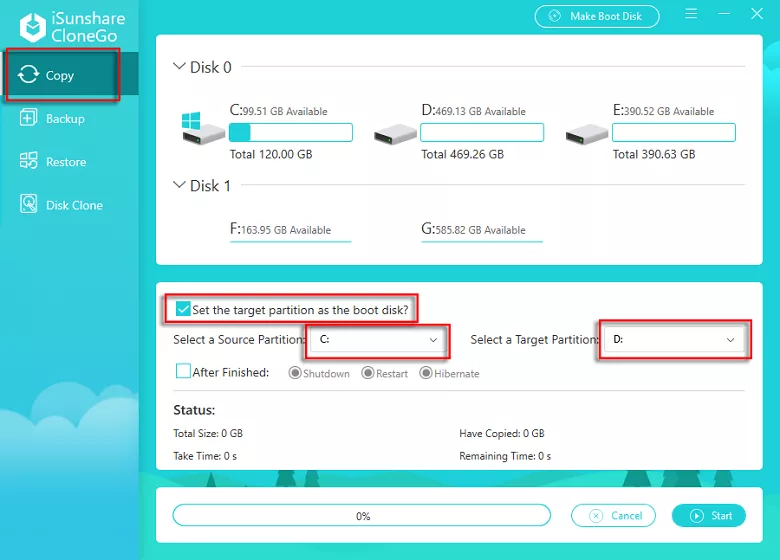
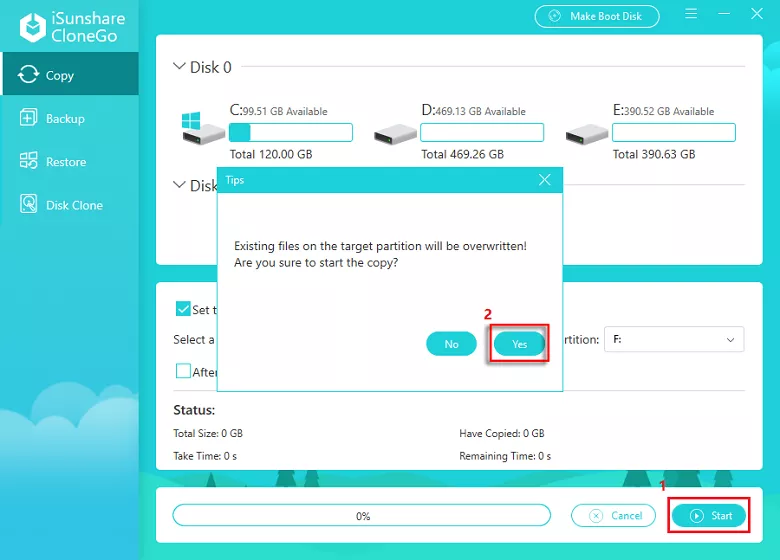
Step 5: After successful installation, run CloneGo. First, Click Copy on the left sidebar, then tick "Set the target partition as the boot disk", after that, select C drive from "Select a Source Partition" dropdown menu and select F drive from "Select a Target Partition dropdown menu".
Step 6: Click Start, and if a Tips box pops up to ask for your confirmation, click Yes to continue.
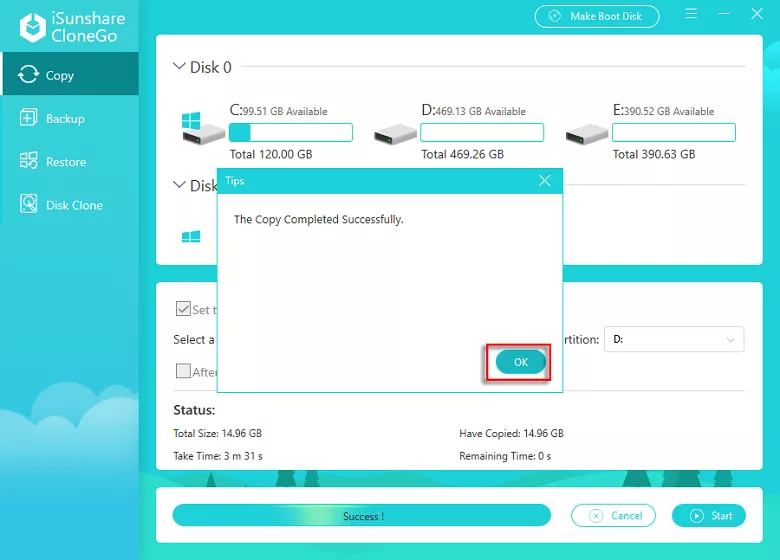
Step 7: Software will start copying automatically, then click OK if copy completed. System files have been stored in the root directory of F drive.
Step 8: Reboot computer, and press "F12" or "Delete" key (for HP) quickly and repeatedly to enter BIOS during restart process. (Another computer hotkeys can consult OEMs or search from Internet.)
Step 9: In BIOS, select Change boot order, then choose the newly added disk and move it to the top as the first startup item with "+" key.
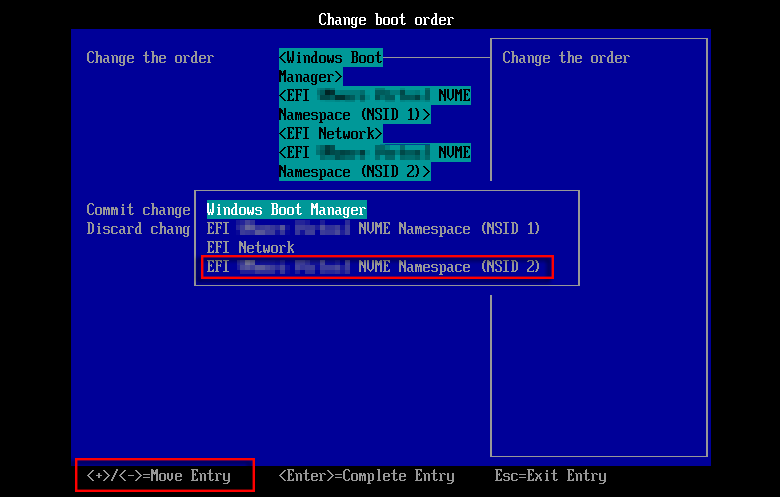
Step 10: After that, hit Enter to save configuration and then press Esc to exit program.

Step 11: Now you have entered Desktop interface, repeating step 2 to run Disk Management.
Step 12: Checking partition again, system disk has been successfully replaced to a new hard drive.