2 Ways to Add a Password to Protect a Word Document

When you want to protect your Word document’s content and let it can’t be edited, add a password to protect a Word document is a good choice. How to add a password to protect a Word document? How to add password to Word documents? In this article, we will utilize pictures and words to tell you 2 ways about how to add a password to protect a Word document.
Way 1: Add a Password to Protect a Word Document with File Option
In fact,add a password to protect a Word document is not a difficult thing. A function of Microsoft Word can help us protect documents with password. And now there is a simple method for you. It is easy to operate. Just a few clicks, you can add a password to protect a Word document.
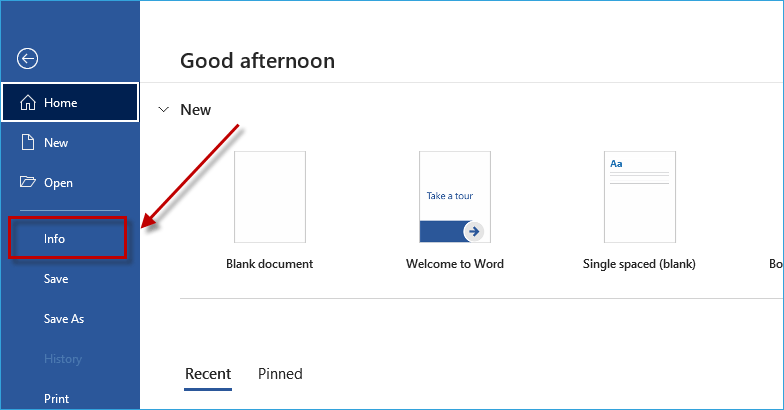
Step 1: Please Open the Word document first and then click File option in the left upper corner.

Step 2: Choose Info option.
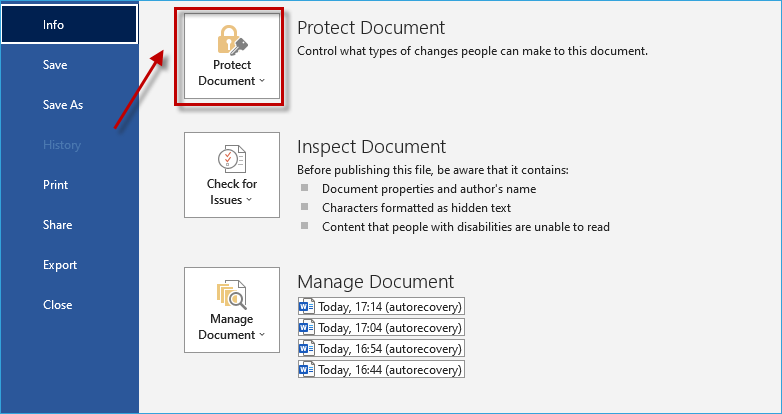
Step 3: Choose Protect Document.
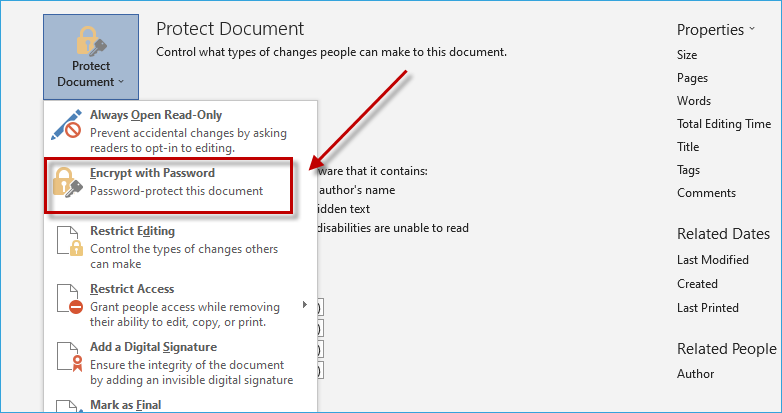
Step 4: Click Encrypt with Password option.
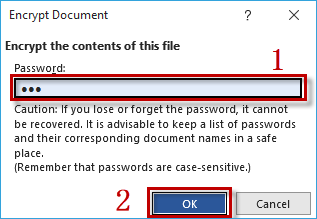
Step 5: Type the password you want to add and then choose OK. Then you will find you add a password to protect a Word document successfully.
Way 2: Add a Password to Protect a Word Document to Encrypt a Document
A Word document in read-only mode needs a password to edit it so we can utilize this function to add a password to protect a Word document. Open Restrict Editing and add password to the Word documents then its content will be protected with password.
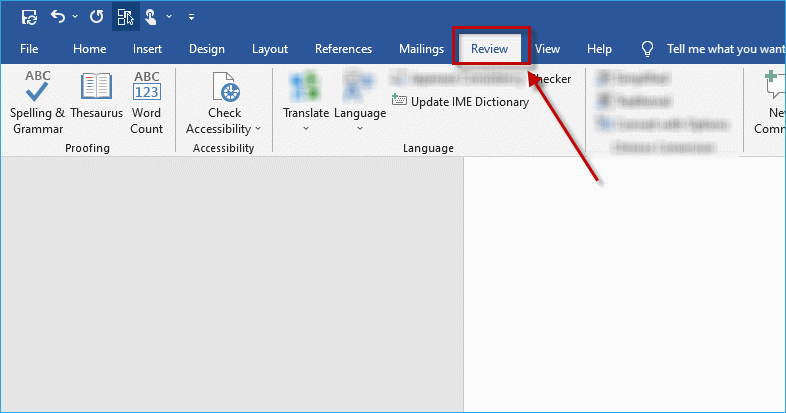
Step 1: Open Review option.
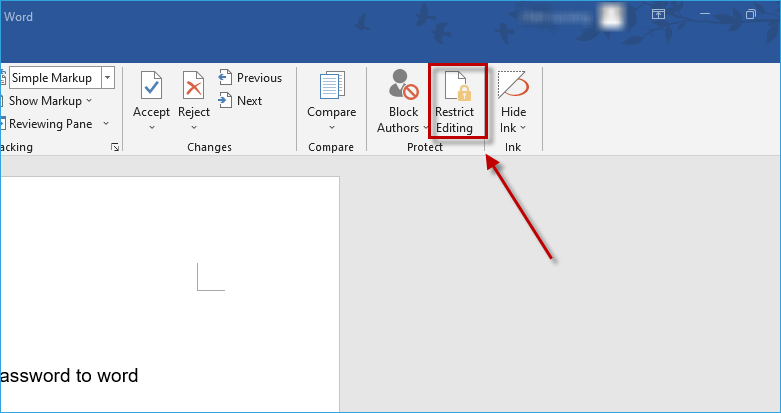
Step 2: Hit Restrict Editing button.
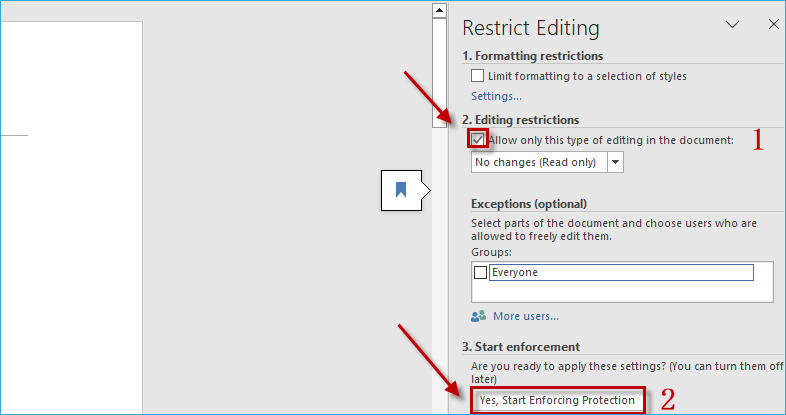
Step 3: Tick Allow only this type of editing in the document option then hit Yes, Start Enforcing Protection option.
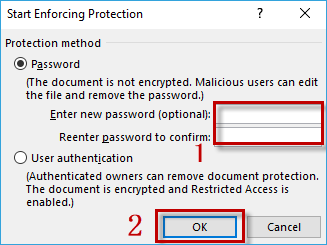
Step 4: Set a password for the Word document then reenter it to confirm password then choose OK.
Extra Tips: Use a Convenient Tool to Remove Office Password
Have you forgotten your Word document’s password and don’t know how to unlock them? In order to protect Word document’s content and let it can’t be edited by others, most of people will set a password to lock the document. But a few months later, they may forget the password and have no idea about how to unlock their Word documents.
How to Unlock a Word document? Now we have a more rapid and convenient way to solve the problem for you. That is to download iSunshare Word Password Genius. As a professional and safe tool, it can remove password quickly and efficiently. Just hit a few tabs on the screen, you can find your password. Here we will show you how to use iSunshare Word Password Genius.
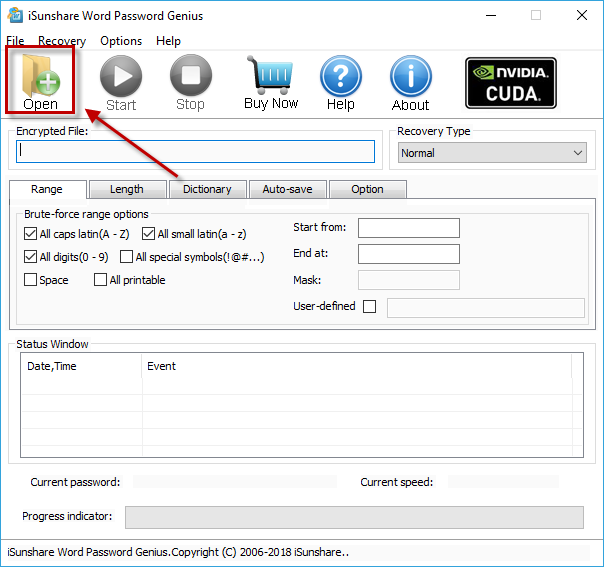
Step 1: Choose Open option in the top left-hand corner.
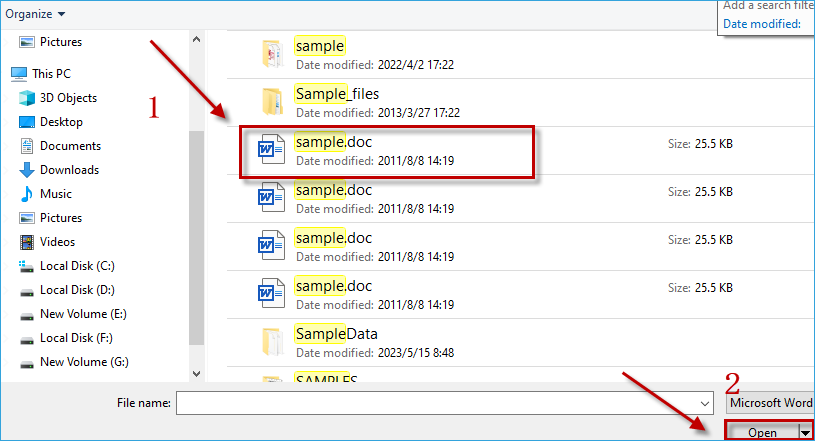
Step 2: Choose a Word document that you want to find password.
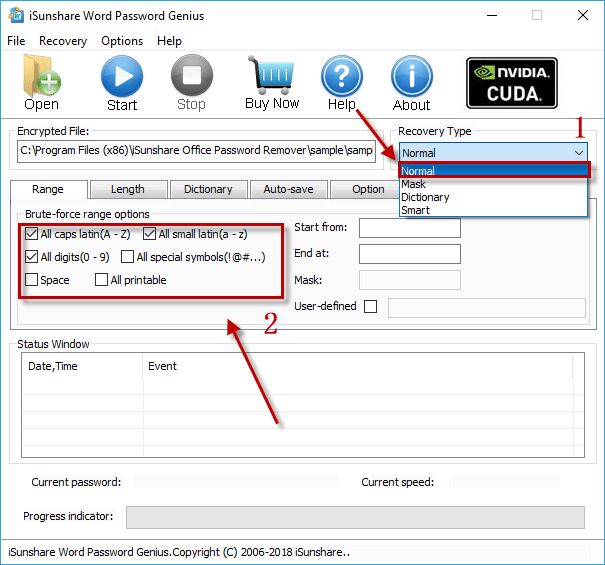
Step 3: Change Range option.
You can tick different options according to your needs. If there are numbers in your password, tick the small grid in front of All digits option.
If there are special characters in your password, tick the small grid in front of All special symbols option. In addition, you can give some clues about your password which will be helpful for the software to find the password. If you want to know more about specific functions of each options, this article will show you how to use iSunshare Word Password Genius.
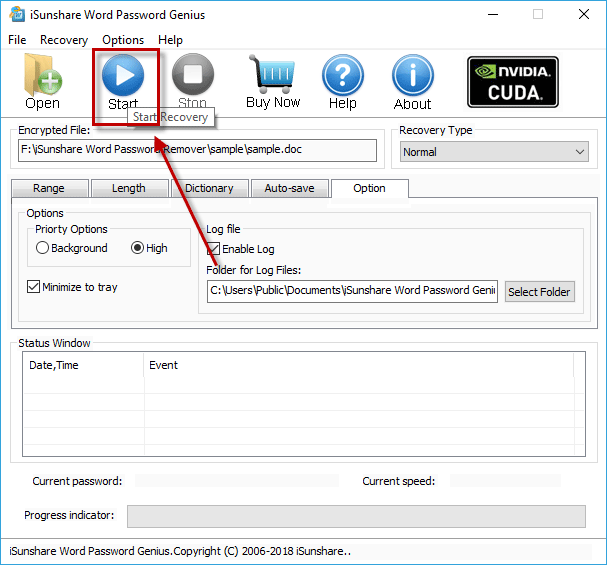
Step 4: Hit Start option.
Step 5: The password has been found then choose Copy.
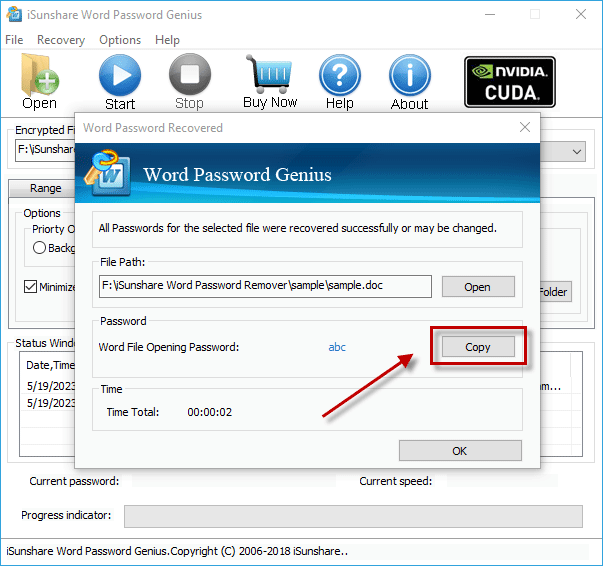
Step 6: Click with the right mouse button first and choose Paste.
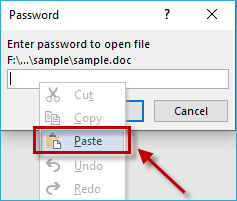
Look, the Word document has been unlocked successfully!

Would you like to have a try? Hope this software will make your life easier and more convenient.
Download:iSunshare Office Password Genius


