How to Use Excel VBA to Protect Workbook/Sheet with Password

July 10, 2023

For some important Excel files, we often hope to protect them by setting passwords to prevent information leakage. This article will introduce how to use VBA to protect workbook/sheet with password in Excel from being opened or edited by others.
1. Protect workbook via Password attribute method
This method can protect the whole workbook from being opened by others.
Step 1: Open your Excel file and press shortcut key Alt+F11 to enter the VBA editor.
Step 2: Click on the Insert tab and Module in the pop-up window.
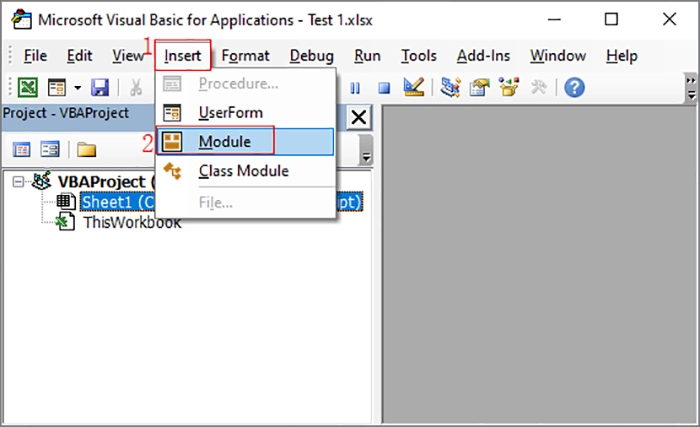
Step 3: Enter the following code and press F5 to run it.
Tips: The "231" part can be changed with your own password.
Sub Shareus()
Dim wb As Workbook
Set wb = Excel.ThisWorkbook
wb.Password = "231"
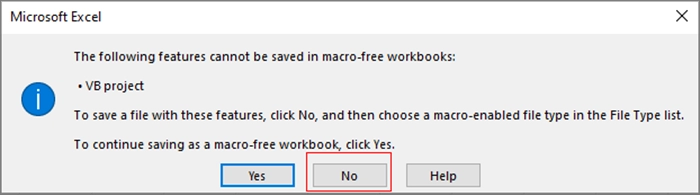
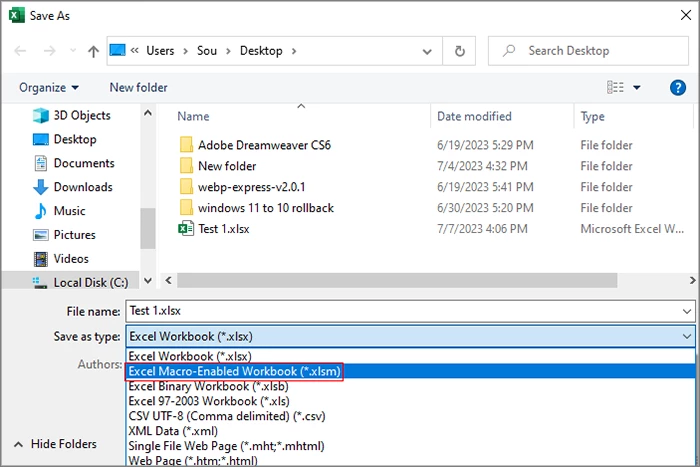
End SubStep 4: Save the Excel file. If it's not a .xlsm file, the following window will pop up, just click on No.
Step 5: Save the file as the Excel Macro-Enabled Workbook(*.xlsm) type.
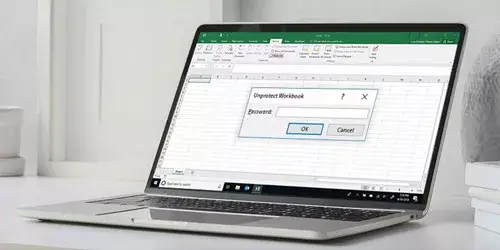
It’s all done now. When you re-open the file, a prompt box will pop up to inform you to enter the password.
2. Protect workbook via SaveAs method
This method can also protect the Excel file from being opened by others.
Its syntax is as follows:
SaveAs (FileName、 FileFormat、 Password、 WriteResPassword、 ReadOnlyRecommended、
         CreateBackup、 AccessMode、 ConflictResolution、 AddToMru、 TextCodepage、
         TextVisualLayout、 Local)
Enter the following code in the VBA editing window.
Tips: You can change the "f:\Test 2.xlsm" part with your own file name.
Sub Shareus()
    Dim wb As Workbook
    Set wb = Excel.ThisWorkbook
    wb.SaveAs "f:\Test 2.xlsm", xlOpenXMLWorkbookMacroEnabled, "231(your password)"
End Sub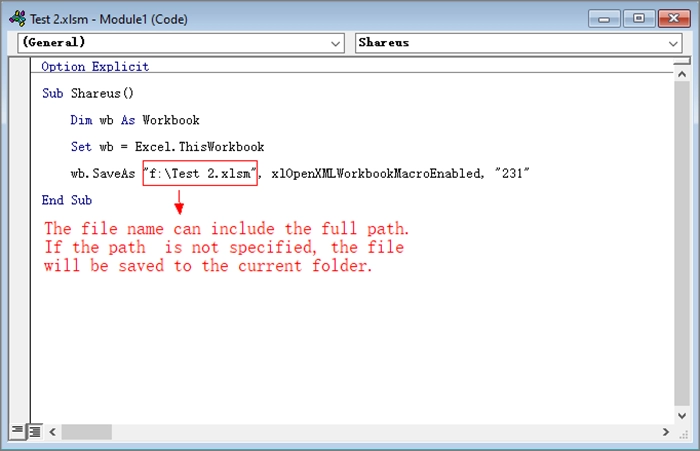
3. Protect worksheet via Protect method
This method can protect worksheets from being edited, but others can still read the contents in the sheets.
Its syntax is as follows:
Protect(Password, DrawingObjects、 Contents、 Scenarios、 UserInterfaceOnly、
        AllowFormattingCells、 AllowFormattingColumns、 AllowFormattingRows、
        AllowInsertingColumns、 AllowInsertingRows、 AllowInsertingHyperlinks、
        AllowDeletingColumns、 AllowDeletingRows、 AllowSorting、 AllowFiltering、
        AllowUsingPivotTables)
If you want to protect multiple worksheets, enter the following code in the code editing window of the VBA editor then run it.
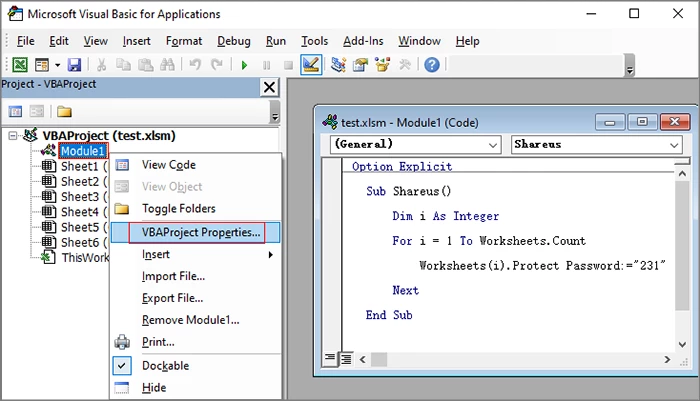
Sub Shareus()
Dim i As Integer
For i = 1 To Worksheets.Count
Worksheets(i).Protect Password:="231(your password)"
Next
End Sub
Since others can read the sheets, they can also read the code in the VBA window. It’s needed to set a password to protect the code from being viewed with following steps.
Step 1: Click on Module1 and VBAProject Properties.
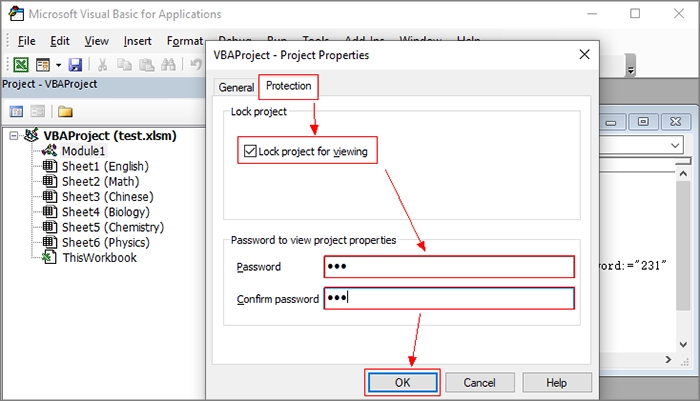
Step 2: Choose Protection tab, check the Lock project for viewing checkbox, then enter your password and click on OK.
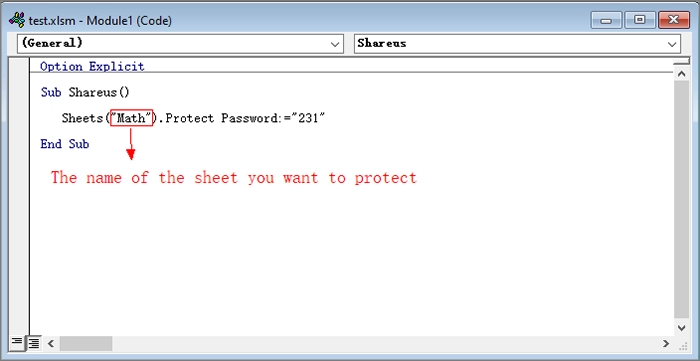
If you want to protect only one sheet, enter the following code instead.
Tips: You can change the "Math" part with your own sheet name.
Sub Shareus()
   Sheets("Math").Protect Password:="231(your password)"
End Sub