[Examples] How to Recover Permanently Deleted Files Using Command Prompt in Windows 10

September 13, 2021
Are you eager to retrieve your permanently deleted files that can't be found in Recycle Bin using Command Prompt in Windows 10? This article is going to tell you how to do so in just several easy steps.
Some simple Command Prompt command examples will be given to you, and then you can just copy and paste them to the Command Prompt to get your shift deleted files or data recovered.
- Step 1: Download Windows File Recovery, a command-line utility from Microsoft.
- Step 2: Open Windows File Recovery.
- Step 3: [Examples] Copy and paste the command below and press Enter.
- Step 4: Hit Y Key when it asks you to confirm, and then wait a moment.
- Step 5: Press Y Key to view recovered files.
- FAQ
- MORE: An easier way to recover your deleted files.
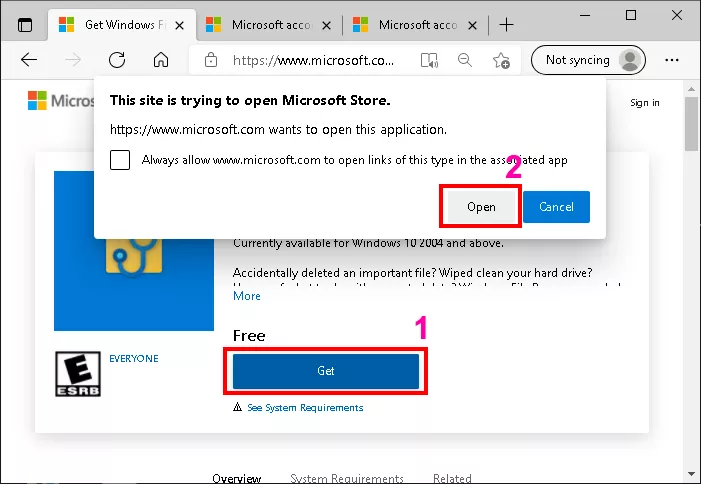
Step 1: Download Windows File Recovery, a command-line utility from Microsoft.
Click here to go to the Microsoft Store website, and then clickGetandOpento run the application, Microsoft Store.
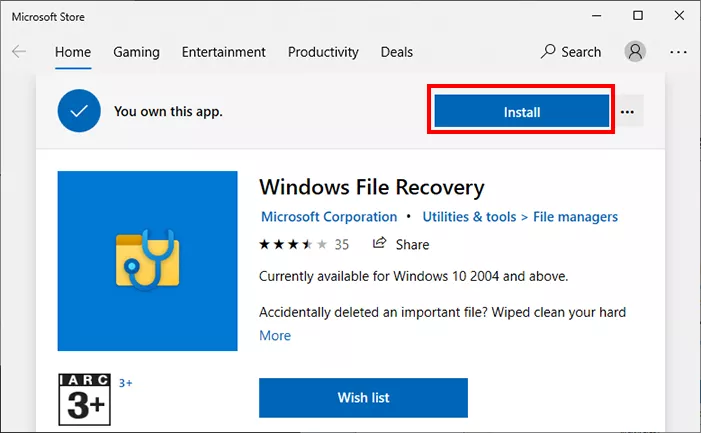
In the Microsoft Store, clickInstallto get the download and install.
Note:
1. Windows File Recovery is only available for Windows 10 Version 2004 and above currently, so you need to update your Windows if not eligible. How to update Windows?
2. You need to sign in to your Microsoft account in the Microsoft Store before installing Windows File Recovery.

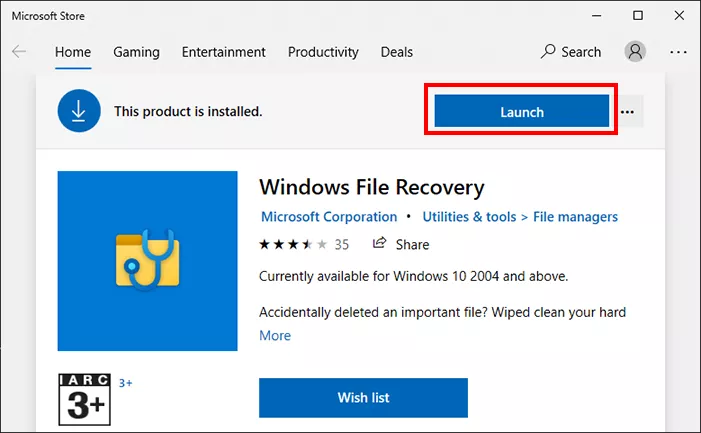
Step 2: Open Windows File Recovery.
Click Launch, and select Yes if you are asked to allow it to make changes to your device.
Step 3: [Examples] Copy and paste the command below and press Enter.
Create a new text document on the Desktop.
Copy the command you need below, paste it to the new text document, and replace the underlined word(s) if necessary.
Then copy the modified command, paste it to the Command Prompt by one single right-clicking, and press Enter.
Example 1:
Recover permanently deleted files from Desktop to D: drive.
With specific file extensions: docx, doc, pptx, xlsx, jpg, mp4, mp3, etc. (With special file extensions: dll, exe, htm, psd1, etc., click here.)
Winfr C: D: /regular /n \Users\admin\Desktop\*.docx 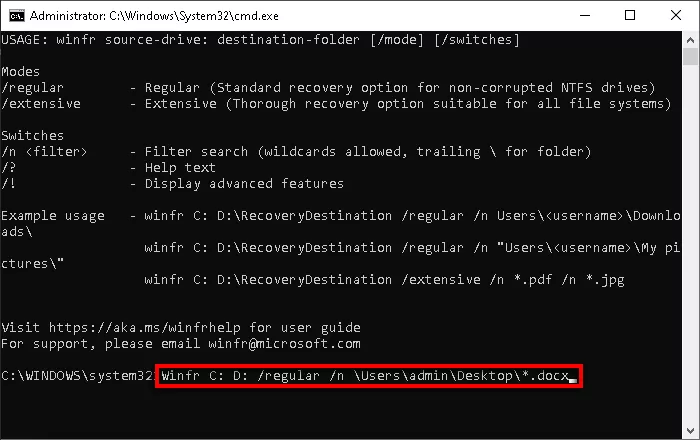
Without specific file extension:
Winfr C: D: /regular /n \Users\admin\Desktop\ 
Note:
The underlined wordadminneed to be replaced with your own Windows username, which can be learned from Start > Settings > Accounts > Your info.
Another underlined worddocxshould be replaced with the extension of the file you want to recover.
Example 2:
Restore shift deleted files from any location to another drive.
From D:\Program Files (x86)\Apple Software Update\ to E: drive.
With specific file extensions: docx, doc, pptx, xlsx, jpg, mp4, mp3, etc. (With special file extensions: dll, exe, htm, psd1, etc., click here.)
Winfr D: E: /regular /n “\Program Files (x86)\Apple Software Update\*.jpg” 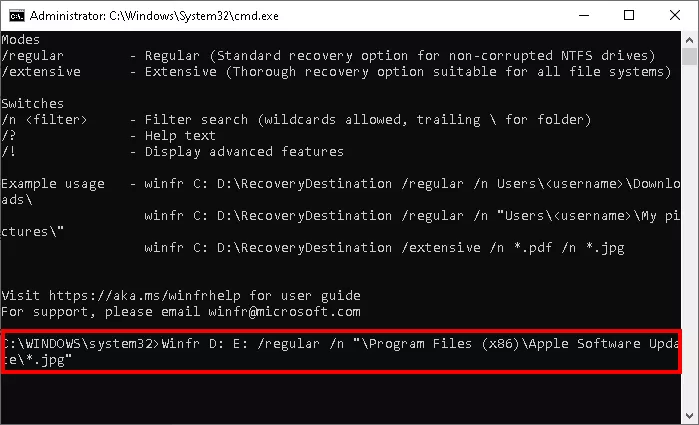
Without specific file extension:
Winfr D: E: /regular /n “\Program Files (x86)\Apple Software Update\” 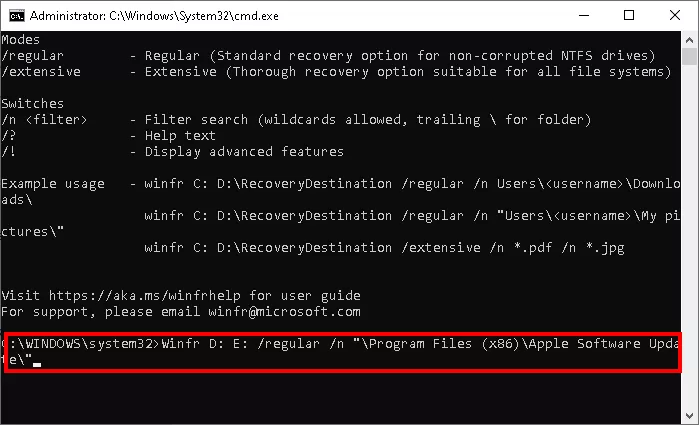
Note:
Surround the file path with quotes if there are spaces in it as above.
The underlined wordsDand\Program Files (x86)\Apple Software Update\should be replaced with the path of the files you want to recover.
You can replace the underlined wordEwith any other (except for the original D:) drive where you want to store the recovery files.
Example 3:
If deleted files cannot be recovered using the commands above, try using the advanced command below, which will take much more longer to scan the files.
Recover from D:\ProgramData\Microsoft OneDrive\setup\ to F: drive.
Winfr D: F: /extensive /n "\ProgramData\Microsoft OneDrive\setup\"
Example 4:
To recover files with special extensions: dll, exe, htm, psd1, etc., use the command below.
Recover files with the extension exe from F:\ Pictures\ to D: drive.
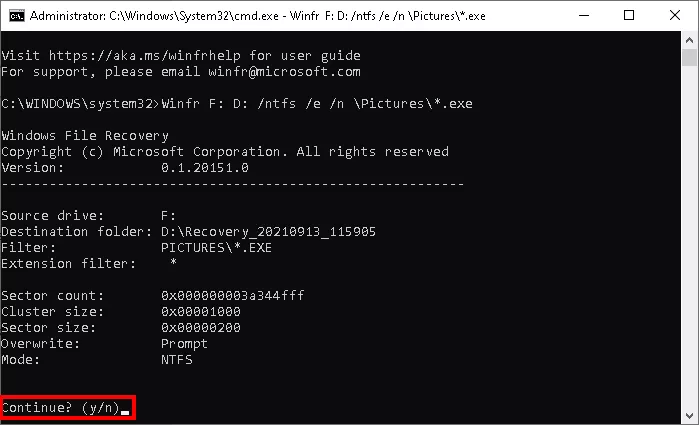
Winfr F: D: /ntfs /e /n \Pictures\*.exe
Full list of special file extensions:
_, adm, admx, appx, appx, ascx, asm, aspx, aux, ax, bin, browser, c, cab, cat cdf-ms, catalogItem, cdxm, cmake, cmd, coffee, config, cp, cpp, cs, cshtm, css, cur, dat, dll, et, evtx, exe, fon, gpd, h, hbakedcurve, htm, ico, id, ildl, ilpdb, iltoc, iltocpdb, in, inf, inf_loc, ini, js, json, lib, lnk, log, man, manifest, map, metadata, mf, mof, msc, msi, mui, mui, mum, mun, nls, npmignore, nupkg, nuspec, obj, p7s, p7x, pak, pckdep, pdb, pf, pkgdef, plist, pnf, pp, pri, props, ps1, ps1xm, psd1, psm1, py, resjson, resw, resx, rl, rs, sha512, snippet, sq, sys, t4, targets, th, tlb, tmSnippet, toc, ts, tt, ttf, vb, vbhtm, vbs, vsdir, vsix, vsixlangpack, vsixmanifest, vstdir, vstemplate, vstman, winmd, xam, xbf, xm, xrm-ms, xs, xsd, ym
Step 4: Hit Y Key when it asks you to confirm, and then wait a moment.
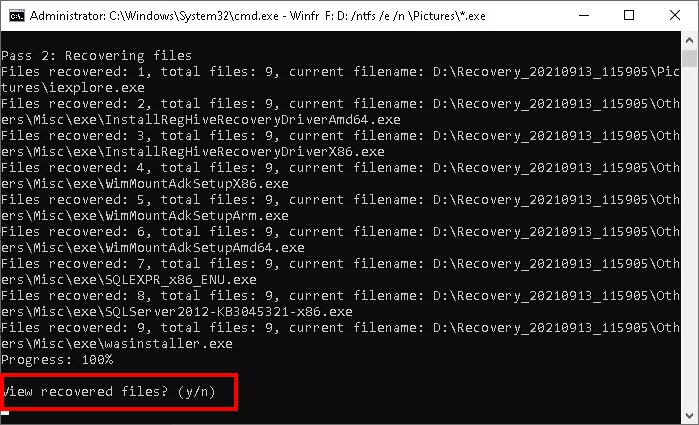
Step 5: Press Y Key to view recovered files.
FAQ
1. It’s too complicated for me. Is there any easier way?
Yes. Click here for a more convenient way.
2. Still cannot recover deleted files using the command in Example 3. What can I do?
If your files were stored on an SSD (solid-state drive), please see: Cannot Recover Deleted Files from SSD Drive? Causes & Solutions.
Or you can try another easier way to recover your files.
3. “There was an error parsing your command. Please check /? for more information and try again.” What does it mean?
This shows up always because you forget some of the characters (: \ “ * ”) or spaces needed. Don’t worry and check the command again.
4. “File F:\Recovery_20210910_161822\Pictures\jpg\TIMG_7~1.JPG exists: (o)verwrite, (s)kip, (a)lways overwrite, (n)ever overwrite, (k)eep both once, keep (b)oth always.” How do I do?
Press the corresponding Key according to the letter in parenthesis.
5. Can I recover the deleted files to their original drive?
No, the destination drive and original drive can’t be the same.
6. How to update Windows?
Step 1: ClickStart(Windows icon) in the lower left corner and selectSettings.
Step 2: Scroll down and select Update & Security.
Step 3: ClickCheck for updatesand follow the prompts.
You may need to restart your computer after updating.
MORE
An easier way to recover your deleted files.
1. You can download a tiny but powerful data recovery software, BitGenius.
Download: BitGenius2. Run BitGenius. Choose a location you lost files to Start scanning.
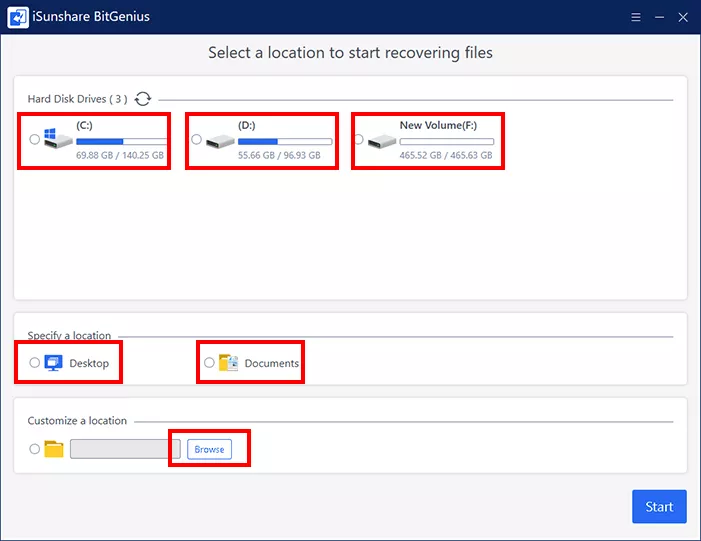
You are highly recommended toCustomize a locationif you remember where you shift deleted the files. Just click browse and select a folder.
If you lost files on the Desktop or Documents folder, please Specify a location: Desktop or Documents.
You can also select the whole drive you want by Hard Disk Drives if you can’t remember where data loss occurred.
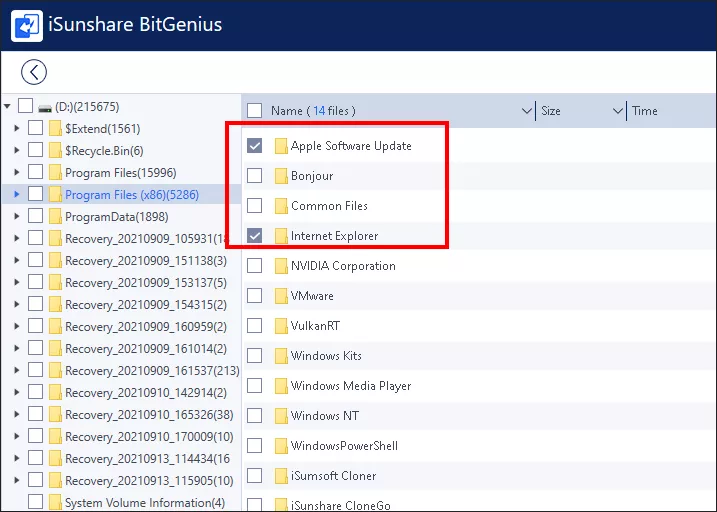
3. After the scanning is finished, select the permanently deleted files and clickRecover.
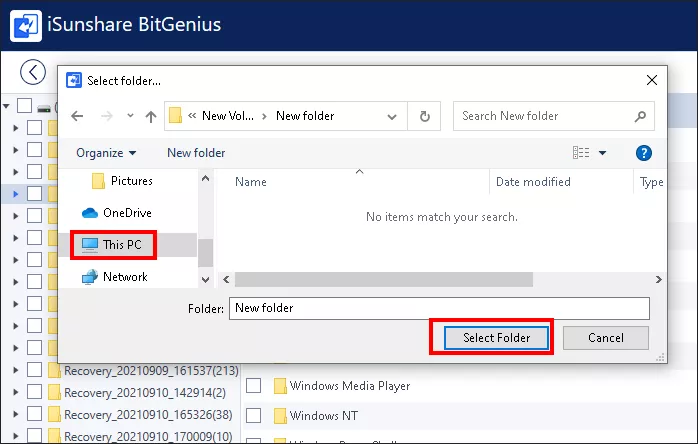
4. Select a folder to store the recovered files.
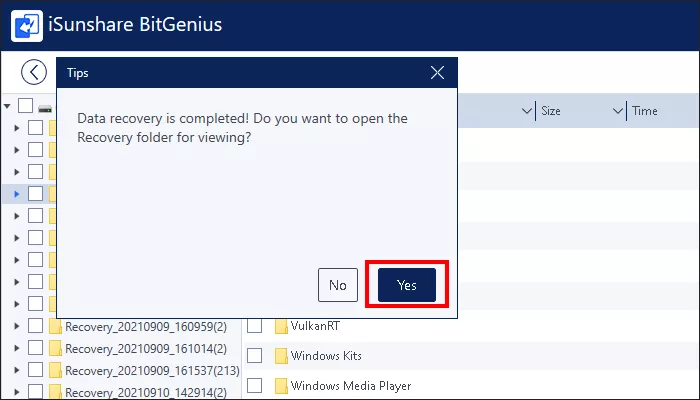
5. ClickYeson the pop-up to view the recovered folder.
For more details, please visit: BitGenius - A small but powerful data recovery software > Quick Guide
![[Examples] Windows File Recovery (CMD) - Recover Formatted Data](../img/software/examples-windows-file-recovery-cmd-recover-formatted-data/examples-windows-file-recovery-cmd-recover-formatted-data-m.webp)

![[Fixed] How to Recover Deleted Excel File Not in Recycle Bin](../img/office/fixed-how-to-recover-deleted-excel-file-not-in-recycle-bin/fixed-how-to-recover-deleted-excel-file-not-in-recycle-bin-m.webp)