3 Ways to Turn off Windows 10/11 Error Reporting

Windows has a build-in error reporting utility that collects error information about software crashes and hardware failures for users as well as provides the possible solutions at the same time. But some users may thought this feature bothering and prefer no error logs on their system. If you are also likely not to receive error messages from Microsoft, here's how to permanently disable Error Reporting in Windows.
What is Windows Error Reporting
Windows Error Reporting, abbreviated as WER, is an event-based feedback tool which gathers data about system and hardware problems and the error logs would be saved on your computer. Introduced with Microsoft Windows XP, this feature has been constantly improved. It also sends the post-error debug information to the developer and then provides any possible solutions for users. If you disable it, you won’t know whether there exists unexpected problems on your system and you will find no fixes information in the Security and Maintenance feature in the Control Panel. So, you’d better have a clear consideration of your needs before disabling this feature.
How can I disable Windows Error Reporting
1. Via Services
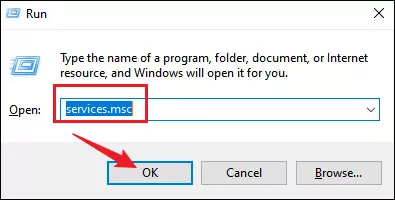
Step 1: Press Windows + R to open Run dialog and type services.msc in the box. Then click OK to open Services panel.
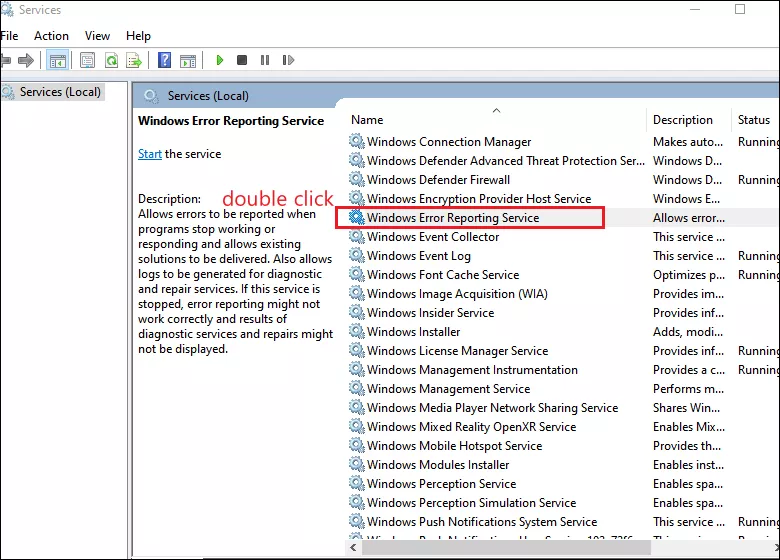
Step 2: In Services window, scroll down to locate Windows Error Reporting Service and double-click on it.
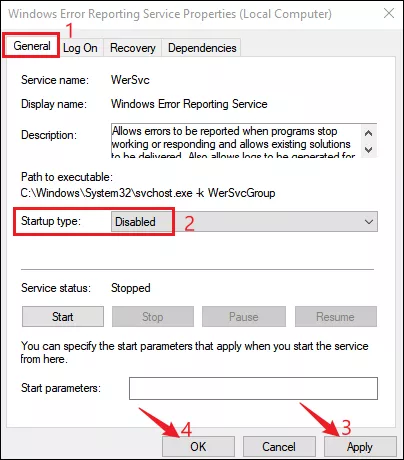
Step 3: Under General tab, expand the drop-down menu next to Startup type and choose Disabled.
Step 4: Click Apply and then OK to save the change.
2. Via Group Policy Editor
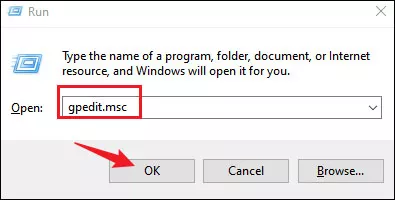
Step 1: Press Windows + R to open Run dialog and type gpedit.msc in the box. Then click OK to open the Group Policy Editor.
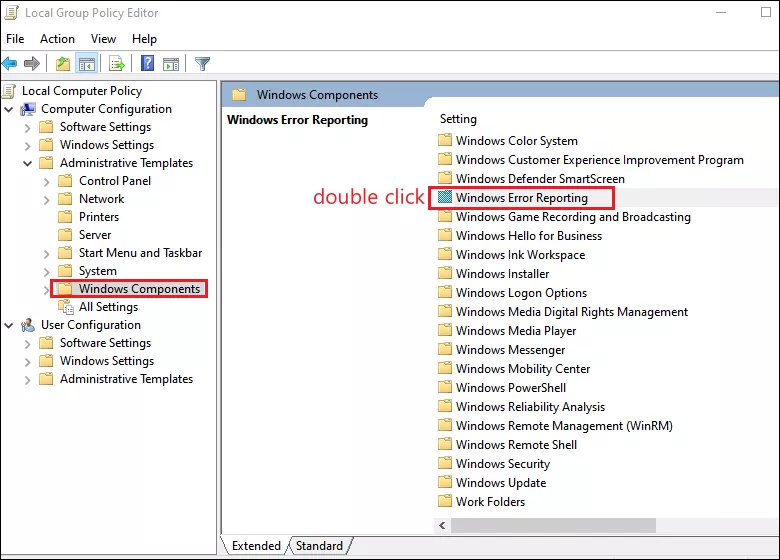
Step 2: Head to the following directory:
Computer Configuration > Administrative Templates > System > Windows ComponentsStep 3: Locate Windows Error Reporting under Windows Components folder and double-click on it.
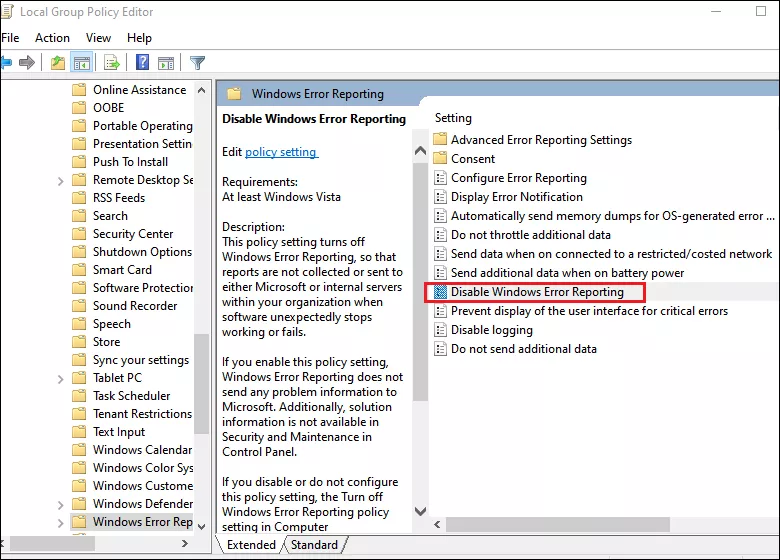
Step 4: Find Disable Windows Error Reporting policy and double-click on it.
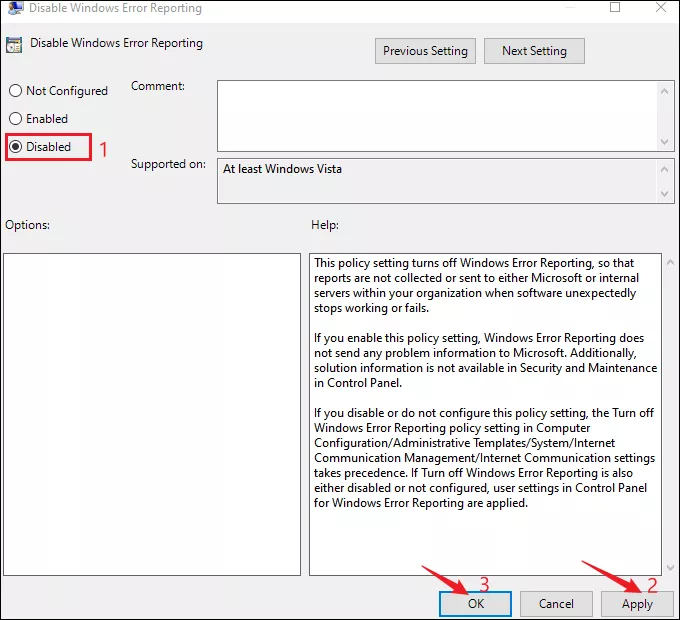
Step 5: Choose Disabled option in the next window and then click Apply and OK.
3. Via Registry Editor
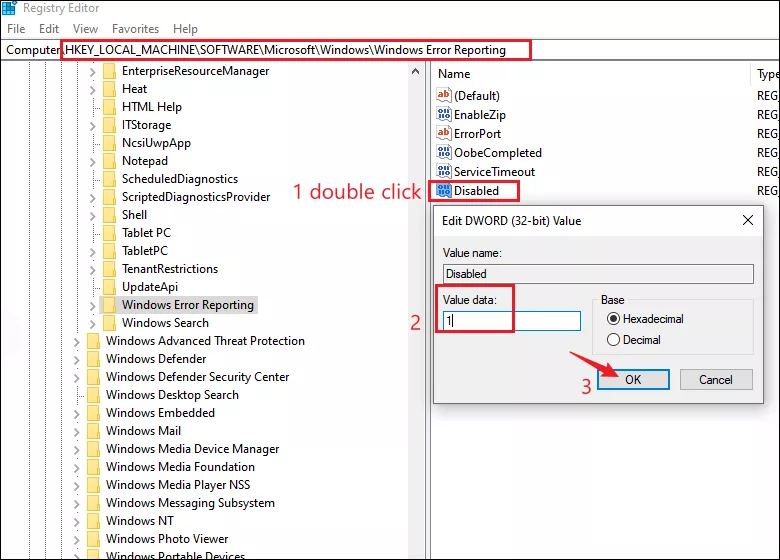
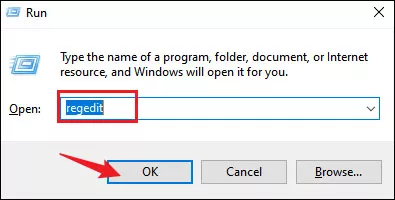
Step 1: Press Windows + R to open the Run dialog, type regedit in the box and click OK to open the Registry Editor.
Step 2: Navigate the the below path:
Computer\HKEY_LOCAL_MACHINE\SOFTWARE\Microsoft\Windows\Windows Error ReportingStep 3: Right-click an empty area and select New>DWORD(32-bit) value from the context menu.
Step 4: Name the newly created value as Disabled and double-click on it. Change its Value data to 1 and click OK.
