[8 Tricks] Speed Up Windows 11 Quickly & Fluidly
![[8 Tricks] Speed Up Windows 11 Quickly & Fluidly](../img/windows/8-tricks-speed-up-windows-11-quickly-fluidly/8-tricks-speed-up-windows-11-quickly-fluidly.webp)
Since being updated to Windows 11, the system has gradually become slow or even stuck, which seriously affects the user experience. That may be because you haven’t made full use of the performance. Don’t worry, we will explore 8 effective tips to make Windows 11 run quickly and fluidly.
Trick 1: Disable Startup Apps
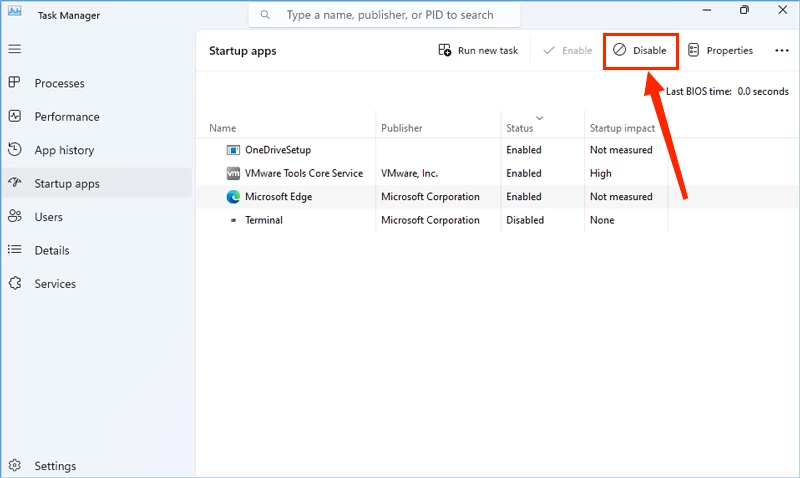
Step 1: Right-click the taskbar > Click Task Manager > Select the Startup apps tab.
Step 2: Choose the apps you don’t want to automatically start up > Click Disable.
Trick 2: Enable Storage Sense
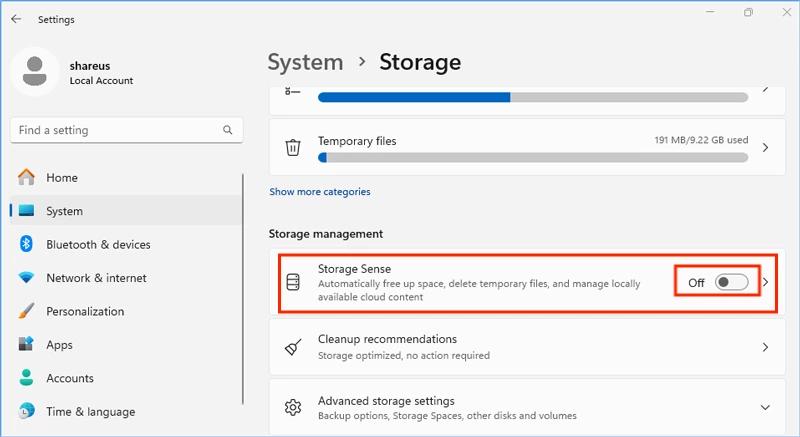
Step 1: Press Win + I keys > System > Storage > Storage Sense > Set the toggle to off.
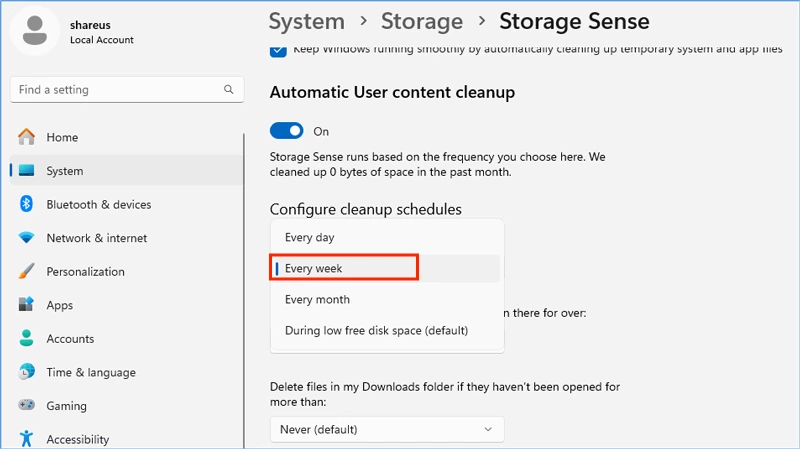
Step 2: Click Storage Sense > Set Run Storage Sense to Every week.
Trick 3: Tweak Performance Settings
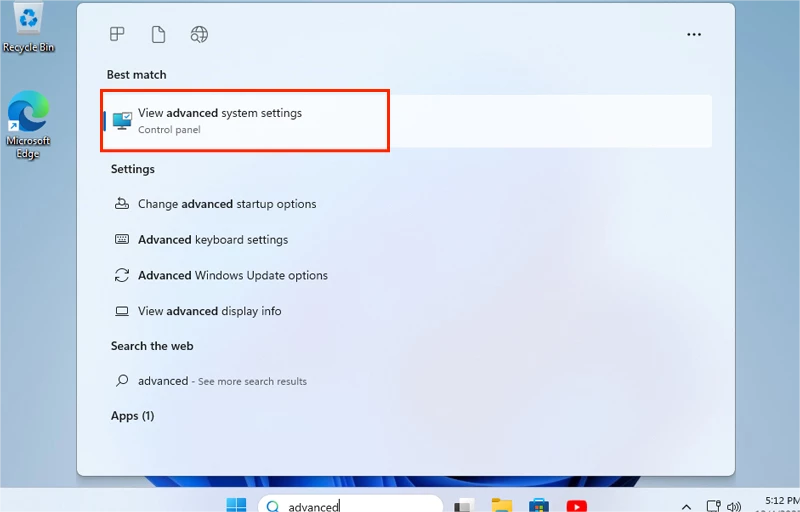
Step 1: Type “advanced” > Click View advanced system settings.
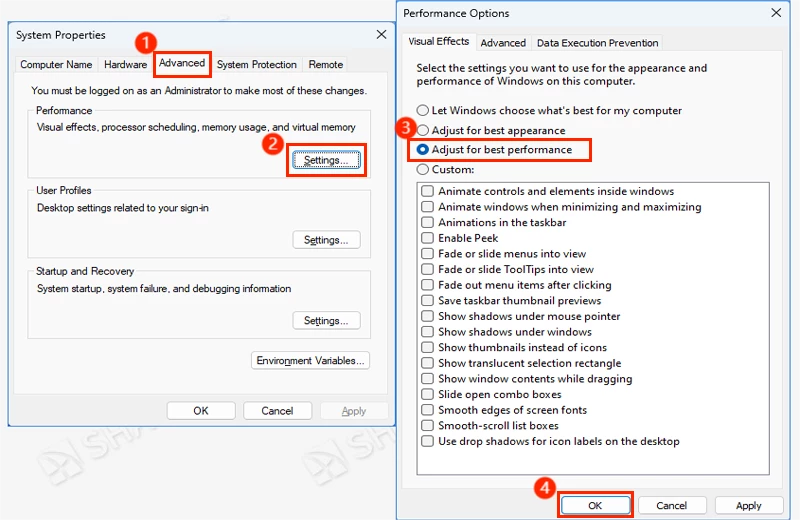
Step 2: Click Settings under the Performance column > Tick “Adjust for best performance” and click OK.
Trick 4: Turn off Visual Effects
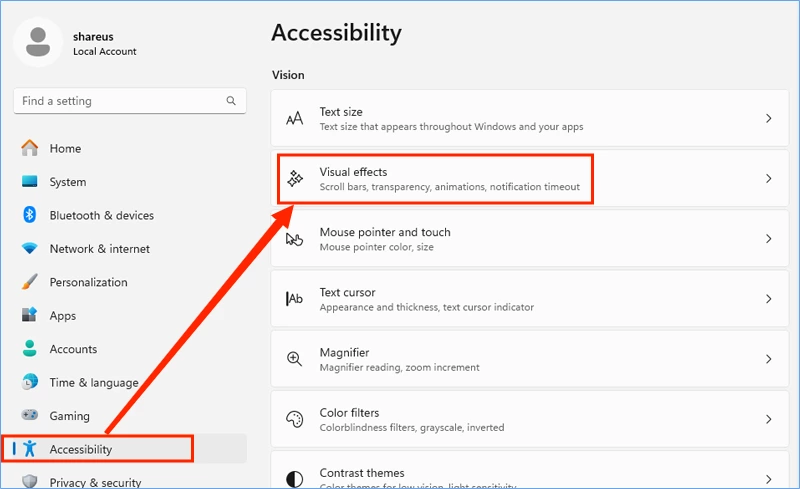
Step 1: Press Win + I > Accessibility > Visual effects.
Step 2: Turn off “Transparency effects” and “Animation effects”.
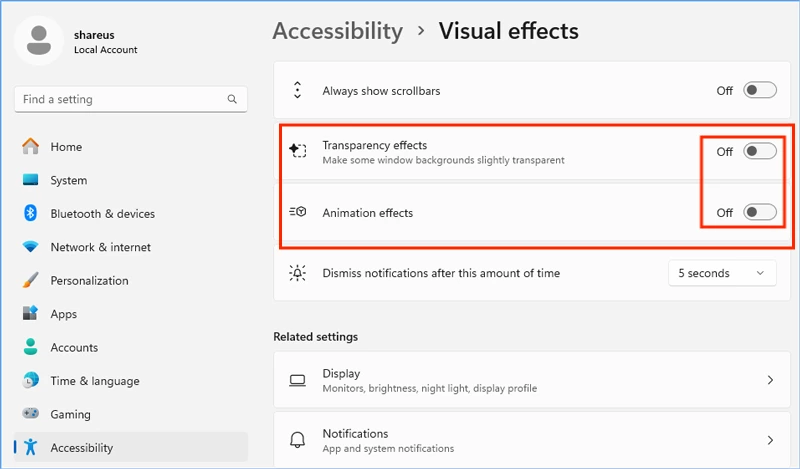
Note: Closing these two options may affect the appearance; if you require the appearance, you can keep the visual effects on.
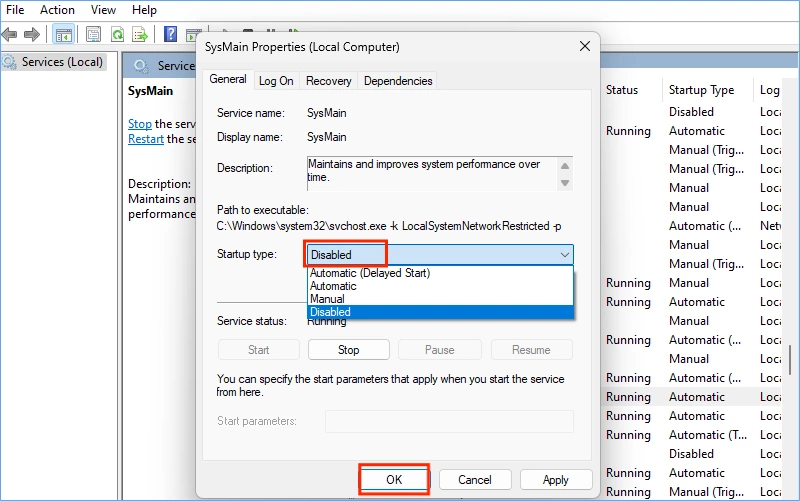
Trick 5: Disable SysMain Service
Step 1: Press Win + R > Type “services.msc” then hit the Enter button.
Step 2: Find and double-click the SysMain service > Choose “Disabled” in the Startup type, then click OK.
Trick 6: Free up Memory via Disk Cleanup Tool
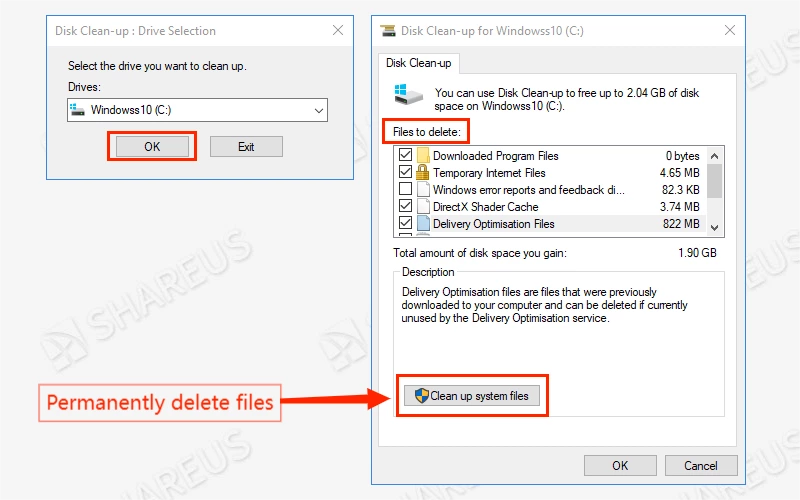
Step 1: Press Win + R > Type “cleanmgr” and hit the Enter button.
Step 2: Select the driver you want to clean up > Choose files to delete > Click OK. If you want to permanently delete the system files, click "Clean up system files" to delete.
Trick 7: Turn off Notifications
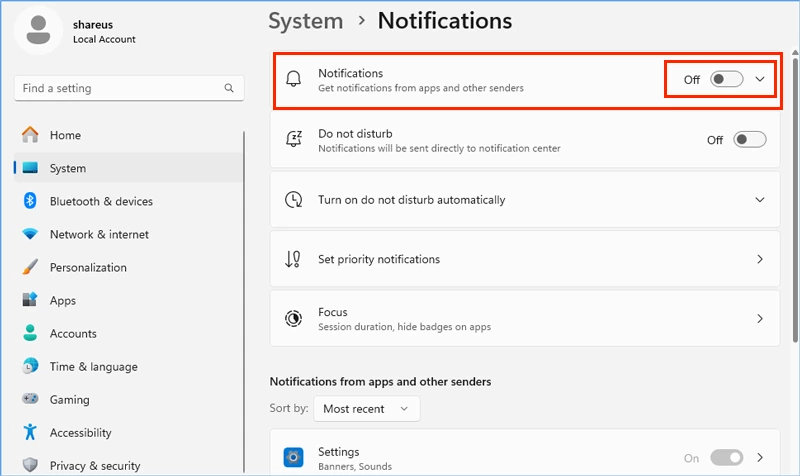
Steps: Open the Settings window > System > Notifications. You can turn off the overall notifications or keep some necessary notifications.
Trick 8: Pause Windows Updates
Step 1: Press Win + R, type “regedit” and press Enter.
Step 2: Browse to the following path:
Computer\HKEY_LOCAL_MACHINE\SOFTWARE\Microsoft\WindowsUpdate\UX\SettingsStep 3: Right-click the Settings folder > New > DWORD (32-bit) Value.
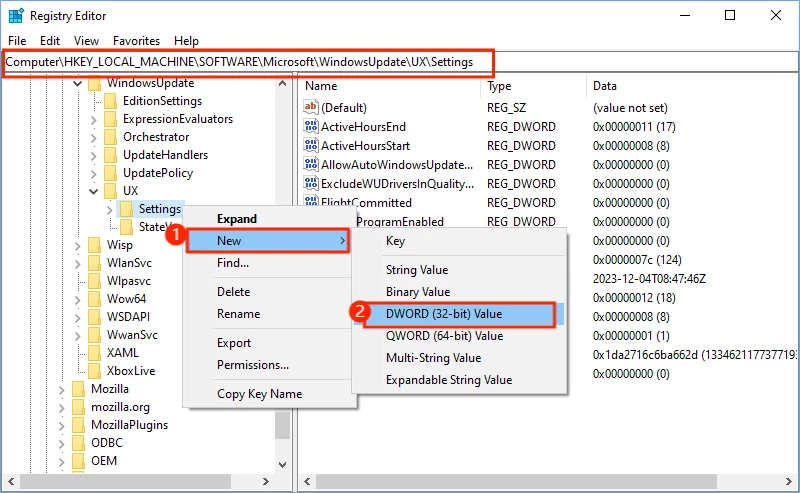
Step 4: Rename it to “FlightSettingsMaxPauseDays” and double-click it > Change the Base to Decimal > Change the Value data to 3650. (The value data can be set according to your needs.)
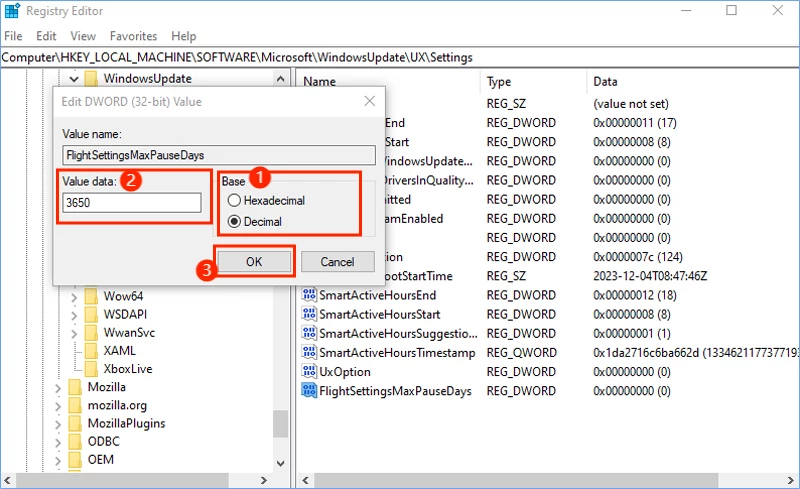
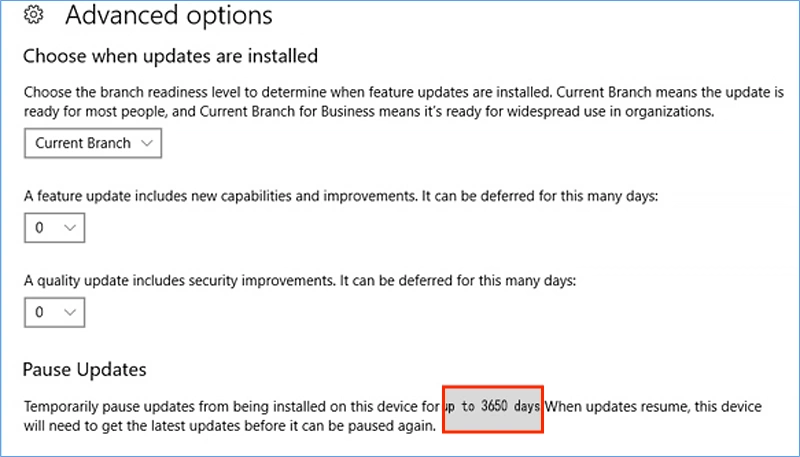
Now you can see the number of pause days is up to 3650 days.
