Application Error Exception Access Violation on Windows 10/11: Fix it now
In some cases, when you attempt to launch an application or enjoy a game, an error message showing Exception Access Violation pops up and prevents you from running the app. This error message is triggered because the application fails to handle memory or there’s some problems with your RAM modules. If every time you start the app, this message would appear and that could be an irritating thing. The description of this software error may vary, but in any case, you can try the following methods. Let’s see how to resolve Windows Exception Access Violation Error.
1. Reinstall the problematic app
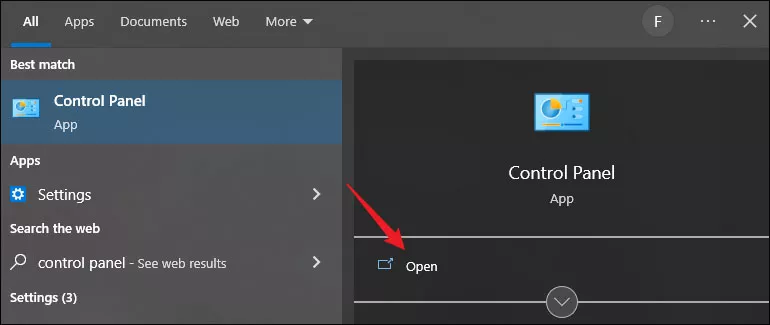
Step 1: Search control panel in the search bar and open it.
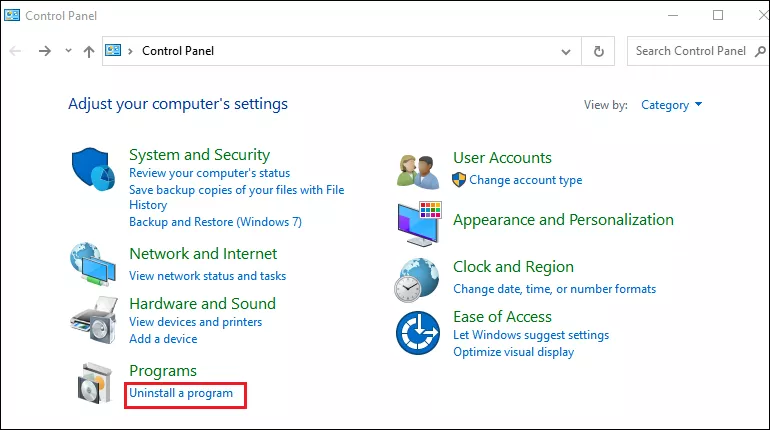
Step 2: Click Uninstall a program under Programs.
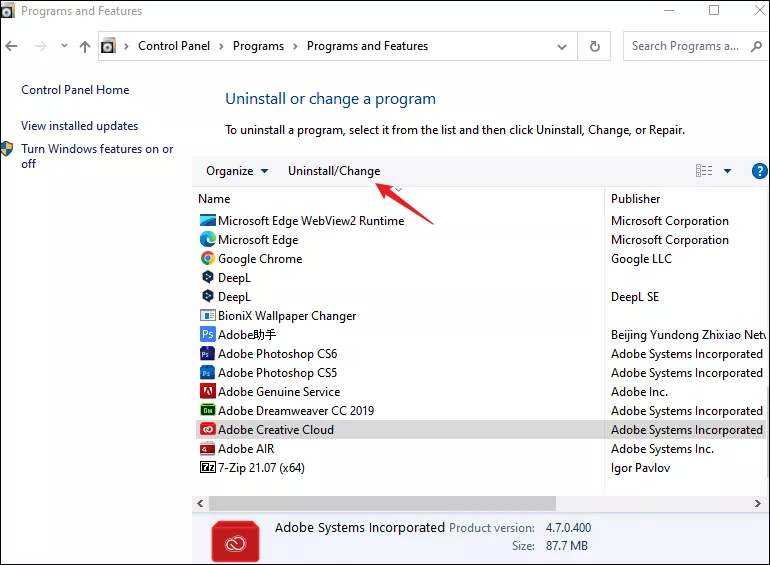
Step 3: Select the problematic application and click Uninstall.
Step 4: Download that app from the official website again.
2. Add Data Execution Prevention exception
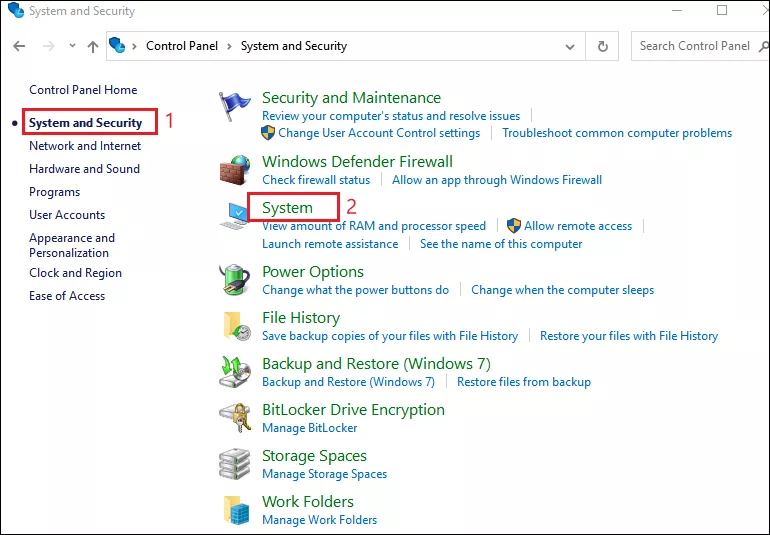
Step 1: Open Control Panel and choose System and Security>System.
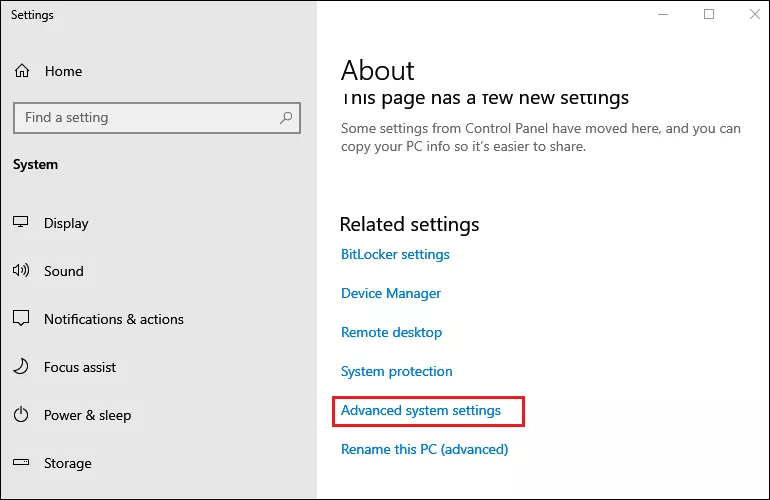
Step 2: In the opened Settings window, scroll down to the bottom at the right pane and click on Advanced system settings.
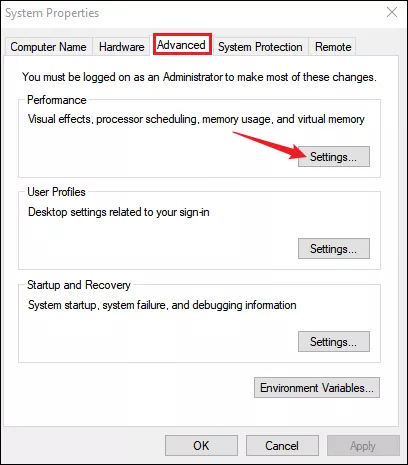
Step 3: In the Advanced tab, click Settings in the Performance section.
Step 4: Choose Data Execution Prevention tab, choose Turn on DEP for all programs and services except those I select option and click Add. Then select the .exe file of the program you want to open.
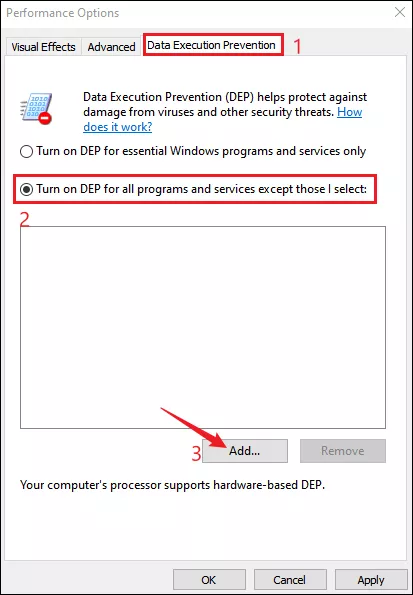
Step 5: Back to Performance Options window, click Apply and OK after you’ve added the program to the list. Then you can open the program again and see if the error disappears.
3. Turn off User Account Control
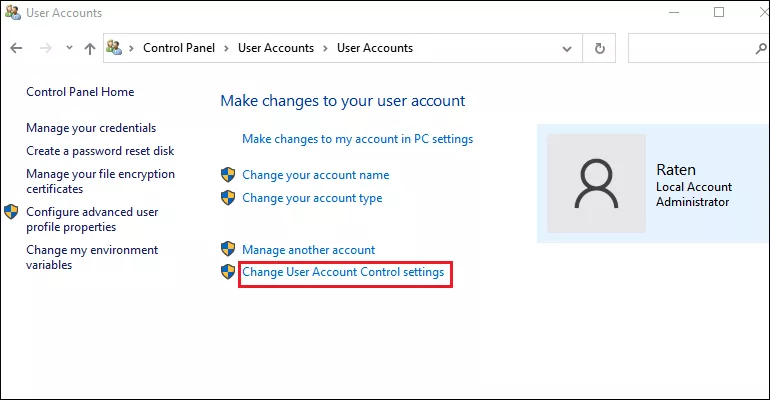
Step 1: Open Control Panel and choose User Accounts > User Accounts.
Step 2: Click Change User Account Control settings.
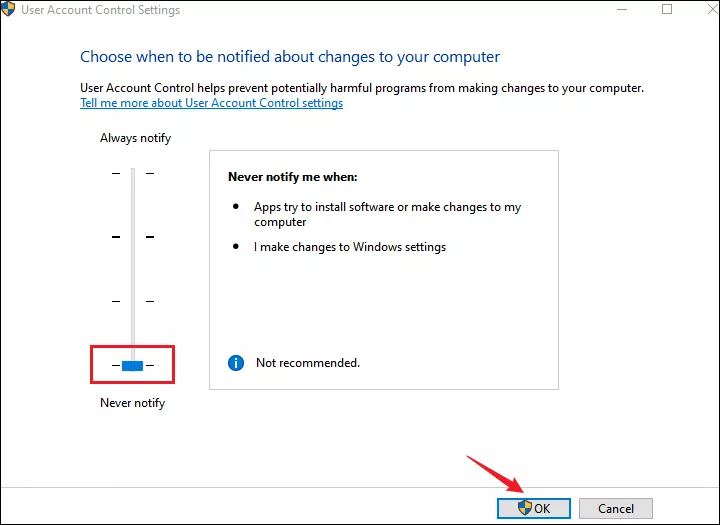
Step 3: Drag the slider to the bottom Never notify and click OK.
4. Create options.ini file for the app
This method applies to those who met the error message when starting a game by creating a settings file.
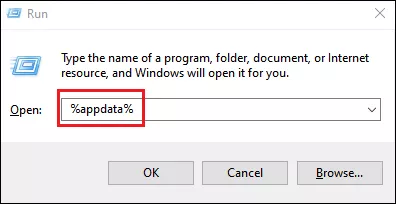
Step 1: Press Windows+R to open run dialog and type %appdata% in the box. Then press Enter to open the AppData folder.
Step 2: Open the folder of the game and right-click an empty area. Then select New>Text Document.
Step 3: Open the new document and paste the following in it:
AudioLOD = Low
HasSeenLogoMovies = yes
IdealStaticGameLOD = VeryLow
Resolution = 800 600
StaticGameLOD = VeryLow
TimesInGame = 1
Step 4: Click File and choose Save as. Then select All files in Save as type section and name the file as options.ini.
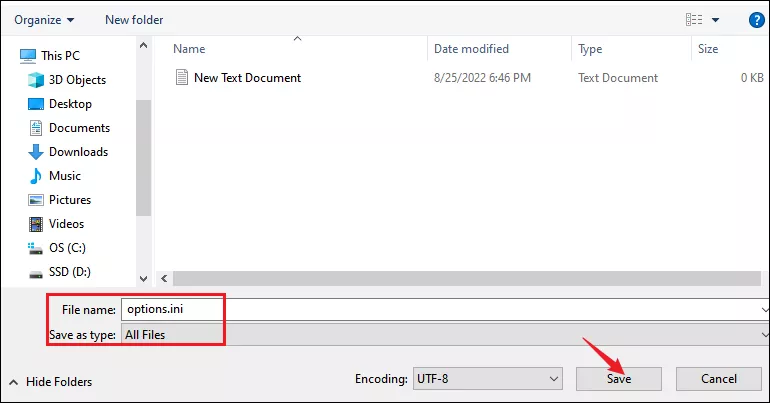
Step 5: Click Save and close the File Explorer. Then you can try opening the game again.
5. Check if the file is set as read-only
If you receive an error message stating the file name, the error is caused by the particular file and you need to check the properties of that file.
Step 1: Press Windows+E to open File Explorer and search for the problematic file.
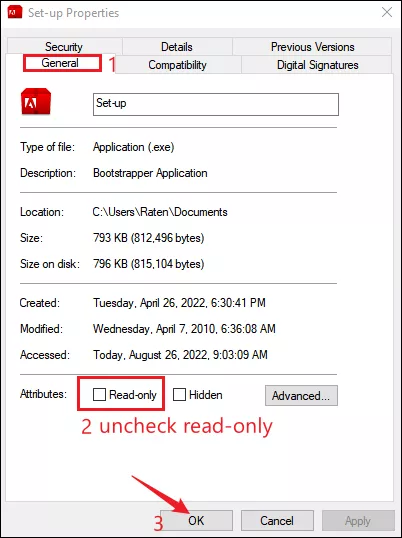
Step 2: Right-click the file and select Properties.
Step 3: In General tab, make sure the box next to Read-only is unchecked. Then click OK.
6. Run the app in compatibility mode
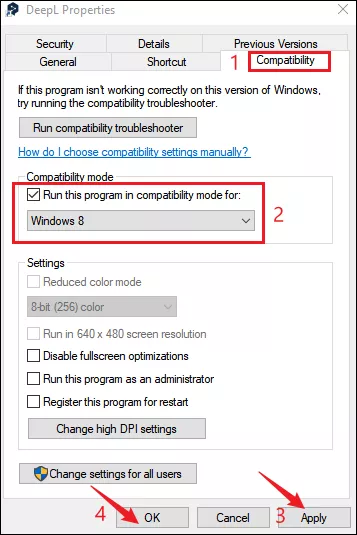
Step 1: Right-click the shortcut of the application that fails to open and select Properties.
Step 2: In compatibility tab, check the box next to Run this program in compatibility mode for and select a previous Windows version from the drop-down menu. Then click Apply and OK.
7. Run hardware troubleshooter
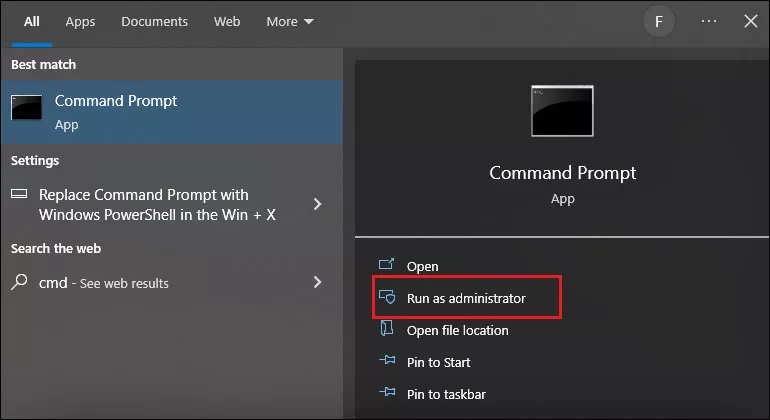
Step 1: Search cmd in the search bar and select Run as administrator.
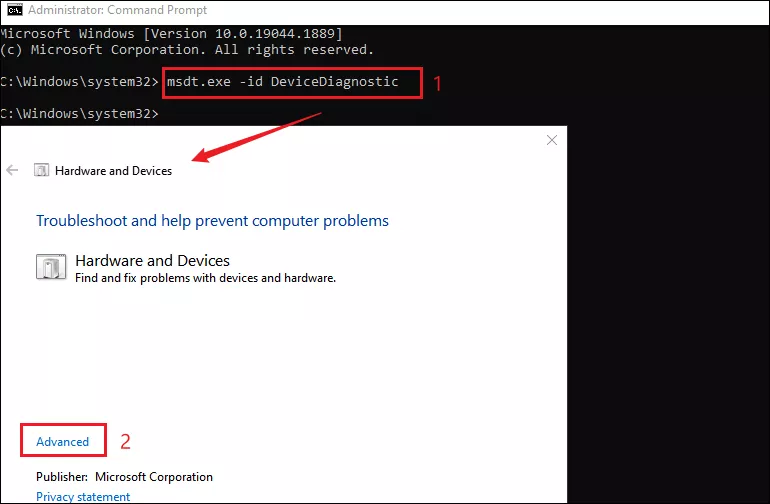
Step 2: Copy and paste msdt.exe -id DeviceDiagnostic in Command Prompt and press Enter.
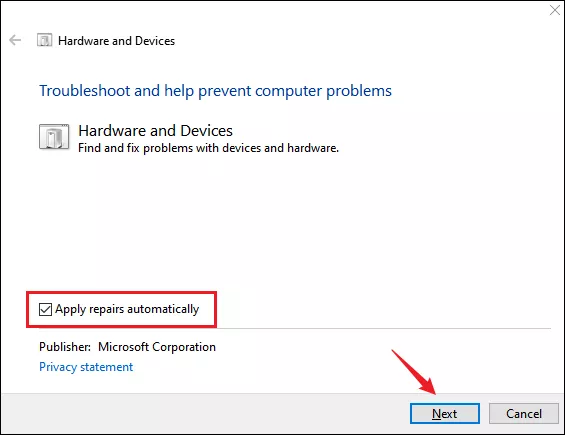
This will open the Hardware and Devices window and click Advanced option.
Step 3: Check Apply repairs automatically and press Next. Wait until the troubleshooter process completes and if there do exist any problems, they should be automatically fixed. You can try launching the program again.
