Error Fix: Not Enough Storage Is Available to Process This Command in Windows 10/11

There are so many reasons why "not enough storage is available to process the command" error appears on your device, such as incorrect registry value, problematic graphics driver and limited hardware capabilities. This issue has been seen all the time in Windows, but the fixes are quite simple. If you are one of those who are troubled by this error, this post will help you fix "not enough storage is available to process the command".
1. Close background processes
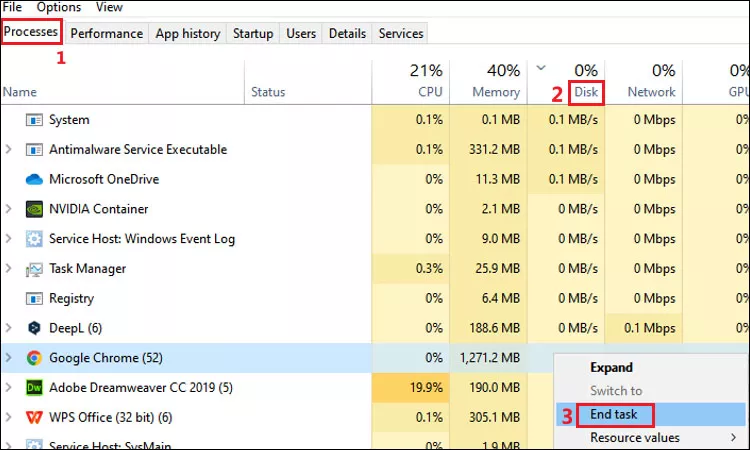
Step 1: Press Ctrl+Shift+Esc to open Task Manager.
Step 2: Choose Processes tab and select Disk column to make it display in the descending order of disk usage.
Step 3: Filter out applications or services that take up too much storage space, right-click on unwanted processes and select End task.
2. Free up C drive using disk cleanup
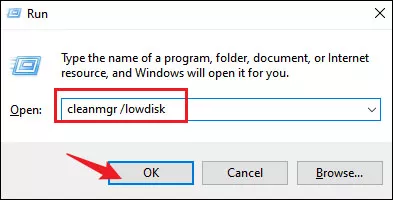
Step 1: Press Windows+R to open run command and type cleanmgr /lowdisk in the open box and press OK.
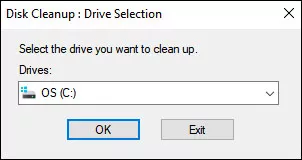
Step 2: Select C: drive from the drop down menu and click OK.
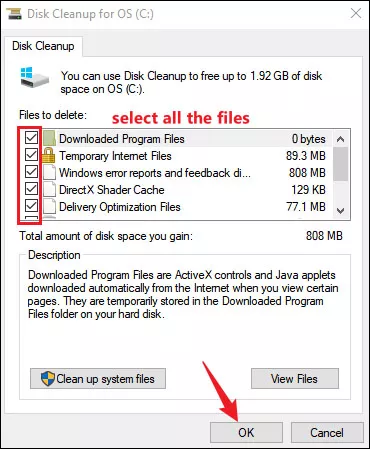
Step 3: In the list of Files to delete, check all the options and click OK.
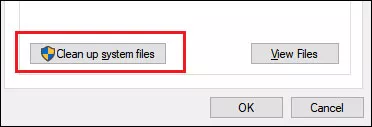
Step 4: Now, click on Clean Up system files and select C: drive again.
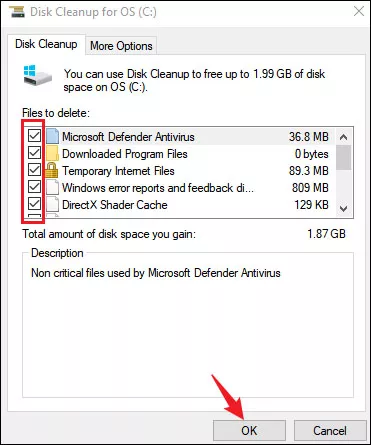
Step 5: Choose all of the files and click OK.
Step 6: System protection window will pop up, click Continue to delete files.
3. Clean up temporary files
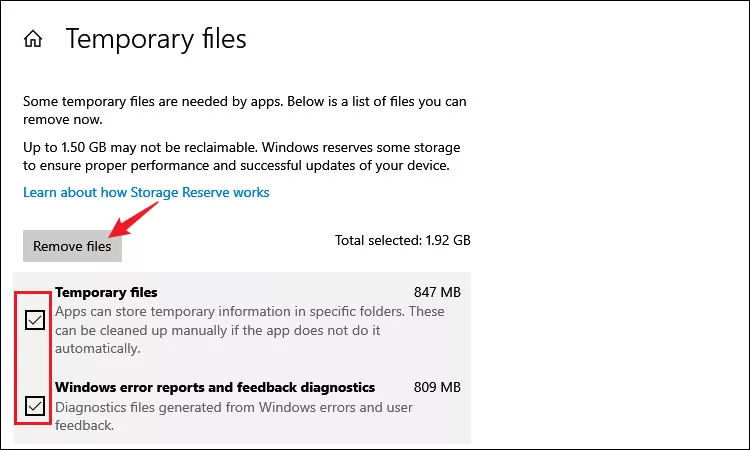
Step 1: Press Windows+I to open Settings and select System>Storage>Temporary files.
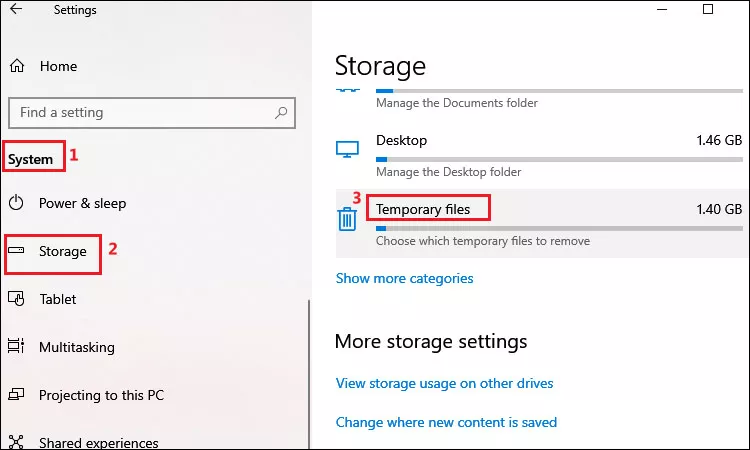
Step 2: Mark the checkbox of temporary files you desired to delete and click on the Remove files button. Some temporary files are needed by apps and the system has automatically selected a list of files you can remove. Please be careful not to delete necessary temp files.
4. Tweak registry value
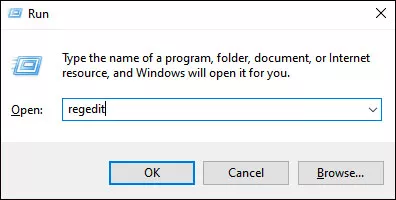
Step 1: Press Windows+R to open run command and type regedit in the open box. Click OK to open Registry Editor.
Step 2: Navigate to the following file path:
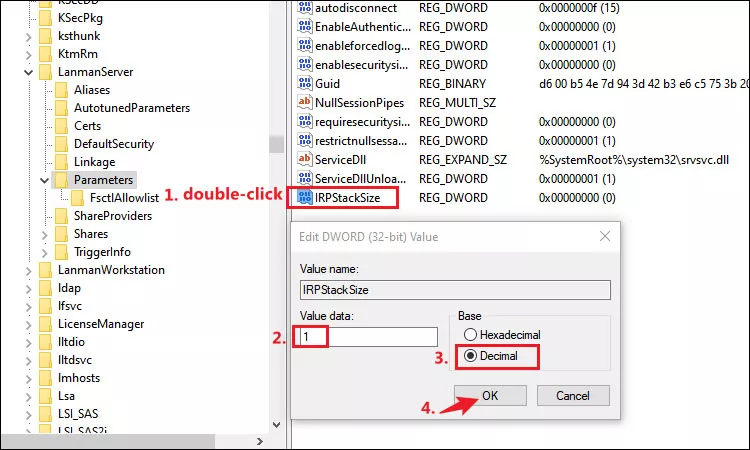
HKEY_LOCAL_MACHINE\SYSTEM\CurrentControlSet\Services\LanmanServer\ParametersStep 3: Find a key named IRPStackSize, double-click on it. Then choose Decimal option, set the Value data as 1 and click OK.
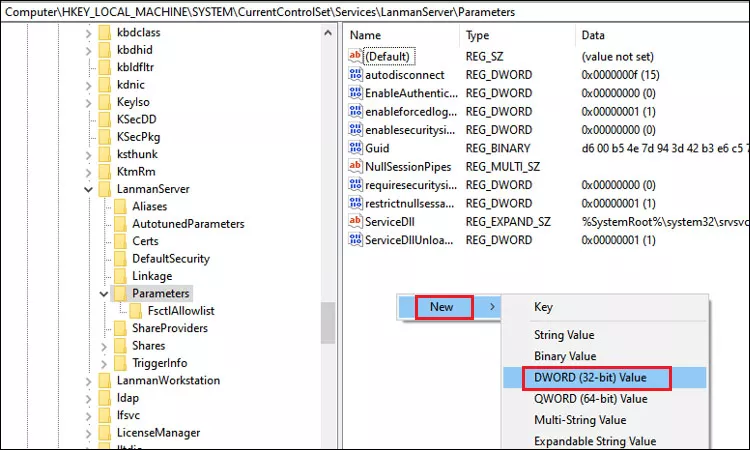
Step 4: If you find IRPStackSize entry not existing, right-click on an empty area in the right pane and select New > DWORD (32-bit) Value. Name it as IRPStackSize and then follow step 3.
5. Change performance options
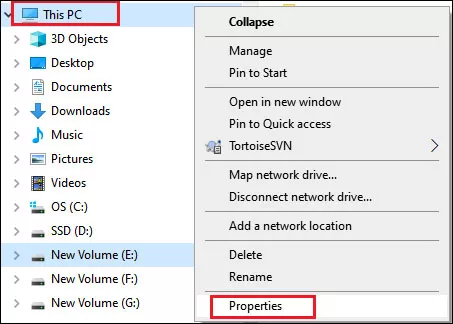
Step 1: Press Windows+E to open File Explorer, select This PC and right-click on it. Then select Properties.
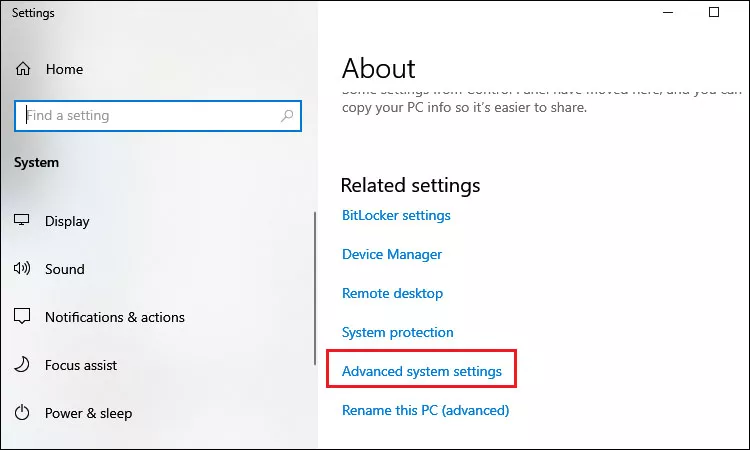
Step 2: Settings window will open, scroll down to find Advanced system settings and click on it.
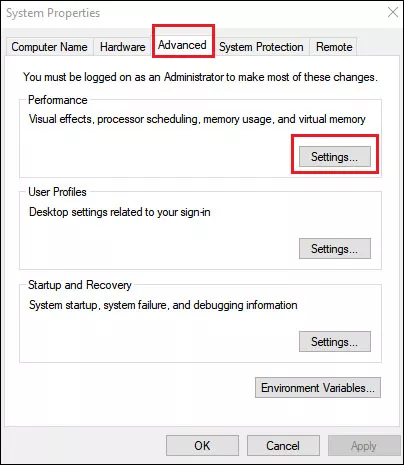
Step 3: In System Properties window, choose Advanced tab and click on Settings.
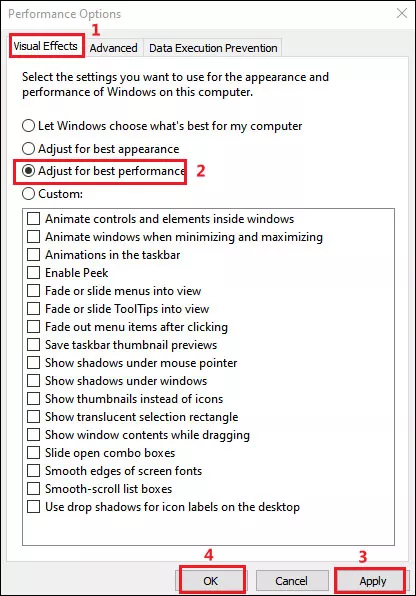
Step 4: In Performance Options window, choose Visual Effects tab and check Adjust for best performance. Then click Apply and OK.
6. Increase paging file size
Step 1: Repeat step 1-3 in the above method to open Performance Options.
Step 2: Switch to Advanced tab and click on Change… under Virtual memory.
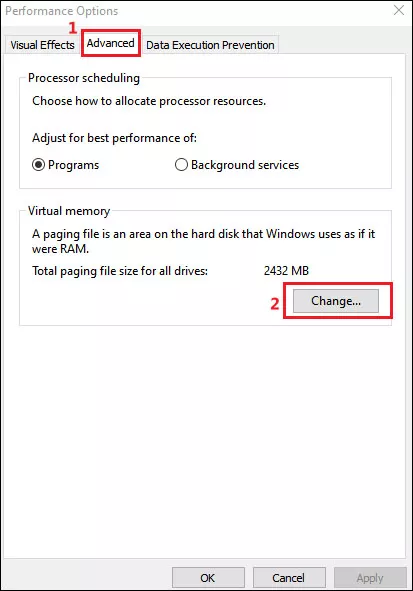
Step 3: Uncheck Automatically manage paging file size for all drives and choose Custom size.
Step 4: Compare the Currently allocated paging file size with the Space available in the selected C: drive and type the Initial size (MB) and Maximum size (MB).
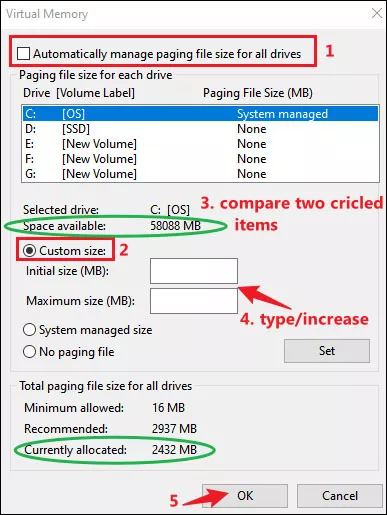
Step 5: Click OK to apply the changes and reboot your PC.
7. Run DISM in clean boot mode
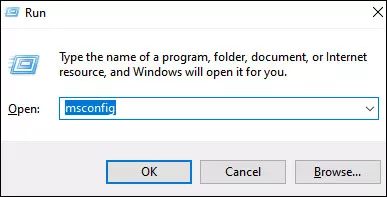
Step 1: Press Windows+R to open run command and type msconfig in the open box and press OK to open System Configuration.
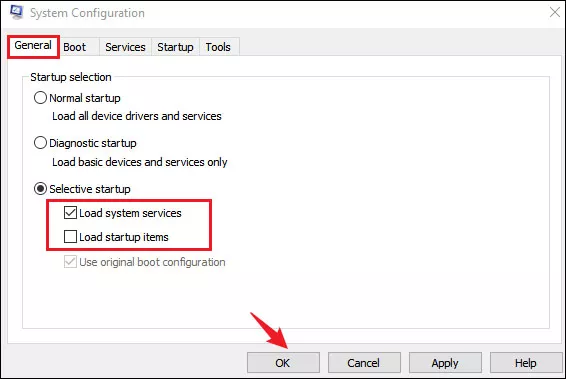
Step 2: Choose General tab, uncheck Load startup items and check Load system services. Then click OK.
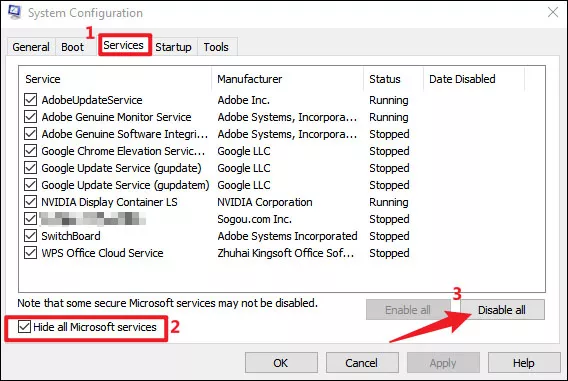
Step 3: Switch to Services tab, check Hide all Microsoft services and then click Disable all. Finally, click Apply and then OK.
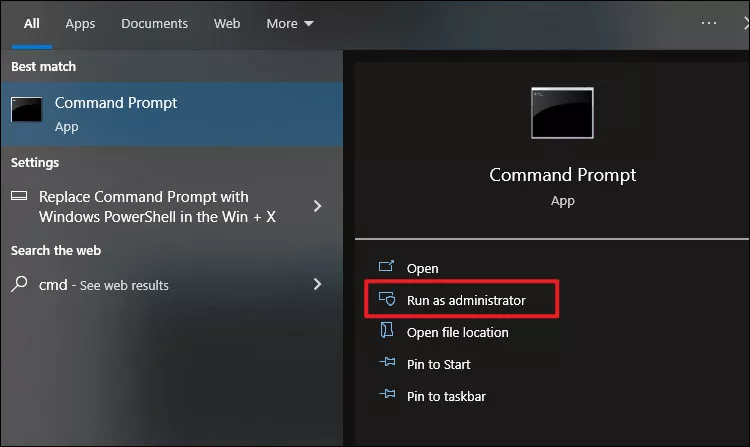
Step 4: Restart your PC, it will be booted in clean mode. Then type and search cmd in the search bar and select Run as administrator.
Step 5: To run DISM command, enter the below command in Command Prompt and hit Enter.
DISM /Online /Cleanup-Image /RestoreHealth


