Fix: Mouse Cursor Moving Automatically on Windows
Sometimes when you are using your Windows computer, your cursor will move by itself without you touching it, making it difficult to click on the screen. Don't worry, here are a few tips to help you fix the mouse cursor moving on its own. You may not have to try them all. Just take one or two of the suggestions for fixing.
Initial actions
Note: Apply the following initial actions before you continue to go for the fixes below, and see if the problem persists:
1. Restart your computer. After restarting check if your mouse is working fine or not.
2. Clean sensor-sensitive areas. Keep your mouse's bottom and your working surface from dust.
3. Unplug the mouse from the USB port, and then insert the mouse again. If that doesn't work, try plugging the mouse into other USB port on your device.
4. Plug your mouse into another computer. If it doesn't work out on another computer also, then it may be wrong with your mouse.
5. Replace the battery (If you are using a wireless mouse). Then see if the problem still exists.
Adjust your mouse pointer speed
1. Press Win + R key together to open the Run window.
2. Type the following into the Run window.
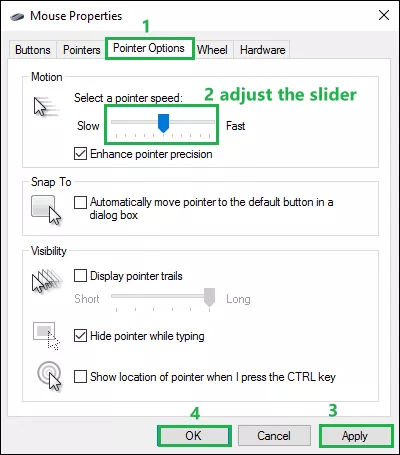
main.cpl3. In the Mouse Properties window, click Pointer Options tab.
4. Under the Motion section, adjust the pointer speed according to your choice.
5. Click Apply and OK.
Uncheck hide pointer option
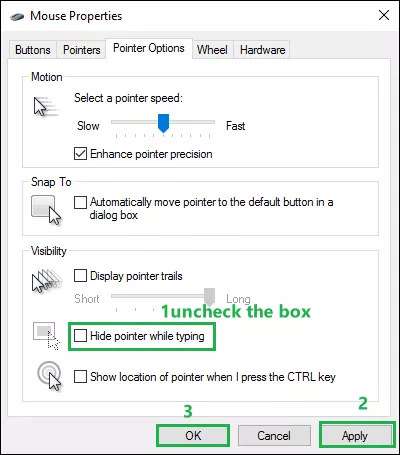
1. Repeat step 1, step 2 and step 3 above.
2. Under Visibility, uncheck the Hide pointer while typing option.
3. Click Apply and OK.
Update your mouse driver
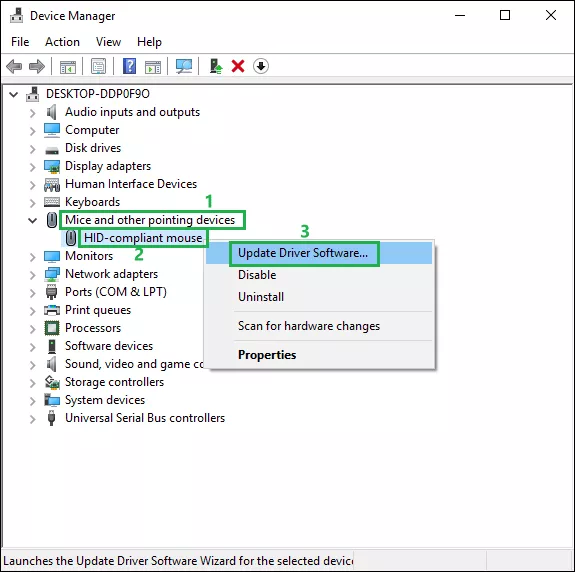
1. Right click the Windows icon and click Device Manager.
2. Click Mice and other pointing devices to expand it.
3. Right click the mouse device you are using currently. Click Update Driver Software...
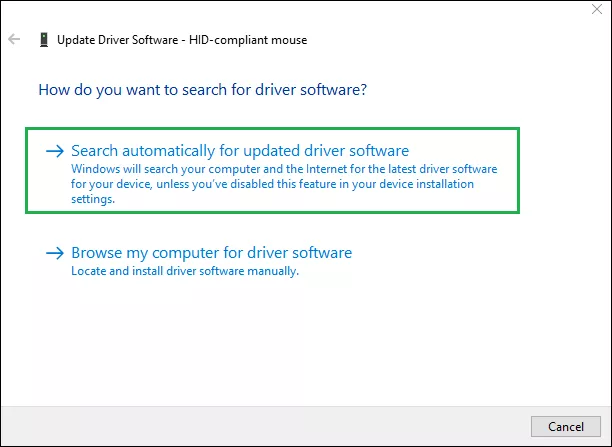
4. In the pop-up box, select Search automatically for updated driver software.
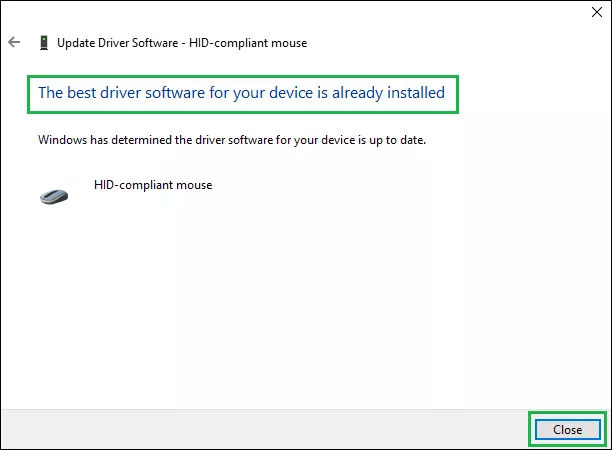
5. The next thing you need to do is to wait for Windows to find a compatible driver for your mouse.
6. If you see The best driver for your device is already installed, then click Close.
