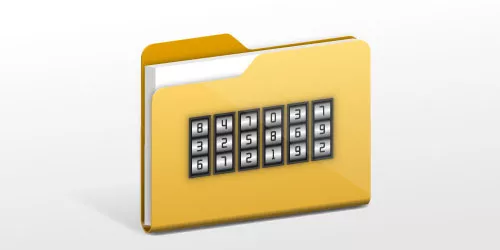
How Do I Put a Password on A Folder | Password Protect Privacy File in Windows 10/11

February 21, 2024
This article will provide you an overview of four ways about how to password protect folders or files, along with step-by-step instructions for each.
When your computer is temporarily borrowed, colleagues may inadvertently view embarrassing files. How can you prevent this? An encrypted folder would be ideal. Without further ado, let's learn how to put a password on a folder in Windows 10/11.
1. Hide your folders
Step 1: Right click the target folder, choose Properties.
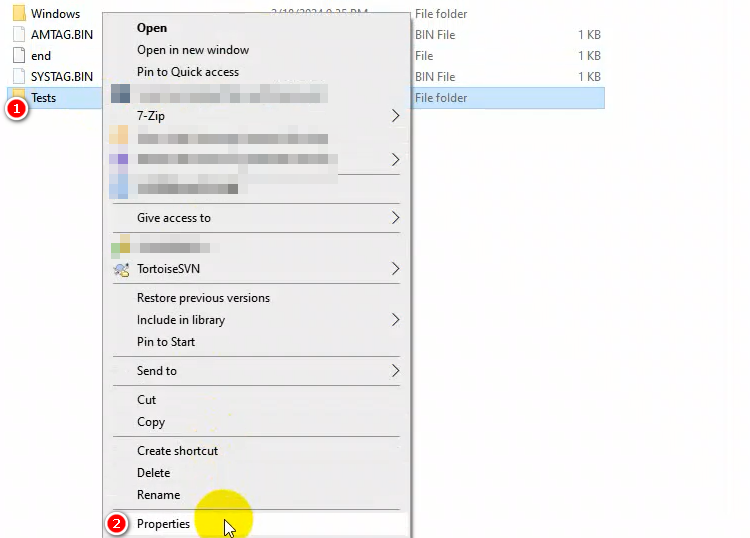
Step 2: Click the 'Hidden' option, then click the 'OK' button.
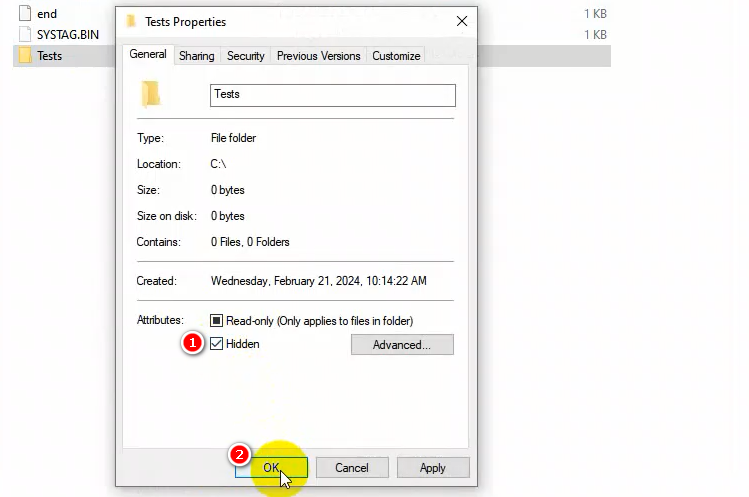
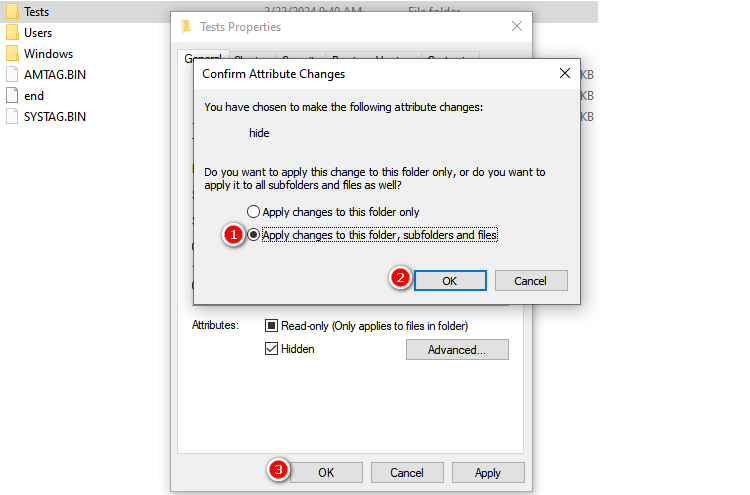
After completing this step, the target file will be hidden.
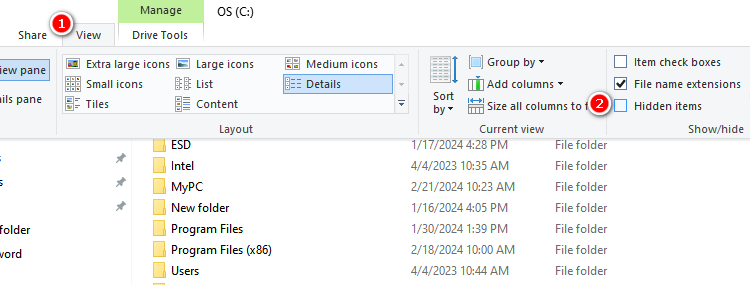
Step 3: Click the 'View' button and select 'Hidden items' to view the hidden target file again.
2. Encrypt your folders
Caution: It's worth noting that this feature is only available on Pro and higher versions, and the Home version is not supported.
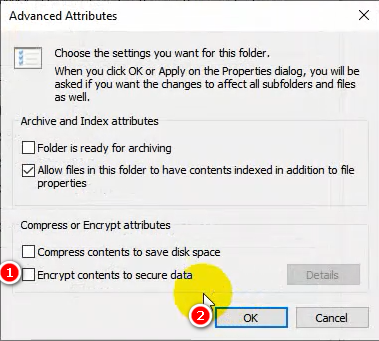
Step 1: Right-click the target folder, select 'Properties', then choose 'Advanced'.
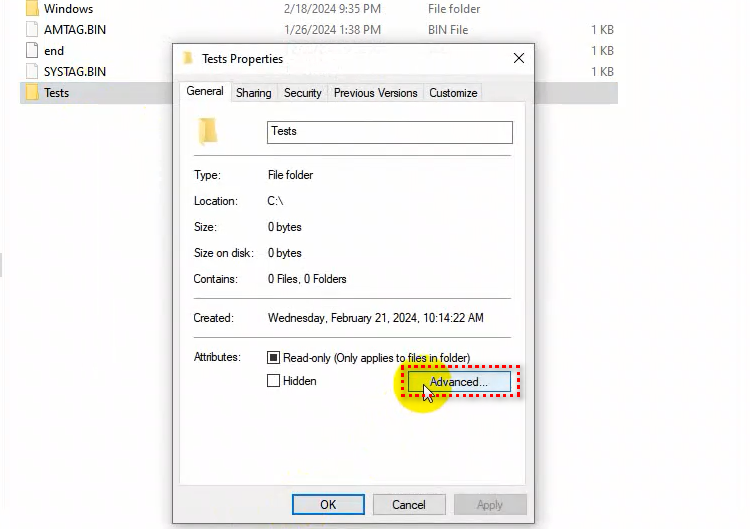
Step 2: In the pop-up dialog, select 'Encrypt contents to secure data', then click 'OK'. Finally, click 'OK' in the 'Properties' window.
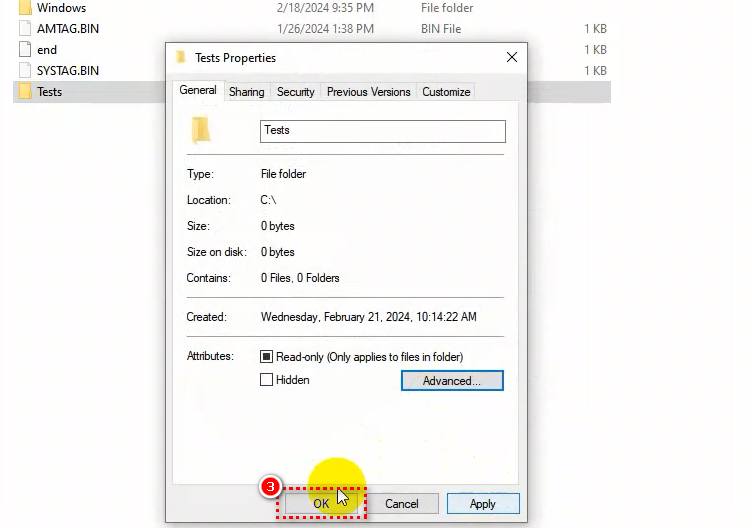
After this operation, Only the local account on this computer can access this folder. Other accounts on this computer cannot access this folder. Access will also be restricted when copied to another computer.
3. Create a password protected zip file
Step 1: Choose your target folder, add to archive.
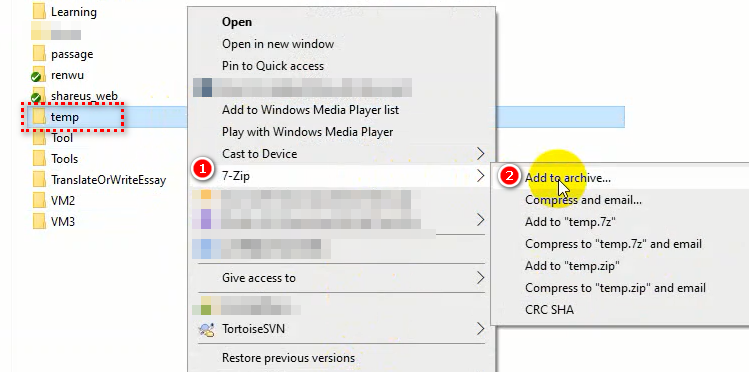
Step 2: Enter your password twice then click OK.
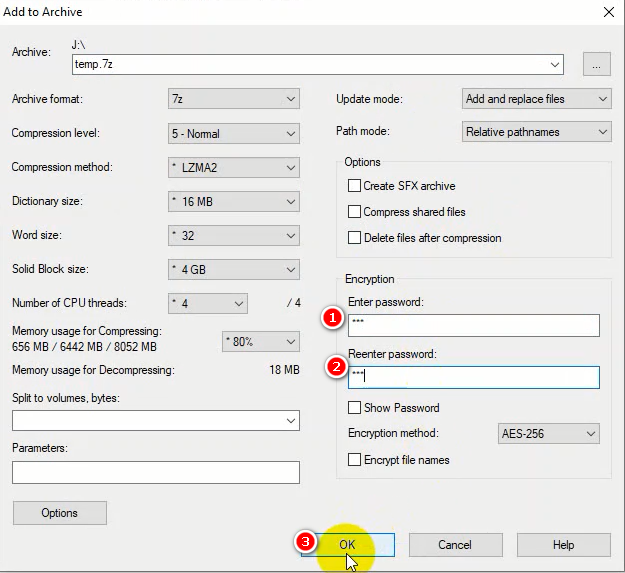
After completing this operation, a temp.7Z file will be created in the directory.
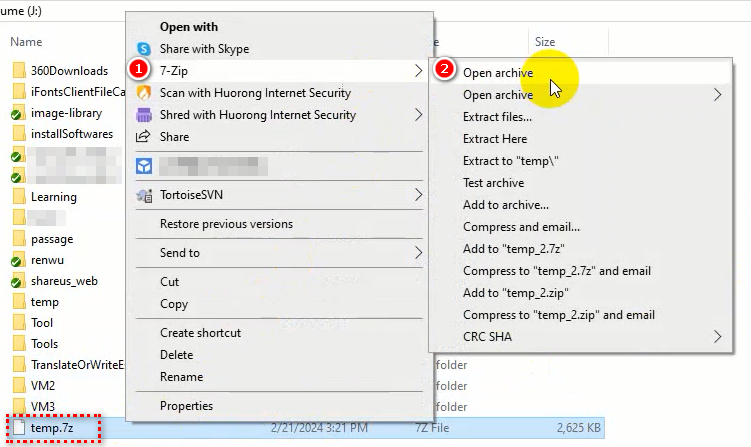
Step 3: Right click the temp.7z file, choose "Open archive".
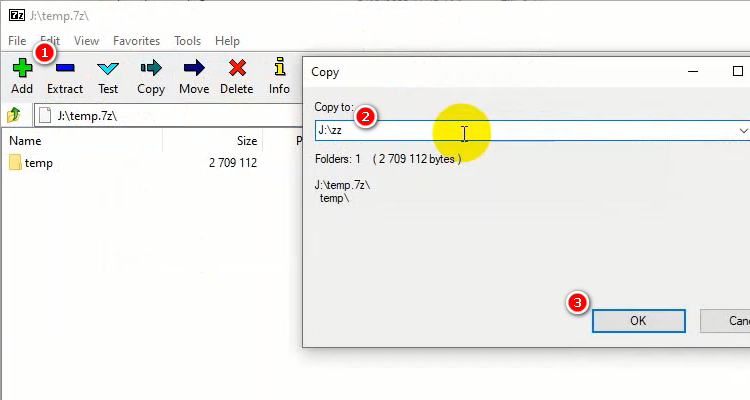
Step 4: Click "Extract" , then choose a folder to place file.
Step 5: Enter your password to unlock the zip file.

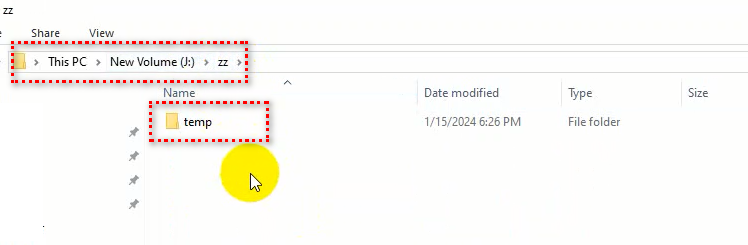
Step 6: Locate the path to access the file.
4. Disguise your folders
In this method, you should place your file in folders named MyPC, MyDevice, MyNetwork. Once disguised, these folders will redirect to another path.
Step 1: Press the Windows key, type 'cmd', then run Command Prompt as administrator.
Step 2: Execute these CMD commands in order.
md MyPC // create MyPC folder
ren MyPC MyPC.{20D04FE0-3AEA-1069-A2D8-08002B30309D} // rename MyPC folder to Disguise
ren MyPC.{20D04FE0-3AEA-1069-A2D8-08002B30309D} MyPC // restore MyPC folder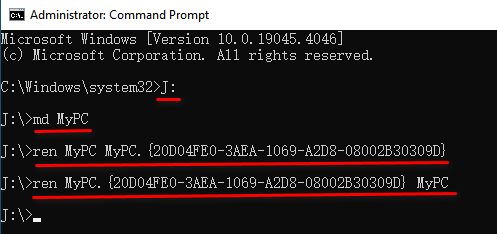
After executing the instructions, the MyPC folder will change its icon and link to another path.
If you want to restore MyPC folder, execute the instructions above. It will change to a normal folder.
Besides, We can also disguise folder into "MyDevice" and "MyNetwork" whose icon are printer and network respectively.
Execute the following commands in the Command Prompt window.
md MyDevice
ren MyDevice MyDevice.{2227A280-3AEA-1069-A2DE-08002B30309D}
ren MyDevice.{2227A280-3AEA-1069-A2DE-08002B30309D} MyDevice
This command below is for "MyNetwork" folder.
md MyNetwork
ren MyNetwork MyNetwork.{7007ACC7-3202-11D1-AAD2-00805FC1270E}
ren MyNetwork.{7007ACC7-3202-11D1-AAD2-00805FC1270E} MyNetwork
Below are two images: one before and one after the conversion.
Before:
After:
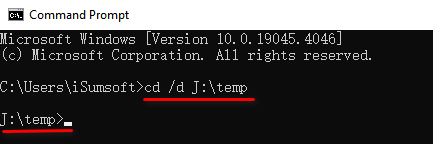
Additionally, here's how to use the CMD command to navigate to a specific address: use the command below.
cd /d J:\temp"J:\temp" is a address called absolute address.
5. Conclusion
Comparison of several methods: if you prefer simplicity and convenience with a slightly lower level of security, use the first method. For file protection among multiple users on one computer, opt for the second method. If you seek long-term secure storage, use the third method. Alternatively, the fourth method is simple and convenient, requiring only a TXT file to store the necessary instructions.