How to Add or Remove Startup Items in the Registry for Windows 11/10?

Some users of Windows 11/10 will set some commonly used software as startup items, so that they can start automatically when they turn on the computer, saving their time to open them manually. there are many ways to add or remove startup items in Win11/10, and one of them is to add or remove startup items through the registry.
Add startup items
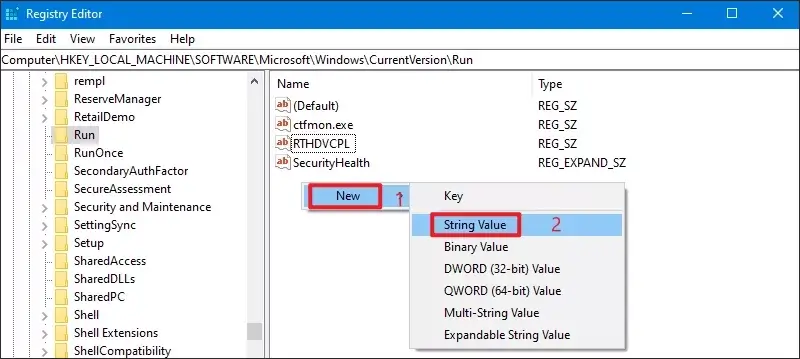
Step 1: Use WIN+R to open the Run dialog box, type "Regedit", and click "OK" to open the registry editor.

Step 2: Find the following address in the registry.
HKEY_LOCAL_MACHINE\SOFTWARE\Microsoft\Windows\CurrentVersion\Run
Step 3: Right-click on the "New String Value" in the right-hand window margin, the value name can be customized. Double-click to open it.

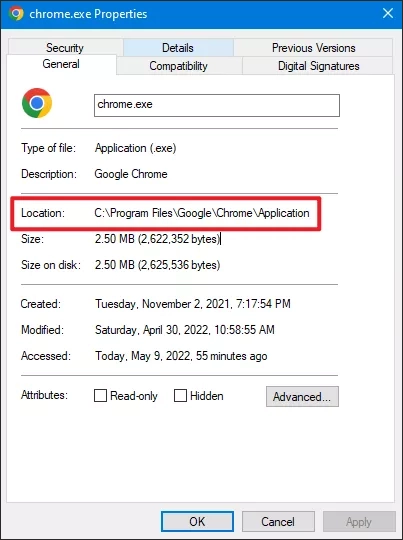
Step 4: Find the location to the file you need to boot up and copy it, for example, Google Chrome.

Step 5: Enter the location and filename of the file you want to boot in the Value Data field. (Note: file name needs to have a suffix.) For example, if the file to be added is chrome.exe and the location is in the C drive, then the "value data" should be added as:
"C:\Program Files\Google\Chrome\Application\chrome.exe"
Click "OK" to save the changes.
Step 6: If you want to run it only the next time you boot up the computer and not afterward, you can operate it in the following location.
HKEY_LOCAL_MACHINE\SOFTWARE\Microsoft\Windows\CurrentVersion\RunOnce
Step 7: Finally, restart your computer so that the programs you have set up will start on their own after booting.
Remove startup items
Step 1: Repeat step 1 and step 2 above.
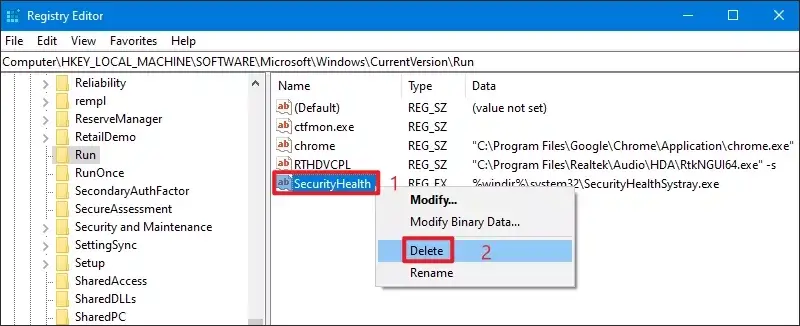
Step 2: In the corresponding right-hand window, right-click on the startup item that needs to be removed. Delete to remove the startup items. (Note: All other startup items are redundant as long as they are not on the C drive.)

Step 3: Click "Yes" to remove the startup items.

Watch the Video Tutorial
Learn how to manage startup items by modifying the registry - Watch the video now!


