How to Completely Disable Windows Defender on Windows 11/10?

Windows Defender is an antivirus program provided by the system; however, it brings some troubles, like occupying a higher CPU, mistakenly deleting apps, and so on. Generally, you can install third-party antivirus software to automatically disable Windows Defender. If you don’t want to install any antivirus software, please follow each step of the article to completely turn off Windows Defender on Windows 11/10 without appearing again.
Part One: Turn off Virus & Threat Protection Settings
Step 1 for Windows 10: Press Win + I to open the settings window → Update & security → Windows Security → Open Windows Security.
Step 1 for Windows 11: Press Win + I to open the settings window → Privacy & security → Windows Security → Open Windows Security.
Step 2: Virus & threat protection → Scroll down and find Virus & threat protection settings → Manage settings.
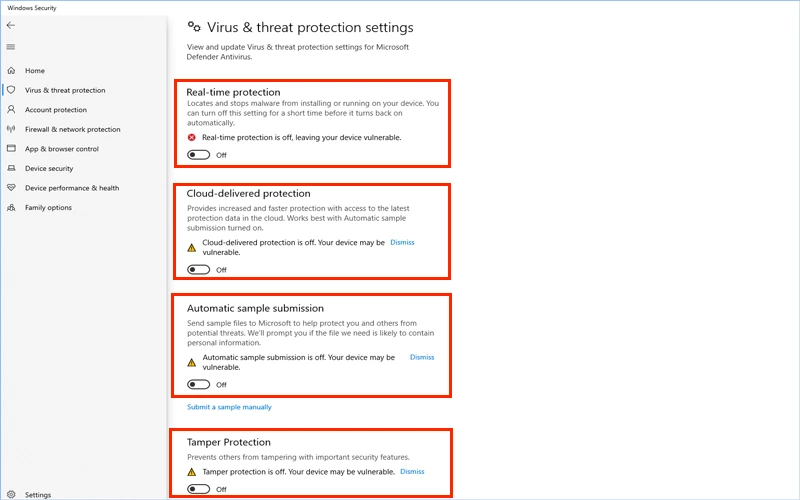
Step 3: Set these toggles to off: Real-time protection, Cloud-delivered protection, Automatic sample submission, and Tamper Protection.
Part Two: Manage the Permissions
Step 1: Press Win + R and type “msconfig” then hit the Enter button.
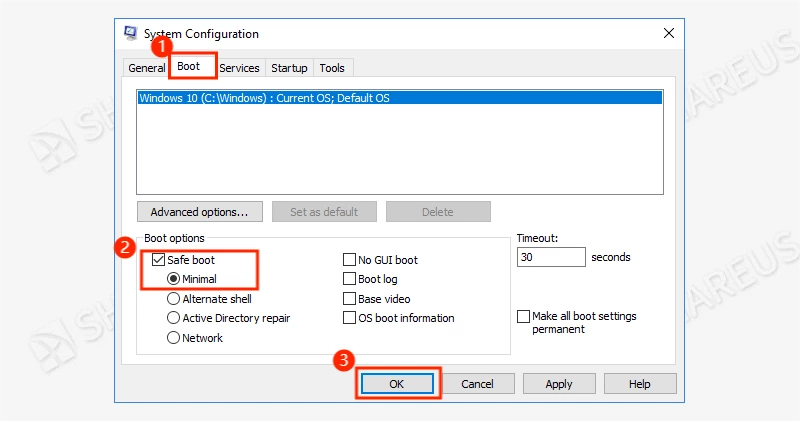
Step 2: Choose the Boot tab → Tick Safe boot and click OK, then restart your PC.
Step 3: After restarting, press Win + R and type “regedit” then press the Enter button.
Step 4: Browse to the following path:
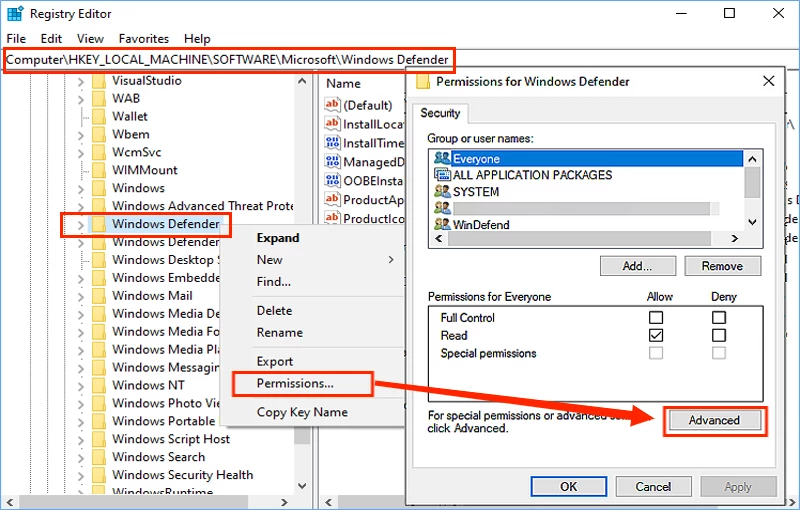
Computer\HKEY_LOCAL_MACHINE\SOFTWARE\Microsoft\Windows Defender
Step 5: Right-click the Windows Defender folder → Permissions… → Click Advanced.
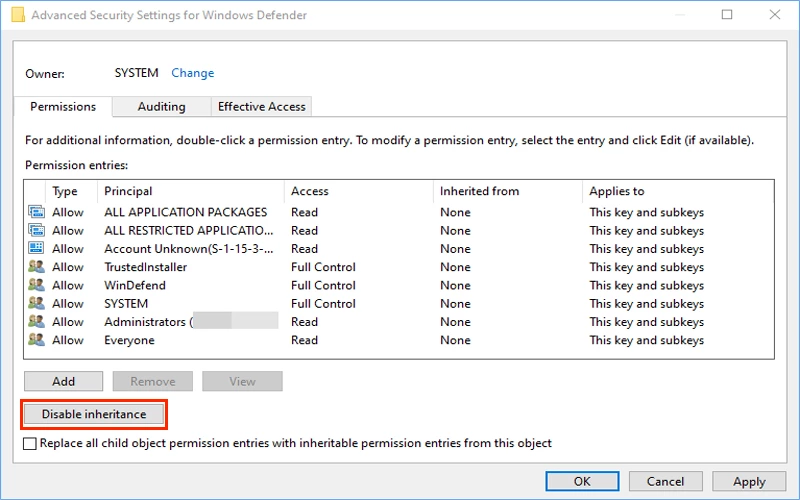
Step 6: Click "Disable inheritance" → Click Apply.
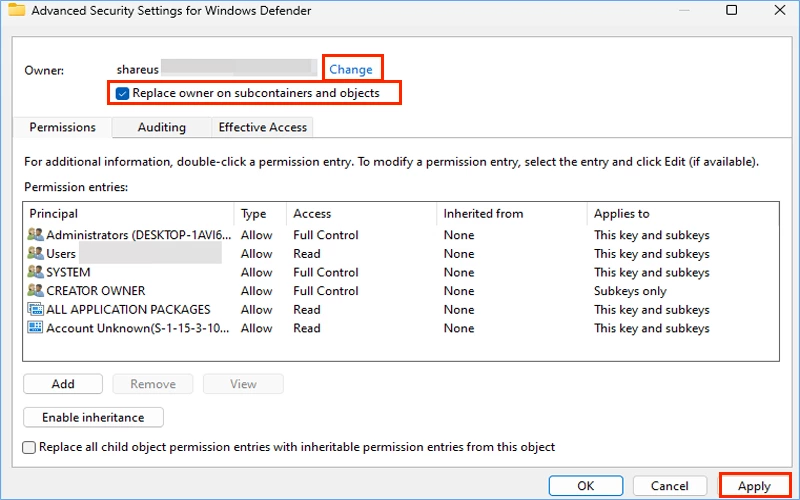
Step 7: Click "Change" → Change the Owner to your desktop username → Tick "Replace owner on subcontainers and objects" then click Apply.
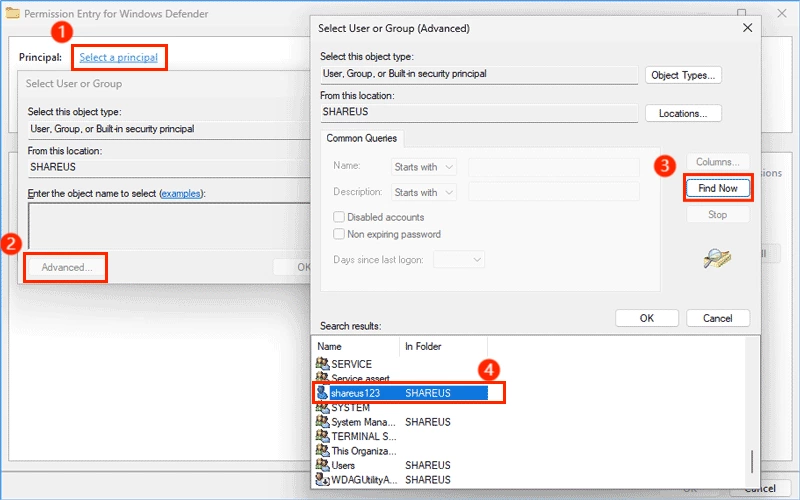
Step 8: Click "Add" to add your username → Select a principal → Advanced → Find now → Your username → OK → Apply.
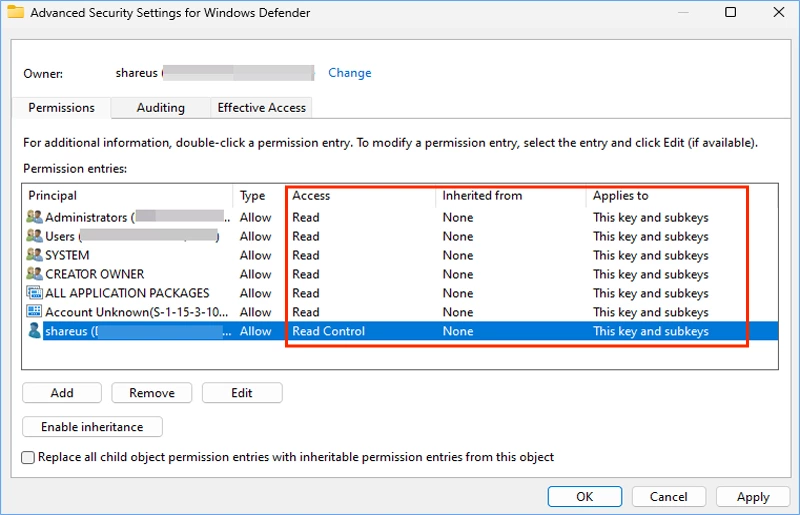
Step 9: Set all Principals’ access except for your username to Read Access → Double-click one principal → Choose "This key and subkeys" → Only tick Read permission then click OK.
Part Three: Disable Windows Defender
• Modify the Registry Editor
Before modifying the registry editor, you should make sure you have finished the permissions management in Part Two.
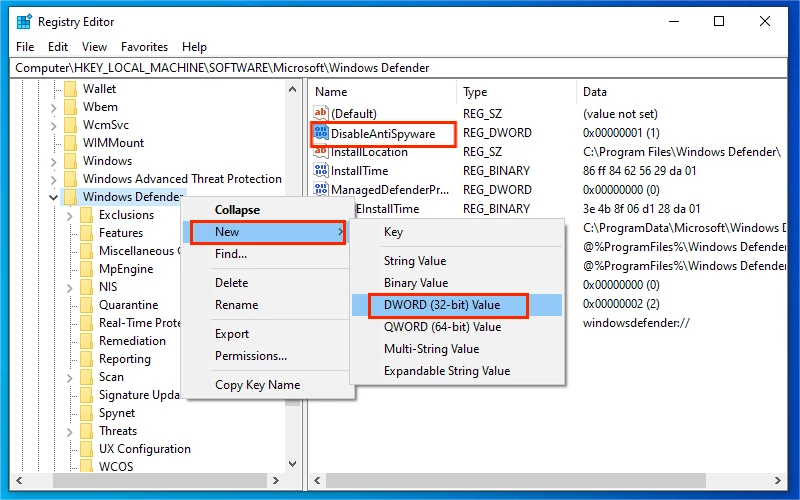
Step 1: Right-click the Windows Defender folder → New → DWORD (32-bit) Value → Rename it to “DisableAntiSpyware”.
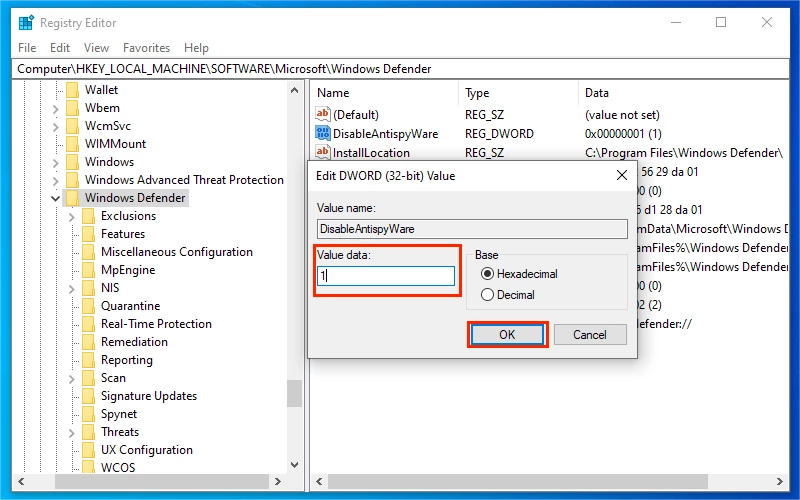
Step 2: Double-click it and change the value data to “1”, then click OK.
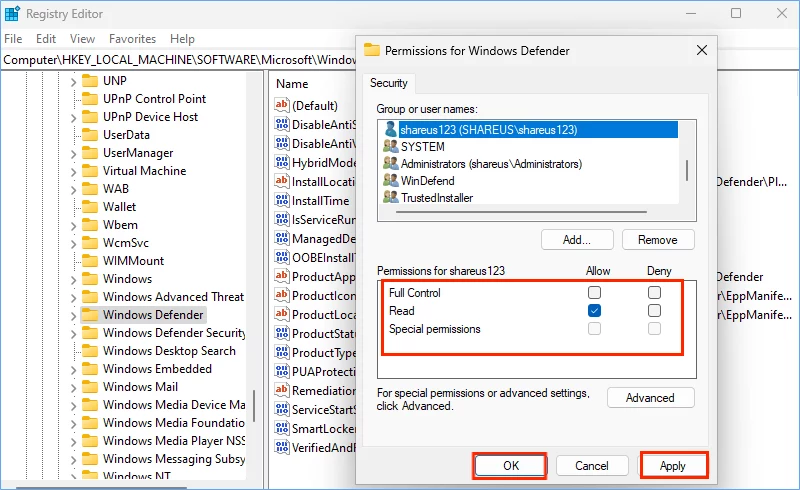
Step 3: Right-click the Windows Defender folder → Permissions… → Find your username in the top bar → Set its permissions as Read-only, then click Apply and OK.
Step 4: Type “msconfig” in the search bar and press the Enter button → Choose the Boot tab → Untick Safe boot → Click Apply and restart your computer.
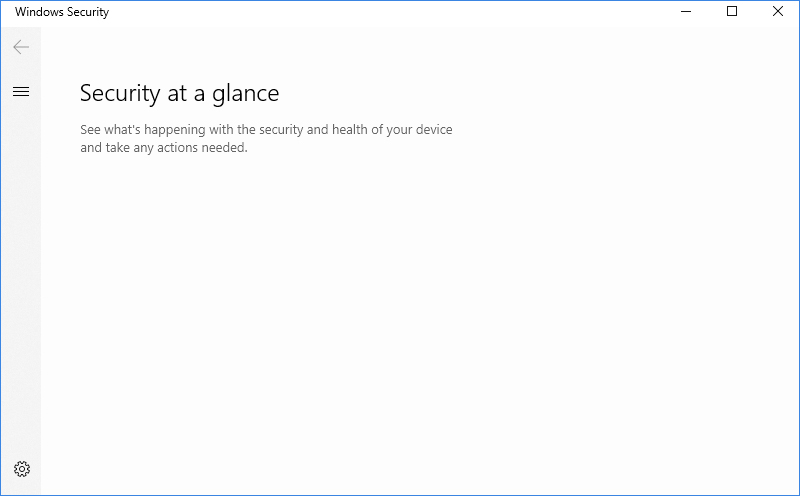
After you reboot your PC, you will find that the Windows Defender icon disappears in the Show hidden icons. If you open Windows Security, you will find that it is blank. At this point, you've shut down Windows Defender for good.
• Via Local Group Policy Editor
Before modifying the local group policy editor, you should set all principals’ permissions to read-only.
Step 1: Press Win + R and type “gpedit.msc”, then click OK.
Step 2: Navigate to the following path:
Computer Configuration\Administrative Templates\Windows Components\Microsoft Defender Antivirus
Step 3: Find and double-click “Turn off Microsoft Defender Antivirus” in the right panel → Click Enable and OK. Do the same steps to enable “Turn off routine remediation”.
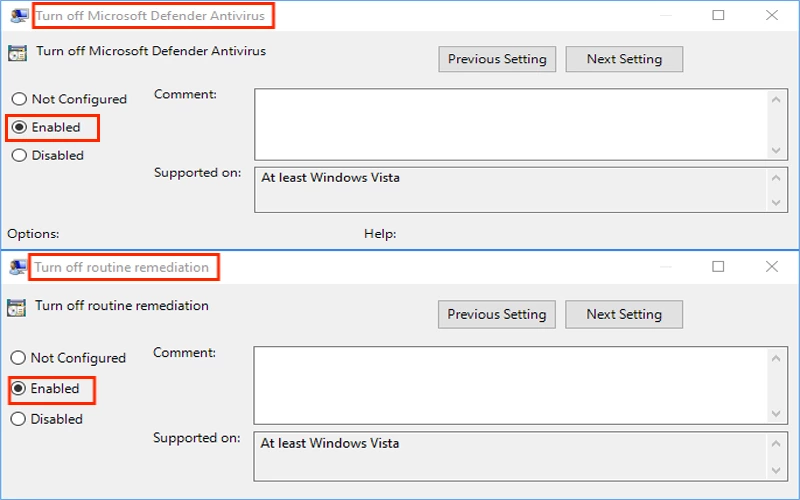
Step 4: Click “Real-time Protection file” → Find and enable "Turn off real-time protection".
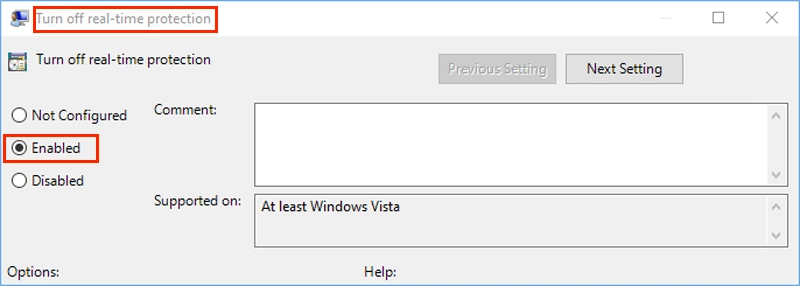
After that, reboot your computer and check if Windows Defender has been disabled completely.


