How to Fix Windows 11 23H2 Install Error 0x800f081f?

When the Windows 11 23H2 update does arrive, but you are unable to install it, it might be annoying. Windows 11, version 23H2 install error 0x800f081f usually means that some system files are corrupted or some important components are missing. In this article, we will discuss how to fix the Windows 11 23H2 install error 0x800f081f.
Fix 1: Turn off the “Get the latest updates” Option
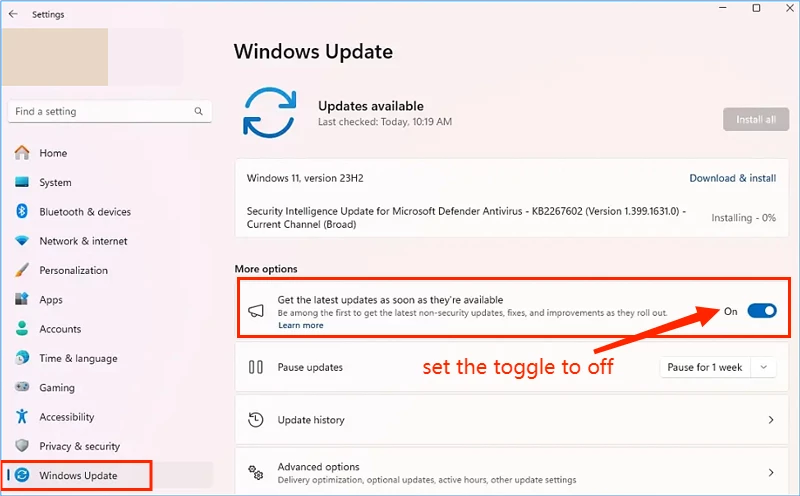
Steps: Press Win + I to open the Settings window > Select Windows Update > Turn off “Get the latest updates as soon as they’re available" > Click Retry again to check if the install error - 0x800f081f has disappeared.
Fix 2: Install with Windows 11 23H2 ISO
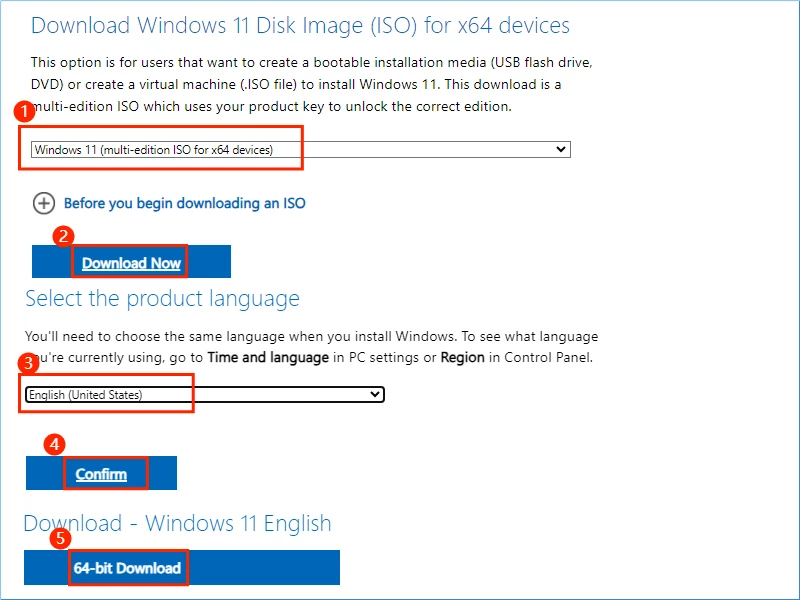
Step 1: Download Windows 11 23H2 ISO > Scroll down to find “Download Windows 11 Disk Image (ISO) for x64 devices” > Select “Windows 11 (multi-edition ISO for x64 devices)” > Click Download Now > Select the product language > Confirm > Click 64-bit Download.
Step 2: Right-click the ISO file > Click Mount > Double-click setup to install Windows 11 23H2.
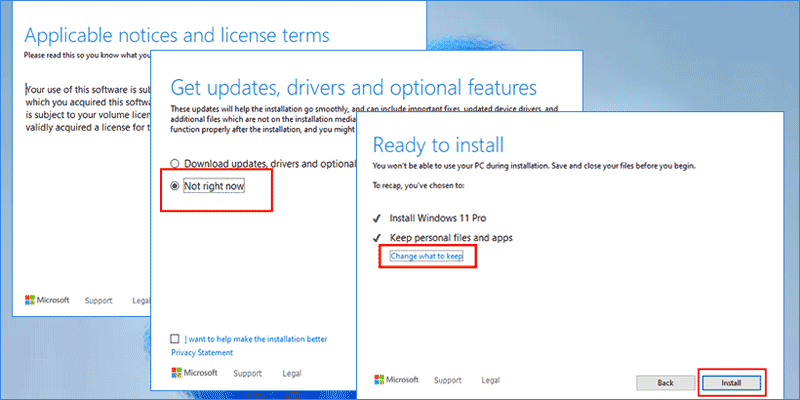
Step 3: In the Windows 11 setup process, click Accept > Not right now > Change what to keep > Install.
Fix 3: Perform System File Checker Tool
Step 1: Press Win + R > Type “cmd” then hit the "Ctrl + Shift + Enter" button to get the administrative privilege.
Step 2: In the command prompt window, type “ sfc /scannow ” then press the Enter button.
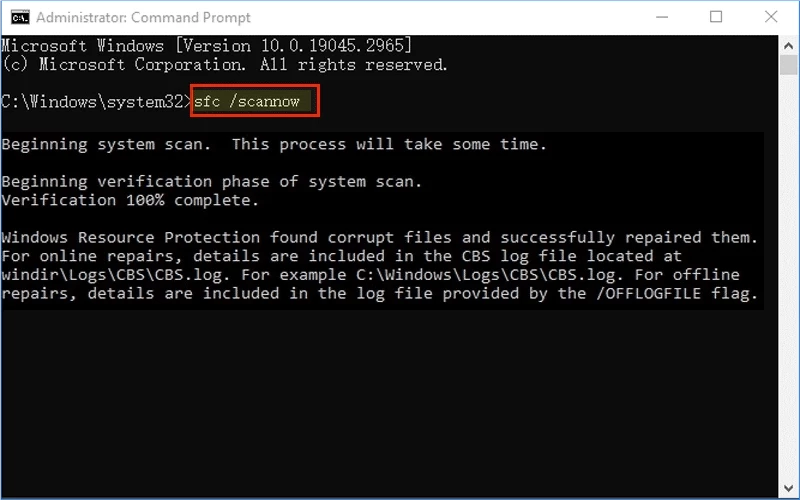
It will take a few minutes to scan and repair the corrupted system files. After that, reboot your computer to check whether you can install Windows 11, version 23H2.
Fix 4: Enable Microsoft .NET Framework 3.5
Step 1: Press Win + R > Type “appwiz.cpl” then hit the Enter button.
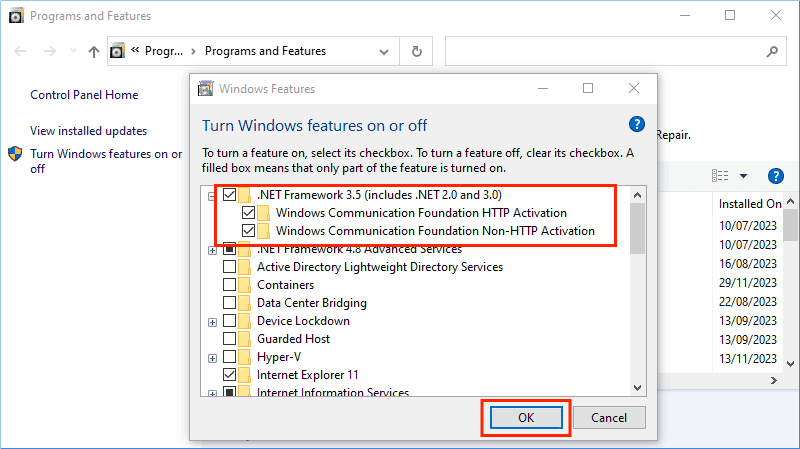
Step 2: Click "Turn Windows features on or off" in the left panel > Find and tick .NET Framework 3.5 (includes .NET 2.0 and 3.0).

Step 3: Expand the .NET Framework 3.5 (includes .NET 2.0 and 3.0) > Tick “Windows Communication Foundation HTTP Activation” and “Windows Communication Foundation Non-HTTP Activation” > Click OK.
Fix 5: Modify Group Policy Settings
Step 1: Type “gpedit” in the search bar, then hit the Enter button.
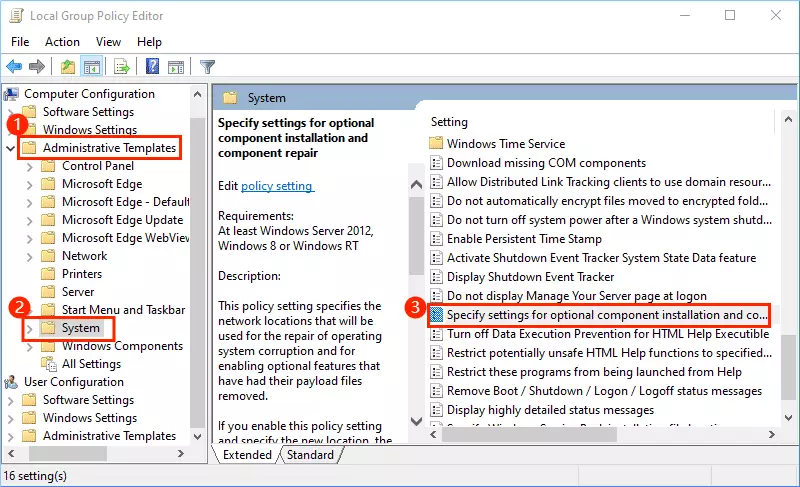
Step 2: Browse to the following path: Administrative Templates>System>Specify settings for optional component installation and component repair.
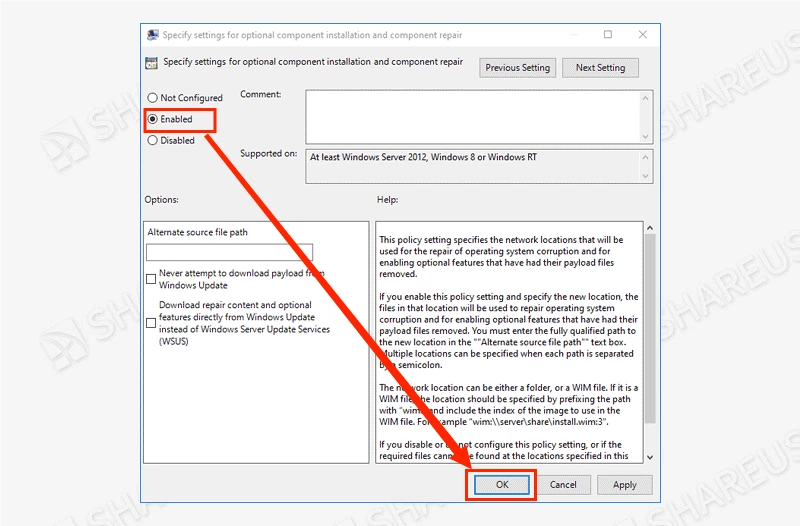
Step 3: Double-click "Specify settings for optional component installation and component repair" > Check Enabled, then click OK. You may resolve the install error - 0x800f081f in Windows 11 23H2 by enabling optional component installation and component repair.
Fix 6: Reset Windows Update Components
Step 1: Press Win + R > Type “cmd” then press the “Ctrl + Shift + Enter” buttons to run as administrator.
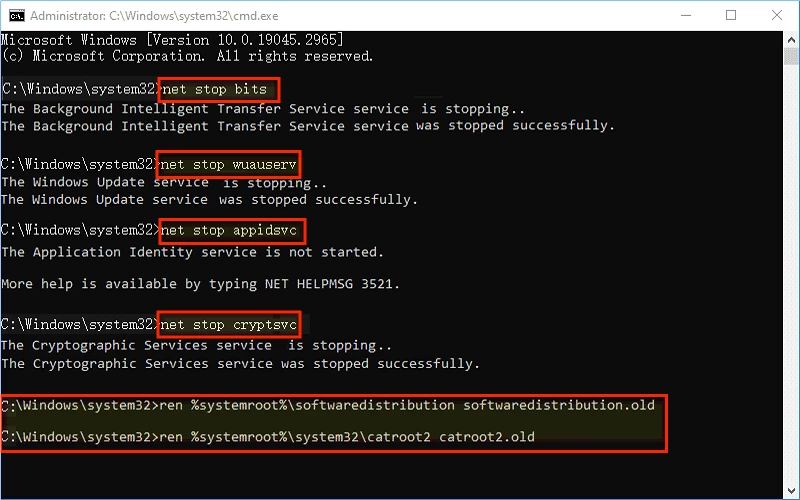
Step 2: Type the following four commands to stop relative services and press the Enter button after each command.
net stop bits
net stop wuauserv
net stop appidsvc
net stop cryptsvc
Step 3: Type the following two commands to rename SoftwareDistribution and catroot folders, and hit the Enter button after each command.
ren %systemroot%\softwaredistribution softwaredistribution.old
ren %systemroot%\system32\catroot2 catroot2.old
Step 4: Type the next four commands to restart the stopped services and hit the Enter button after each command.
net start bits
net start wuauserv
net start appidsvc
net start cryptsvc
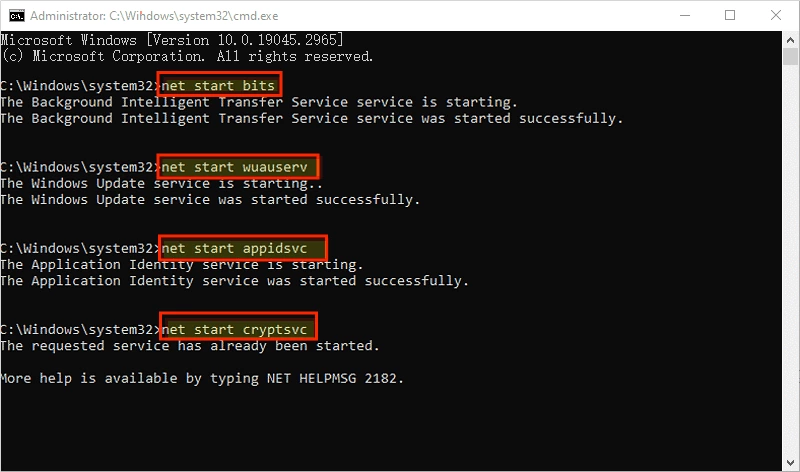
Once the above commands are finished, restart your computer to check if you can successfully install Windows 11 23H2.


