How to Use Windows File History to Back Up and Restore Files?
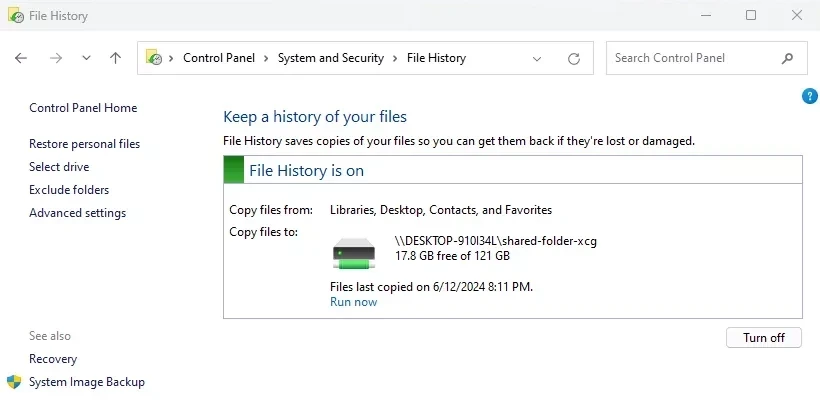
Sometimes, we may find that a previous version of a file is better and need to retrieve it. However, this is not always possible. Fortunately, Windows File History can help us by automatically backing up data according to pre-configured rules. This post will explain in detail how to use Windows File History to back up and restore files. Let's take a look.
Part 1: What Is File History
File History is a tool built into Windows since Windows 8. It can store multiple versions of folders and files and help us restore a specified version when needed. Additionally, it provides options to modify file retention time, file retention frequency, backup file scope, and more. Furthermore, it also supports backing up files to a network location. Let's delve into how to use it.
Part 2: Backing Up Data Using File History
Note: The demo environment is Windows 11.
Basic Backup Operations
Step 1: Link a drive if you want to back up files to an external hard drive. Alternatively, you can add a network location to store backup files.
Step 2: Type "file history" in the search bar, then choose the "File History" from the results.
Step 3: Click the "Select a network location" from the File History window.
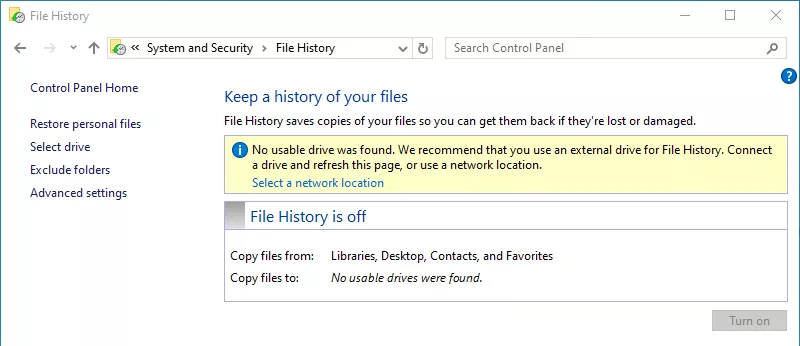
Step 4: Click the "Add network location", then add a network location to store files.
Step 5: Select this location, then click "Turn on" button to enable File History.
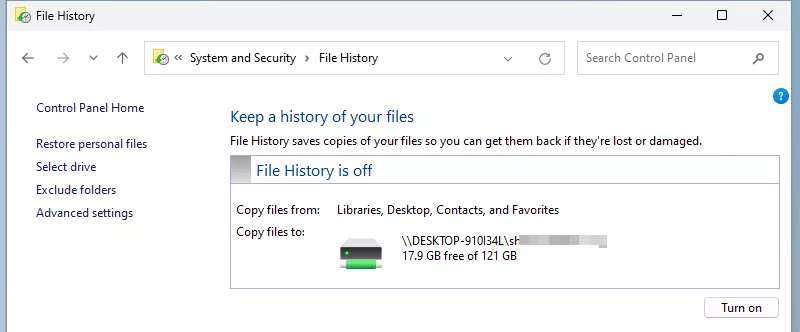
The basic backup operations are complete. You can modify it further by the following steps.
Advanced Settings
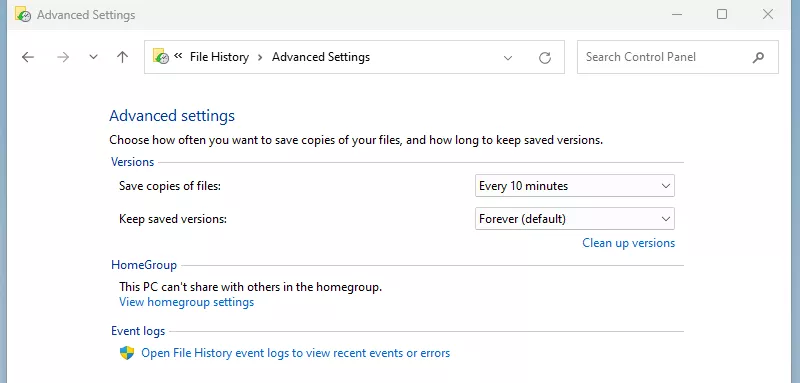
Step 1: Click the "Advanced settings" option in the left panel.
Step 2: Optimize how often to save copies of files and how long to keep saved versions in this page. The default value are "Every hour" and "Forever", and you need to modify it according to your needs.
Note: You can also clean up previous versions conveniently by "Clean up versions" option in this page later.
Excluding Folders
Step 1: Click the "Exclude folders" option on the left panel.
Step 2: Click "Add" button to specify folders and libraries you don't want to back up.
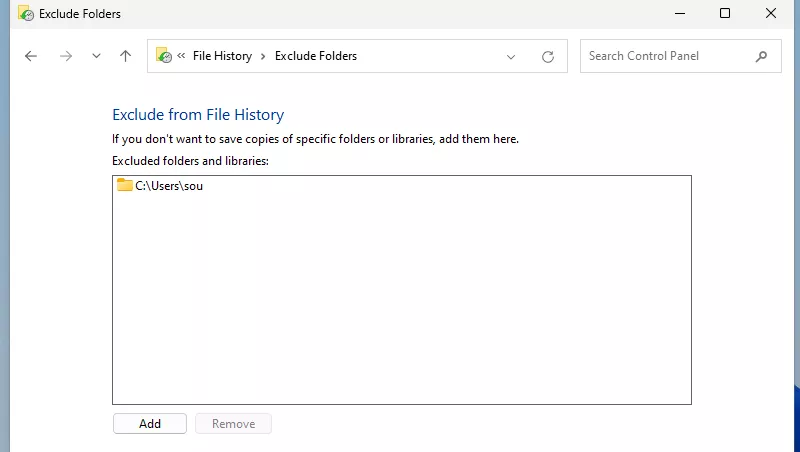
Note: I add C:\Users\username folder to exclude all default folders and libraries. You can exclude folders according to your needs. The "username" means user name of the current login user.
Adding Folders
Step 1: Navigate to the folder you want to back up.
Step 2: Press "Shift" key and right-click it.
Step 3: Locate to "Include in library" option from the context menu, then click "Create new library" item.
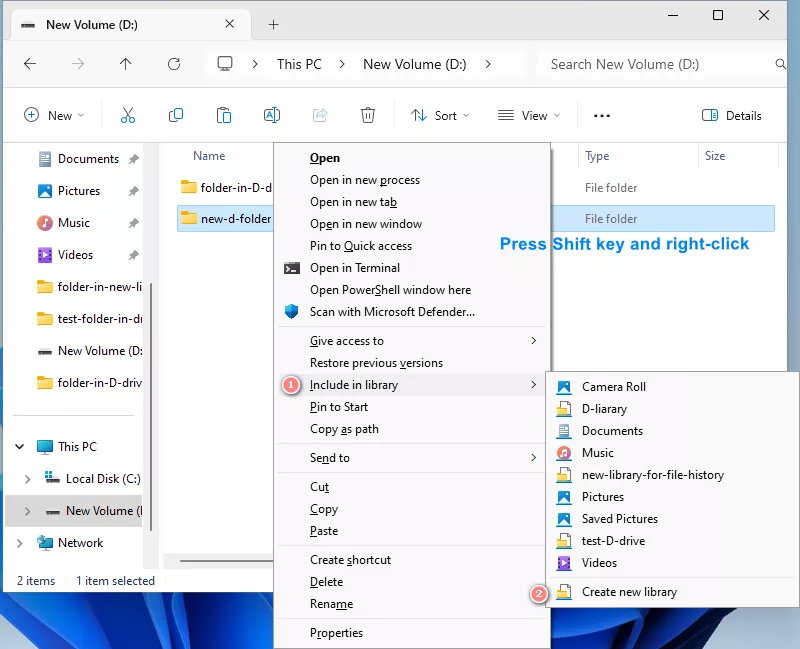
Step 4: This folder will be backed up later. You can add more folders using this method.
Tip: You can find the library by typing "libraries" in the address bar of the File Explorer.
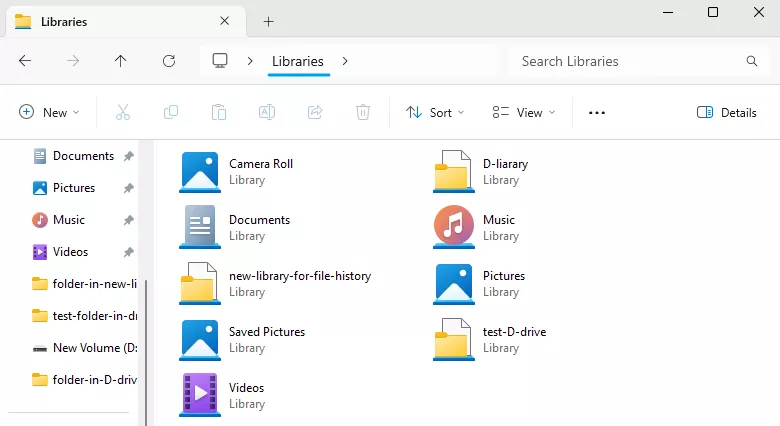
The operations on Windows 10 are similar and easier. You can access it through Settings > Update & Security > Files backup > Back up using File History.
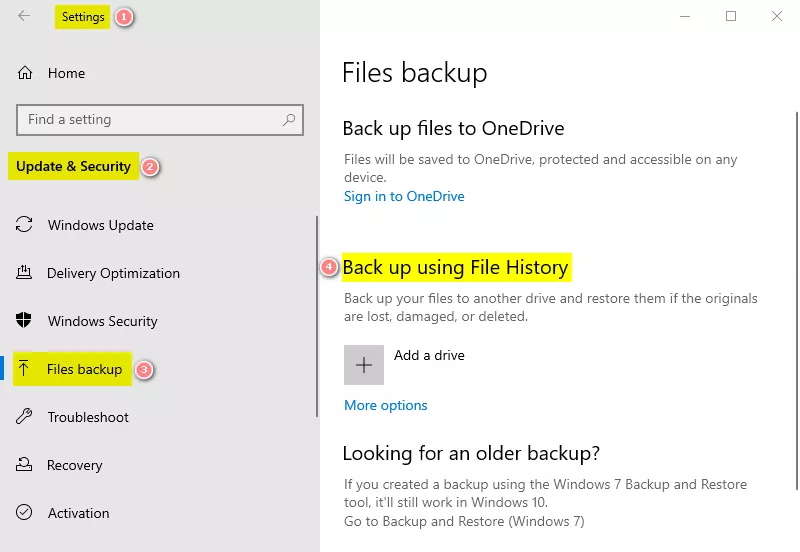
Part 3: Restoring Data via File History
If you want to restore files, open the File History window first.
Step 1: Click the "Restore personal files" option from the left panel of this window.
Step 2: Locate to the file or folder you want to restore.
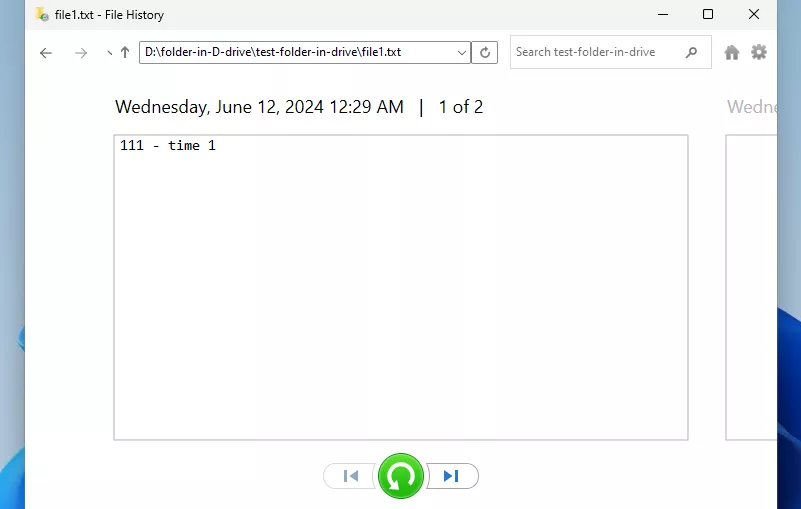
Step 3: View the versions of the selected item through the right and left arrow button below.
Step 4: After determining the version needed, click the green recovery button to restore to original location.
Conclusion
This post shows you how to use File History to back up and restore files on Windows 11. Give it a try when you need to back up important files.


![[Examples] Windows File Recovery (CMD) - Recover Formatted Data](../img/software/examples-windows-file-recovery-cmd-recover-formatted-data/examples-windows-file-recovery-cmd-recover-formatted-data-m.webp)


