Install Windows 10/11 without Microsoft Account Signing in
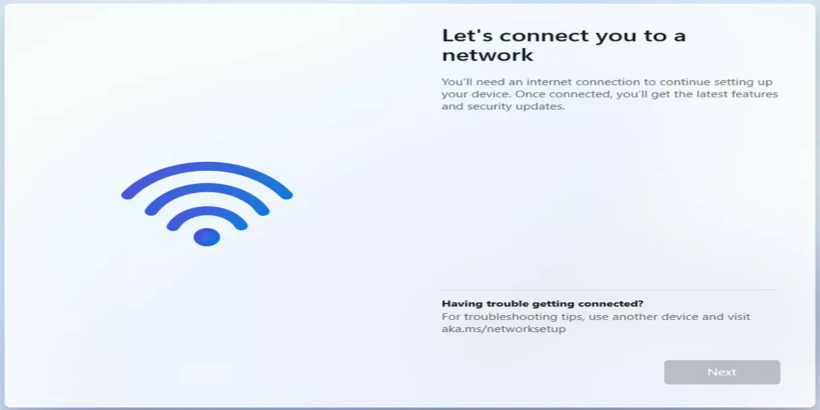
Sometimes, We are asked to sign in Microsoft account when we install Windows 11/10, and helplessly find that there is no other option for us to move on before signning in. Sign in Microsoft account seems the only way for us. Really? There are some ways to solve this problem actually. I will provide detailed explanations in this article on how to install Windows 10/11 without the need to sign in with a Microsoft Account.
A brief introduction to the application of the method
| Preview | ||
|---|---|---|
| Windows 11 23H2 Home(English United States) | no network connection | way 1: use "oobe\bypassnro" command |
| have network connection | disconnect the network and use way 1 | |
| Windows 10 22H2 Home(English United States) | no network connection | no need a workaround, just follow the installation instructions step by step |
| have network connection | way 2: disconnect the network | |
| way 3: use dummy email and password(It may no longer be valid now.) | ||
1. Local Account or Microsoft Account
Before starting, I hope you fully understad whether you need to bypass it or not. Here is an article about The Difference Between Local and Microsoft Accounts in Windows for you to estimate.
In these cases, local account is more suitable for you, just read on.
- There is no internet connection when you install Windows 11 23H2.
- You care deeply about your privacy and security.
- You want to create a more personalized folder name.
- Anyway, as long as you like.
What’s more, it is worth mentioning that you can add your Microsoft account to Microsoft Apps individually even if you use local account to sign into Windows. So feel free to install Windows without Microsoft Account signing in.
Here are three ways for you.
2. Three ways to install Windows without Microsoft Account
Way 1: Use "oobe\bypassnro" command
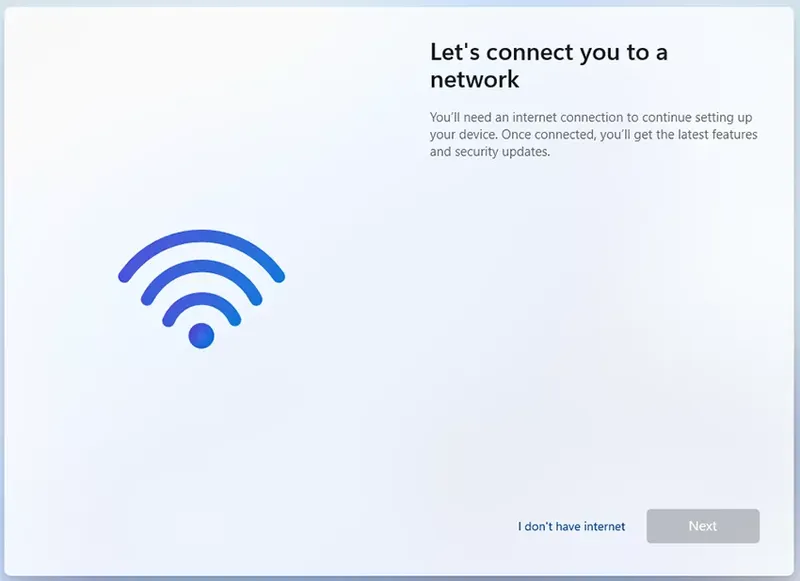
This solution can solve the problem that you get stuck in the screen in which "Next" button is grey when you install Windows 11 23H2 without a network.
The specific steps are as follows:
Step 1: Press "Shift + F10" keys to open the command prompt.
Tips: If "Shift + F10" is not available, try "Shift + Fn + F10".
Step 2: Move the cursor to the command line interface, click it, and enter "oobe\bypassnro".
oobe\bypassnro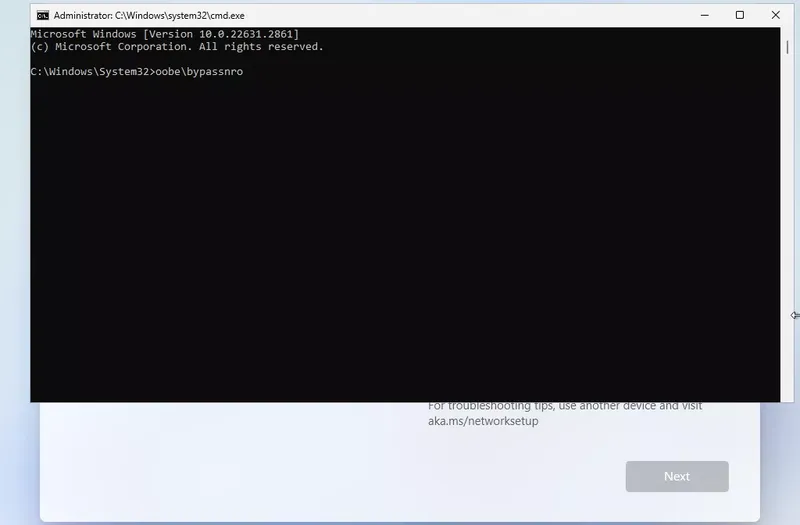
Step 3: Press "Enter", and the computer will restart.
Step 4: After your system restarts, you need to start by selecting your region again. But this time, on the "Let's connect you to a network" screen, you will see the "I don't have internet" option.
Way 2: Disconnect the network
This solution is applicable to the situation that install Windows 10 22H2.
You can do this by disconnecting the Ethernet or turn off the WiFi. And if the installation is ongoing, you still can do this by command prompt. Here are two ways to achieve it.
1.1 Use "ipconfig /release" command
Step 1: Run "ipconfig /release" in command prompt.
ipconfig /release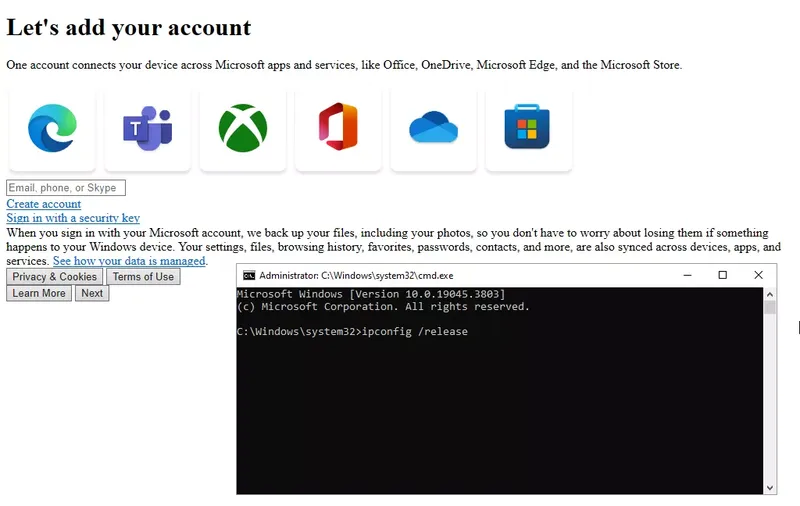
Step 2: If the computer does not reboot, then click back button on top left corner of the page to return previous step. Otherwise, then wait for the reboot to complete.
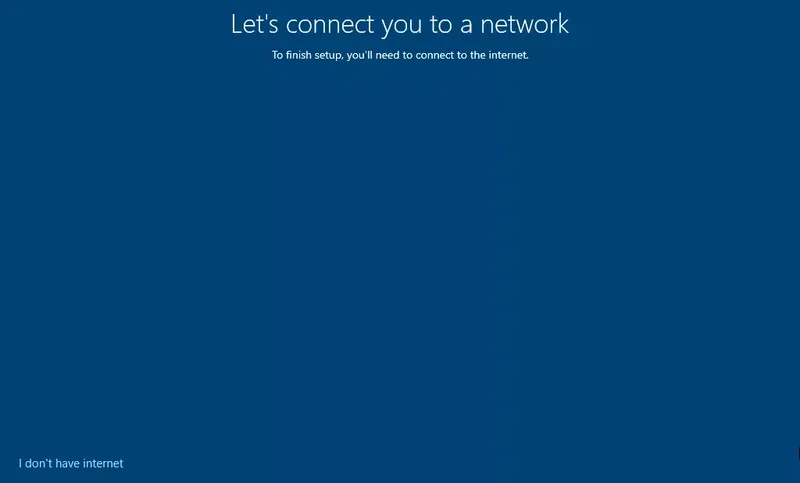
Step 3: Now you can see "I don't have internet" on bottom left corner of the page, click it , and follow the instructions on the page.
1.2 Use "taskmgr.exe" command
If the above method is valid, just skip this.
Step 1: Enter "taskmgr.exe" in the command prompt.
taskmgr.exe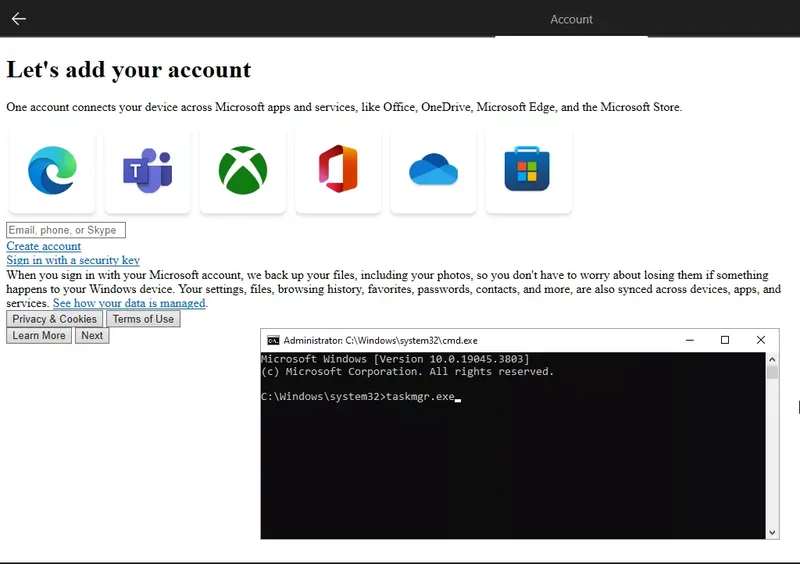
Step 2: Click "more details" if contents listed are fewer.
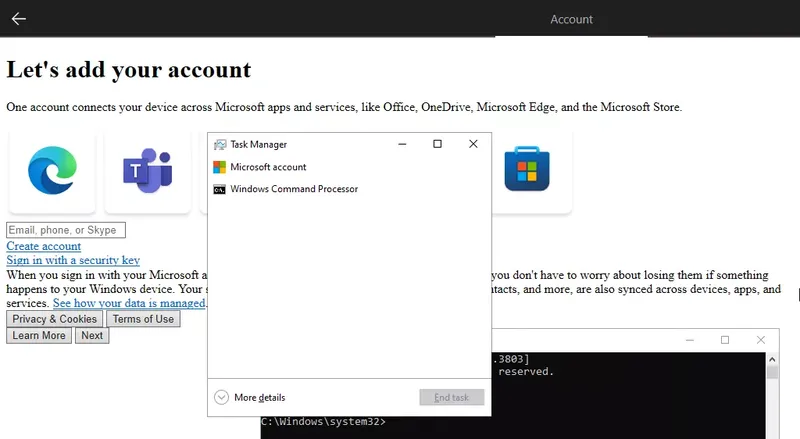
Step 3: Find the "networkconnectionflow.exe" in the "background processes" sector.
Step 4: Right click the programm and select "End task" in the menu.
Step 5: Same operations as 1.1 from step 2.
Way 3: Use dummy email and password
If the two above are all failed, you can also try this method. This method is available when you install Windows 10 22H2 and you can't or don't want to disconnect from the network.
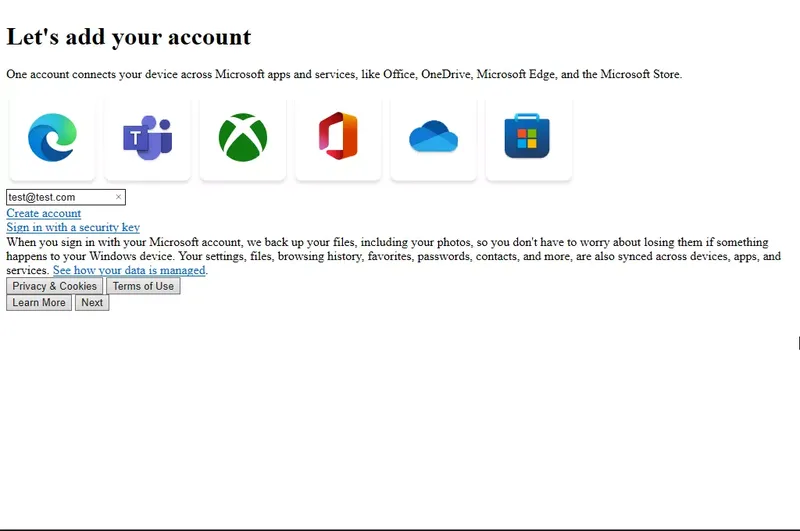
Step 1: You can just type test@test.com or any other email and put any random password, it will fail and Windows will tell you something is wrong.
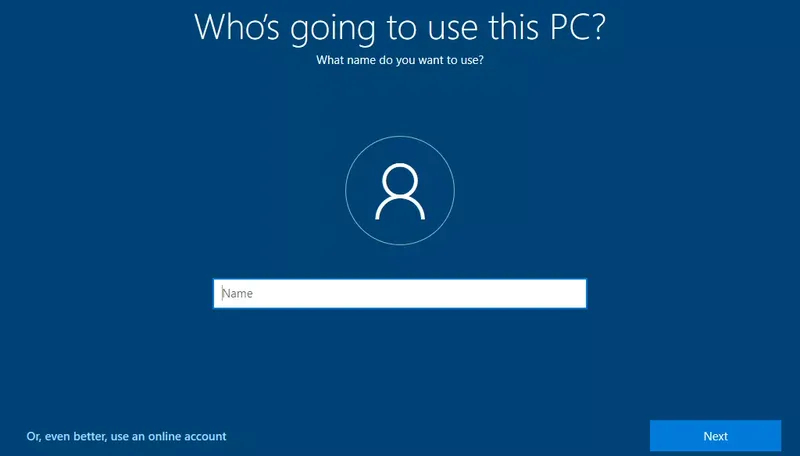
Step 2: Then You can click "Next" and continue with a local account.

How to Switch to local account from Microsoft Account
What's more, if you have signed in Microsoft Account, you can switch to local account according to the following steps.
Step 1: Open the "Settings" by pressing "Windows logo + i" keys simultaneously or other means.
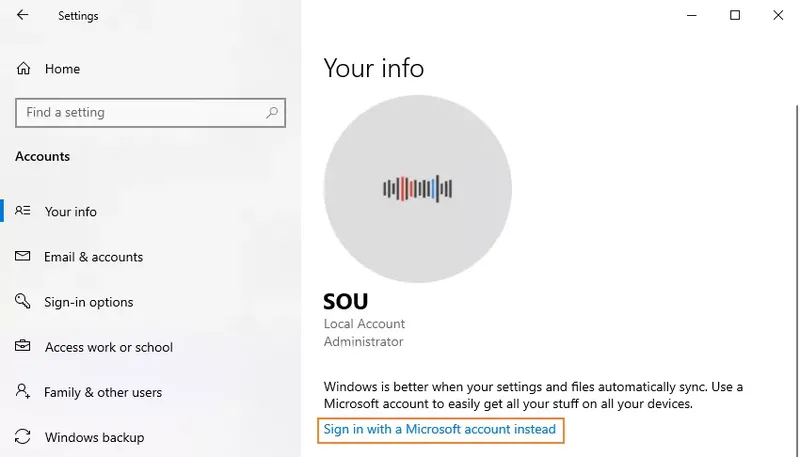
Step 2: Select "Accounts", then click "Stop signing in to all Microsoft apps automatically" on "Your info" page.
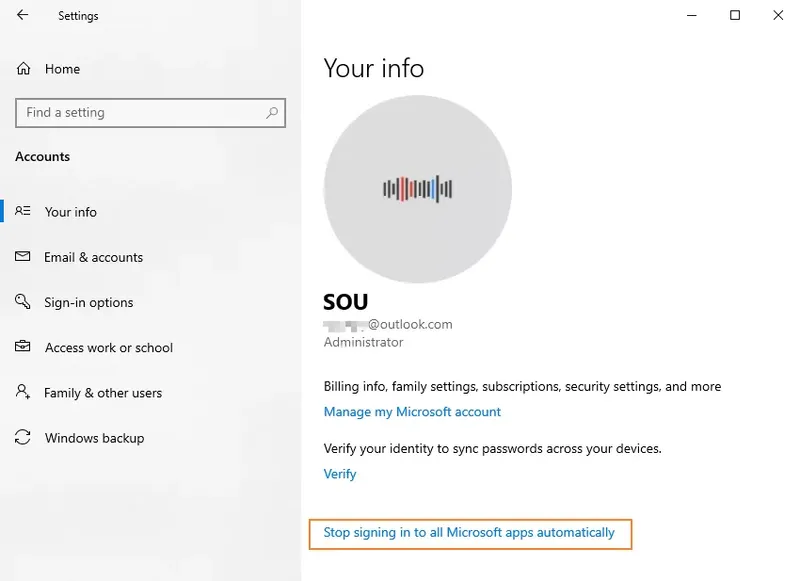
Effect is as follows:
3. Conclusion
This problem occurs when you install Windows with network connection. So if it appears, you can solve it according to the solutions provided by this article. In summary, the most effective way to solve this problem is to disconnect the network first.
Finally, I would like to say the development of technology should make life more free and convenient, not more restrictive. Everyone's privacy and right to choose should be respected and protected. From now on, value and protect it in your life.


