Solved: Green Screen of Death Error in Windows 11/10
The Green screen of death (GSOD) is a stop screen error appearing on Windows Insider Build with a message that your Windows Insider Build ran into a problem and needs to restart. Then your PC may get stuck at a green screen or reboot itself. If you are confronting the same error, don't be panic. Here we will guide you to fix the Windows green screen error.
If your PC is stuck at the stop error and you can't perform any fixes, you have to press and hold the power button to force the computer to shutdown. Then start your PC again and try the following solutions.
1. Unplug external peripherals
External hardware is one of the possible causes of the GSOD. You may not realize that one of the external devices is incompatible, corrupted or containing malware. Disconnect peripherals such as keyboards, speakers, printers, cameras, scanners and storage devices one by one. Every time you removed one, start your computer and check if the error appears until you find the one leading to the problem.
2. Remove recently installed apps
Some applications can cause harm to your CPU and thus induce system crashes. It's necessary to check the recently installed apps in case they conflict with the system.
Step 1: Press Windows+I to open Settings and select Apps>Apps & features. A list of apps will be displayed in the right pane.
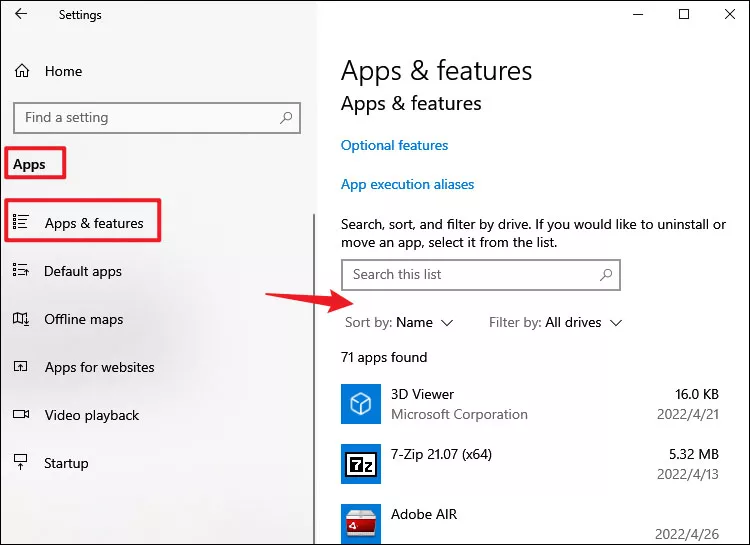
Step 2: Click on the unwanted app and select Uninstall.
3. Check for Windows update
Updating your windows version to the latest build version is a good option to avoid some OS errors.
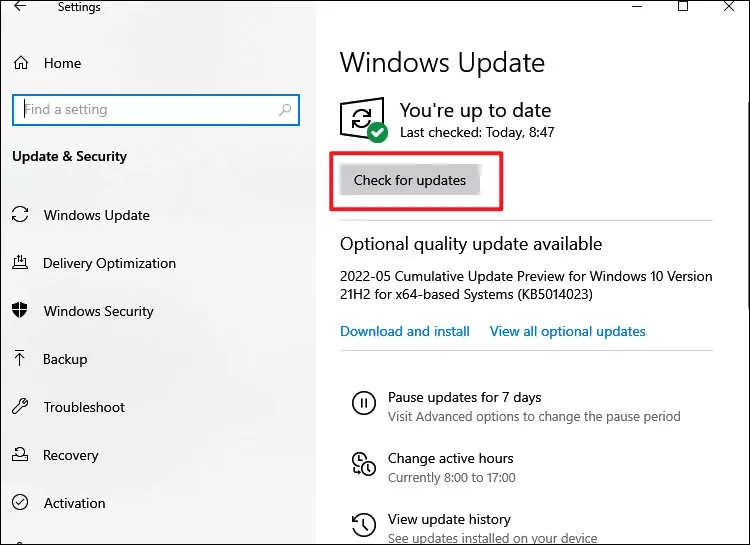
Press Windows+I to open Settings and select Windows Update. Then click Check for updates and the latest version will be installed.
4. Update the graphics driver
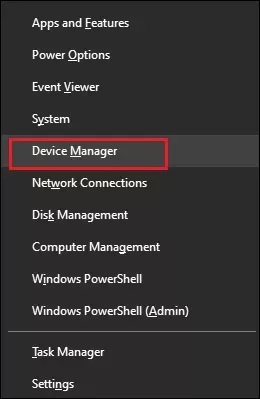
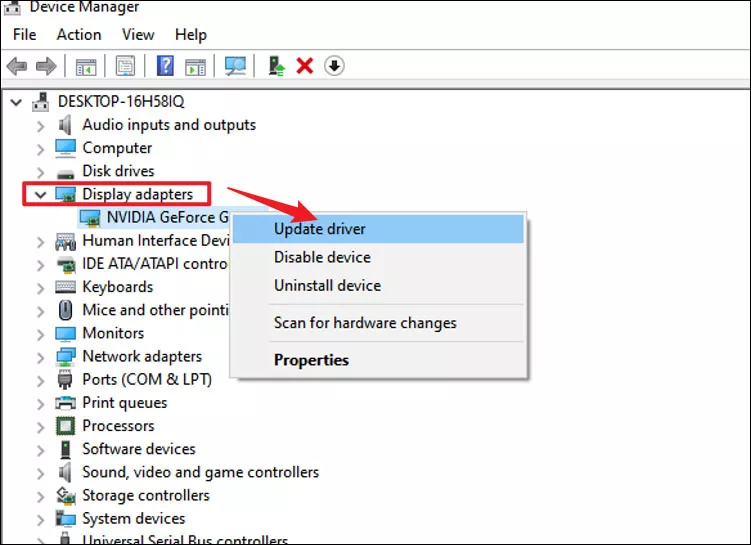
Step 1: Press Windows+X and select Device Manager from the menu.
Step 2: Expand Display adapters and right-click on your graphics card. Then click Update driver.
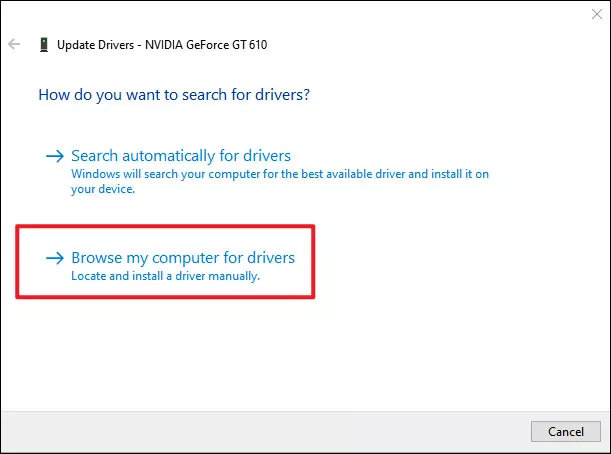
Step 3: In the next window, choose Browse my computer for drivers.
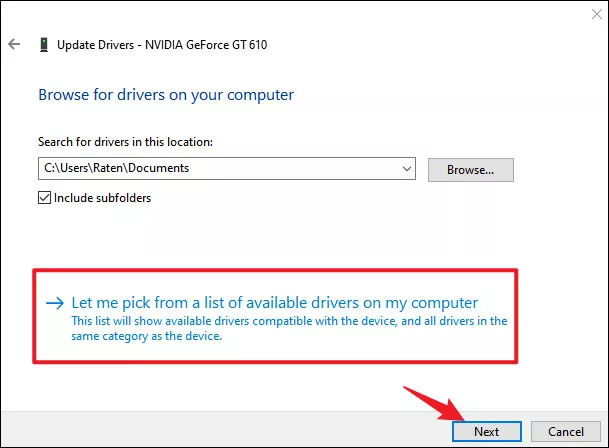
Step 4: Select Let me pick from a list of available drivers on my computer and click Next.
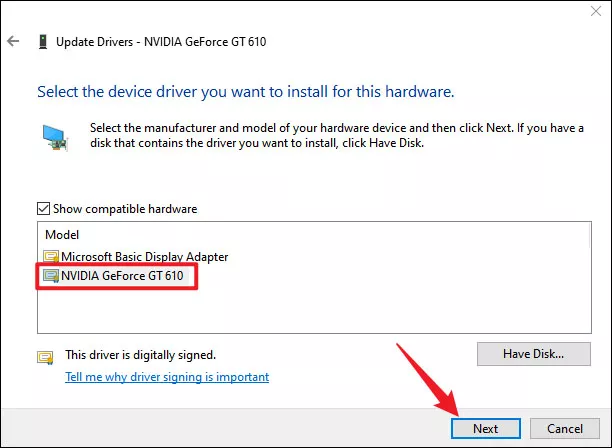
Step 5: Choose your graphics driver and click Next.
5. Run SFC and DISM scan
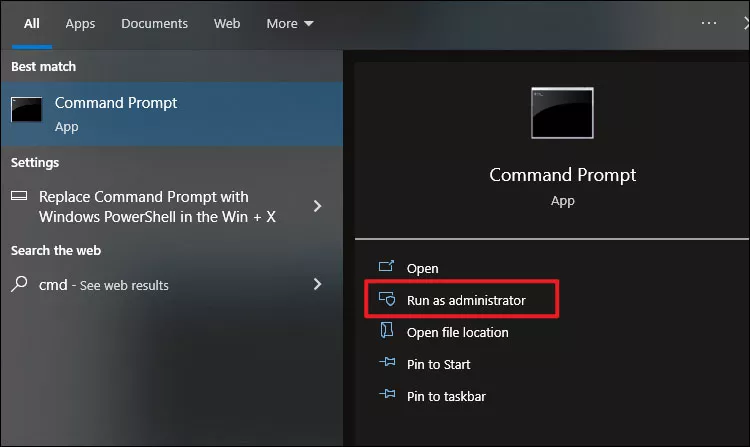
Step 1: Type and search cmd in the search bar and select Run as administrator.
Step 2: To run SFC scan, type sfc/scannow in Command Prompt window and press Enter to launch this command. Wait until the process completes.
Step 3: To run DISM scan, copy and paste the below commands in the prompt and hit Enter. Execute them one by one.
Dism /Online /Cleanup-Image /ScanHealth
Dism /Online /Cleanup-Image /CheckHealth
Dism /Online /Cleanup-Image /RestoreHealth
6. Disable the hardware acceleration
Through hardware acceleration, the performance of your computer can be improved. However, occasionally you may encounter errors when some components are not running at their optimum performance. Your browser will run hardware acceleration if available. To disable it, follow these steps:
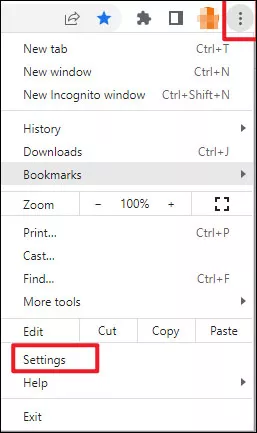
Step 1: Open chrome browser, click the three dots at the top-right corner and select Settings.
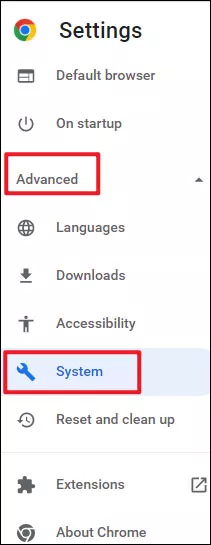
Step 2: In the left pane, expand Advanced and select System.
Step 3: Turn off the toggle after Use hardware acceleration when available.

7. Reset PC
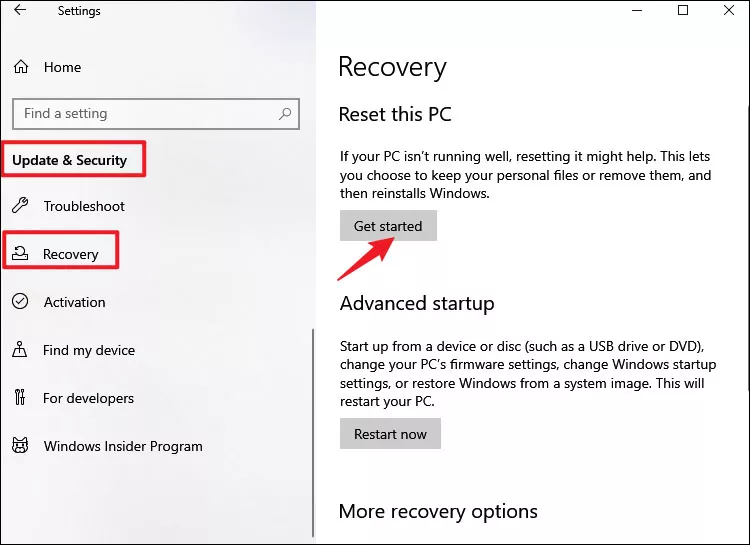
Step 1: Press Windows+I to open Settings and select Update&Security>Recovery. Click on Get started under Reset this PC.
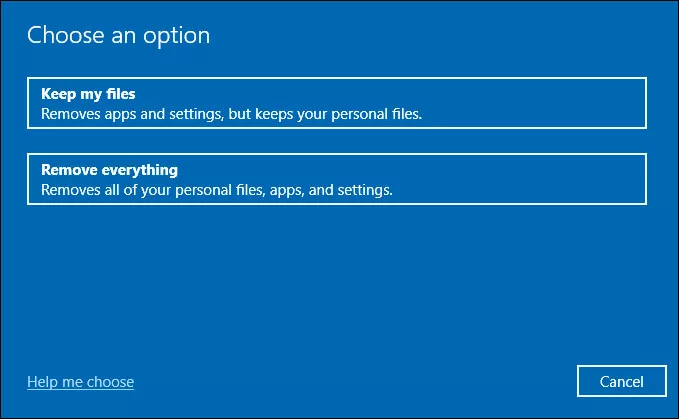
Step 2: Then a window pops up and you need to choose an option. If you choose Remove everything seeking efficiency, you must make a backup.
Step 3: In the next window, choosing Cloud download enables a more stable version while choosing Local reinstall will install the same OS version as you are using now. But the first option takes a longer time than the second one.


