How to Make a Windows Virtual Machine Share the Host's VPN
Using a virtual machine (VM) in a Windows environment offers numerous advantages, including testing different configurations and software in isolated environments. However, you might face challenges when trying to make your VM share the host's VPN connection. This guide will walk you through the process using the v2rayN proxy software, ensuring your VM can leverage the host's VPN seamlessly.
Detailed Steps to Share Host's VPN Connection
Before proceeding, you need to download and install the v2rayN application on your host computer.
Download: v2rayNIf you don't know which package to choose, you can choose "zz v2rayN-With-Core-SelfContained.7z" directly.
Step 1: Enable "Allow LAN Connections" in v2rayN
First, you need to configure v2rayN to accept connections from your local area network (LAN).
1.1 Open v2rayN on your host machine.
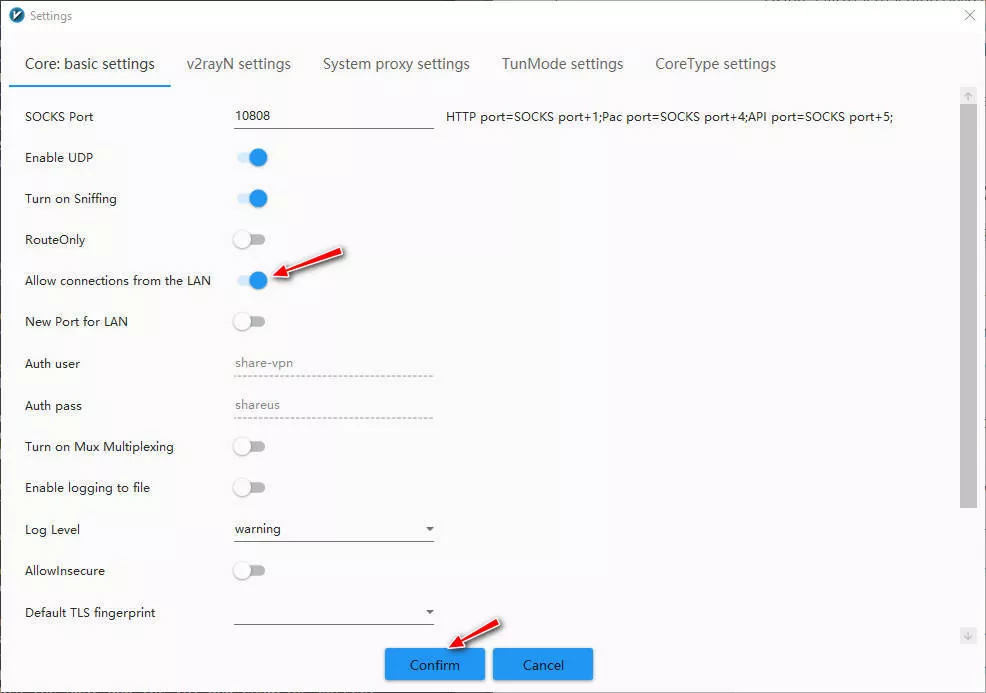
1.2 Navigate to the Settings > Option Setting. Toggle on the "Allow connections from the LAN" button, then click on "Confirm" button.

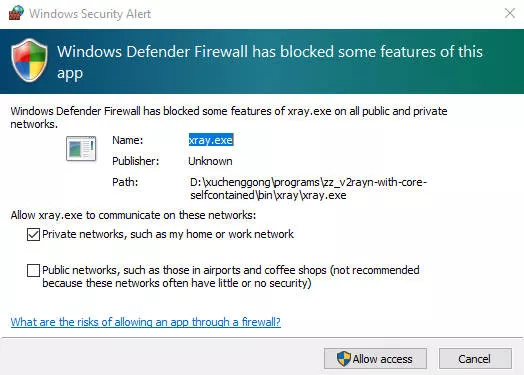
Note: If prompted by the Windows Firewall (Windows Security Alert), make sure to allow access.
Step 2: Start Proxy and Determine the Proxy Configuration
Next, activate the proxy in v2rayN to route traffic through the VPN and check the host's proxy.
2.1 Selct the "Set system proxy" from the System proxy dropdown menu at the bottom of the software window.
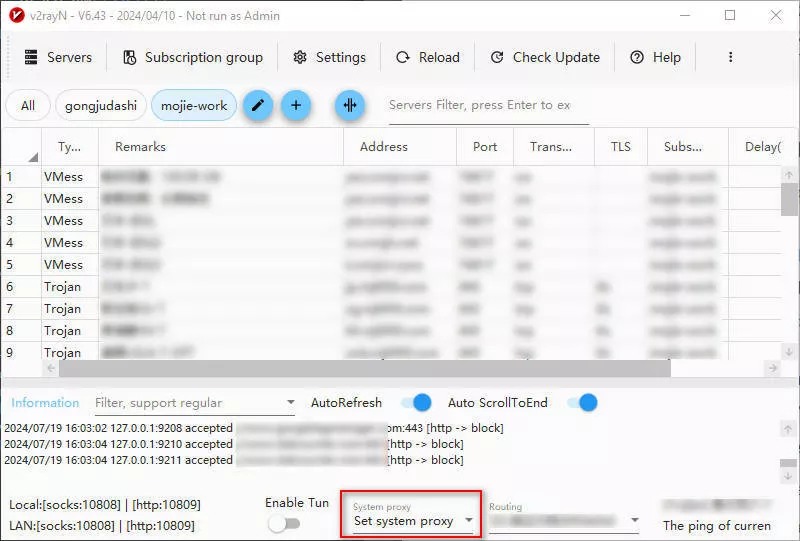
2.2 Check the host's proxy configuration.
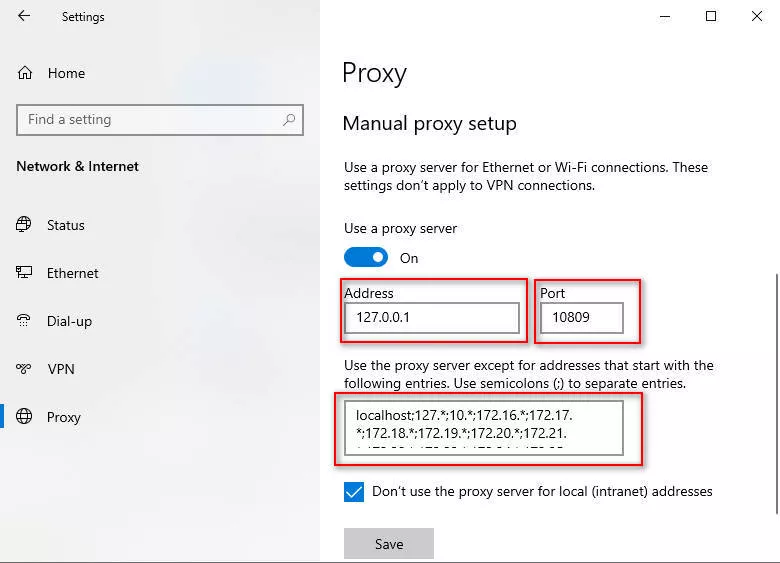
a. Right-click the network connection icon in the bottom right corner of your screen.
b. Select "Open Network & Internet settings."
c. Choose "Proxy" in the left panel.
d. Check the proxy configuration under "Manual proxy setup".
Step 3: Obtain Host IP Address
You need the host machine's IP address to configure the proxy on the VM correctly.
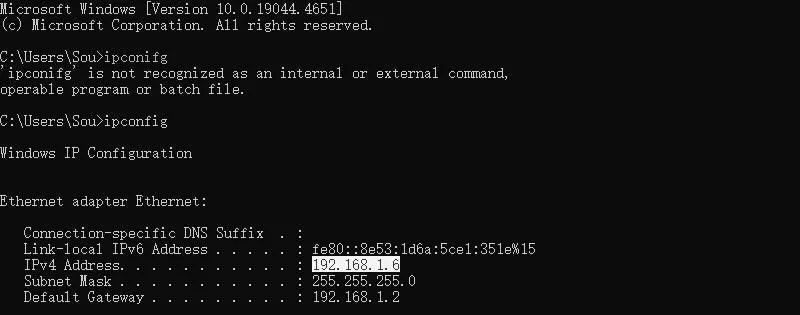
3.1 Open Command Prompt (cmd) on the host machine.
3.2 Type ipconfig and press Enter.
3.3 Look for the IP address under your network adapter (it will be listed next to "IPv4 Address").
Step 4: Configure Proxy Settings in the Virtual Machine
Now, set up the proxy on the Windows VM.
Bridged Mode
If your virtual machine's network adapter is configured in "Bridged" mode, follow these steps:
a. Open the proxy settings on your VM by navigating to the network settings.
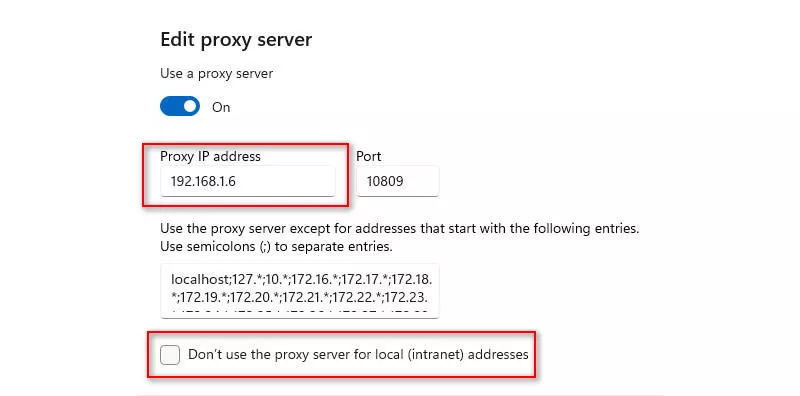
b. Enter the host machine's IP address obtained from the previous step.
c. Set the port to the HTTP port displayed in the v2rayN proxy interface.
d. For "Exceptions" or addresses not to use the proxy for, you can copy these settings directly from the host or use the following list.
localhost;127.*;10.*;172.16.*;172.17.*;172.18.*;172.19.*;172.20.*;172.21.*;172.22.*;172.23.*;172.24.*;172.25.*;172.26.*;172.27.*;172.28.*;172.29.*;172.30.*;172.31.*;192.168.*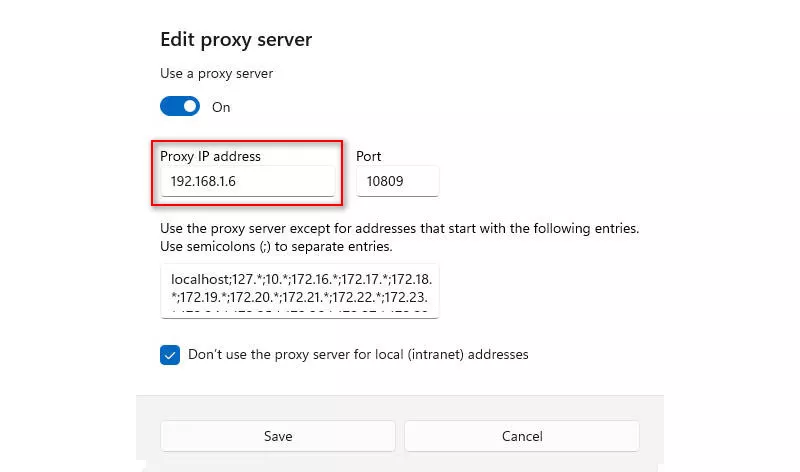
NAT Mode
For VMs using NAT mode:
a. Follow similar steps as above to enter the proxy settings.
b. Make sure to uncheck "Don't use the proxy server for local (intranet) addresses" to ensure all traffic is routed through the VPN.
With these configurations in place, your VM should now be able to use the host's VPN connection effectively.
Summary
In summary, sharing the host's VPN connection in a Windows virtual machine involves configuring v2rayN to allow LAN connections, setting up the proxy on both the host and the VM, and ensuring correct network settings based on whether the VM is in Bridged or NAT mode. The main principle is routing the VM's traffic through the host's network and proxy settings, allowing it to leverage the VPN connection seamlessly.


