Fix: "Resolving host" Issue in Google Chrome
When you open some web pages with Google Chrome, they load very slowly, or it shows that this webpage is not available. If you notice the message "Resolving host" in the status bar of your browser, then this may be the root cause of the delay or failure to open. If DNS is unable to find the desired IP in its database, it can cause a resolving host issue when opening a webpage in Google Chrome. This post will guide you to fix the isuue of resolving host in Google Chrome.
Fix 1: Clear DNS host cache
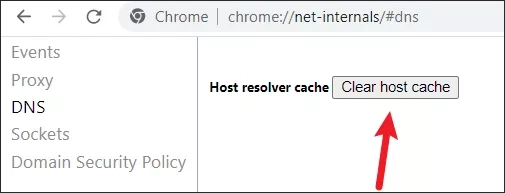
Step 1: Type the following URL into the Google Chrome address bar and click Enter.
chrome://net-internals/#dnsStep 2: Click on the "Clear host cache" button, and then reload your browser.
Fix 2: Switch to Google Public DNS Server
Step 1: Search for Control Panel in the Start menu bar and open it.
Step 2: Select "Network and Sharing Center", and select the "Change adapter settings" in the left menu bar.
Step 3: Right-click on the connected network and select "Properties".
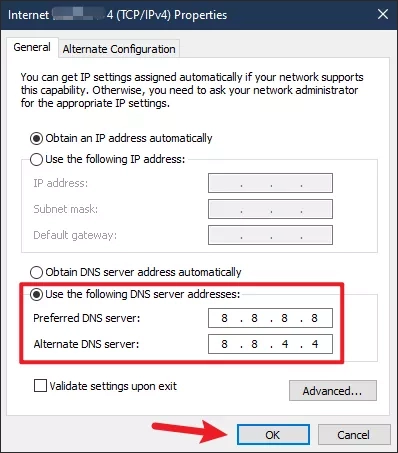
Step 4: Find the "Internet Protocol Version 4(TCP/IPV4)" option and click "Properties".
Step 5: Switch to the "Use the following DNS server addresses" option. Enter 8.8.8.8 for the Preferred DNS server, and 8.8.4.4 for the Alternate DNS server. Click "OK" to save the changes.
Fix 3: Refresh the DNS client
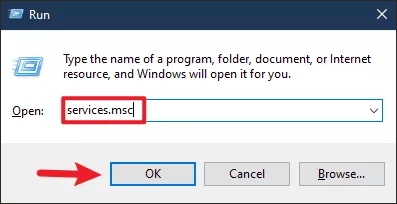
Step 1: Use the keyboard shortcut WIN + R to open the Run dialog box and type service.msc, then click ok to open the service interface.
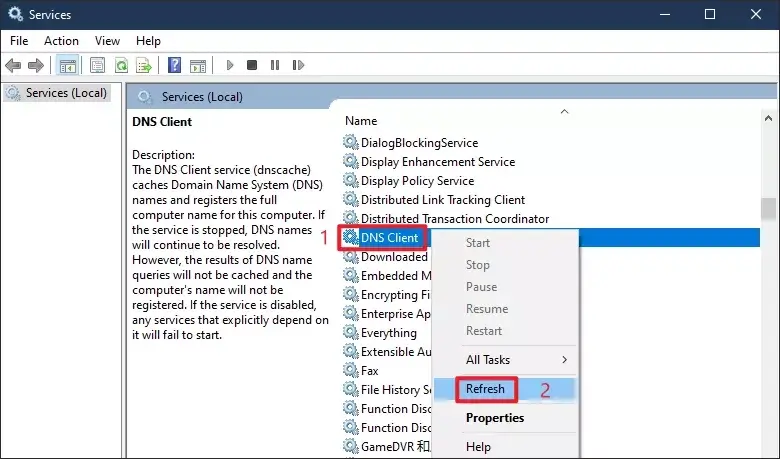
Step 2: Scroll down and find the "DNS Client" service, right-click and select "Refresh".
Step 3: Restart Chrome and check if the issue has been solved.
Fix 4: Disable Autocomplete searches and URLs
Step 1: Click on the three vertical dots in the top right corner of Google Chrome. Select "Settings" and open it.
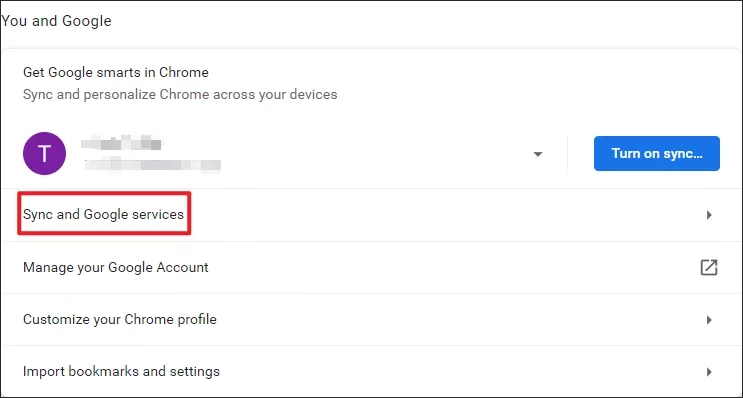
Step 2: Select and expand the "Sync and Google Services" section.
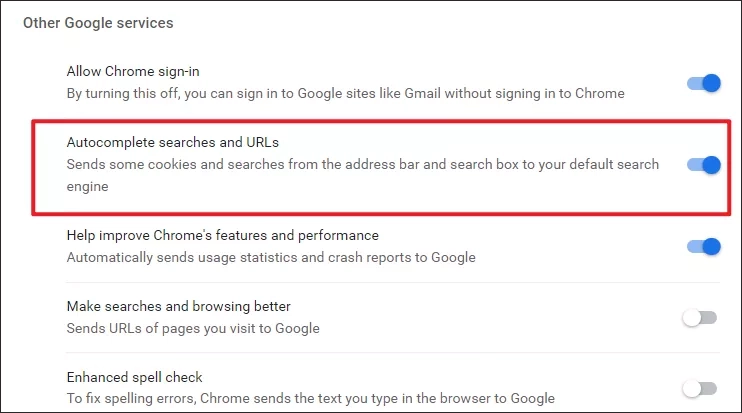
Step 3: Select to disable "Autocomplete search and URLs" in the Other Google services section. Try to access the site and the resolving host issue may have been fixed.
Fix 5: Reset IP Configuration
Step 1: Type CMD in the Start menu bar and select "Run as administrator".
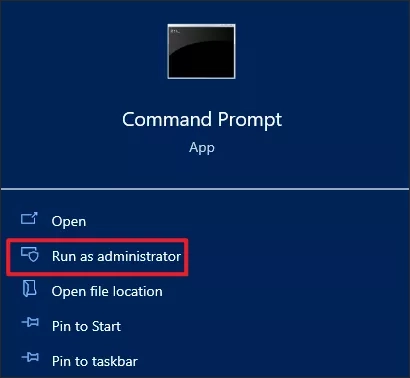
Step 2: Execute the following three commands separately in the Command Prompt. After completion, check if the resolving host issue has been fixed.
ipconfig /releaseipconfig /flushdnsipconfig /renew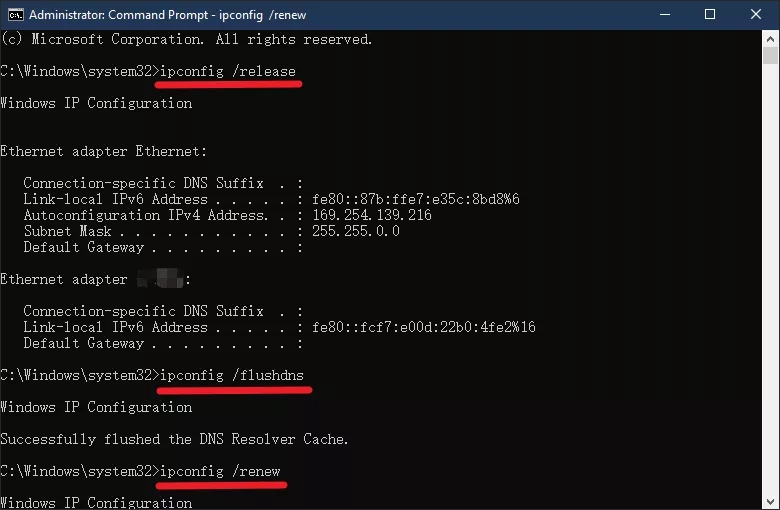
Note: Your IP address has now changed. Therefore, if you need to enter an IP manually, be sure to use the newly generated IP. The newly generated IP addresses can be viewed by entering the ipconfig/all command in CMD.
Fix 6: Clear your Google browser data
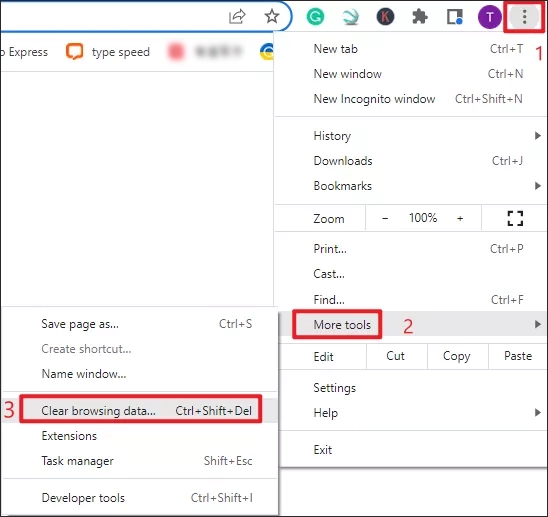
Step 1: In Google Chrome, click on the three vertical dots in the upper right corner and select the "Clear Browsing Data" option in "More tools". You can also open it quickly by pressing the shortcut keys Ctrl+Shift+Del at the same time.
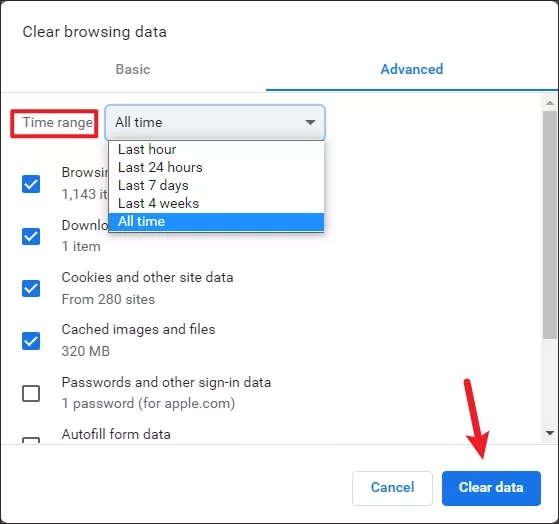
Step 2: Select the "Time range" for which you want to clear the browsing data and click on the "Clear data" option.
Fix 7: Change LAN Settings
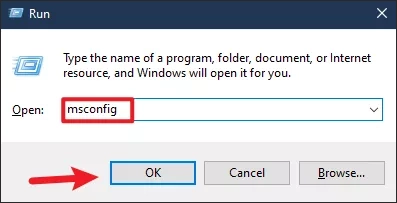
Step 1: Press Windows + R to open Run and then type msconfig and click OK.
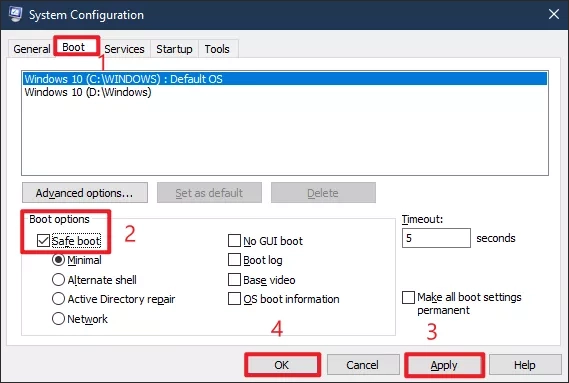
Step 2: In the system configuration interface, move to the "Boot" option, under the "Boot options", select "Safe boot", click "Apply" and "OK".
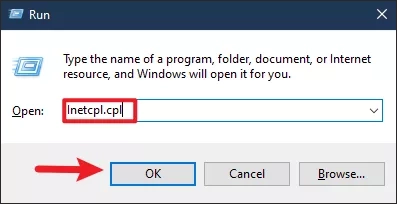
Step 3: Reboot your PC, and then press the shortcut key Windows+R to open Run dialog box, type inetcpl.cpl and click OK to open Internet Properties.
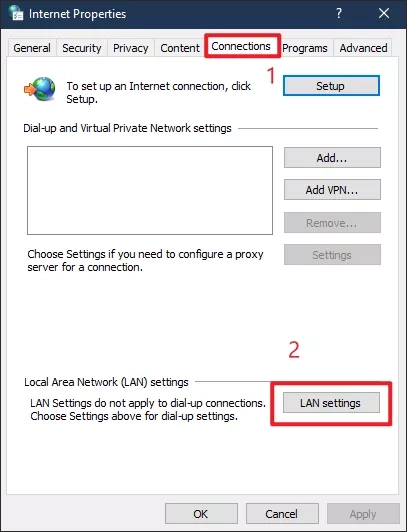
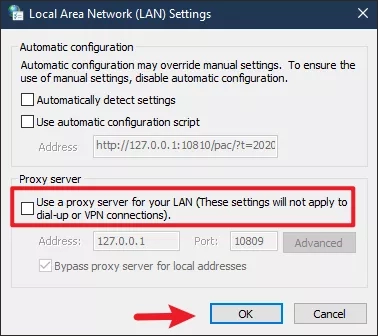
Step 4: Move to the "Connections" tab, and then click "LAN settings".
Step 5: Uncheck "Use a proxy server for your LAN”. Then click "OK".
Step 6: In system Configuration, Uncheck the option "Safe Boot" and click "Apply" and "OK" to complete the changes.
Step 7: Restart your PC and you may be able to fix the resolving host error in google chrome.
Bottom Line
These are the fixes for resolving host issues in Google Chrome, you only need to try one or two of these fixes.


