Fix: "This site can't be reached" Error in Google Chrome
In most cases, the "This site can't be reached" error in Google Chrome is caused by a DNS lookup failure. This usually happens if your Internet Service Provider's (ISP) DNS servers are busy, congested, or experiencing problems. Chrome will also display a "This site can't be reached" error message if the site cannot be accessed due to conflicts with browser extensions/plugins and other network issues. Here are the most effective ways to fix this error in Google Chrome.
Fix 1: Clear browser cache
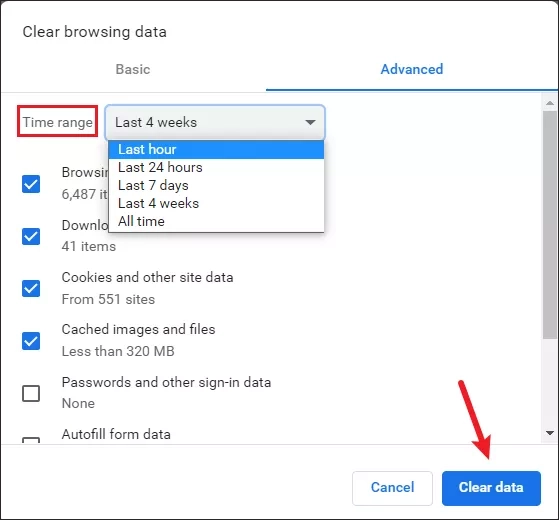
Step 1: In Google Chrome, click on the three dots in the upper right corner and select the "Clear browsing data" option in "More tools", you can also quickly open the clear browsing data option by using the shortcut Ctrl+Shift+Del.
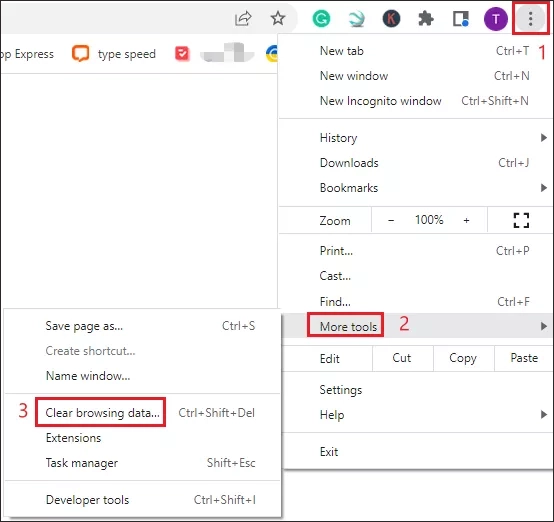
Step 2: Select the "time range" you want to delete and click on the "Clear data" option.
Fix 2: Reset the Chrome browser
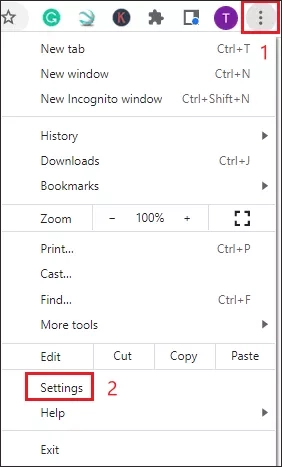
Step 1: In Google Chrome click on the three dots in the upper right corner and find "Settings" to open it.
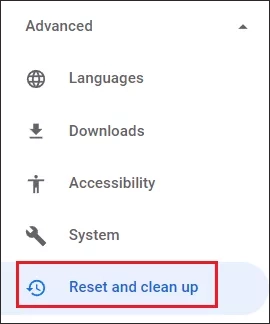
Step 2: Drop down advanced options, and click "Reset and clean up".
Step 3: Click "Restore settings to their original defaults".

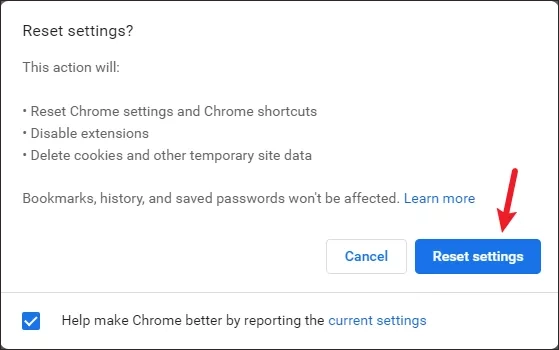
Step 4: In the pop-up window, click the "Reset settings" button. After resetting Chrome, try visiting the page and see if the "this site can't be reached" error still appears on your computer's Chrome browser.
Fix 3: Remove unnecessary extensions from Chrome
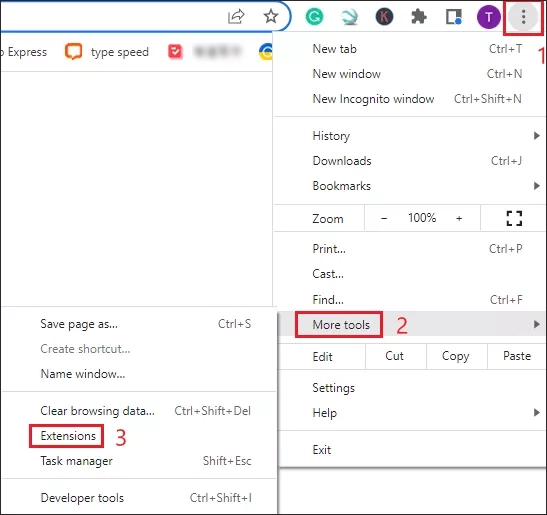
Step 1: Open Google Chrome, click on the three dots in the upper right corner, select "Extensions" in "More Tools" and open it.
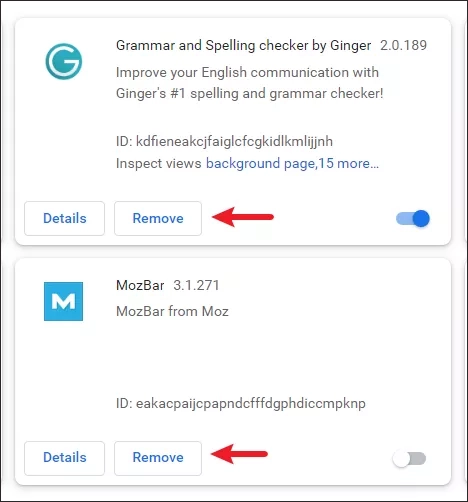
Step 2: Just click to remove unneeded extensions.
Fix 4: Uninstall and reinstall Chrome
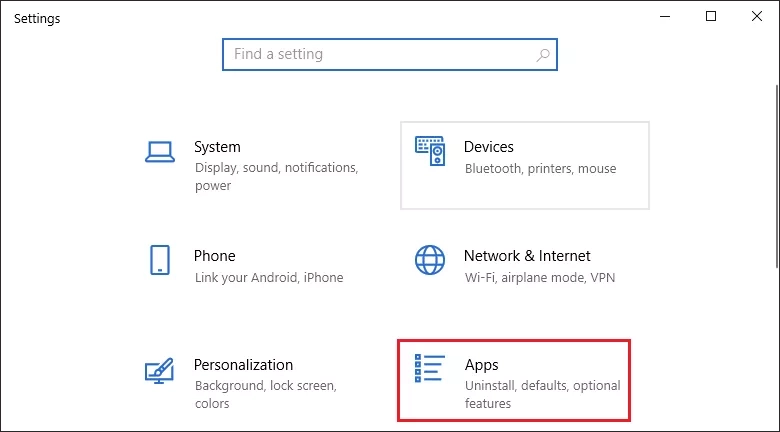
Step 1: Use WIN+I to open Settings and click "Apps".
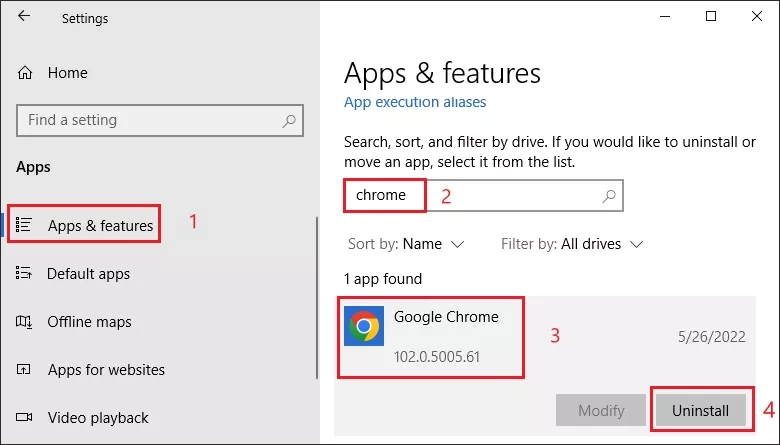
Step 2: In Apps, in the left pane click "Apps & features", in the right pane search for Google Chrome and click the "Uninstall" button.
Step 3: After uninstalling Chrome, please download the latest version of Google Chrome from the Google website.
Fix 5: Change IPv4 DNS Address
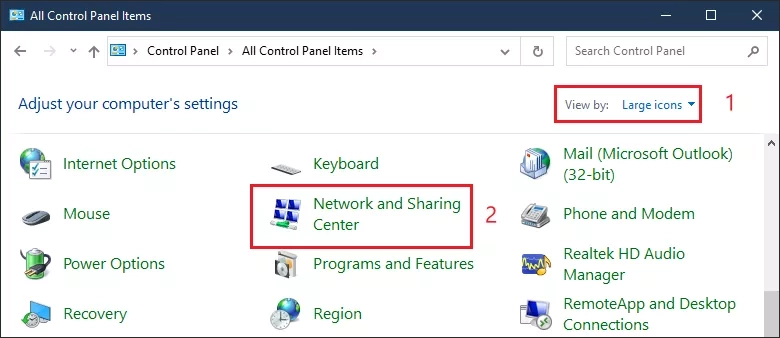
Step 1: Open the control panel, select the display method as small or large icons, find "Network and Sharing Center" and open it.
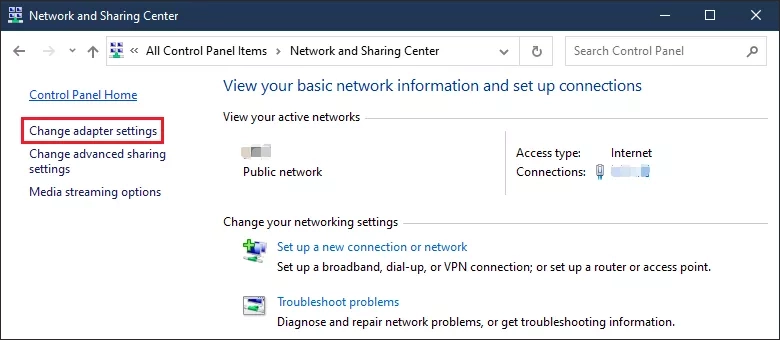
Step 2: Select "Change adapter settings" to open it.
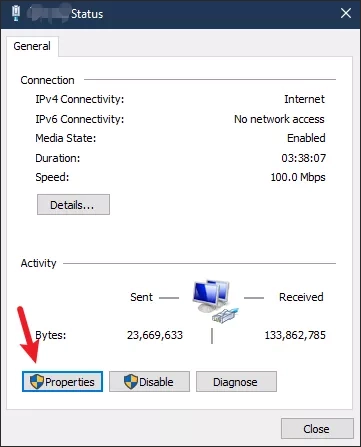
Step 3: Double-click the icon of the internet connection you are using, and then click "Properties" to open.
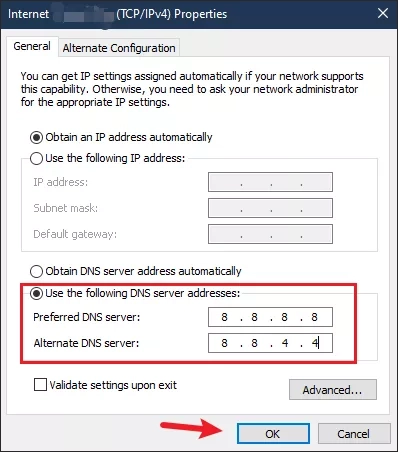
Step 4: Find and click "Internet Protocol version 4 (TCP/IPv4)", and then click "Properties".
Step 5: Enter the new DNS address. Enter the Google public DNS server address. And then click "ok" to complete the change.
Preferred DNS server: 8.8.8.8
Alternate DNS server: 8.8.4.4
Fix 6: Update network drivers
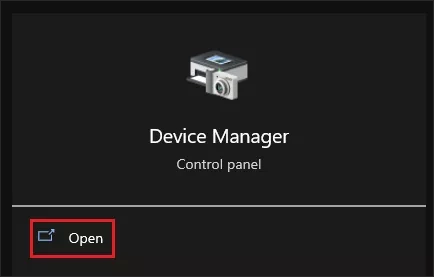
Step 1: Search for Device Manager in the search bar and open it.
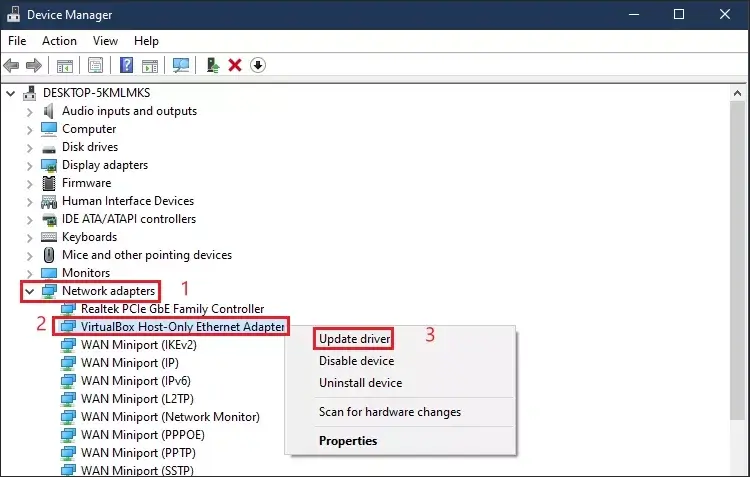
Step 2: In Device Manager, expand the "Network Adapters" entry, right-click on the Ethernet Adapter and click on the "Update driver" option.
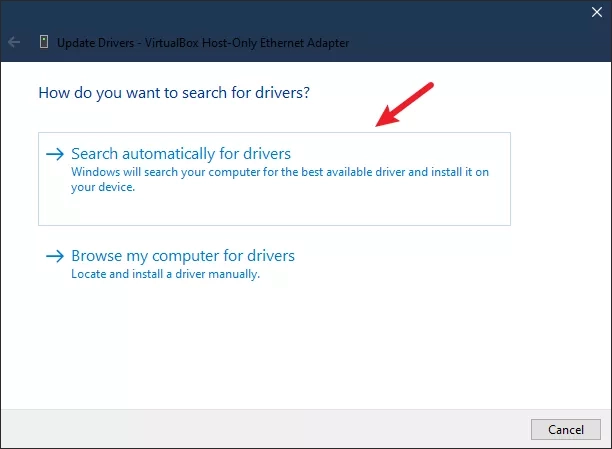
Step 3: Select the "Search automatically for drivers" option and follow the prompts to update the driver.
Fix 7: Reset DNS Cache
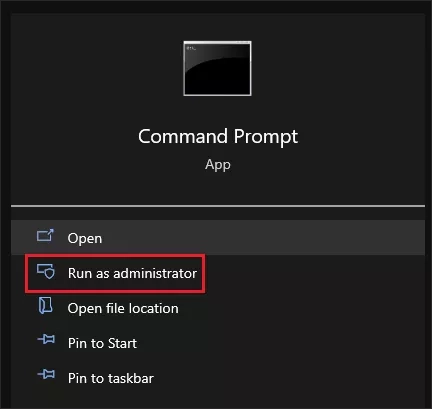
Step 1: Type CMD in the search bar and "Run it as administrator".
Step 2: Type ipconfig /flushdns at the command prompt, and press enter to continue. If it worked, you should see a "Successfully flushed the DNS Resolver Cache" message in the window.

Final Word
Although the "This site can't be reached" error can be annoying, it is not difficult to troubleshoot. In most cases, the error comes from a problem with your Internet connection or DNS and cache settings. I hope the above fixes will solve your problem.


