Check Windows 10/11 Uptime: PowerShell, Task Manager & Control Panel

September 04, 2024

Ever wondered how long your Windows computer has been running without a restart? Whether you're troubleshooting an issue or just curious, knowing your system's uptime can be quite useful. Uptime refers to the amount of time your computer has been operating since it was last rebooted. In this post, we'll walk you through three straightforward methods to check Windows uptime: using Task Manager, Control Panel, and PowerShell. Let's dive in!
1. Check Windows Uptime in Task Manager
The Task Manager provides a quick and easy way to check your system's uptime, specifically by looking at the CPU uptime.
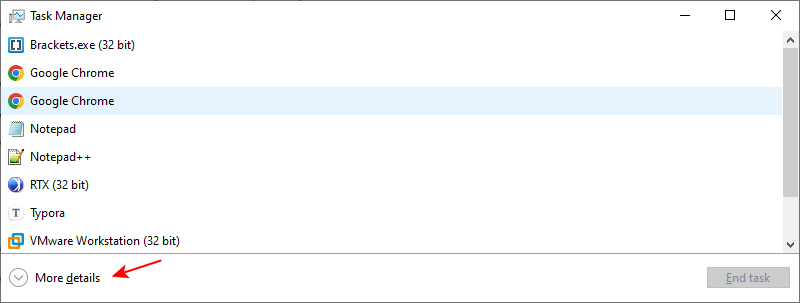
Step 1: Open the "Task Manager" by pressing Ctrl + Shift + Esc on your keyboard simultaneously.
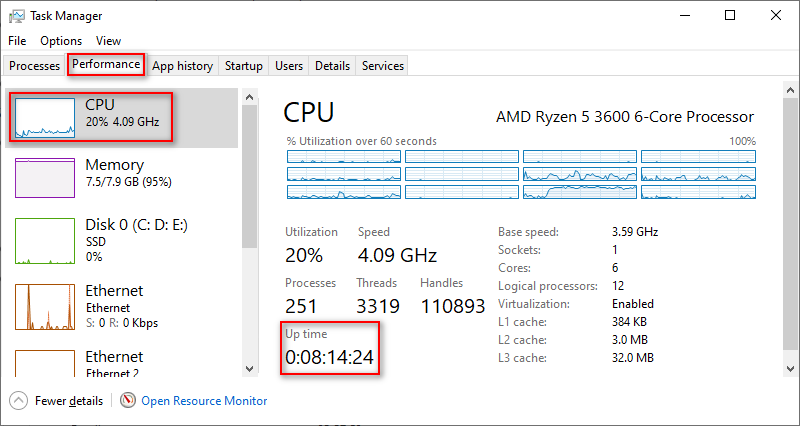
Step 2: Click on the "Performance" tab.
Note: If you don't see this tab, click "More details" at the bottom of the window to expand the view.
Step 3: In the Performance tab, select "CPU" from the left-hand side. You'll see a variety of information about your CPU, including "Uptime", which shows how long your computer has been running.
This method is particularly intuitive and user-friendly, making it a great choice if you need a quick look at how long your computer has been on.
2. View Windows Uptime in Control Panel
Another method to check Windows uptime is through the Control Panel. This method examines the duration of your network connection, which can often reflect the system's uptime.
Step 1: Open the "Control Panel" by searching for it in the Start menu.
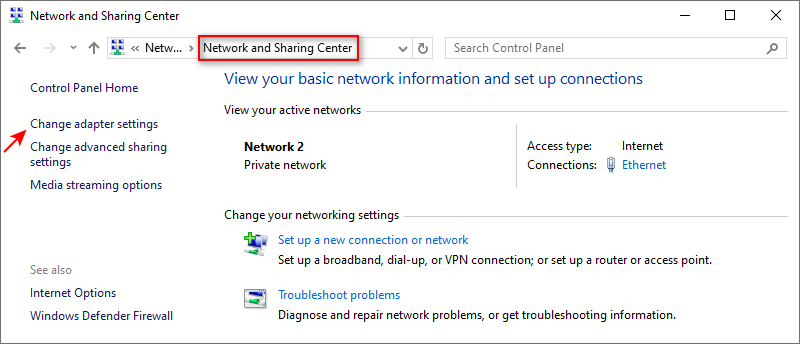
Step 2: Go to "Network and Internet" and then click on "Network and Sharing Center".
Step 3: In the Network and Sharing Center, find "Change adapter settings" in the left-hand menu and click it.
Step 4: Select your active network adapter, right-click on it, and choose "Status" from the context menu.
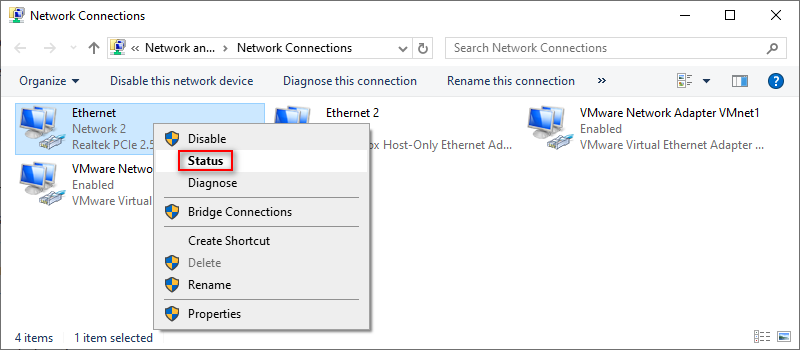
Step 5: In the status window that appears, look for the "Duration" field. This indicates how long the network connection has been active, which often matches the system's uptime.
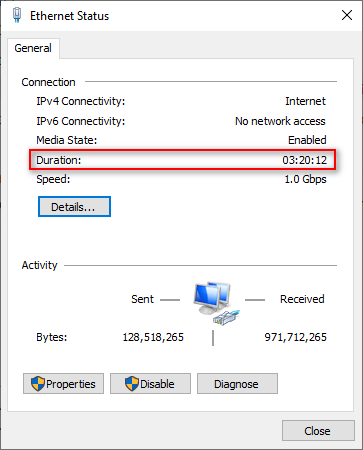
Note: This method is accurate as long as your network connection hasn't been interrupted. If the connection has dropped, the duration will reflect the time since the last connection, not the last reboot.
3. Get Windows Uptime Using PowerShell
For those who prefer a command-line approach, PowerShell offers a powerful way to retrieve detailed uptime information. This method is particularly useful if you want precise details down to the second.
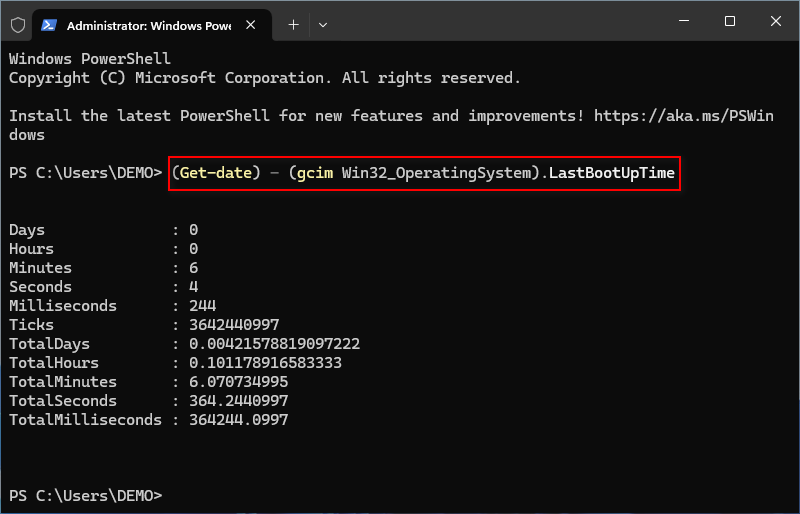
Step 1: Right-click on the Windows icon in your taskbar and select "Windows PowerShell (Admin)". In Windows 11, this option is called "Terminal (Admin)".
Step 2: Type the following command and press Enter:
(Get-date) - (gcim Win32_OperatingSystem).LastBootUpTime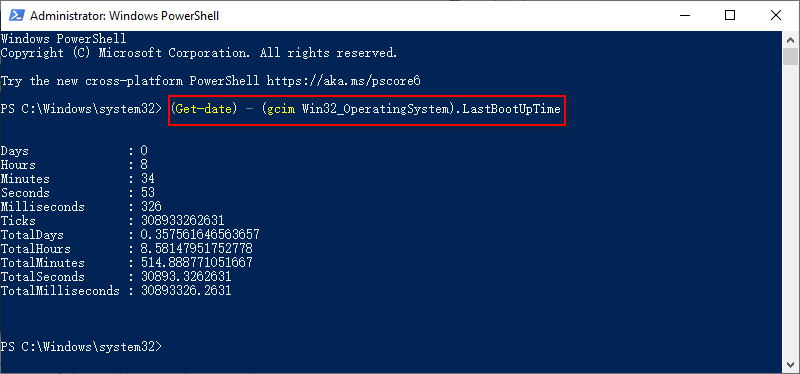
Step 3: PowerShell will display the uptime in days, hours, minutes, seconds, and milliseconds. This is the most detailed method and provides precise information about how long your system has been running.
This method is best for users who are comfortable using command-line tools and want detailed uptime data.
4. Summary
Checking your Windows 10 or 11 computer's uptime is straightforward with the methods we've covered. The "Task Manager" approach is quick and easy, ideal for a general overview. The "Control Panel" method can be accurate if your network hasn't been interrupted. Lastly, "PowerShell" provides the most detailed information, perfect for those who need precision.
By knowing how long your system has been running, you can better manage performance, diagnose issues, and maintain your system's health. Pick the method that best suits your needs and take control of your Windows uptime!