Copy System to a New Drive Without Using Third-Party Software Step by Step
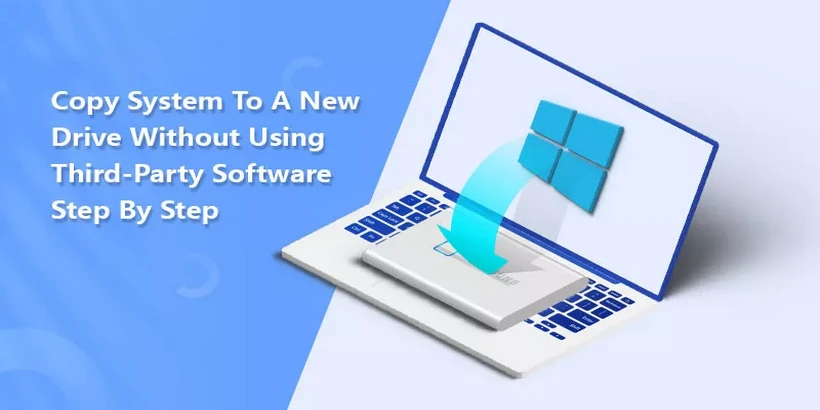
The remaining space on the C system disk gradually decreases. Hard drives are now becoming more affordable, making it a good idea to replace the existing one with a larger capacity. However, there are important data and software configurations that need to be preserved, and the risk of losing files due to reinstalling the system is not desirable. Many technical guides recommend using third-party software. Now, we will guide you step by step through the process of copying system to a new hard drive without using third party software step by step.
Things you need to prepare: one USB flash disk (larger than 8GB), one new hard drive, one backup hard drive, and one USB hard drive adapter cable.
Items to Prepare:
1. Ensure that your new hard drive can be properly installed in your computer.
2. Make sure that your hard drive intended for backup can be connected to the computer using a USB hard drive adapter cable.
3. The capacities of the two prepared hard drives need to be equal to or greater than that of the original C drive.
4. The hard drive intended for backup needs to be formatted. Please ensure to preserve any important data before proceeding.
1. Creating a System Bootable Disk Using a USB Drive
Step 1: Visit this link to download MediaCreationTool22H2.exe

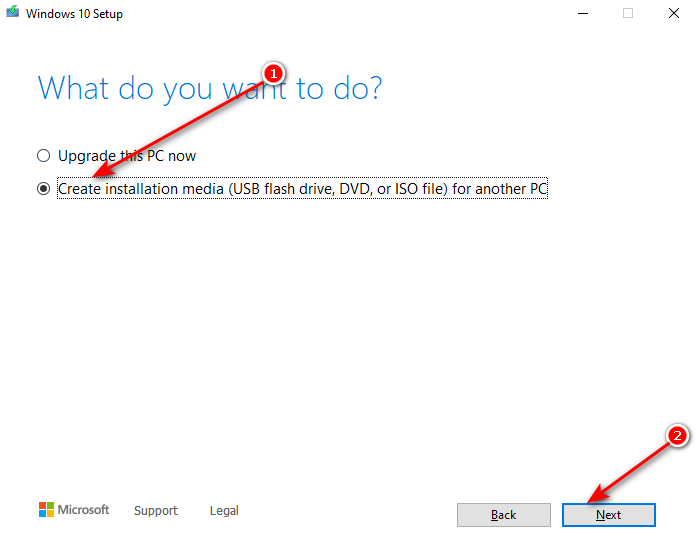
Step 2: After the download is complete, open the software, and follow the instructions based on the images.


2. Format the Hard Drive Intended for Backup
Step 1: Connect the backup hard drive to the computer and execute the following commands in the Command Prompt window.
WIN + R --> cmd --> diskpart --> list disk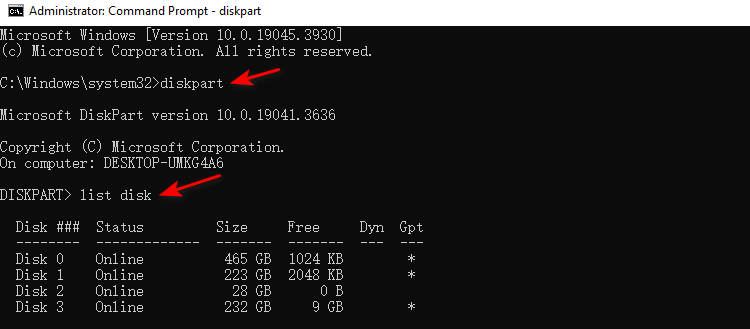
After executing the "list disk" command, find the disk number based on its capacity and name. We assume the disk number for the backup hard drive is 3.
select disk 3 --> clean --> create partition primary format fs=ntfs quick label="G" 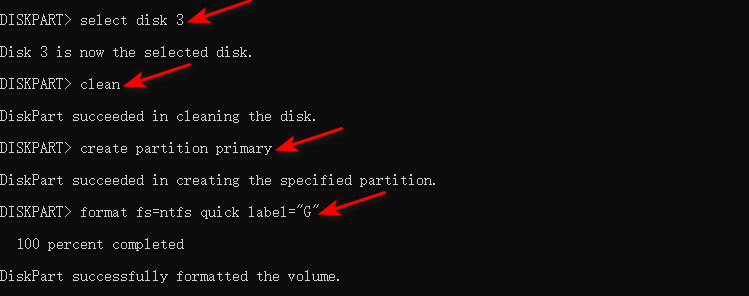
Here, we are naming this backup disk as the G drive. If you already have a G drive, you can replace 'G' with any other letter of your choice in the ‘format fs=ntfs quick label=“G”’ command.
3. Backup the System Drive to the Backup disk
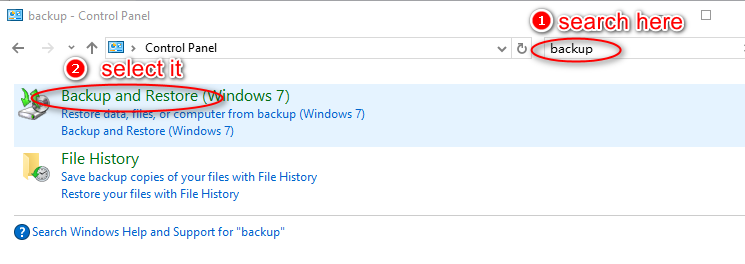
Step 1: Press the Win key, type "Control Panel" and open it.
Step 2: Type "backup" in the search box, then choose and click "Backup and Restore (Windows 7)".
Step 3: Select "Create a system image" on the left.
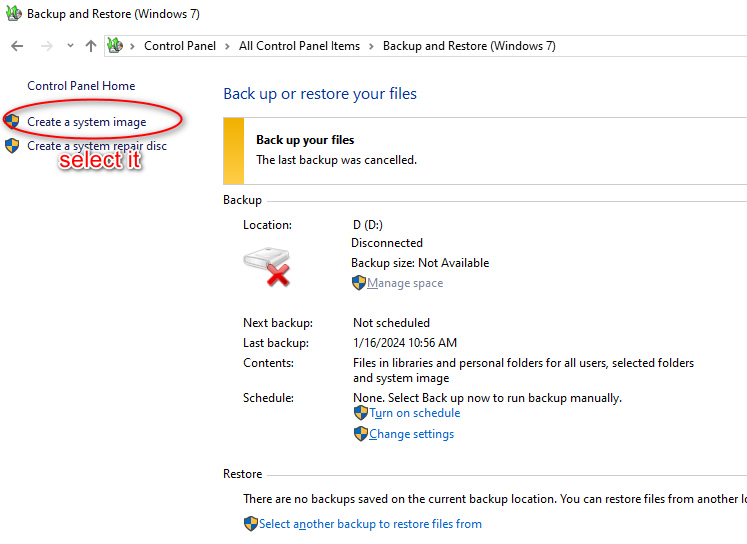
Step 4: Select the right hard drive for backup (Where do you want to save your data? ).
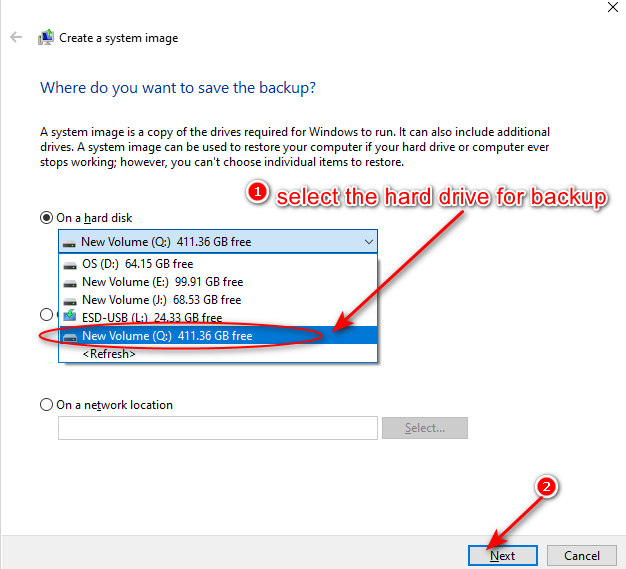
Step 5: Check the partitions you want to backup(what data to backup? ).
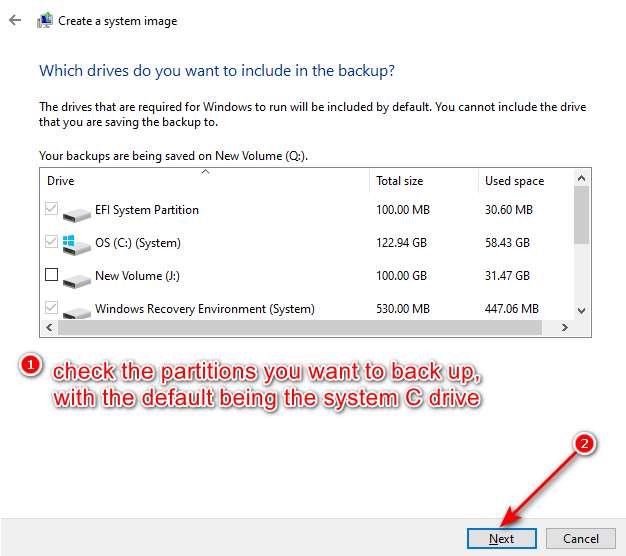
Step 6: Confirm your backup settings.
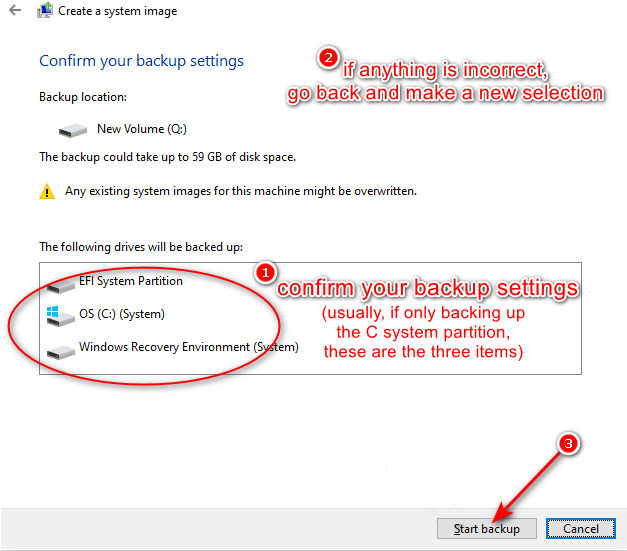
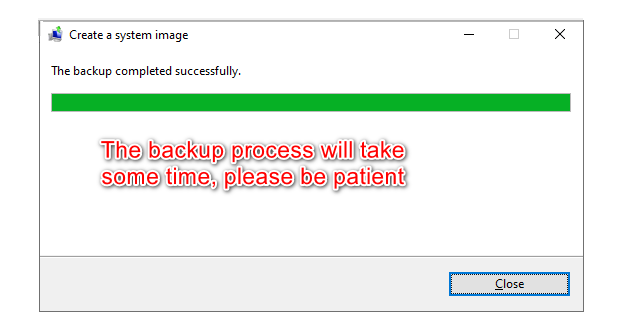
Step 7: Wait patiently for the backup to complete.
4. Perfectly Restore Your System to a New Hard Drive
Step 1: Remove the old system disk, replace it with the new hard drive, and keep the backup disk connected to the computer via USB.
Step 2: Insert the USB flash drive, reboot your computer, press the 'del' key to enter the BIOS settings, and then select the USB drive as the primary boot device in the boot options.
Changing the boot mode may vary slightly among laptops from different brands, and for desktops, the difference lies in the motherboard.
Step 3: The process of system restoration can be completed by following the prompts in the photos.
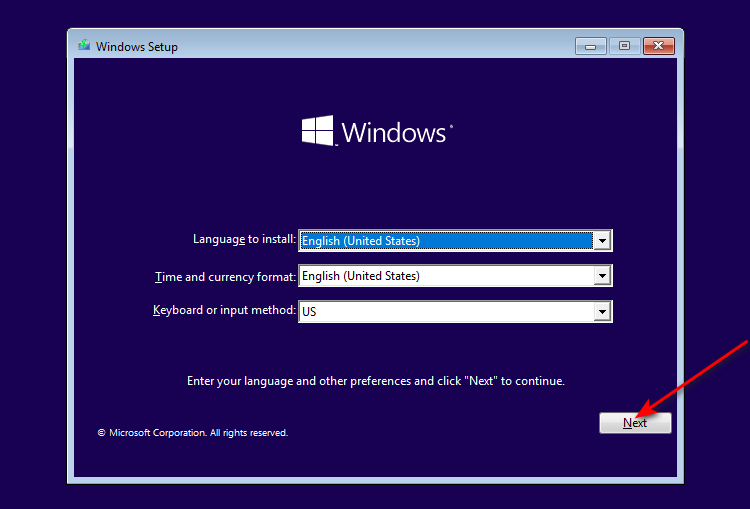
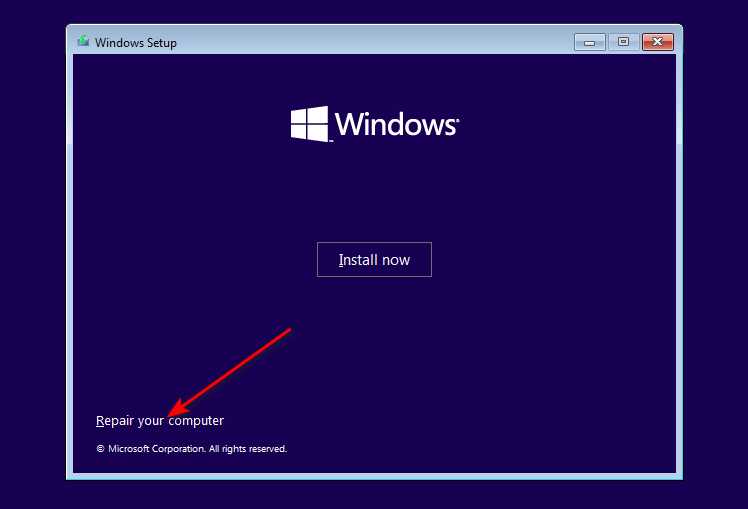
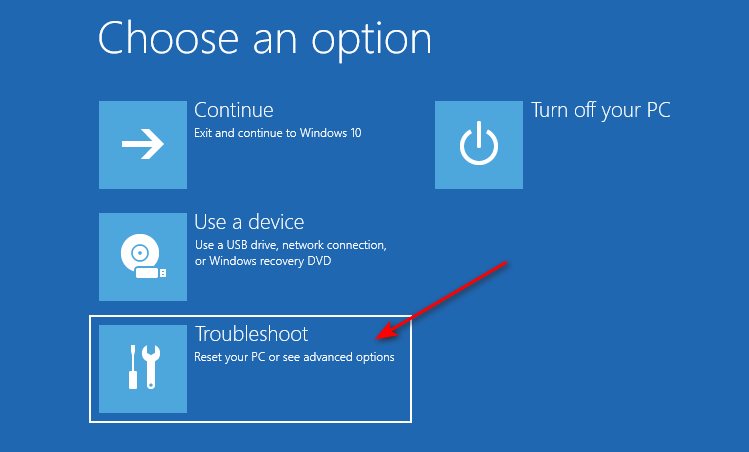
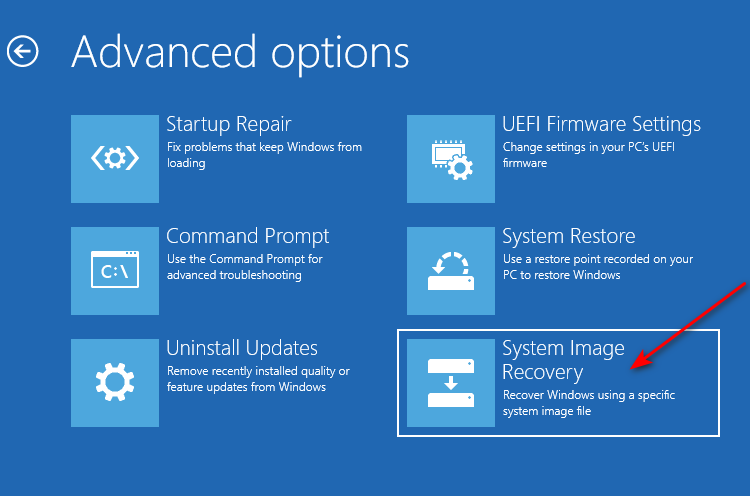
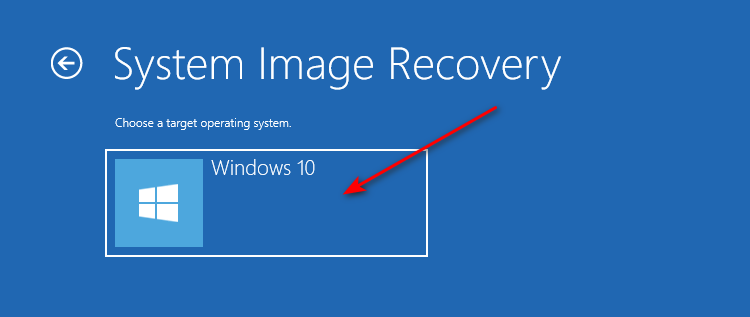
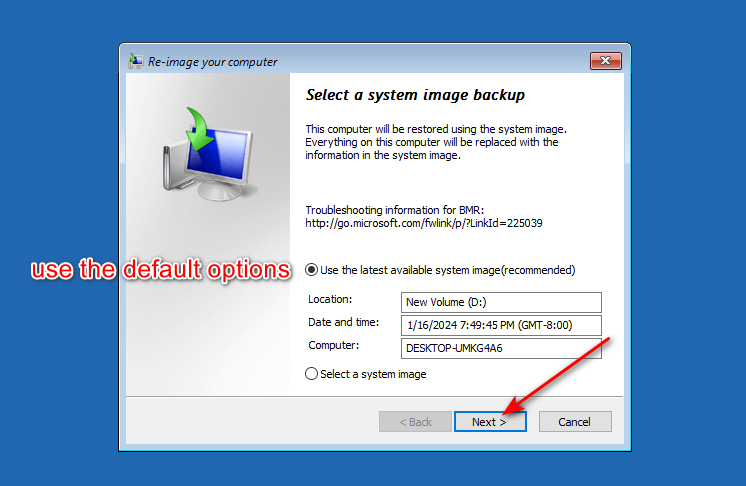
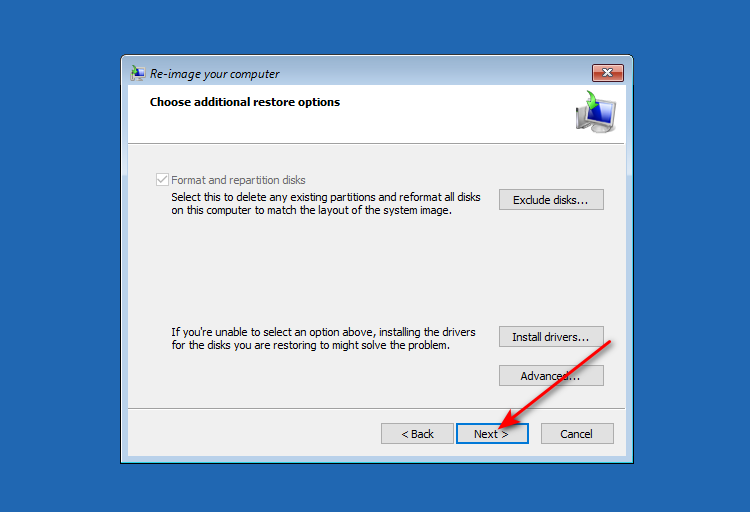
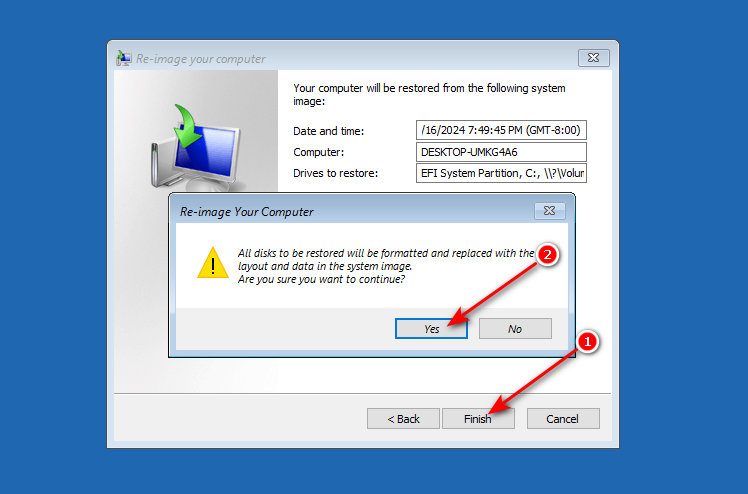
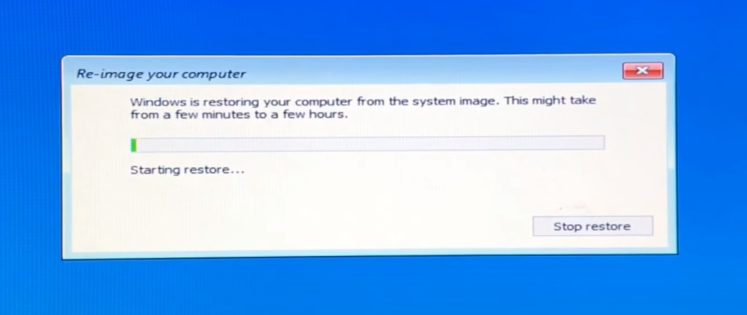
After restoring, restart your computer, and you have already cloned the system to a new hard drive successfully !
Tips:
1. If you are working with a desktop computer (where we assume there are two hard drives inside the case by default) , be careful not to select the wrong disk during the backup process. Before restoring the system, even if your desktop can accommodate multiple hard drives, you should remove the old system disk and replace it with the new one.
2. Most importantly, you must back up your data with CloneGo in case the data is lost during backup.
Watch the Video Tutorial
Learn how to copy system to a new hard drive without using thrid party software - Watch the video now!


