How to Avoid 100MB System Reserved Partition in Windows 7 Installation?
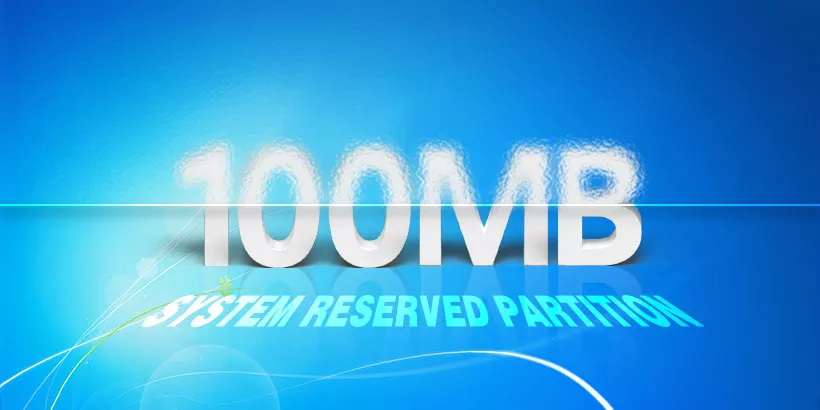
Windows 7 stores the system boot file and WinRE system on the 100MB system reserved drive. It also allows users access to the encrypted function in addition to safeguarding the system boot sector. However, it is not necessary for those users who don’t use the encrypted function. Therefore, this page will offer 2 methods to tell you how to avoid 100MB system reserved partition in Windows 7 installation.
What Trouble will the 100MB System Reserved Partition Bring out?
1. You can’t use the GHOST version system disc to install Windows 7, but to use the installation version to install step by step.
2. You can’t use one-key-restore software to back up the system after installation.
3. It is difficult to activate Windows 7 with 100MB, which may lead to failure.
How to Avoid 100MB System Reserved Partition in Windows 7 Installation?
Way One: Using Diskpart Command to Skip the System Reserved Partition.
Before following the steps, please remain in the first setup screen like below.
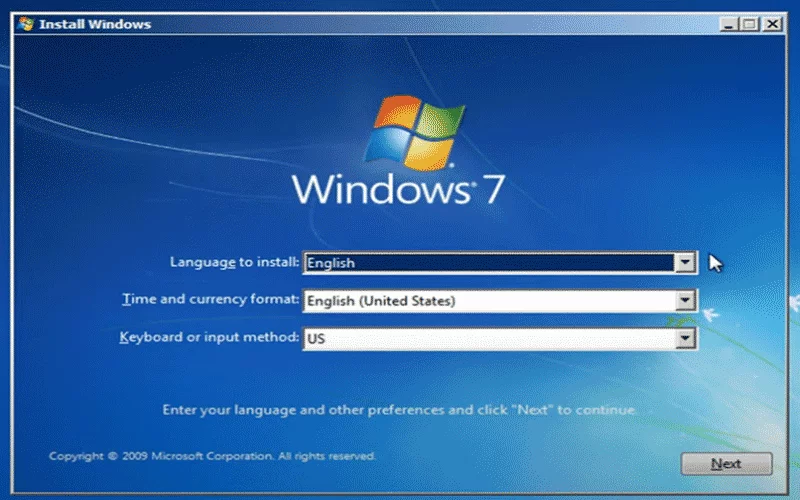
Step 1: Press “shift + F10” to open the command window → Type "diskpart" and hit the Enter button.
Step 2: Type the following commands in order:
list disk
select disk X (X replace to the disk number you want to install Windows.)
clean
create partition primary (this command will take up the whole disk, if you want to assign specific value of the partition, you can type “create partition primary size=102400” (the size’s default unit is MB), but remember that you must take up the entire space by giving no space for the system-reserved partition.)
select partition 1 (the partition you just created.)
active
format fs=ntfs quick
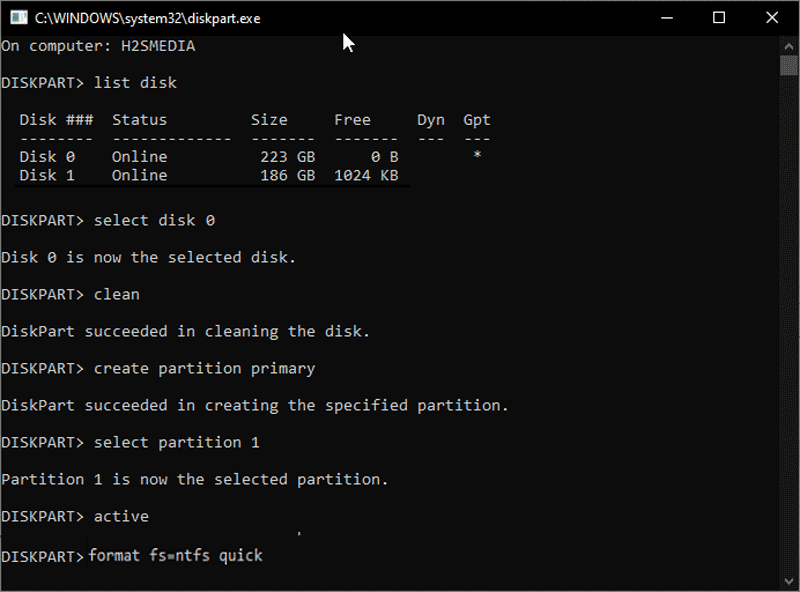
If you want to create multiple primary partitions, then repeat the steps from “create partition primary size=XXXX” to “format fs=ntfs quick”. If you just want to create one primary partition, you should assign a value of “create partition primary size=XXXX” before then continuously type the following commands:
create partition extended (create all the remaining space as an extended partition.)
create partition logical (you can specify the number to make the rest of the space as the logical partition, like create partition logical size=153600.)
format fs=ntfs quick
exit (to quit diskpart.)
exit (to quit command window.)
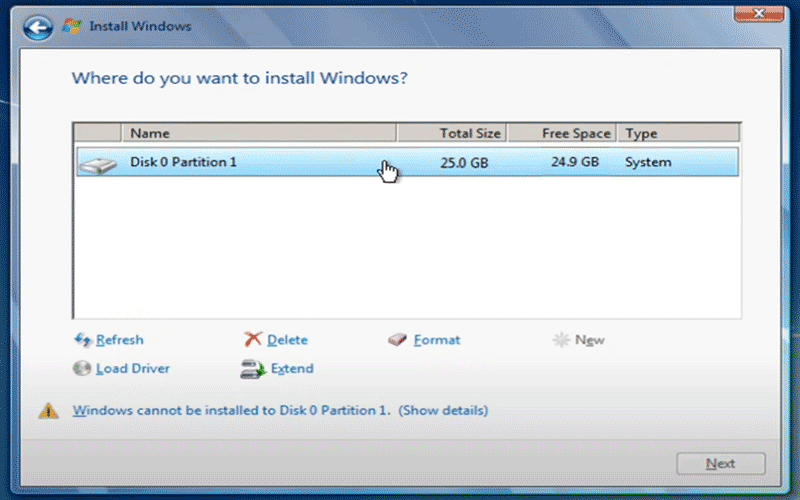
Then go back to the win7 installation partition step. In the screen of “Where do you want to install Windows”, you can see the partition you just created with no system reserved partition.
Way Two: Allocating the Partition to Format the System Reserved Partition.
The following method is based on a new, unpartitioned hard drive.
Step 1: Choose the partition → Click Drive options → Click Delete. Then it will pop up a window of “To ensure that all Windows features work correctly. Windows might create additional partitions for system files.” Just click OK.
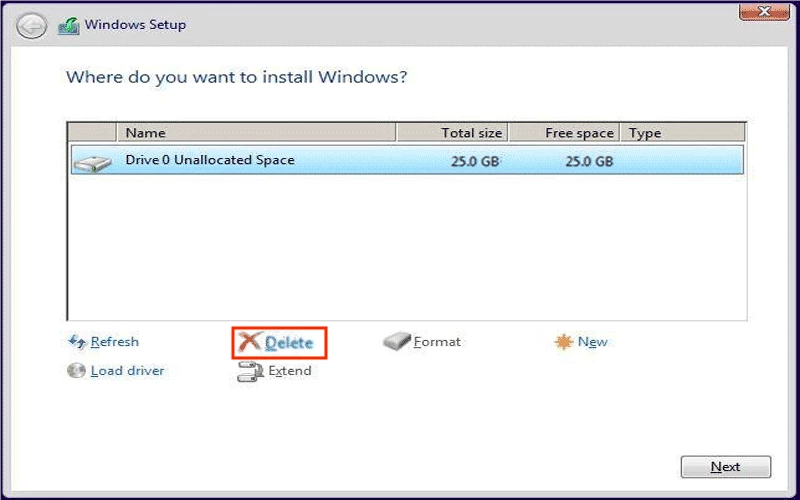
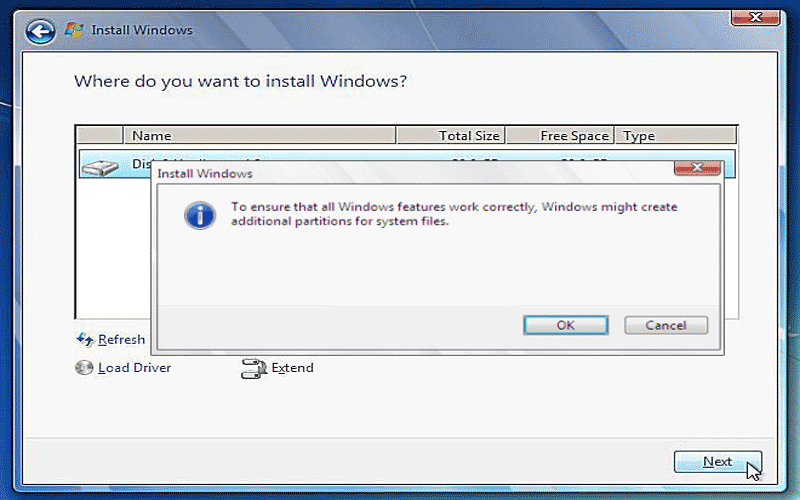
Then Windows might create two partitions: one is a 100MB system reserved partition, and the other is a primary partition.
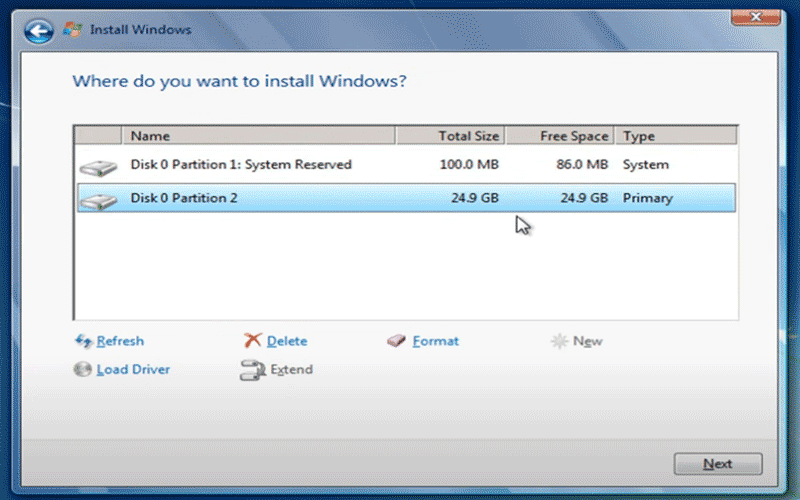
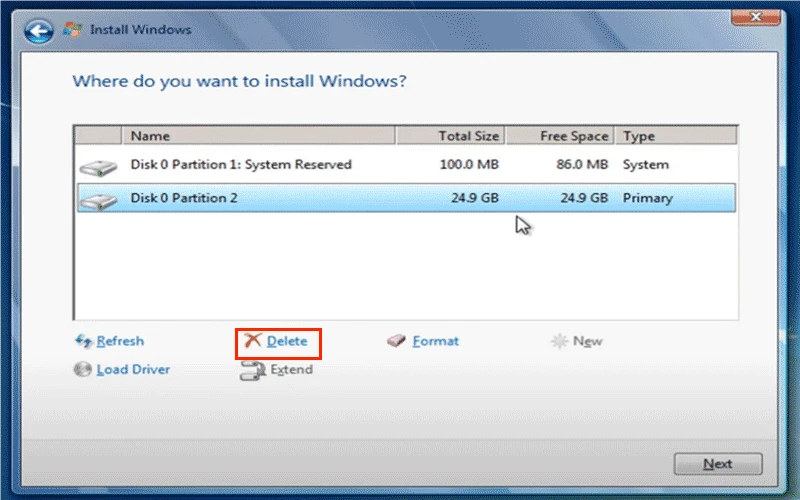
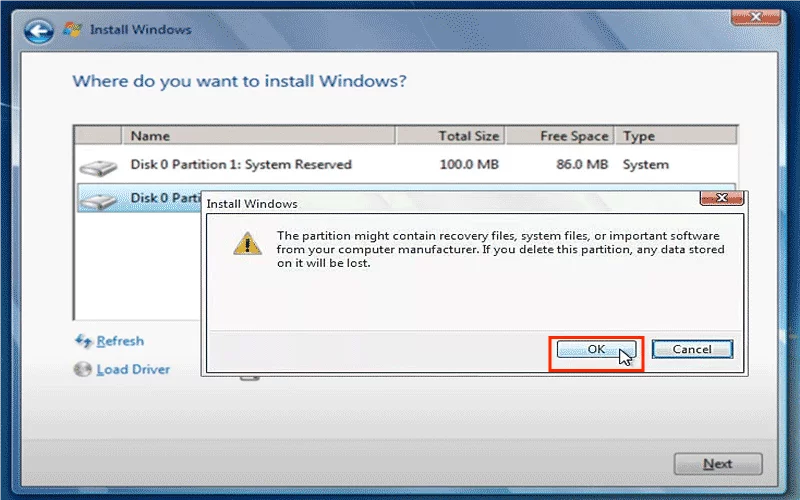
Step 2: Delete partition 2 → Click OK on the pop-up window of “The partition might contain recovery files, system files, or important software from your computer manufacturer. If you delete this partition, any data stored on it will be lost.” After that, the deleted partition will become an unallocated space.
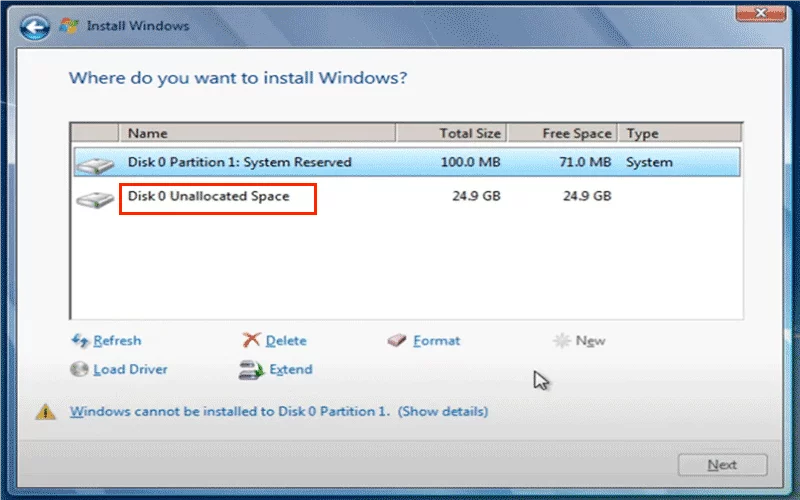
Step 3: Choose the partition 1 → Click Extend (the size is the current default value.) → Click Apply. Then click OK on the window of “Extending a partition is not a reversible action. If you proceed, you will not be able to undo this action later.”
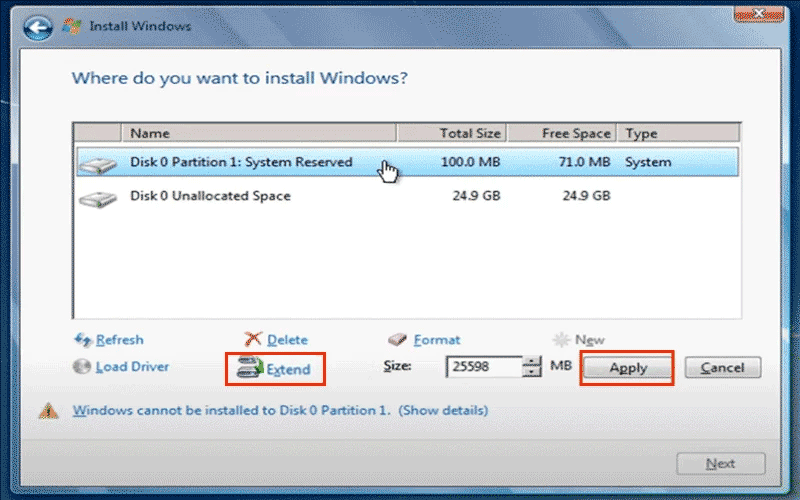
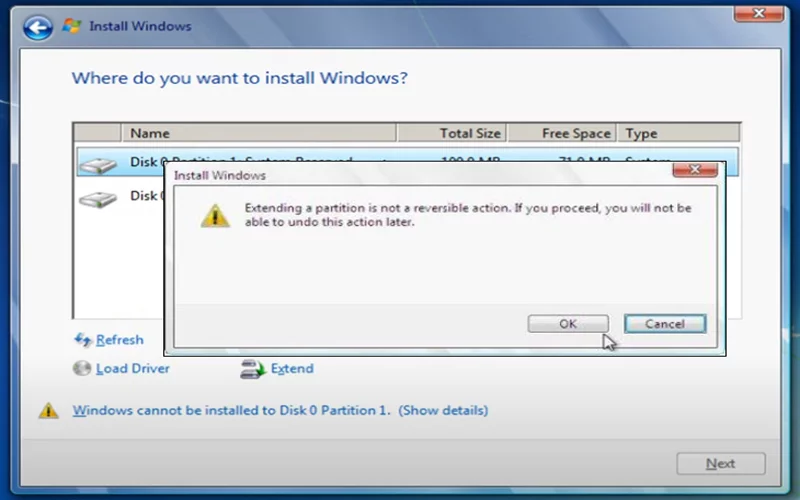
Step 4: Choose the partition 1 → Click Format. Then it will come a prompt of “The partition might contain recovery files, system files; or important software from your computer manufacturer. If you format this partition, any data stored on it will be lost.” Click OK on it.
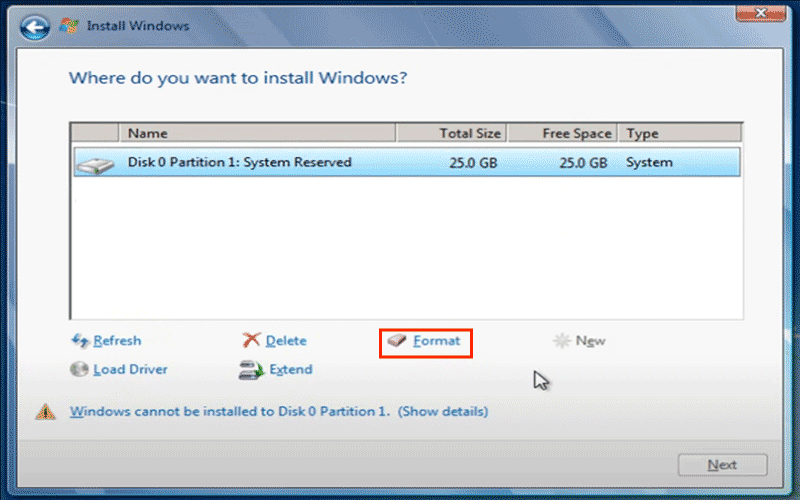
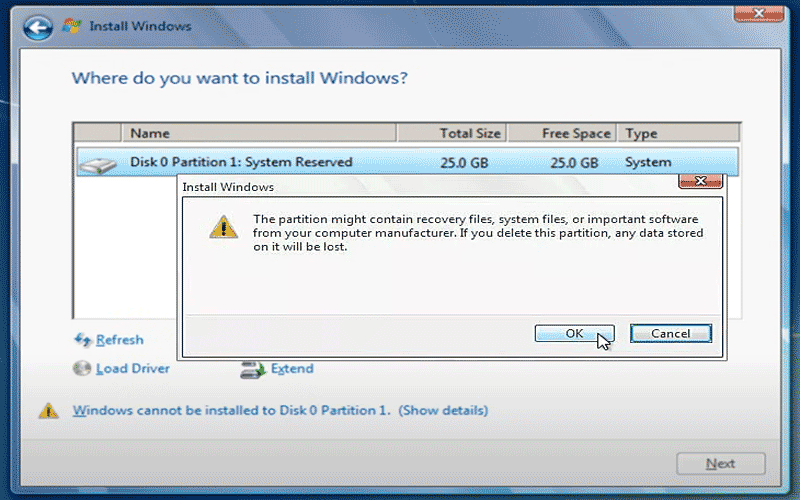
After finishing the above steps, you can find that the system reserved sign is gone. It becomes a normal primary partition. Then keep doing the Win 7 installation steps as usual.
