How to Change Administrator Name and Email on Windows 11
I am currently signed in with a local account on Windows 11. How can I go about changing the username associated with this account? Moreover, is it possible to modify the automatically generated username when signing in with a Microsoft Account? Additionally, I'm interested in linking the administrator account to another Microsoft Account. How can I achieve this? Lastly, is there a way to update the email address linked to the Microsoft Account? I will provide you with all the answers in how to change Administrator name and email on Windows 11. Let's dive in and get started.
Part 1: Ways to change Administrator name
There are two scenarios for changing your administrator name. If you are signed in with your Microsoft Account, you can modify it through the Settings. Otherwise, you will need to make the change using the Control Panel or by utilizing the netplwiz command. I will guide you through the process in the following content.
Way 1: Edit your Microsoft Account name via Settings
If your administrator account is linked to a Microsoft Account, you can use this method to change your administrator name.
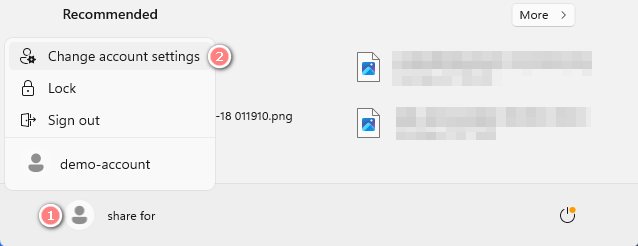
Step 1: Navigate to Settings -> Accounts -> Your info.
Tips: You can conveniently access it by clicking on your account name on the Start menu, then select Change account settings.
Step 2: Select Manage my accounts option under Related settings section.
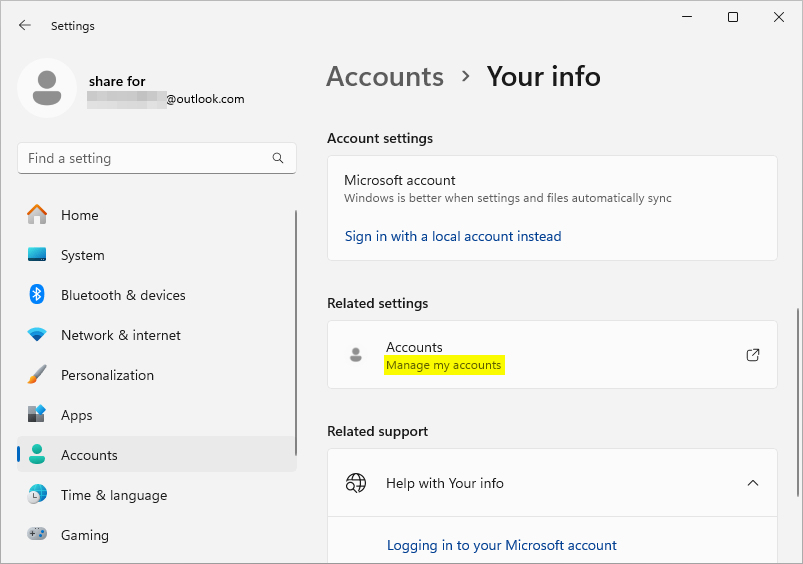
Step 3: Sign in to your Microsoft Account on the popped-up webpage.
Step 4: Click on Your info in your Microsoft Account management page.
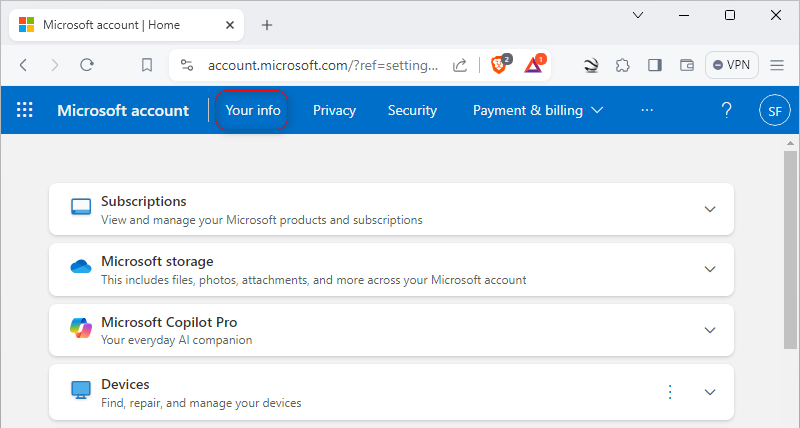
Step 5: Choose Edit name on Your info page.
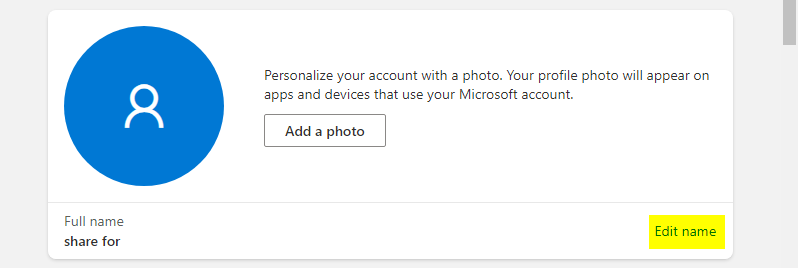
Step 6: Modify your account name and save the changes.
Step 7: Restart your computer to apply it.
Caution: This change will affects all the services provided by Microsoft.
Way 2: Modify your Local Account name using the netplwiz command
Step 1: Open the User Accounts window by typing netplwiz in the search bar.
Step 2: Double-click on the account you wish to modify.
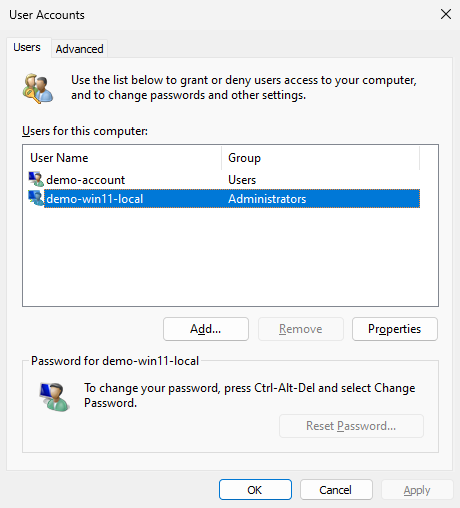
Step 3: Edit the administrator name and click OK.
Step 4: Changes will be visible after logging out and logging in again.
Caution: If both User name and Full name are set, the Full name will be displayed.
Way 3: Change your Local Account name through the Control Panel
Step 1: Open Control Panel and set the view to Category.
Step 2: Choose User Accounts and then click on User Accounts once again on the following page.
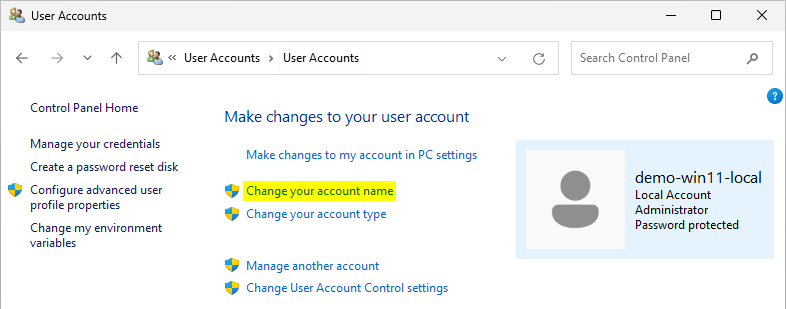
Step 3: Click on Change your account name on the displayed page.
Step 4: Enter a new account name and click the Change Name button.
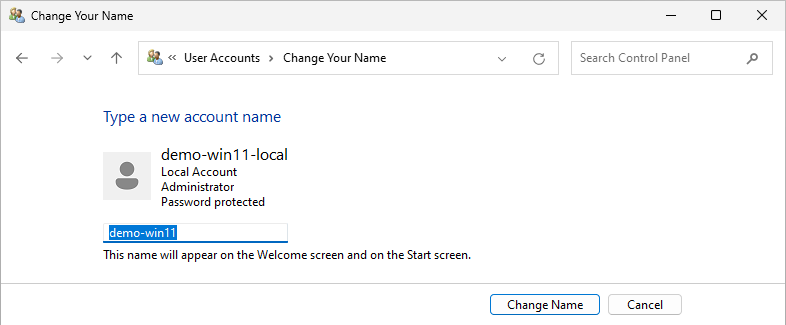
Note: This modification applies to the "Full name" field.
Step 5: Sign out and sign in again for the changes to take effect.
Part 2: Ways to update Administrator email
You can change the administrator email through two methods. The first involves linking your administrator account to another Microsoft Account, while the second entails updating the email address associated with your current Microsoft Account. I will elaborate on both methods in the following essay.
Way 1: Associate your computer with another Microsoft Account
If you wish to change your Microsoft Account associated with your administrator account, this method will be helpful.
Step 1: Switch to local account
1.1 Navigate to Settings -> Accounts -> Your info
1.2 Click Sign in with a local account instead under the Account settings section.
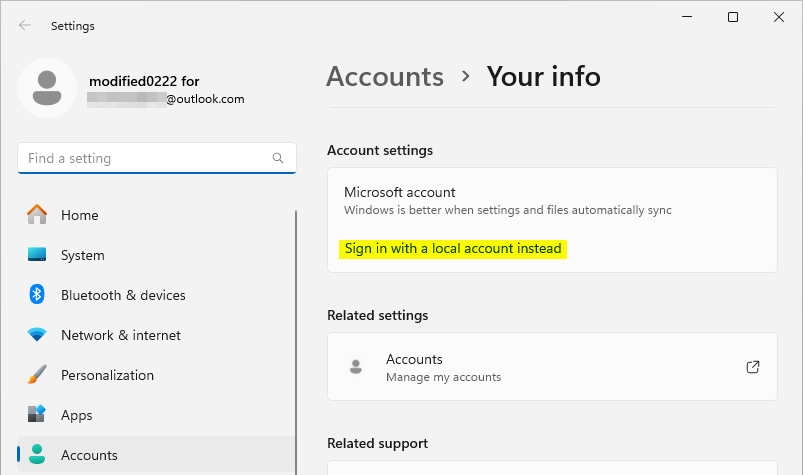
1.3 Follow the prompts to complete switch.
Step 2: Sign in with another Microsoft account
2.1 Repeat the same procedure to sign in with another Microsoft Account.
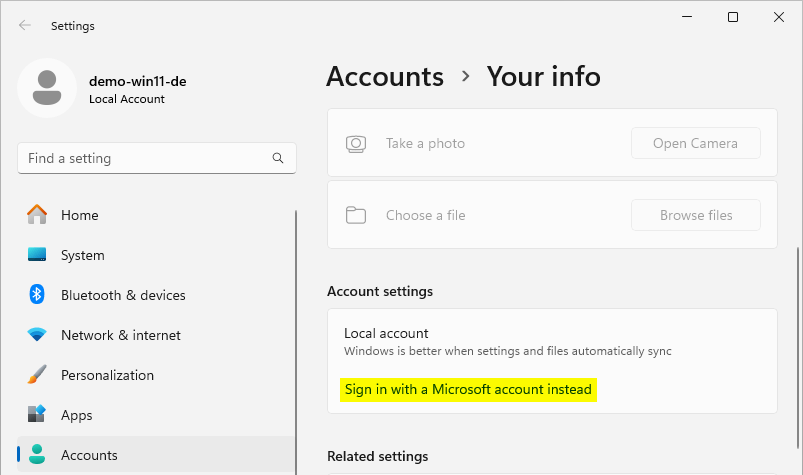
2.2 Complete the configuration of your Microsoft Account following the prompts.
The process of updating your Microsoft Account linked to your administrator account has been successfully completed thus far.
Way 2: Update the email address linked to your Microsoft Account
You can also change administrator email through updating the email address associated with your Microsoft Account. The following is a detailed procedure.
Step 1: Navigate to the Your info page on your Microsoft Account management page, following the previously outlined steps.
Step 2: Click on Edit account info in the Account info section.
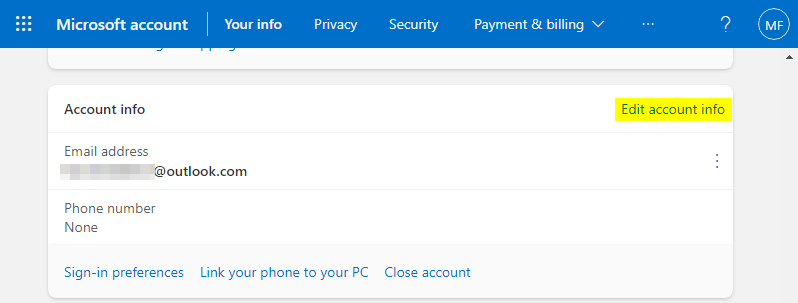
Step 3: Verify your identity.
Step 4: Choose Add email and follow the prompts to complete the process.
Step 5: Set the newly added email as the primary email.
Step 6: Now you can remove the previous email if it is no longer in use.
Note: This operation requires identity verification, so ensure you remember the relevant information to successfully complete the verification process.
Closing Words
Regardless of your reasons, feel free to update your administrator name and email now. Trust that, by following the steps outlined in the article, you will eventually achieve your goal.


