How to Customize and Beautify Windows Terminal?
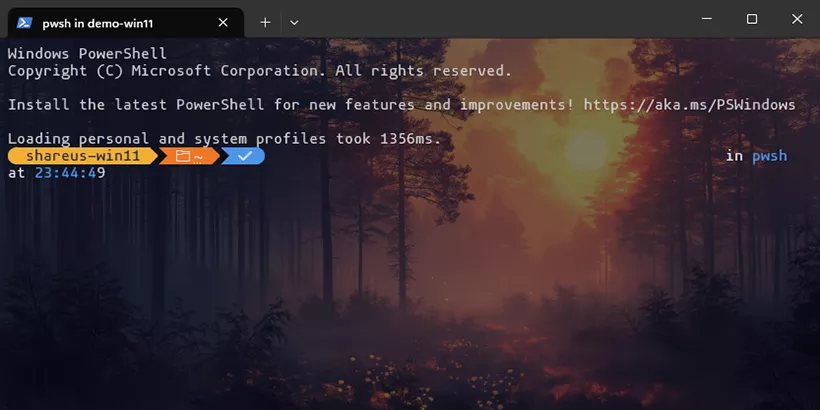
If you are dissatisfied with the plain Windows Terminal interface and want to enhance its appearance, this article is tailored for you. It will guide you through customizing and beautifying the Windows Terminal step by step.
Part 1: What Is Windows Terminal
Windows Terminal is a modern command line app built in Windows 10 2004(build 19041) or later. It contains support for Command Prompt, PowerShell, WSL(Windows Subsystem for Linux) and Azure Cloud Shell Connector and can be used for connecting to SSH by configuring a profile. It is a multi-tabbed terminal that replaces the default Windows Console on recent versions of Windows for greater convenience.
It is powerful, and you can further improve your productivity and workflow by customizing it to suit your needs. Let's get started.
Part 2: Customize and Beautify Windows Terminal
First, you should check the version of your Windows Terminal.
Check and Update Windows Terminal
Step 1: Open the Windows Terminal by running wt command in the Run dialog. Alternatively, you can search "terminal" in the search bar and open it from the appeared results.
Note: If your computer doesn't include Windows Terminal, you can install it from the Microsoft Store. It is worth mentioning that Windows Terminal is available on Windows 10 2004(build 19041) or later.
Step 2: Type wt -v to get current version information. Compare it with the latest version information on the official website. The latest version is v1.20.11271.0 as of the time of writing this article.
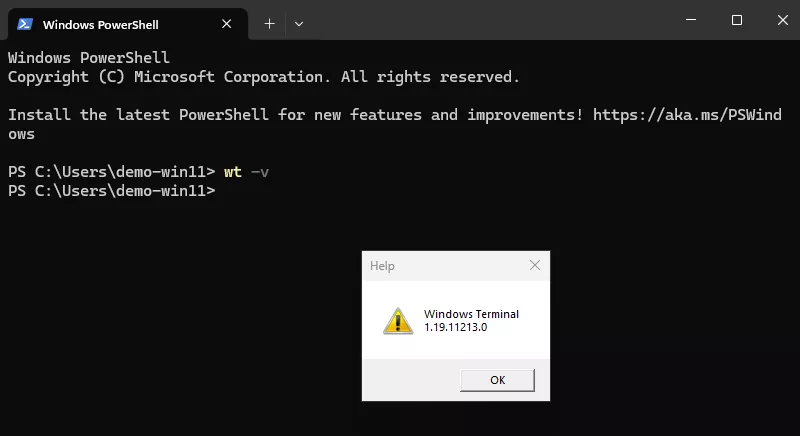
Step 3: If the version isn't the latest, update it in the Microsoft Store.
Customize the Background
You can customize the appearance of every command-line tool separately. The Windows Terminal provides many options for you to customize the interface, such as font, font size, color schemes, and background. I will take changing the background as an example to demonstrate.
Step 1: Open the settings page by clicking the drop-down arrow then selecting "Settings" option in the terminal window. Alternatively, the "Ctrl + ," shortcut key can also open the settings page.
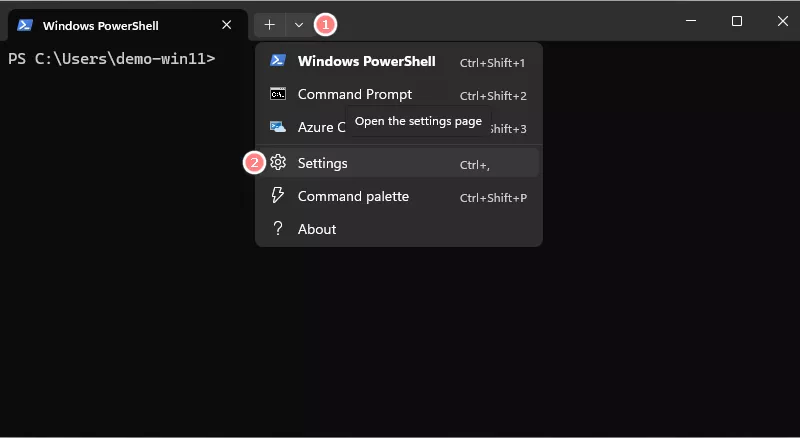
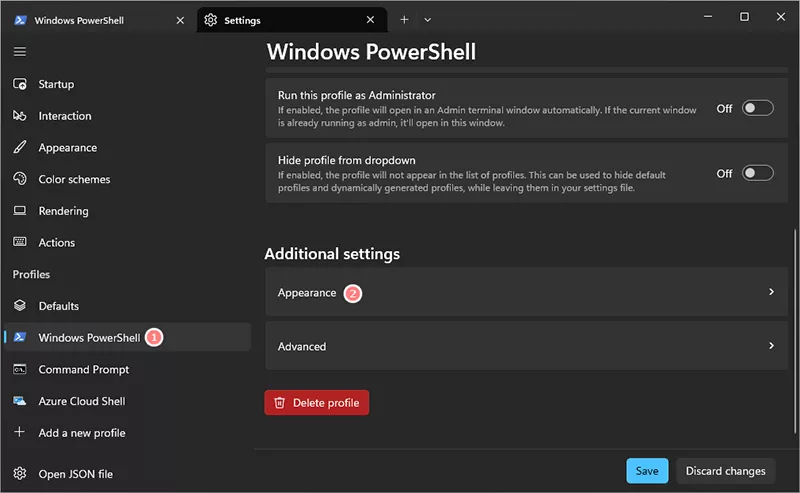
Step 2: Navigate to the command-line tool you want to customize in the left panel and click it.
Step 3: Scroll down to locate and click the "Appearance" option under the "Additional settings" field in the main panel.
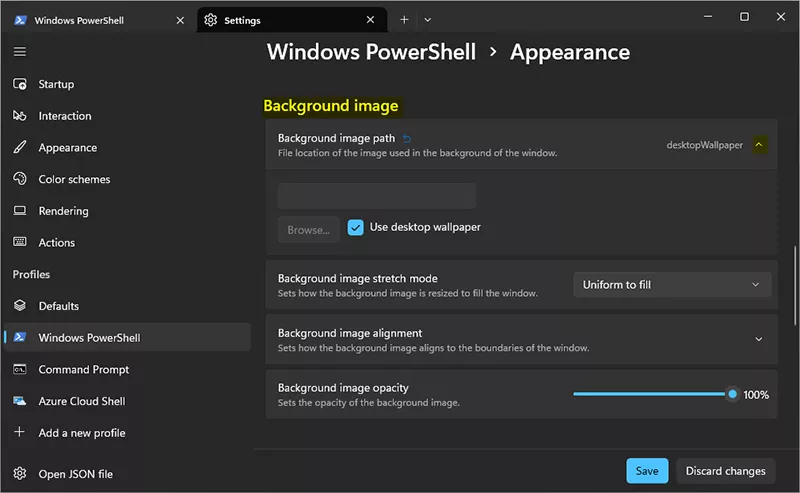
Step 4: Scroll down again to find the "Background image" field, then click the drop-down arrow. Type the path of image you want to set as background or click "Browse" option to select. After you set a background image, you can adjust its effect further using the appeared options, such as " Background image opacity ".
Note: If you want to set your desktop wallpaper as the background, check the 'Use desktop wallpaper' checkbox. After setting this, your terminal background will be consistent with the Windows desktop.
Step 5: Scroll down further to locate the "Transparency" field and modify the opacity of the window to your preferred percent. If you like acrylic effect, toggle on the "Enable acrylic material" option.
Step 6: Click "Save" option to apply these changes.
The operation is similar on all command-line tools, and you can explore more personalization in this position by yourself.
Customize the Theme Using Oh My Posh
Not satisfied with the current interface? Consider using the "Oh My Posh" theme engine for additional customization. It provides richer themes and personalization options to enhance your experience.
Install "Oh My Posh"
Step 1: Open Windows Terminal as administrator by searching for 'Windows Terminal' in the search box, right-clicking the results, and selecting the 'Run as administrator' option.
Step 2: Type winget install JanDeDobbeleer.OhMyPosh -s winget to install the Oh My Posh.
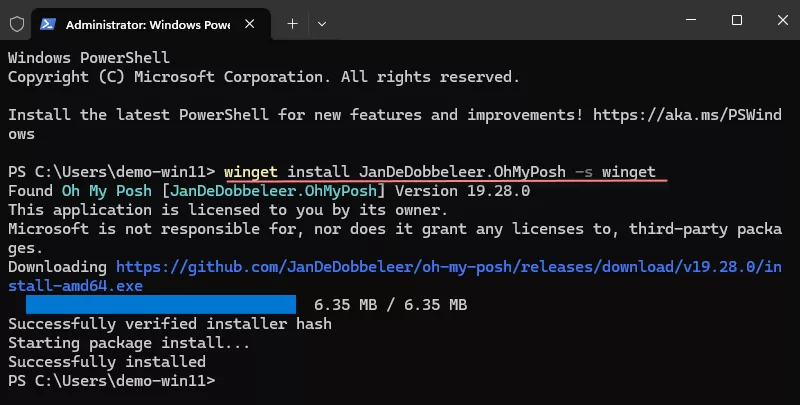
If the winget command is not available, you can get more information from this page.
Step 3: Wait for the installation to complete, then close the Windows Terminal window.
Install Nerd Fonts and Configure Terminal to Use It
Step 1: Open the terminal again as administrator. Then install the Nerd Font by running oh-my-posh font install command.
Step 2: Move cursor to the font you want to install from the displayed fonts list, then press enter.
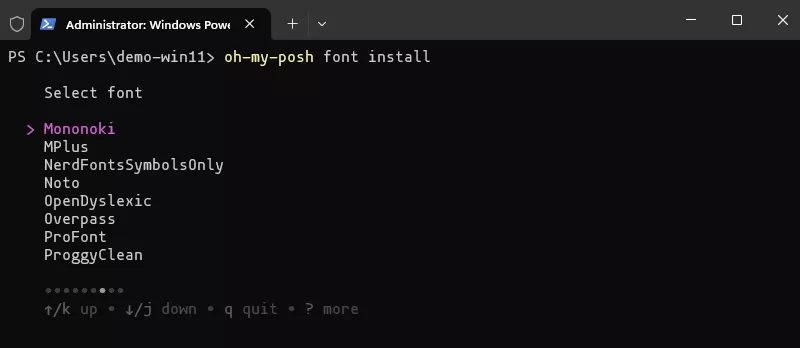
Tip: You can find more fonts from nerd fonts. The usage method is downloading and unzipping it, selecting all files and right-clicking them, then selecting "Install" in the context menu to complete installation.
Step 3: Wait for this process to complete.
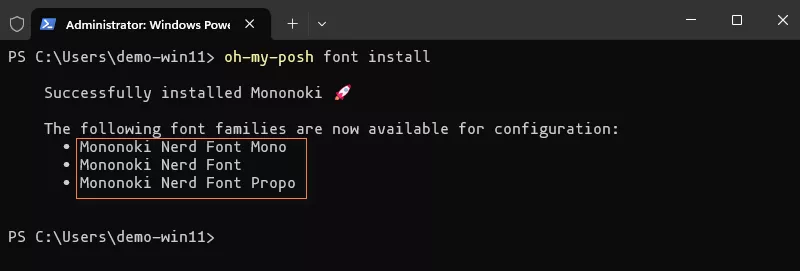
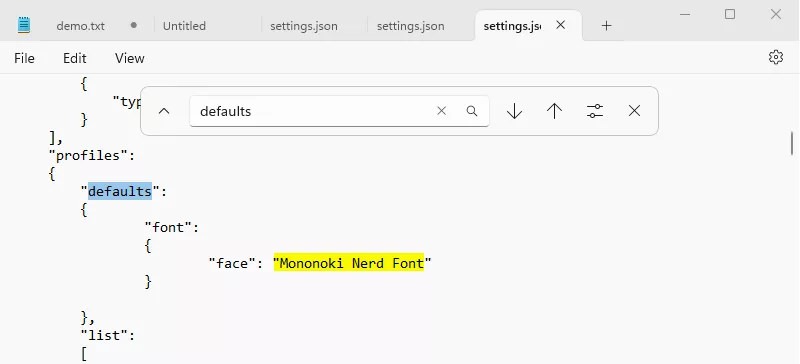
Step 4: Configure the Windows Terminal to use this font by modifying the "settings.json" file. Press "Ctrl + Shift + ," to open it directly. Add the font.face attribute under the defaults attributes in profiles, as shown in the picture. The value should be your selected font name.
Configure Your Shell to Use Oh My Posh
Step 1: Create the profile script by using the New-Item -Path $PROFILE -Type File -Force command.
Step 2: Open the profile by running the notepad $PROFILE command. You can change the "notepad" to other text editor you want to use.

Step 3: Add following line to this file.
oh-my-posh init pwsh | Invoke-Expression
Step 4: Running . $PROFILE to reload this profile script.
Note: If you encounter the error "xxx cannot be loaded because running scripts is disabled on this system...", run Set-ExecutionPolicy -ExecutionPolicy RemoteSigned -Scope LocalMachine to enable running local scripts and require remote scripts to be signed.
Step 5: The Oh My Posh is applied on PowerShell now. If you want to apply it on other command-line, refer this page.
Configure a Theme(Optional)
If you want to try the theme provided by oh my posh, refer "themes" to accomplish it.
The operations on other command-line tool is similar, you can get the corresponding commands from the official page.
Back Up Terminal Settings
The "settings.json" contains all configuration information, so if you want to back up the Windows Terminal settings, all you need to do is storing this profile on a other position.
The location of this file is %LocalAppData%\Packages\Microsoft.WindowsTerminal_8wekyb3d8bbwe\LocalState. Paste it into the address bar of File Explorer and back up the file to another position.
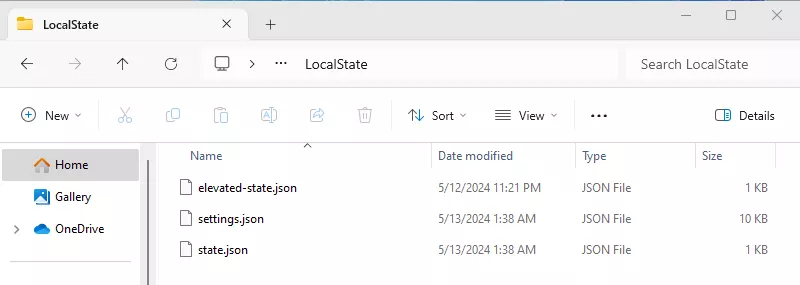
When you need to apply these settings, use this file to replace the original "settings.json" file.
Conclusion
This article displays how to customize the background and enhance the terminal interface, and recommends a powerful tool, Oh My Posh. Give it a try to achieve your preferred interface now.


