Step by Step Guide to Make Windows 11 Look Like macOS

While Windows 11 offers a more modern appearance, it still falls short of macOS aesthetics. If you prefer not to switch to macOS but desire a macOS-like display, this article is tailored for you. Let's explore how to make Windows 11 resemble macOS.
Prerequisites
Before getting started, make sure to complete the following preparations:
1. Create a restore point as a precautionary measure against potential issues. You can follow the steps outlined in Microsoft's guide on how to create a system restore point.
2. Ensure a stable internet connection for downloading necessary files.
3. Have a basic understanding of Windows system settings and configurations.
Way 1: Make Windows 11 resemble macOS using an integrated toolkit
In this process, I will utilize the macOS Transformation Pack 5.0 to give Windows 11 a macOS-like appearance. While it is relatively easy to configure, please note that this tool is a few years old, and its style may not match the latest macOS aesthetics. Without further ado, let's get started.
Step 1: Download the macOS Transformation Pack 5.0 archive.
Note: Please be aware that there is a 10-second wait time before the download link appears, and the website may contain some intrusive ads. To avoid this inconvenience, you can opt to download from this mirrored site.
Step 2: Unzip the downloaded file using the password "thememypc.net".
Step 3: Execute the "macOS Transformation Pack 5.0.exe" program located in the decompressed folder.
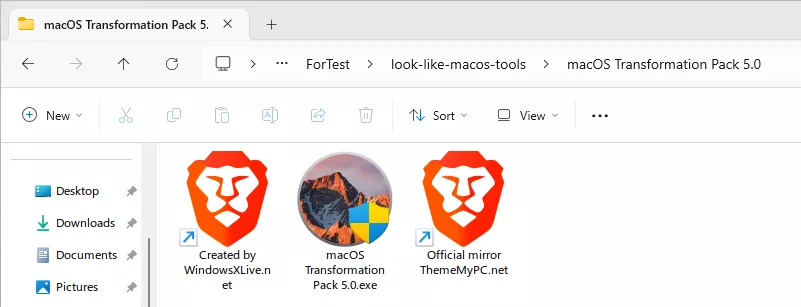
Step 4: Follow the on-screen instructions to complete the installation.
Note: During the installation, the screen may temporarily turn white. Don't worry and wait for the process to finish. You have the option to uncheck the "Set Windows X's Live as default homepage" in the lower-left corner if you don't need it.
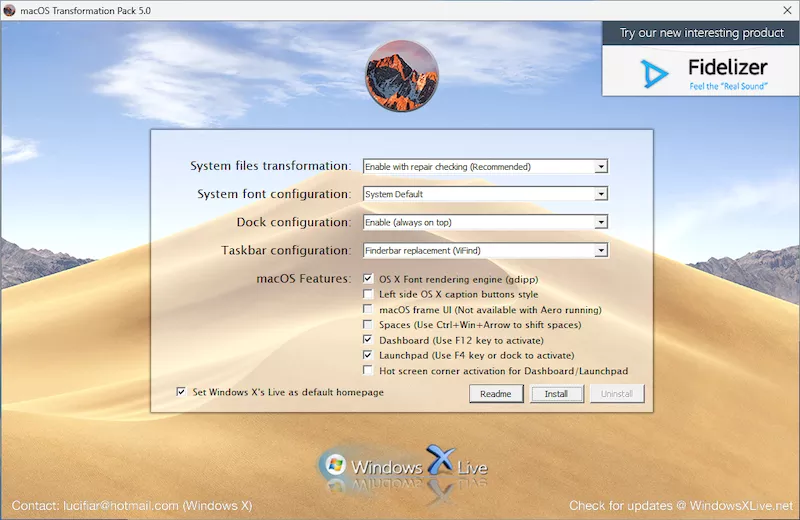
Step 5: When prompted to restart during the installation, select "OK" to complete the setup.
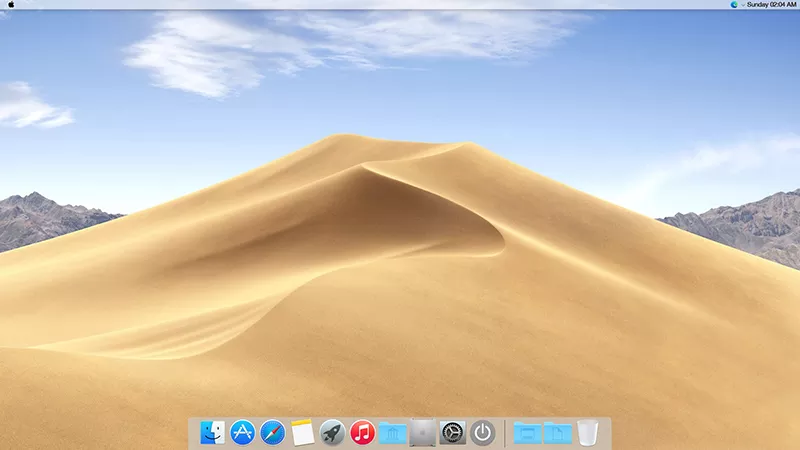
Step 6: After the computer restarts, you'll observe that Windows 11 now resembles macOS.
Note: This process may take some time, and be a little patient.
Tip: Desktop icons will still be visible. To hide them, right-click on a blank desktop space, then select View -> Show desktop icons from the context menu.
The final result is shown below.
Way 2: Make Windows 11 look like macOS with a set of tools
In this sector, I will introduce you how to make Windows 11 resemble macOS step by step. Although this method may require some simple configurations, it is relatively new and offers much greater flexibility. And in this way, you can see how the Windows desktop gradually resembles macOS after each step of setup.
Part 1: Emulate macOS Dock
I will use MyDockFinder to complete this operation. It provides not only the macOS Dock but also the Top Menu, Launchpad, and other useful features. If your goal is to exclusively implement the macOS Dock, you can configure it accordingly or utilize alternative tools like TranslucentTB and Winstep Nexus. Next I will use MyDockFinder to demonstrate.
Step 1: Download the "MyDockFinder.zip" archive in this page.
Step 2: Unzip the file to a specified location.
Step 3: In the decompressed folder, open the "lang" subfolder and delete the "Chinese.ini" file.
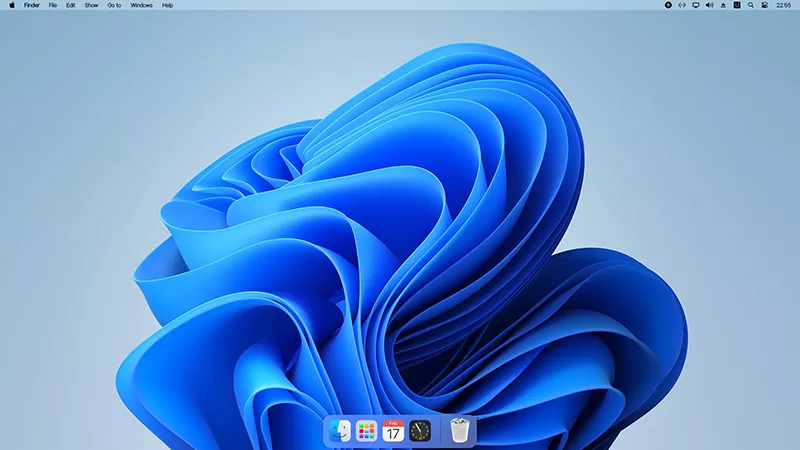
Step 4: Run the "Dock_64.exe" program to use this tool. Now you get the dock and top menu style of macOS.
Step 5: This app doesn't start automatically by default, You can add it to the boot list manually.
Tip : You can do it by running shell:startup command to open the Startup folder and then simply drag the shortcut of the application into this folder.
Step 6: To give your Windows desktop a more macOS-like appearance, consider hiding the Windows taskbar.
Note: Navigate to Settings -> Personalization -> Taskbar -> Taskbar behaviors -> Automatically hide the taskbar. This configuration ensures that the taskbar becomes visible when you move the cursor to its position.
Tip: If you prefer a more permanent hiding solution, you can use ButteryTaskbar2 to hide it completely.
The effect is show in the picture.
Part 2: Replicate macOS Top Menu
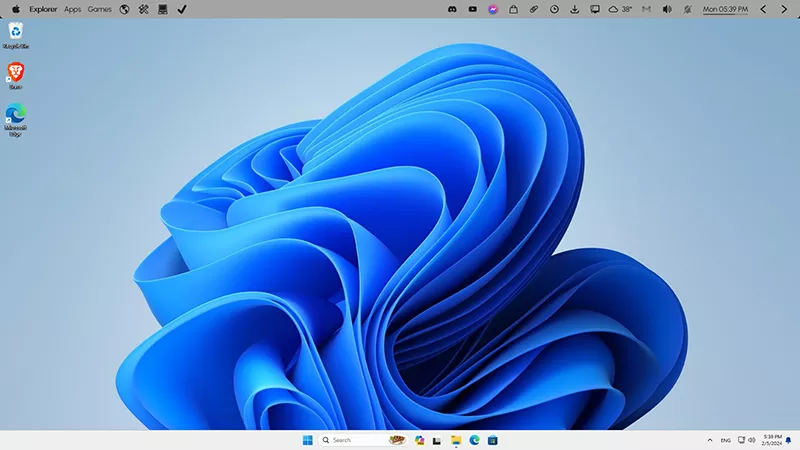
If you mimic macOS dock using the MyDockFinder, you've already acquired the macOS top menu; now, proceed to the next section. Alternatively, you can opt for droptop four to mimic the top menu. It is a rmskin package of Rainmeter. You can get the macOS top menu by this rmskin package.
Before installing droptop four, you need to install and execute Rainmeter first. It is a open source software that allows you to display customizable skins on your desktop. Download and install it while retaining its default setup.
Step 1: Run the Rainmeter application at least once.
Step 2: Double click the Droptop_Basic_Version.rmskin to install it.
Step 3: Follow the on-screen prompts to complete the installation and configuration.
Step 4: You can manage it either in the basic Manage window of Rainmeter or through its own menu later.
Tip: The icon of Rainmeter is in the Windows System Tray. Click it to open the basic Manage window.
Part 3: Create macOS-style Widgets
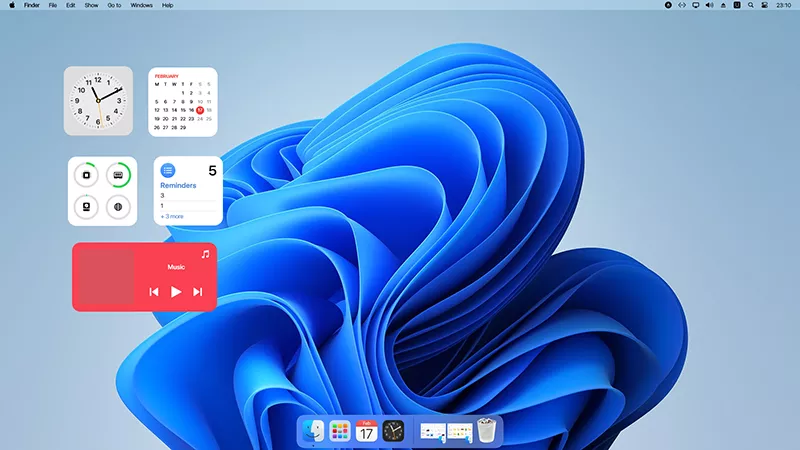
I will use the MontereyRainmeter rmskin to accomplish this. The installation and configuration steps are similar to install Droptop_Basic_Version.rmskin. You can also configure it through its own graphical user interface. (Position the cursor over a widget, then right-click and choose "Edit widgets" to launch the management window.)
The result looks like this.
Part 4: Configure macOS Wallpaper
The WinDynamicDesktop will help us to complete it. Besides it can automatically change the wallpaper based on the time.
Step 1: Download and install it like any other Windows applications.
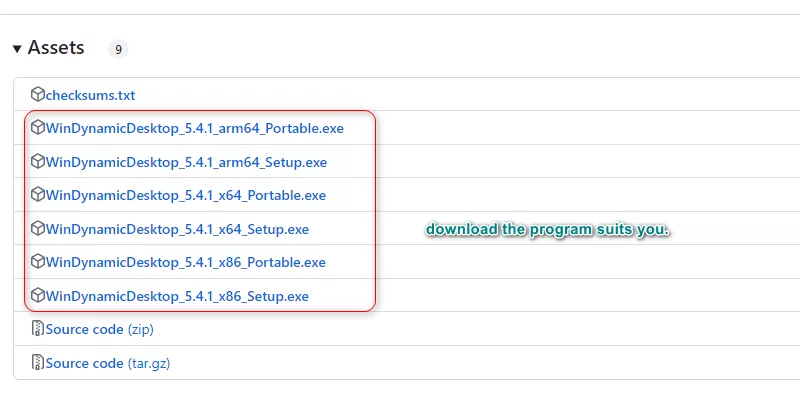
Step 2: Complete the installation and configuration following the instructions of the setup program.
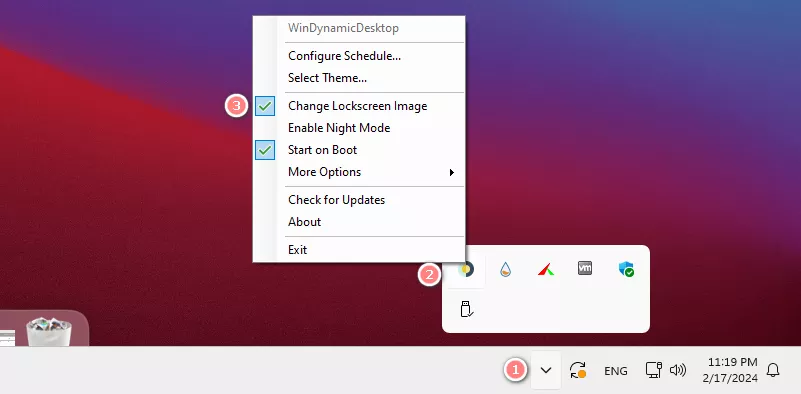
Step 3: Furthermore, You can enhance the resemblance to macOS by concealing the desktop icons. Here's how you can do it.
Tip: It can also transform the Lock Screen into the macOS style.
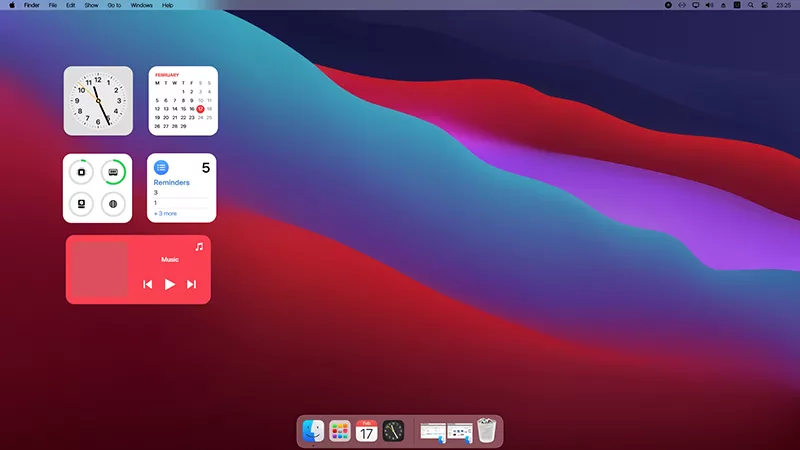
It now looks very similar to macOS.
Part 5: Customize mouse cursor style
You will find the cursor style remains the Windows cursor. We can change it by using the macOS Cursors Megapack for Windows. The following is a detailed procedure.
Step 1: Download the Source code(zip) file in this page.
Step 2: Unzip it and select the cursor folder you want to use in the unzipped folder.
Tip: My choice is "macOS-cursors-for-Windows-0.5 -> 1. Sierra and newer -> 2. With Shadow -> 1. Normal" folder. Feel free to select the one you like.
Step 3: Right click Install.inf file and select Install option to install it.
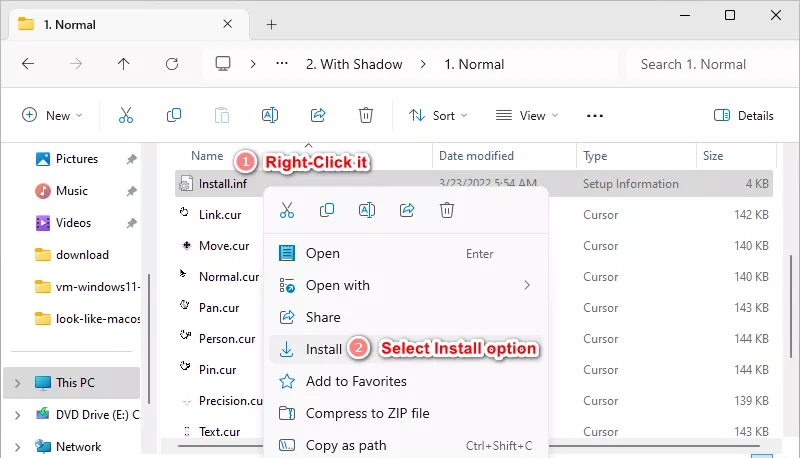
Step 4: Cursors will install automatically and the Mouse Properties menu will be prompted.
Step 5: Refer to the video below to complete the configuration. If you don't like the cursor style after making changes, you can change it back in the Mouse Properties menu.
Note: You can open the Mouse Properties menu by inputting "pointer" in the search box and select "Change the mouse pointer display or speed".
Step 6: Now the macOS-style cursor is set.
Part 6: Imitate macOS Launchpad
I will show you how to get macOS Launchpad in this section. The tool we used is WinLaunch.
All you need to do is to download and install it on your Windows computer. You can activate WinLaunch by pressing "Shift + Tab" or moving the mouse into the upper left corner of the screen after you install it. Additional information is available on this page for your reference.
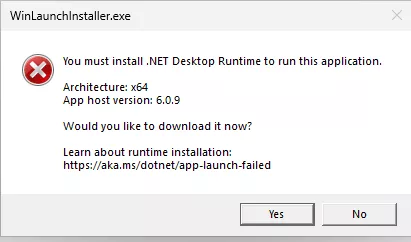
Note: You may be asked to install .NET Desktop Runtime, select "Yes" and install it according to the instructions displayed on the screen.
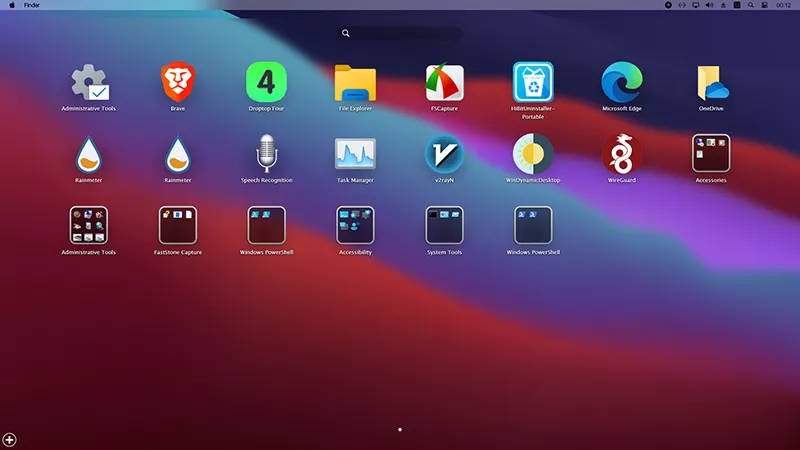
The launchpad effect looks as follows.
Closing Words
In this article, we adopt two ways to make Windows 11 resemble macOS. In the first way, we achieve the goals with the help of macOS Transformation Pack 5.0 theme pack. This way is very easy and no additional configuration is required. On the other hand, since this installation package is a few years old, the style may not be so modern. In the second method, we finished mimicking the look of macOS step by step. Although it requires us to do some configuration, the process of looking at a little bit of change and a relatively new style is worth the effort.
In any case, feel free to choose the option that suits you best, and hopefully, this article proves helpful to you.
I have packed all the tools into a zip package. You can download it from here or from the official site mentioned in the article.
Watch the Video Tutorial
Detailed guide to make Windows 11 look like macOS - Watch the video now!


