How to Convert Apple HEIC Images to JPG in Windows 11

HEIF stands for High-Efficiency Image Format, which enables images to be stored in higher quality while taking up less space on your drive. However, not all devices and software support HEIC format. For example, some devices and software do not support editing or sharing heic images. So, you need to convert HEIC images to JPG, which can make them more compatible.
Way 1: Use libheif-Windowsbinary Program
Step 1: Download the relevant tools.
Click on the Download link under 64-bit x64 to download and install the 7-Zip program.
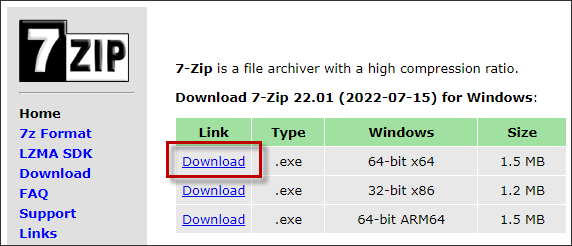
Download and extract the libheif-1.14.0-win64.7z program archive and the source code archive.

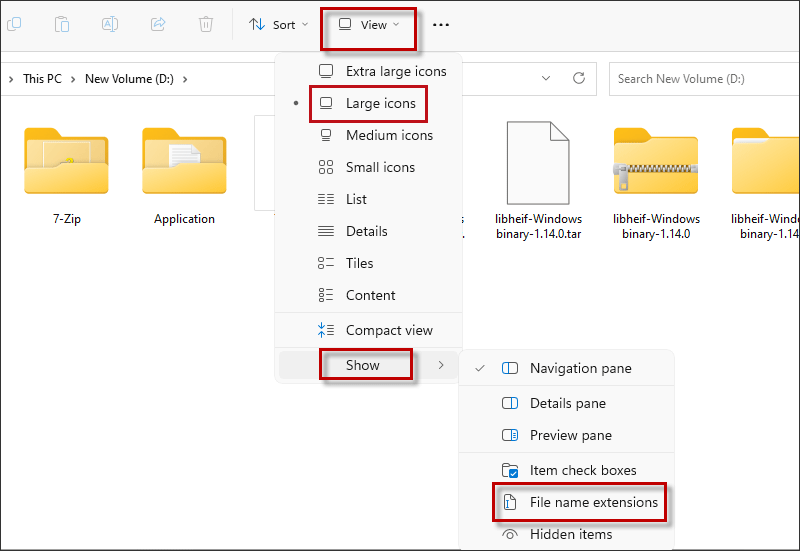
Step 2: In the file manager click on View in the menu bar, then click on Large icons to set a larger preview of the image. And click on Show to set File name extensions.
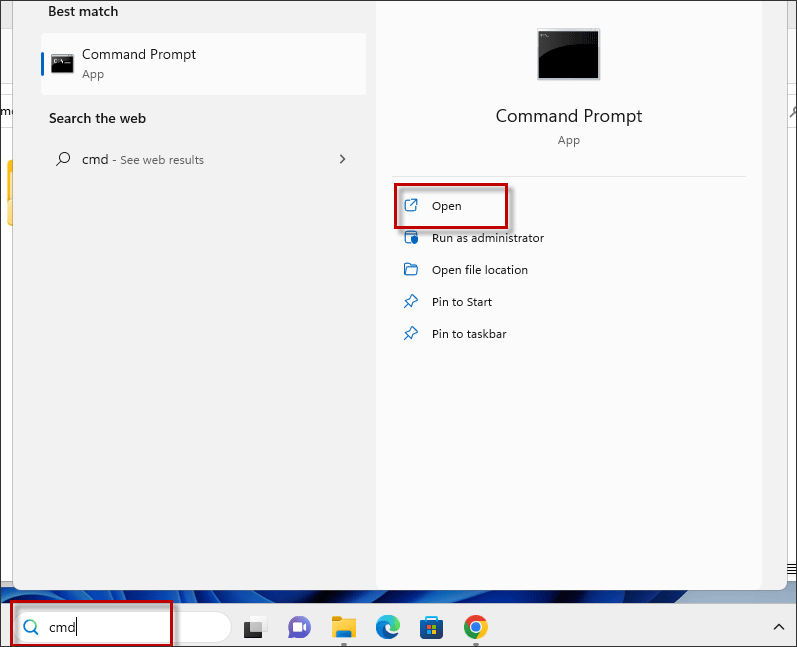
Step 3: Type “cmd” in the search box to find Command Prompt and open it.
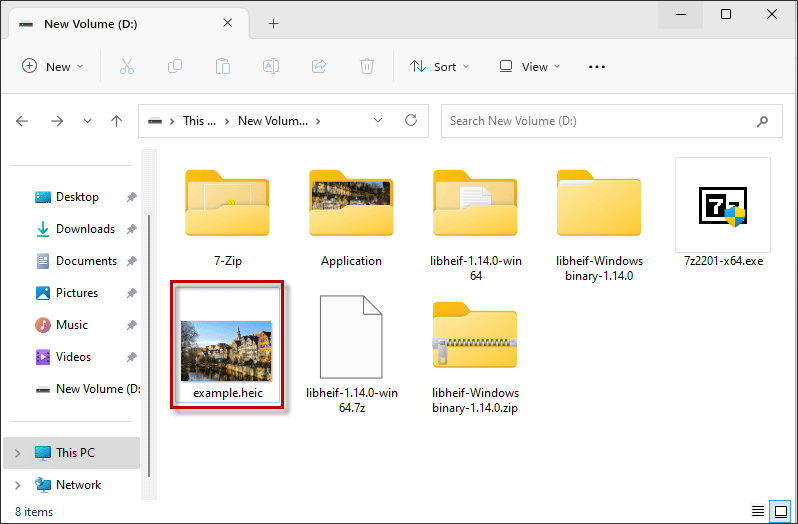
Step 4: Once the CMD window opens, enter the command: copy "D:\libheif-Windowsbinary-1.14.0\libheif-Windowsbinary-1.14.0\examples\example.heic" "D:\". Then press the Enter key.
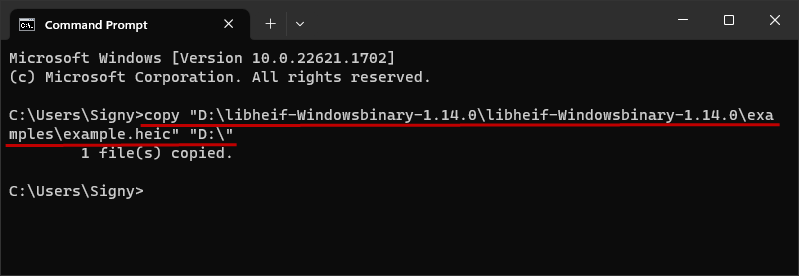
Open the D drive in the file manager and see that example.heic has been successfully copied and pasted into the root directory of the D drive.
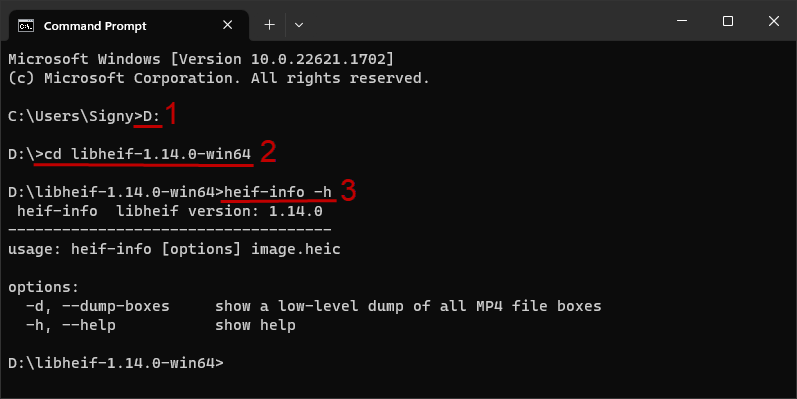
Step 5: Enter the command in this order: D:>cd libheif-1.14.0-win64>heif-info -h and press Enter key to view the help information for the heif-info program command.
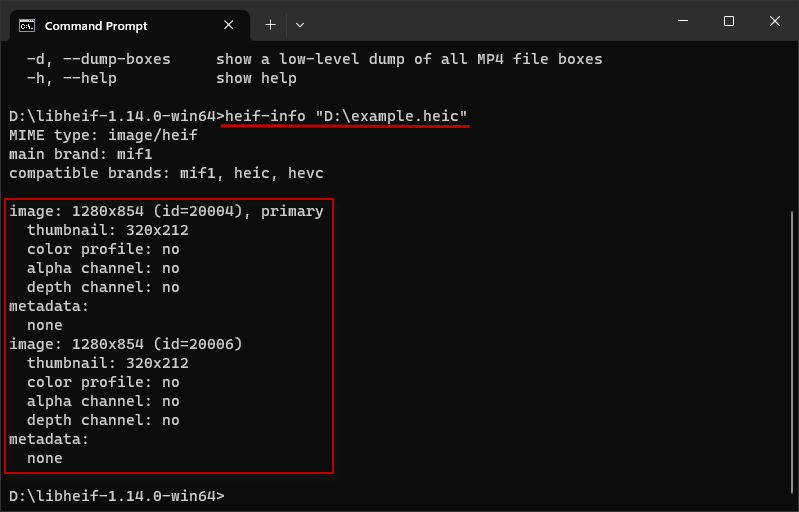
Step 6: Enter the command: heif-info "D:\example.heic" and press the Enter key to get information about the image example.heic on the D drive.
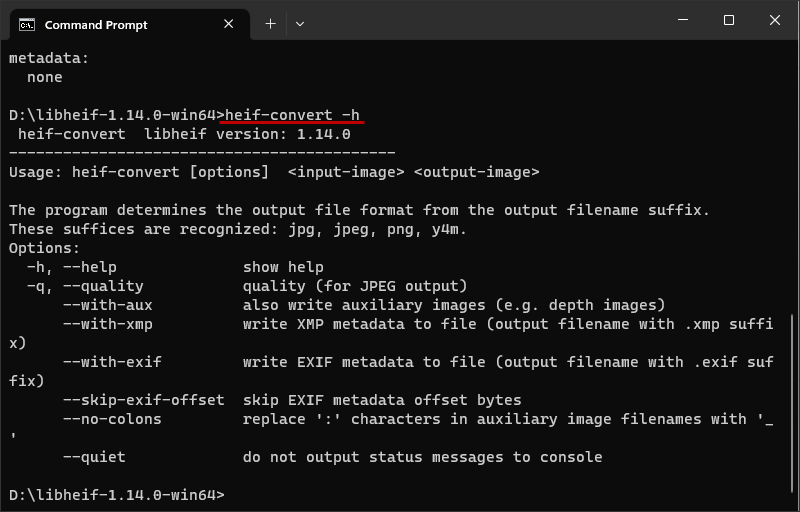
Step 7: Enter the command: heif-convert -h and press the Enter key to view the help information about the heif-convert program command.
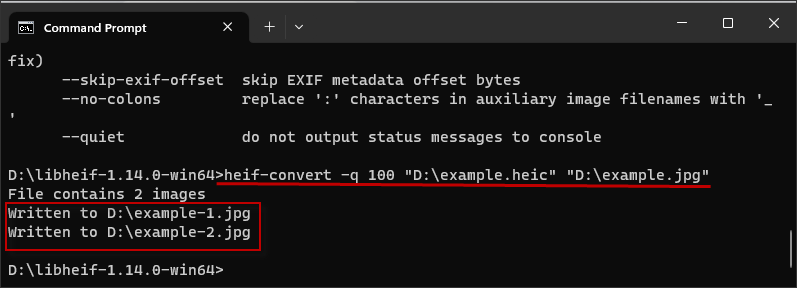
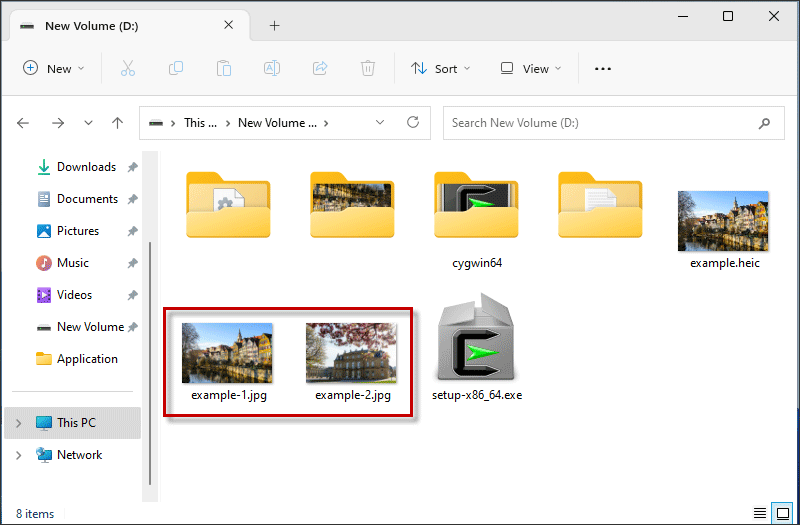
Step 8: Enter the command: heif-convert -q 100 "D:\example.heic" "D:\example.jpg", then press Enter to Finish converting the image and save it to the example-1.jpg and example-2.jpg images.
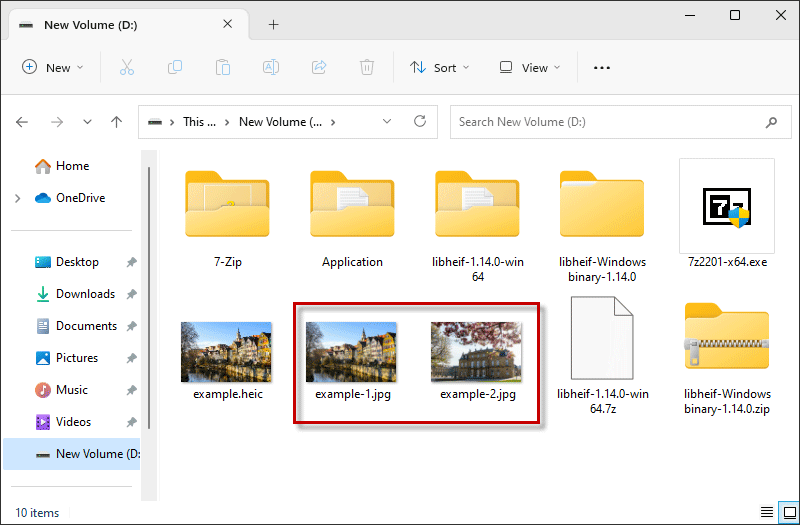
Open the D drive in the file manager and see that the converted example-1.jpg and example-2.jpg images have been stored under the D drive.
Way 2: Use Cygwin to Install libheif-tool
Step 1: Click on the setup-x86_64.exe link to download the libheif-tool installer for the Cygwin program.

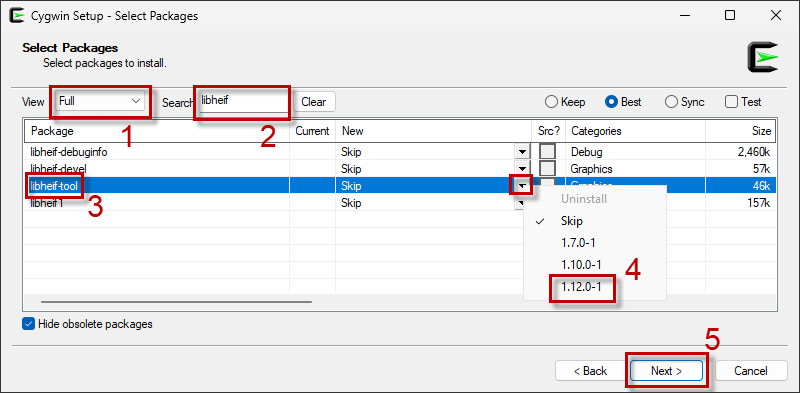
Step 2: After installing Cygwin, enter the installation package window, choose Full on the View option menu, enter libheif in the Search box to find the package libheif-tool, then open the drop-down menu on the right side of the New option and select 1.12.0-1, then click on Next.
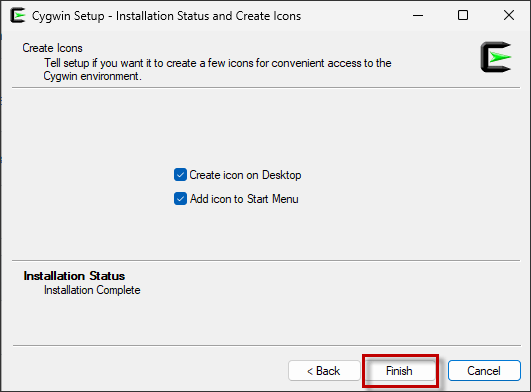
Follow the steps to download the installation package and click Finish to close this window when completed.
Step 3: Set to display File name extensions in the file manager.
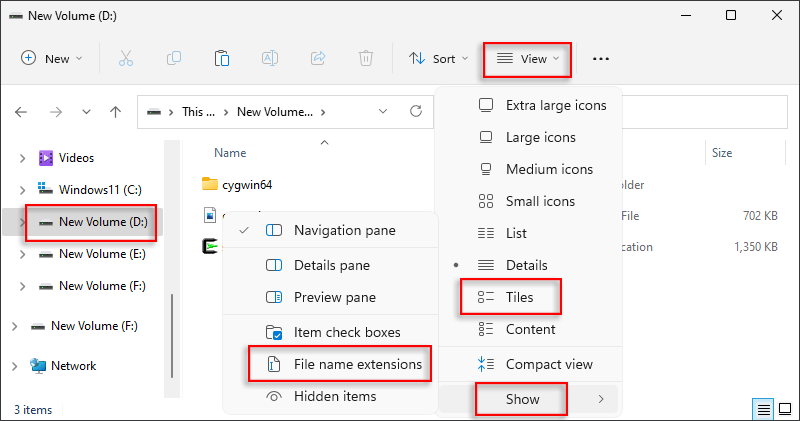
Step 4: Type “cmd” in the search box on the taskbar, find the Command Prompt application and open it.

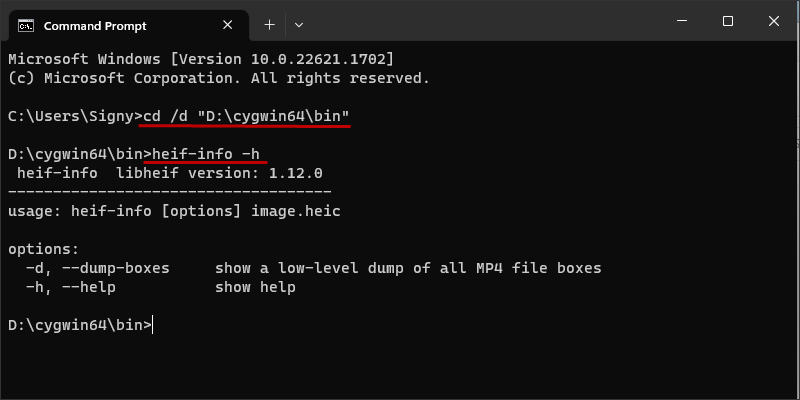
Step 5: In the CMD application window, enter the command: cd /d "D:\cygwin64\bin" then press the Enter key, and then enter the command: heif-info -h, then press the Enter key to view the help information.
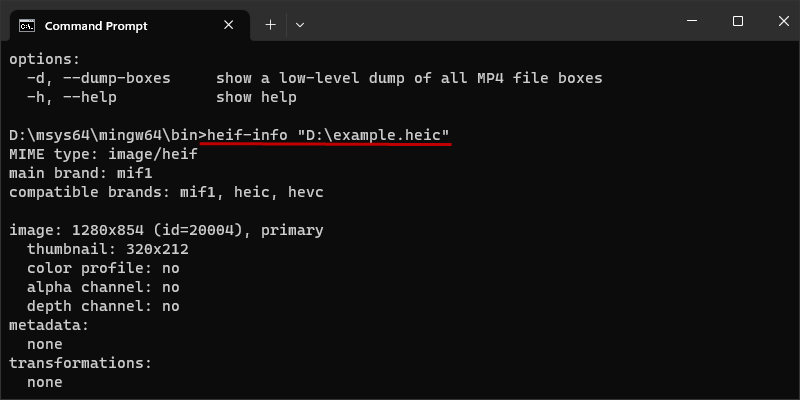
Step 6: Enter the command: heif-info "D:\example.heic" and then press Enter key to get information about the image of example.heic under the D drive.
Step 7: Enter the command: heif-convert -h and press Enter key to view the help information. Then enter the command: heif-convert -q 100 "D:\example.heic" "D:\example.jpg" and press Enter to convert HEIC image to JPG.
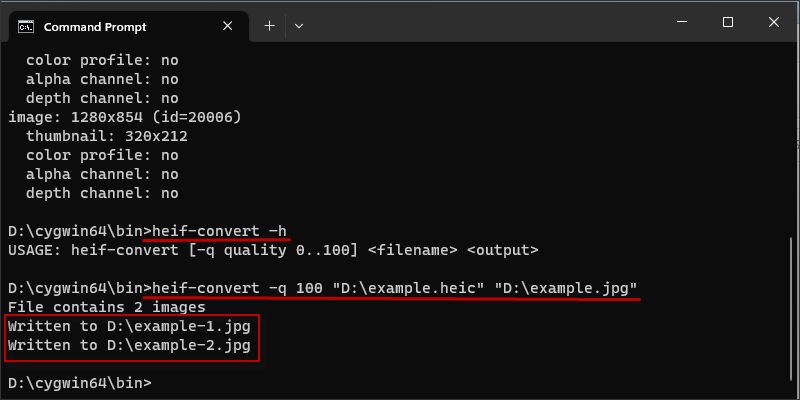
Open the D drive in the file manager and see that the example.heic images under the D drive have been converted to example-1.jpg and example-2.jpg images.
Way 3: Use ImageMagick Program
Step 1: Download the ImageMagick program zip.
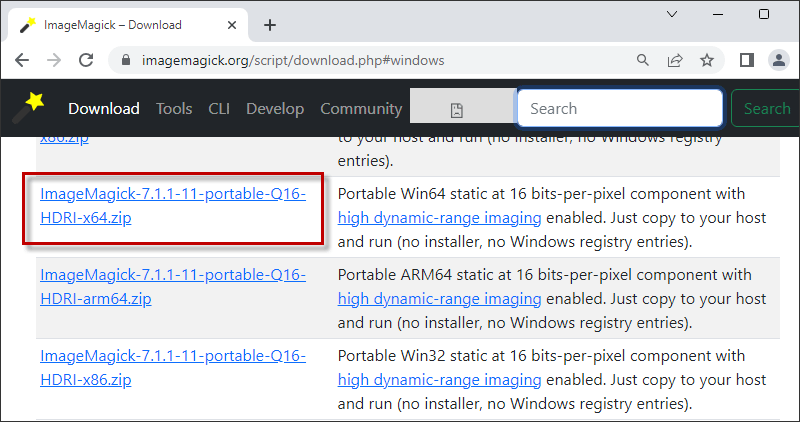
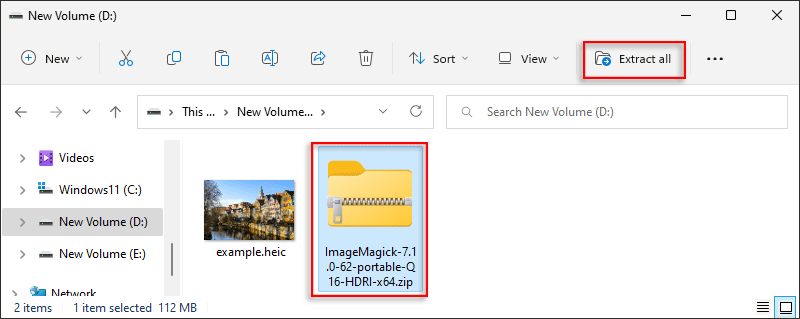
Extract the ImageMagick package, click the ImageMagick-7.1.0-62-portable-Q16-HDRI-x64.zip package, then click Extract all on the top.
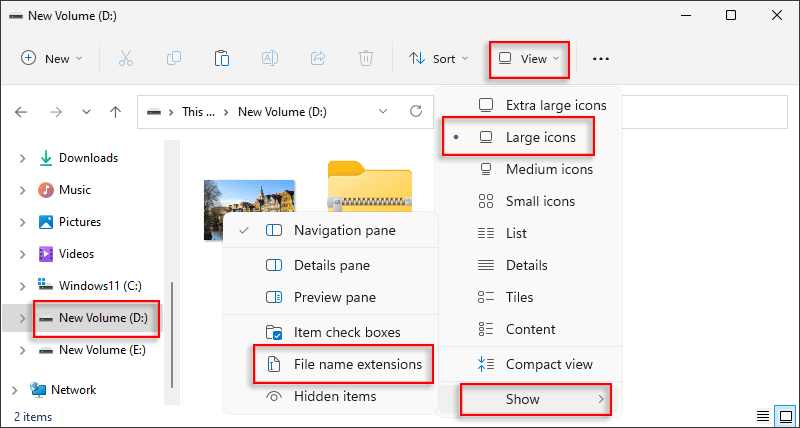
Step 2: Set up Large icons previews and display File name extensions in the file manager.
Step 3: Typing “cmd” in the search box on the taskbar, find the Command Prompt application and open it.

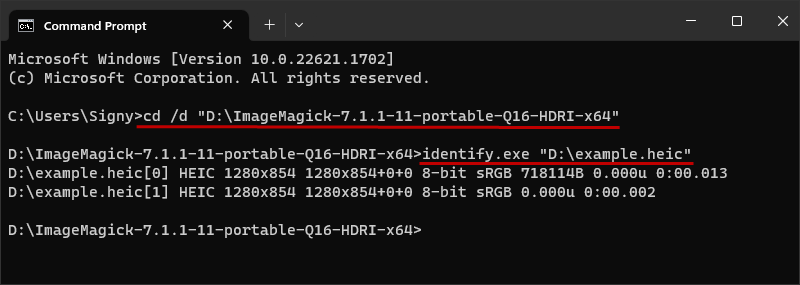
Step 4: In the CMD application window, enter the command: cd /d "D:\ImageMagick-7.1.1-11-portable-Q16-HDRI-x64" and press Enter, then enter the command: identify.exe "D:\example.heic" and press Enter to get information about the image of example.heic under the D drive.
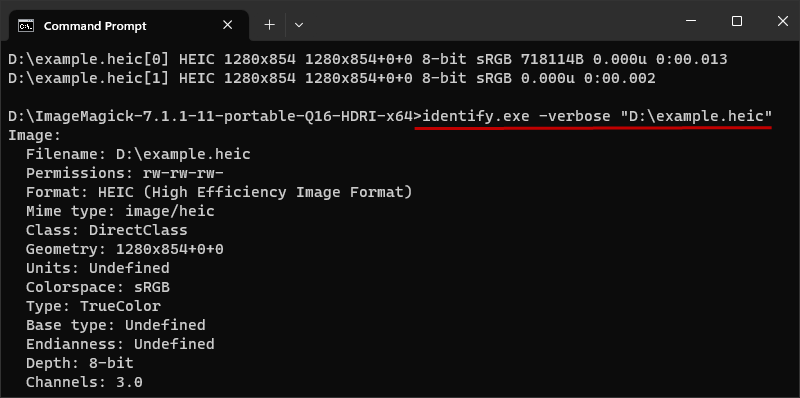
Step 5: Type the command: identify.exe -verbose "D:\example.heic" and press Enter. Get the details of the example.heic image under the D drive.
Step 6: Enter the command: convert.exe "D:\example.heic" -quality 100
"D:\example.jpg" and press Enter to convert the image of example.heic to example.jpg on the D drive.

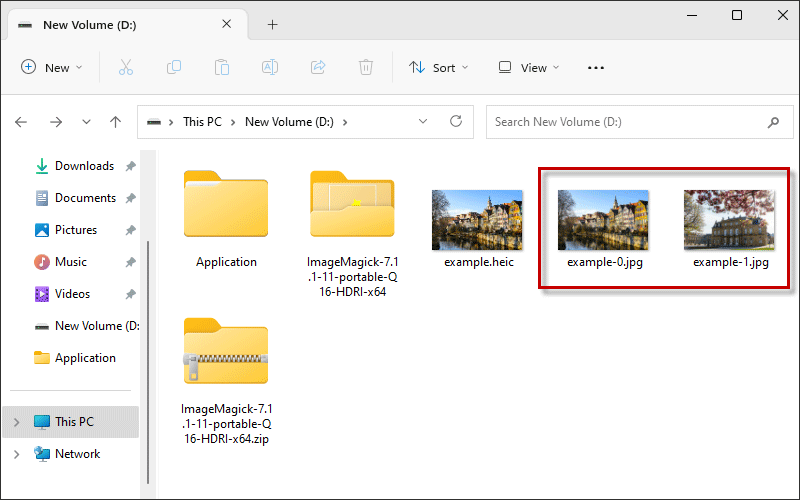
Open the D drive in the file manage and see that the example.heic image has been converted to example-0.jpg and example-1.jpg image.
Way 4: Use MSYS2 MINGW64 to Install msys2-x86_64-libheif
Step 1: Click on the link msys2-x86_64-20230526.exe to download the MSYS2 program.

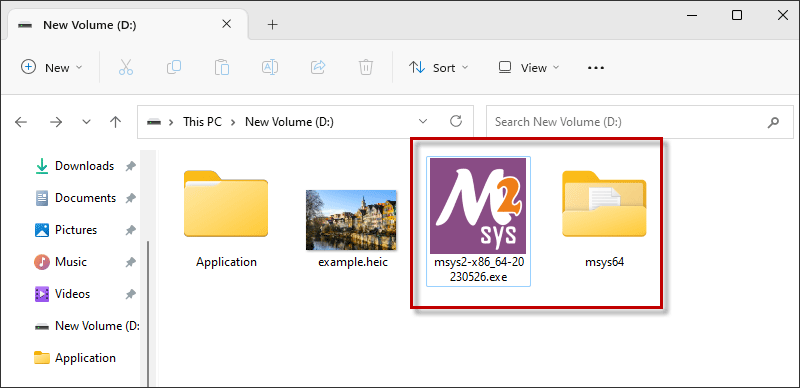
Open the D drive in the file manager and double click to open the msys2-x86_64-20230526.exe program you just downloaded, follow the steps to complete the installation.
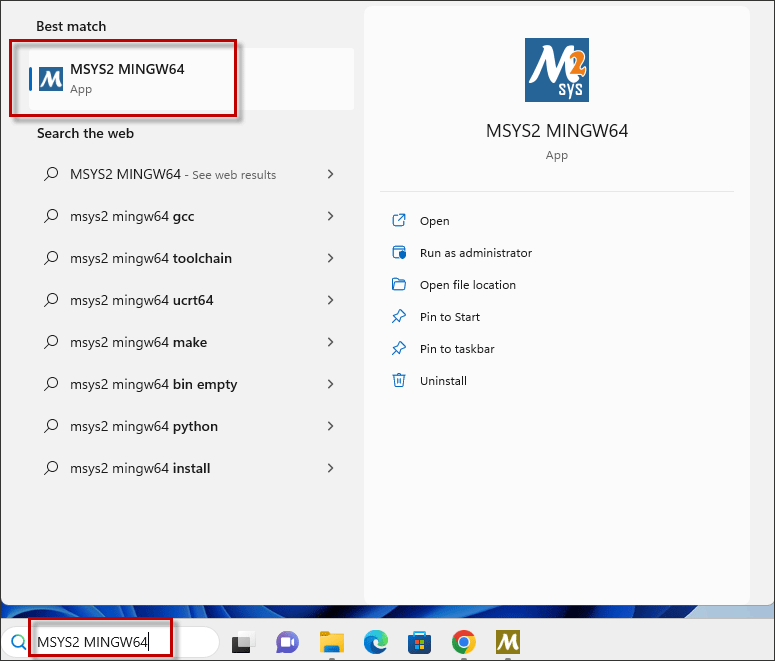
Step 2: Type “MSYS2 MINGW64” in the search box on the taskbar, find the MSYS2 MINGW64 application and open it.
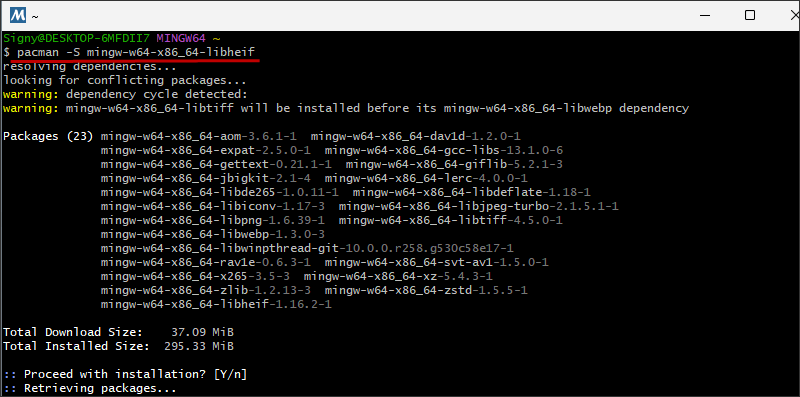
Step 3: In the MSYS2 MINGW64 program window. Enter the command: pacman -S mingw-w64-x86_64-libheif and press Enter key to install the mingw-w64-x86_64-libheif package.
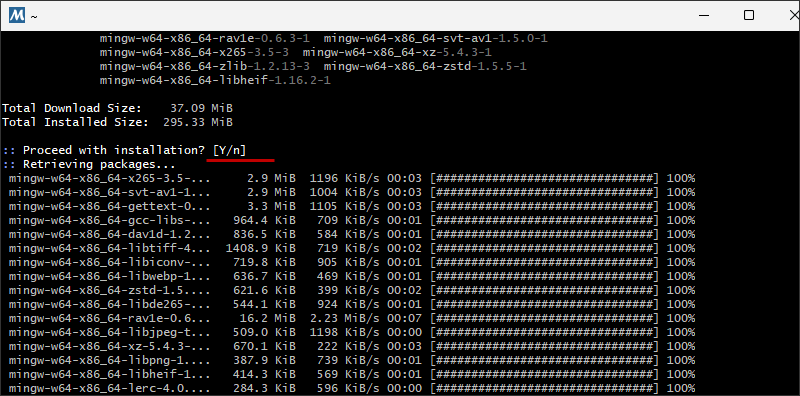
To confirm the installation, press the Enter key or the Y key to install.
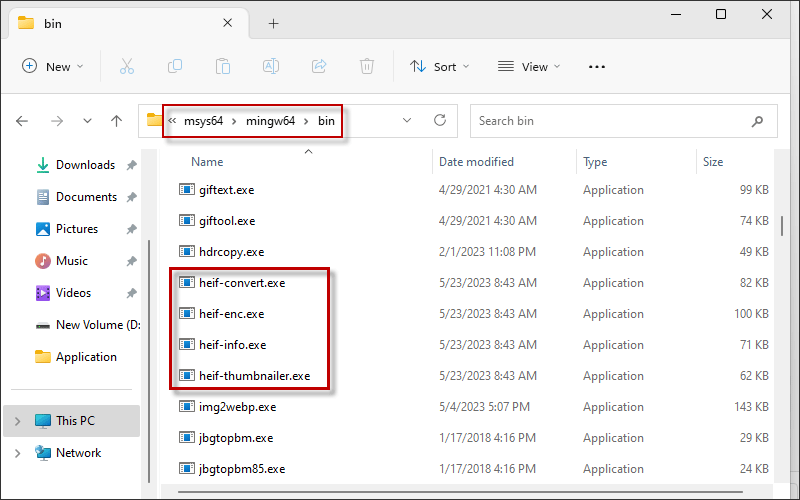
Step 4: Open the D drive in the file manager, and open the msys64> mingw64>bin folders to see where the mingw-w64-x86_64-libheif program is located.
Step 5: Type “cmd” in the search box on the taskbar, find the Command Prompt application and open it.

Step 6: In the CMD program window, type the command in order: D:>cd "msys64\mingw64\bin">heif-info -h, and press Enter to view the program helping information.
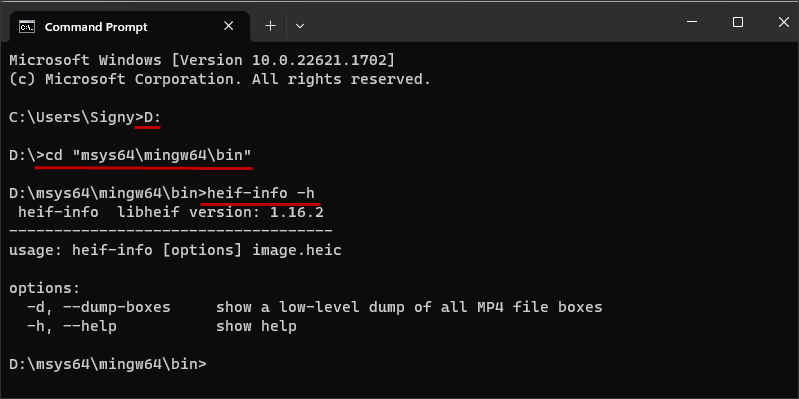
Step 7: Enter the command: heif-info "D:\example.heic" and then press Enter to get information about the image of example.heic under the D drive.

Step 8: Enter the command: heif-convert -h and press Enter to view the helping information of the heif-convert program.
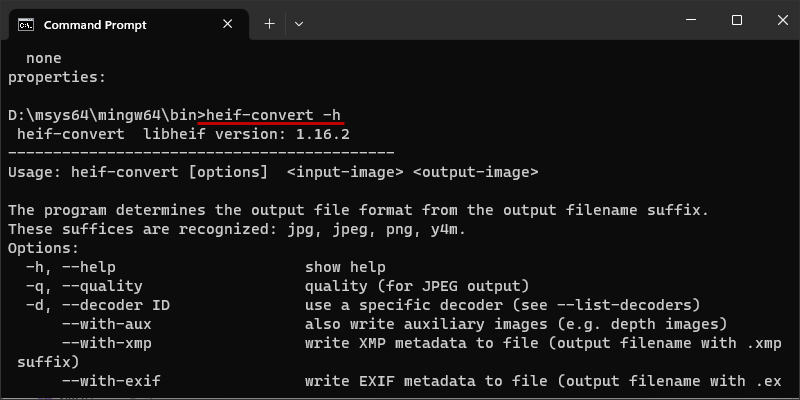
Step 9: Enter the command: heif-convert -q 100 "D:\example.heic" "D:\example.jpg" and press Enter to convert heic images to the JPG image.

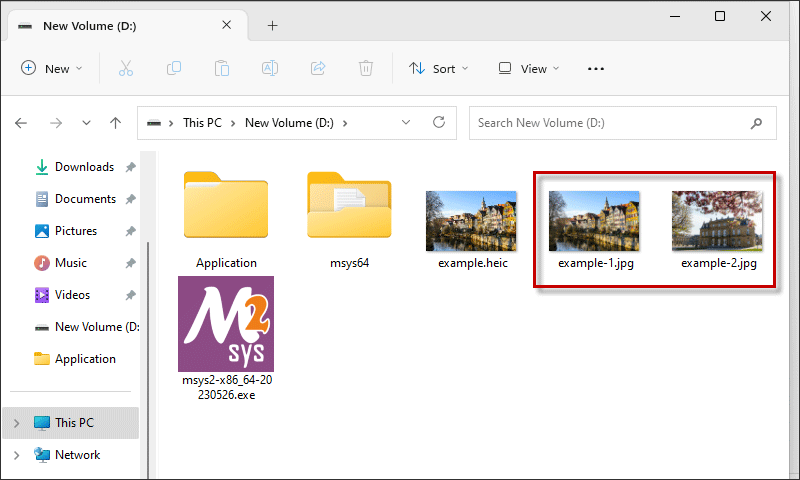
Open the D drive in the file manage, the example.heic images have converted to JPG format images.


![[Free] Five Easiest Ways to Convert TIFF to JPG/PNG on Windows 10/11](../img/windows/free-five-easiest-ways-to-convert-tiff-to-jpg-png-on-windows-10-11/free-five-easiest-ways-to-convert-tiff-to-jpg-png-on-windows-10-11-m.webp)


