How to Disable "Choose an operating system" at Startup in Windows 11/10

When you boot up Windows 11/10 and find that you have to choose an operating system, it could indicate that your computer has two operating systems or a hidden partition. Though it won't be a major problem, having to select the system each time at startup will be irritating. So, how to remove "Choose an operating system" at startup in Windows 11/10? Here are the methods!
1. Delete Other Operating Systems via MSConfig
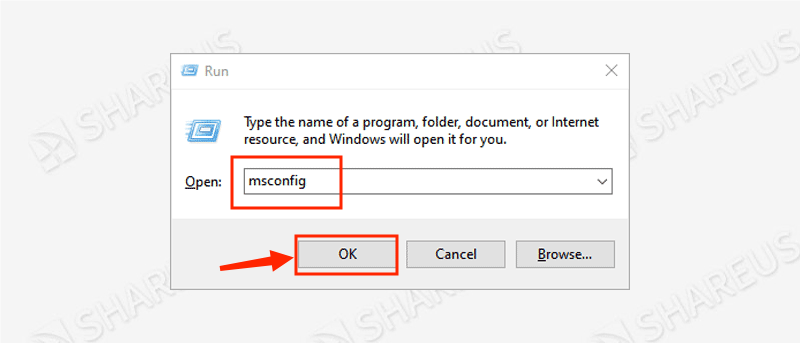
Step 1: Press Win + R and type “msconfig” then click OK.
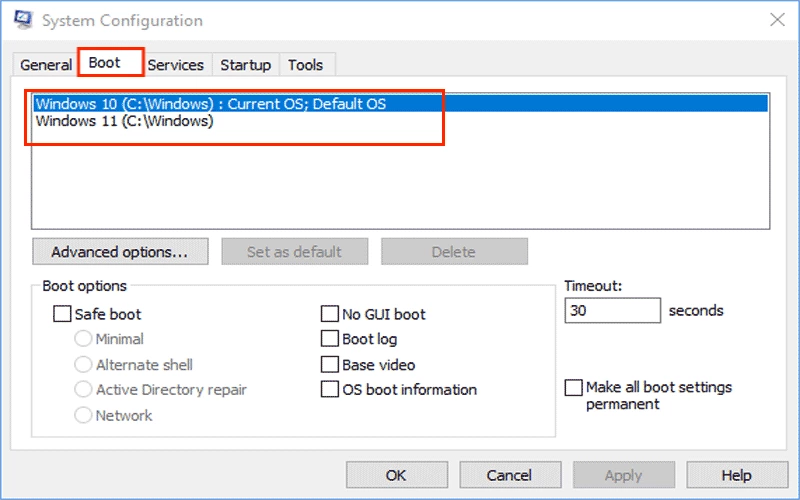
Step 2: Select the Boot tab, you can see several Windows systems listed in the blank.
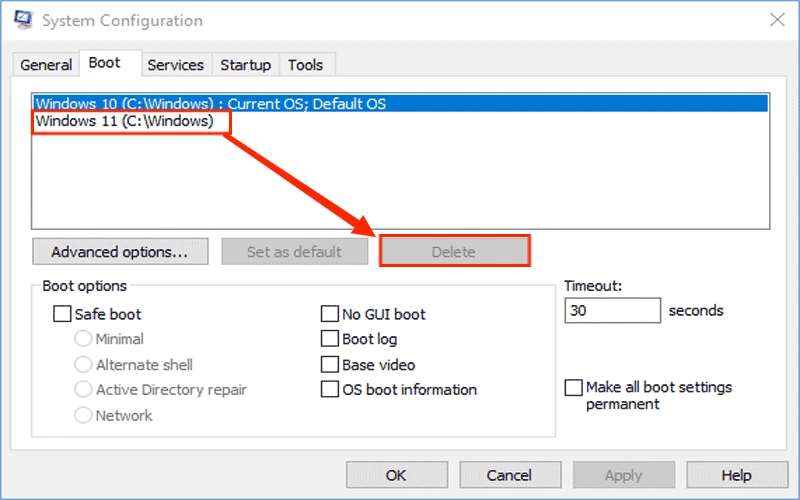
Step 3: Choose the other system you want to delete and click Delete, then click Apply and OK. After that, reboot your computer to check if you have to choose an operating system again.
2. Disable Operating System Display List
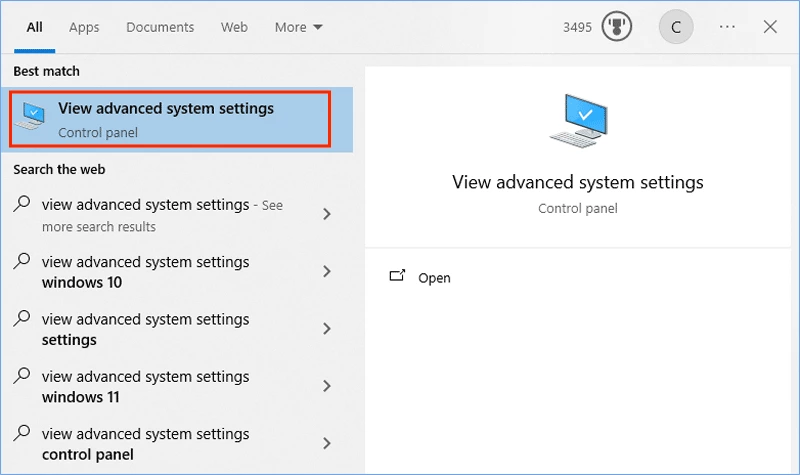
Step 1: Type “view advanced system settings” in the search bar and click to open.
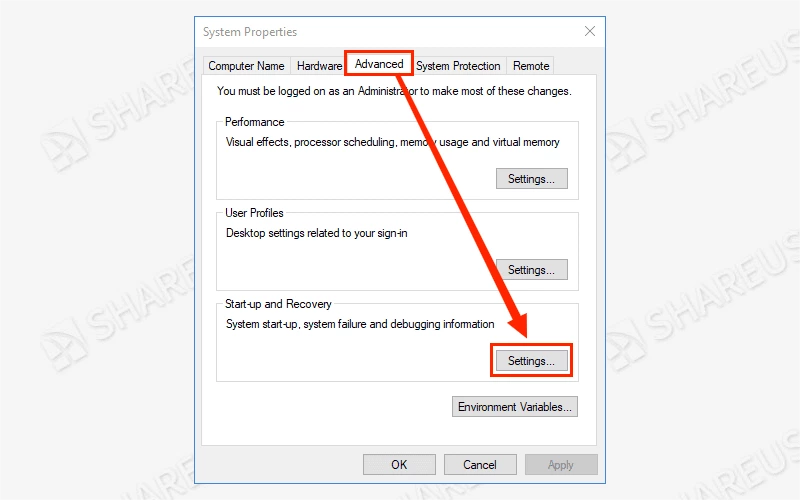
Step 2: In the Advanced tab, click Settings… under the Start-up and Recovery column.
Step 3: Choose the default operating system and uncheck the “Time to display list of operating systems” option, then click OK.
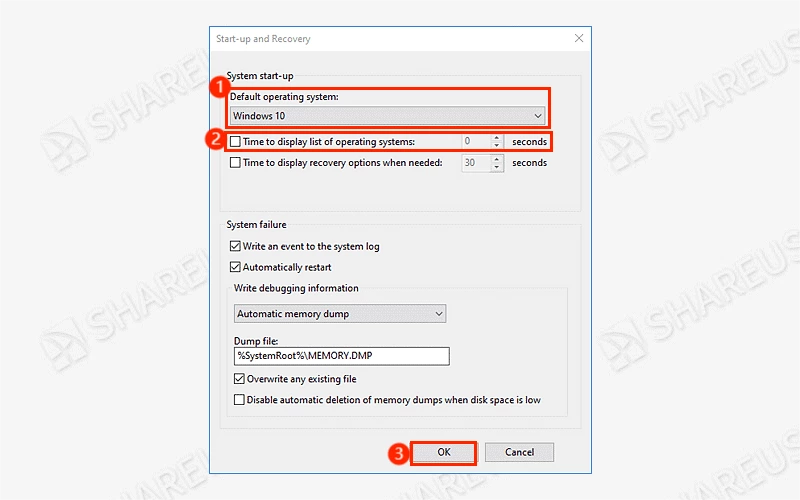
If you want to keep the dual boot to choose which operating system to run the windows, you can keep ticking the “Time to display list of operating systems” and adjust the time seconds.
3. Perform BCDEdit Command-line Tool
BCDEdit is a command-line tool to set the menu options and boot programs when starting up the Windows operating system.
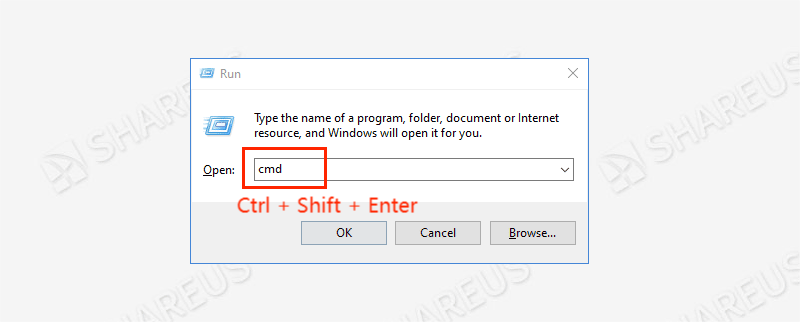
Step 1: Press Win + R and type “cmd” then hit the “Ctrl + Shift + Enter” buttons to run as administrator.
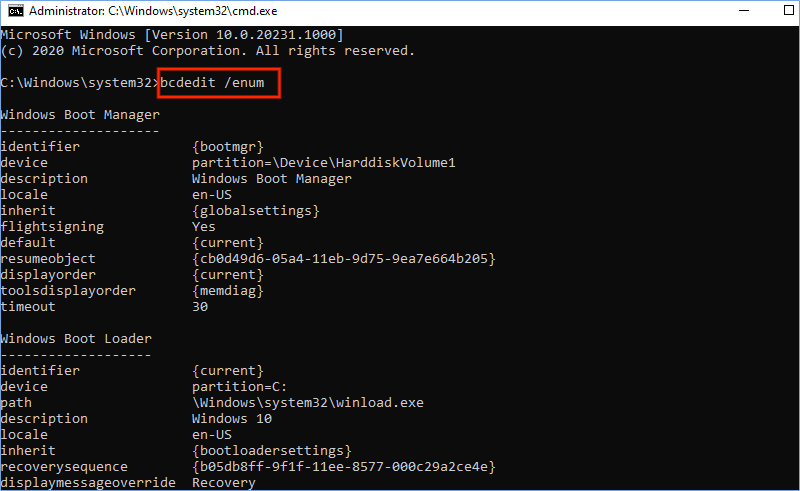
Step 2: Type “bcdedit /enum” and press Enter to check operating system configuration information. Mark down the other operating systems’ alphanumeric string.
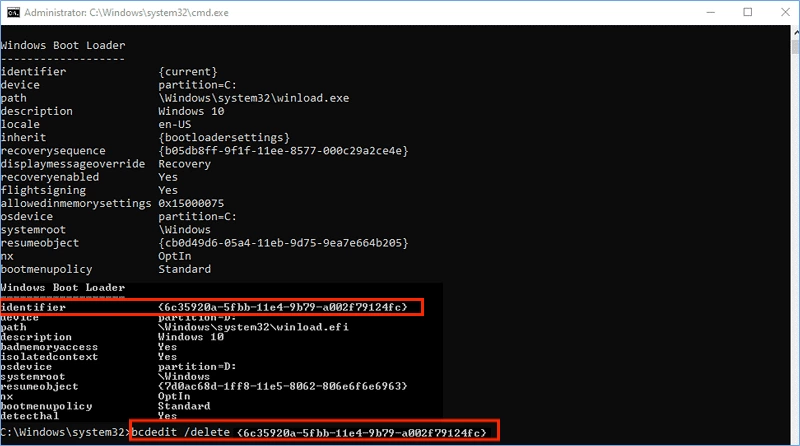
Step 3: Type “bcdedit /delete {identifier}” (identifier replaces the identifier operating system you want to delete.), e.g., bcdedit /delete {6c35920a-5fbb-11e4-9b79-a002f79124fc}.
After that, reboot your computer to check if the “Choose an operating system” screen has disappeared.


