How to Disable or Enable Test Mode in Windows 11
Windows 11 test mode is a temporary Windows state that allows users to install and run software and drivers that have not been approved by Microsoft. The test mode is usually designed for professional developers or advanced users for certain tests. If you are a casual user, you had better disable the test mode as Windows does not perform any security checks when this mode is enabled, which could potentially compromise the security and stability of your system. This article will show you how to disable or enable test mode in Windows 11.
Part 1: How to Disable Test Mode in Windows 11
If you see the watermark in the bottom right corner of your desktop. This means that your system is in test mode. To disable test mode in Windows 11, follow these steps:

Step 1: Click Search on the taskbar to open the panel, then type “cmd” in the search box, find Command Prompt, and click Run as administrator.
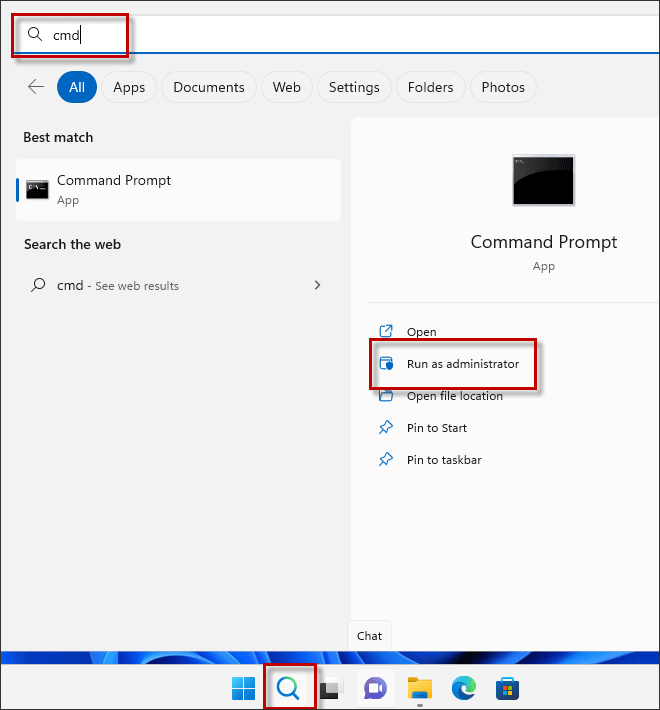
Step 2: Once you click on it, a CMD window will open.
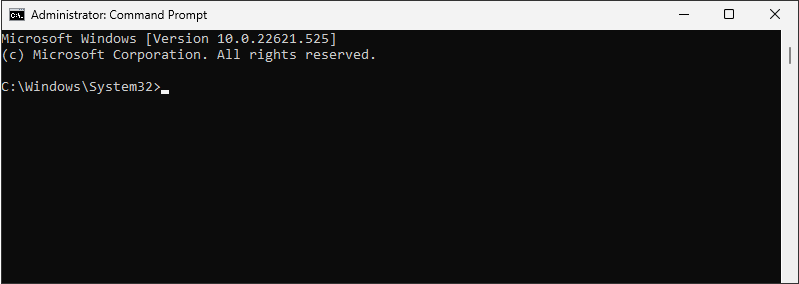
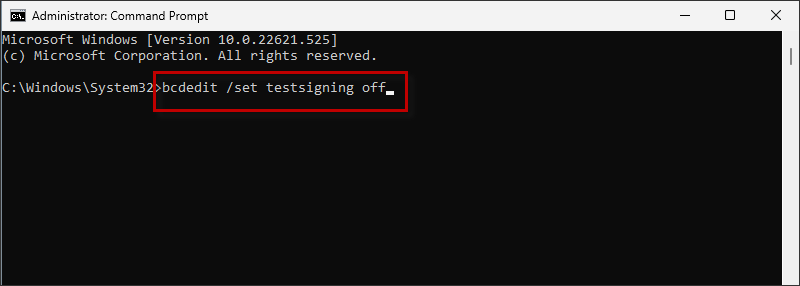
Step 3: In the Command Prompt window, type the following command and press Enter: bcdedit /set testsigning off.
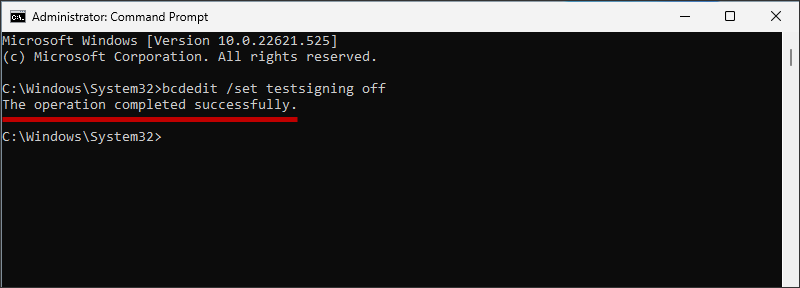
Step 4: You should see a message that says "The operation completed successfully".
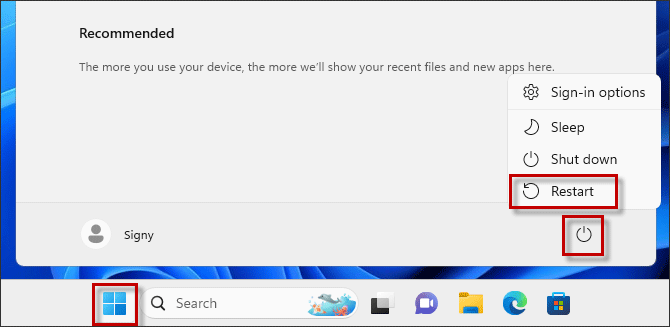
Step 5: Restart your computer for the changes to take effect. Click Start on the taskbar, then click Power and Restart.
After restarting, the test mode watermark should no longer appear on your desktop.
Part 2: How to Enable Test Mode in Windows 11
If you need to enable test mode in Windows 11, you can use the same steps as above but replace "off" with "on" in the command, or you can try the following steps to enable Windows 11 test mode.
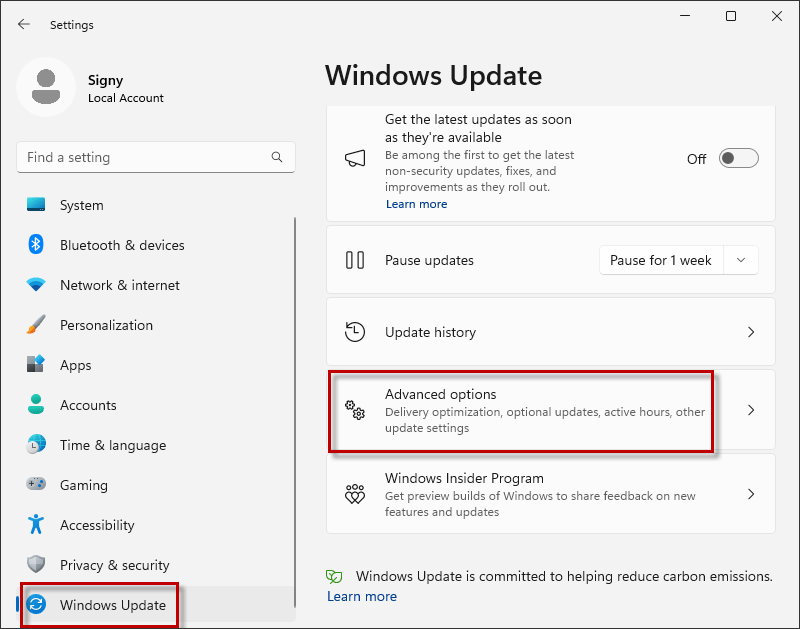
Step 1: Press “Win + I” at the same time to open Windows Settings, then go to Windows Update and click Advanced Options.
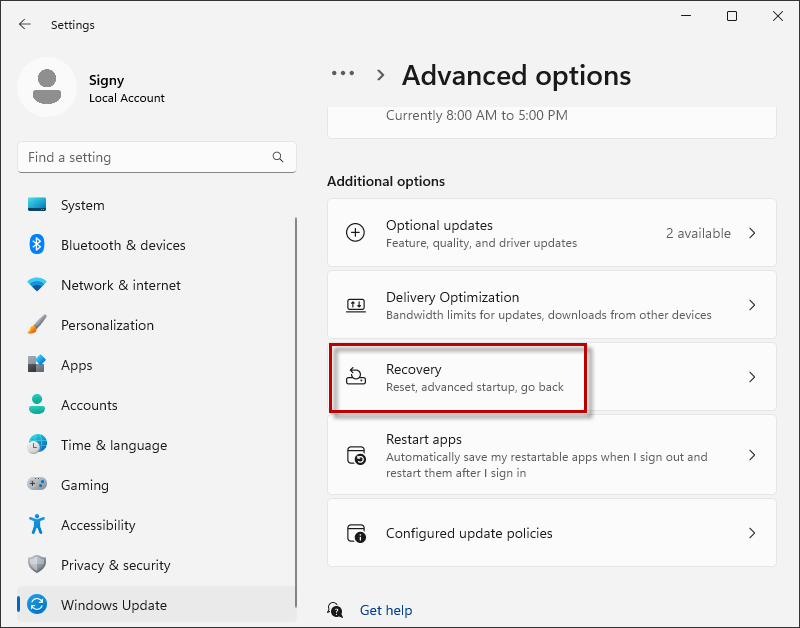
Step 2: Scroll down and choose Recovery.
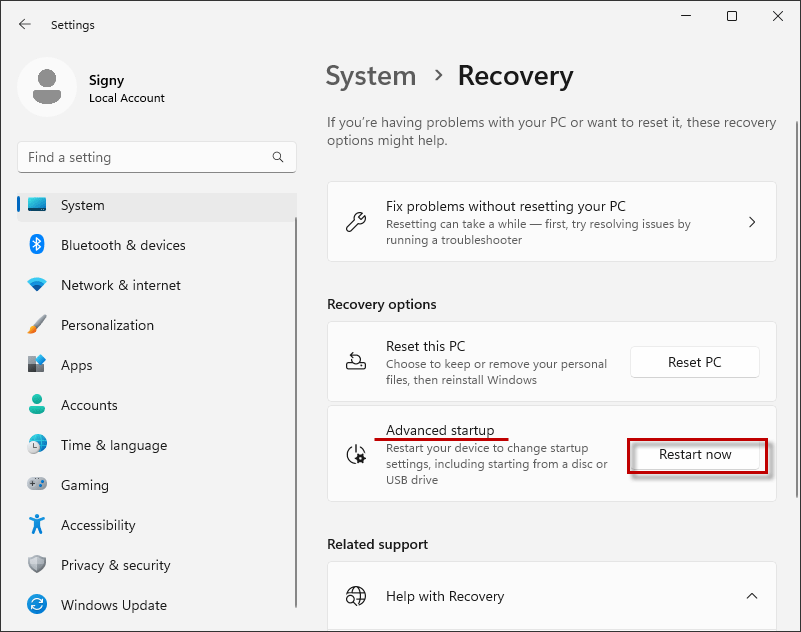
Step 3: Click on Restart now next to the Advanced startup.
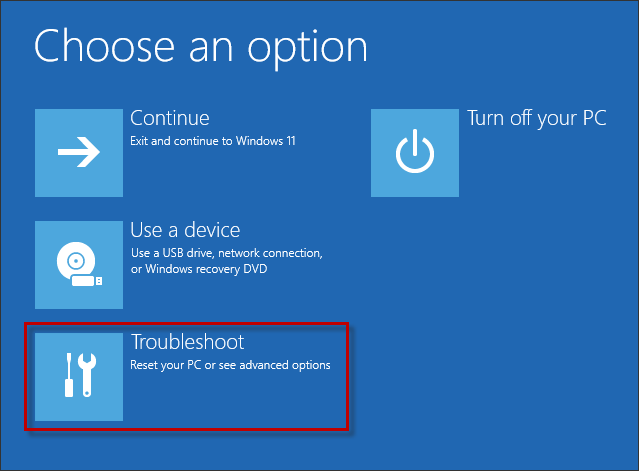
Step 4: After your PC restarts then go to Troubleshoot.
Step 5: On the Troubleshoot window, choose the Advanced options.

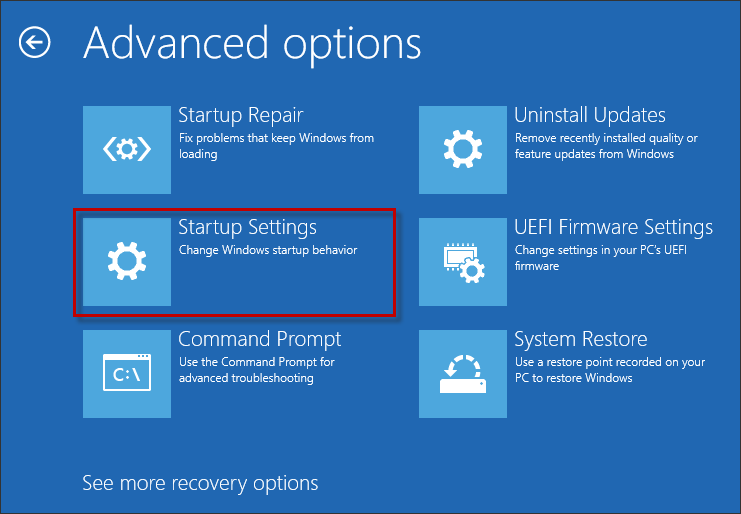
Step 6: Open the Advanced options, and click on Startup Settings.
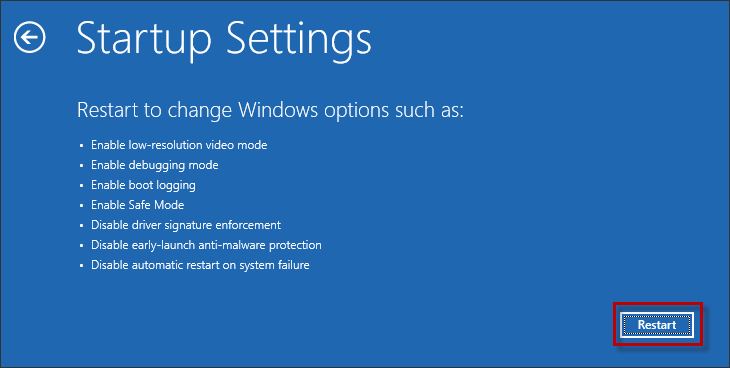
Step 7: Click on Restart under the Startup Settings window.
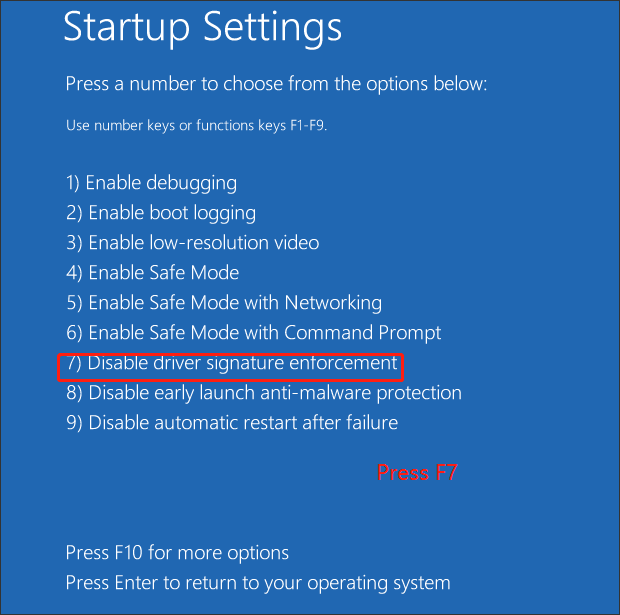
Step 8: Then press F7 to choose Disable driver signature enforcement.
Final Words
This article shows you how to enable and disable test mode in Windows 11. Follow these steps to learn how to enable and disable the test mode, hope the article will help you.


