How to Fix Microsoft Visual C++ Runtime Library Error in Windows 10/11

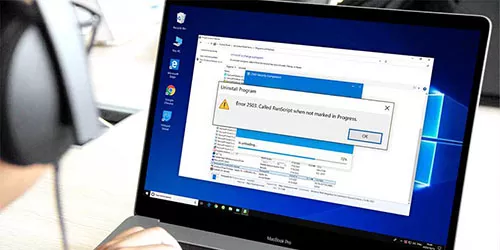
When you start or reboot your PC, an error message of Microsoft Visual C++Runtime Library was presented. And if you don't fix it, the message will keeps popping up. This issue may be caused by a corrupt runtime library in your Windows or by some problematic applications. Sometimes, the error message appears after Windows update. Whatever the reason is, in this post, we will share some fixes on how to resolve Microsoft Visual C++ runtime library error.
1. Run a diagnostic
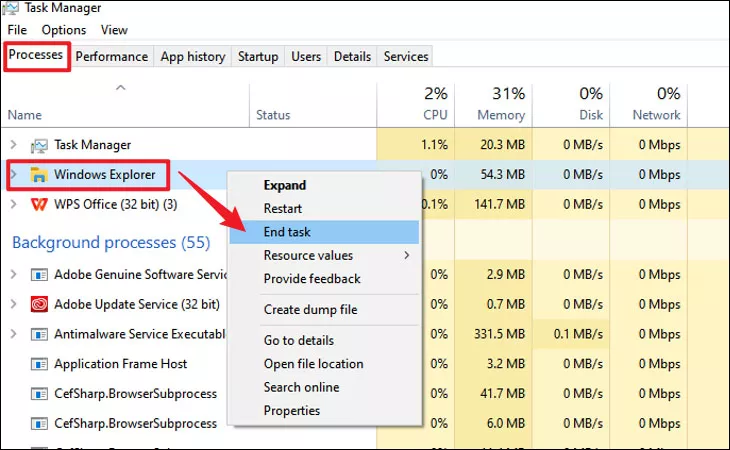
Step 1: Press Ctrl + Shift + Esc to open Task Manager and select Processes tab. Then locate Windows Explorer, right-click on it and select End task.
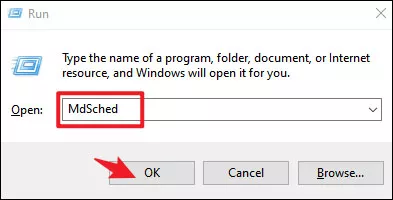
Step 2: Press Windows+R to open run command, type MdSched in the open box and click OK to open Windows Memory Diagnostic.
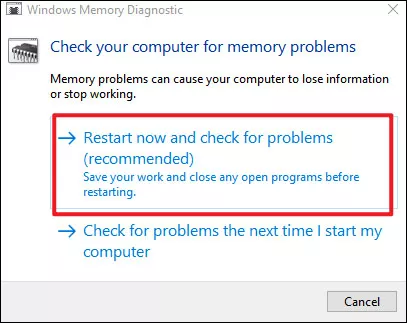
Step3: Select Restart now and check for problems. Then follow the instructions on screen.
2. Rollback display driver
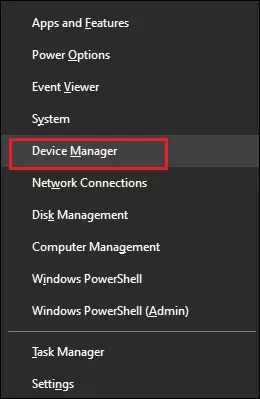
Step 1: Press Windows+X and select Device Manager from the menu.
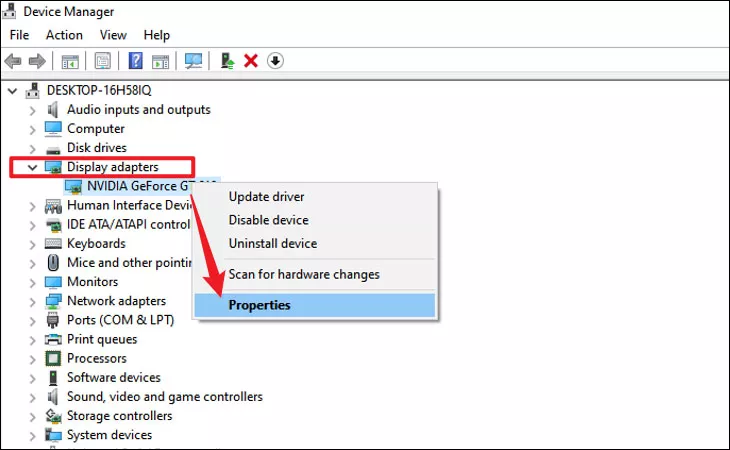
Step 2: Expand Display adapters and right-click on your graphics card. Then select Properties.
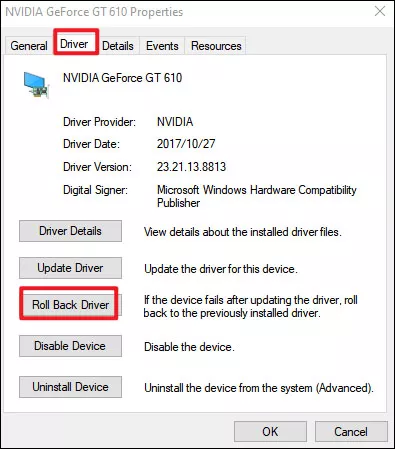
Step 3: In Properties window, choose Driver tab and click Roll Back Driver. After each roll back, you need to see if the version functions well.
3. Perform a clean boot
Some third-party or startup applications may interfere with your system, arising the error message of Microsoft Visual C++ runtime. Performimg a clean boot will fix the problem.
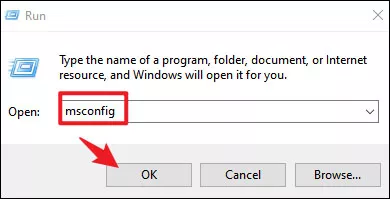
Step 1: Press Windows+R to open Run command. Then type msconfig in the open box and click OK to open System Configuration.
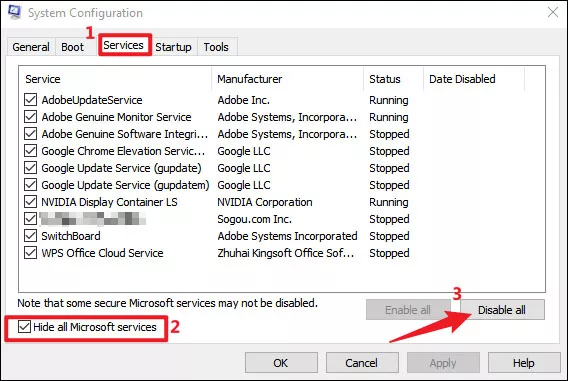
Step 2: Choose Services tab, check the box in front of Hide all Microsoft services and then click Disable all.
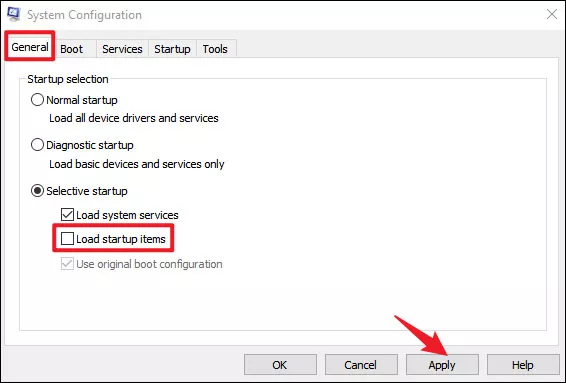
Step 3: Back to System Configuration window and choose General tab. Then uncheck the box in front of Load startup items. Click Apply to save changes.
Step 4: Restart your system and check if the error message disappears.
4. Repair Microsoft Visual C++ Redistributables
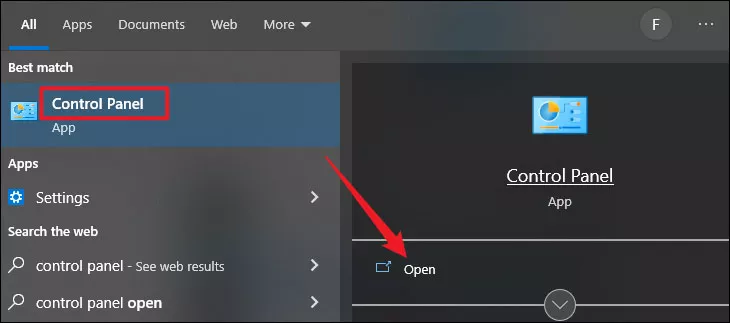
Step 1: Type and search control panel in the search bar and open it.
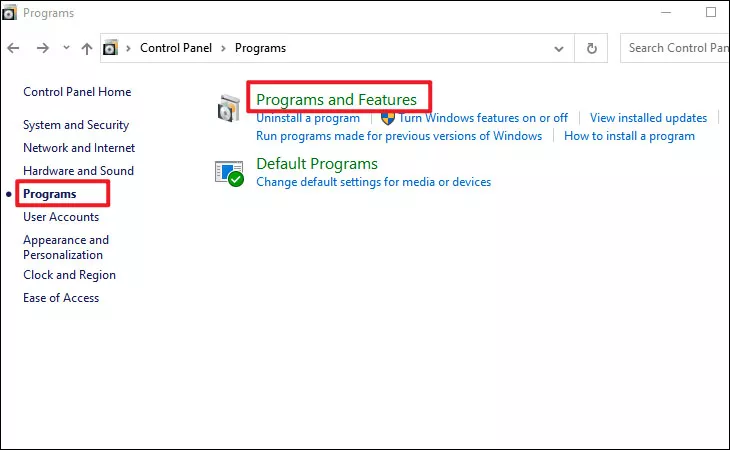
Step 2: Select Programs>Program and Features.
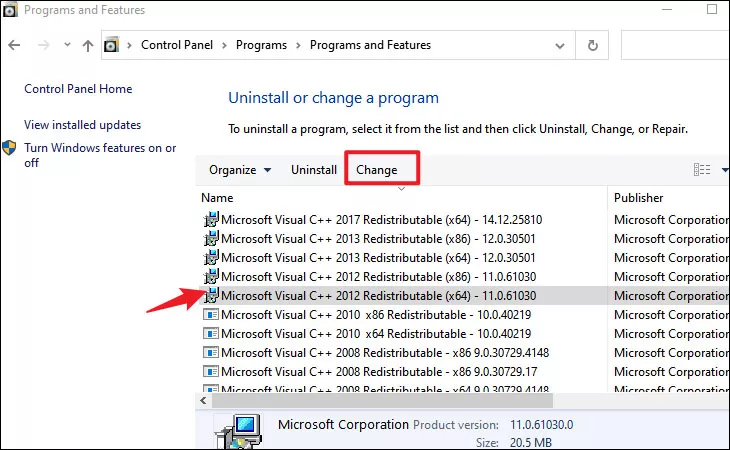
Step 3: Locate Microsoft Visual C++ Redistributables.
Step 4: Click on the problematic Redistributable and tap Change.
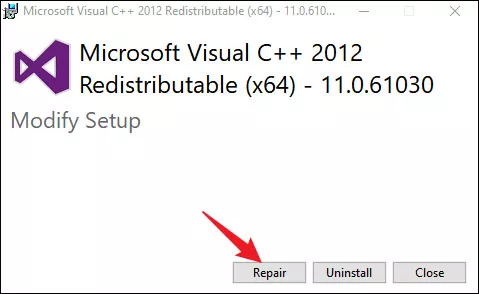
Step 5: Click on Repair in the pop-up window and follow the instructions on the screen until the process completes.
5. Reinstall Visual Microsoft C++ Redistributables
Repeat step1 to step 3 in method 4. Select each Redistributable and click Uninstall. After you remove all Redistributables, download them from Microsoft. Make sure you've install all available Redistributables.
Note: Since not all Redistributables can be repaired, if you find the change option is not available, it means you can't repair that program. In this case, you can only uninstall and reinstall the selected Redistributable. The reinstalling process might be cumbersome, but it's worth a try.


