How to Maintain Internet Connection during Sleep in Windows 10/11

Have you ever encountered a situation where some important tasks or programs were running in the background with a network connection, but the process was interrupted because the network was disconnected when the system went into sleep mode. That could be frustrating. So if you want to prevent Windows 10/11 from disconnecting network in sleep mode, please read on. Here we will share three effective ways with you.
1. Maintain internet connection via Device Manager
Step 1: Press Windows+X and select Device Manager from the menu.
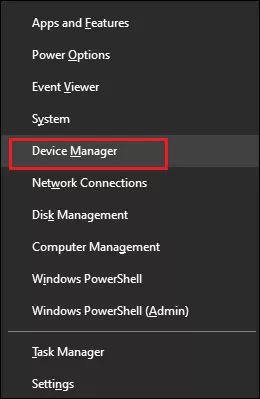
Step 2: Expand Network adapters and select your WIFI driver. Then, right-click on it and click on Properties. (If you are using Ethernet, then right-click on Ethernet.)

Step 3: Select Power Management tab, uncheck Allow the computer to turn off and click OK.

2. Maintain internet connection via Group Policy Editor
Step 1: Press Windows+R to open run command, type gpedit.msc in the open box and hit Enter to open Local Group Policy Editor.

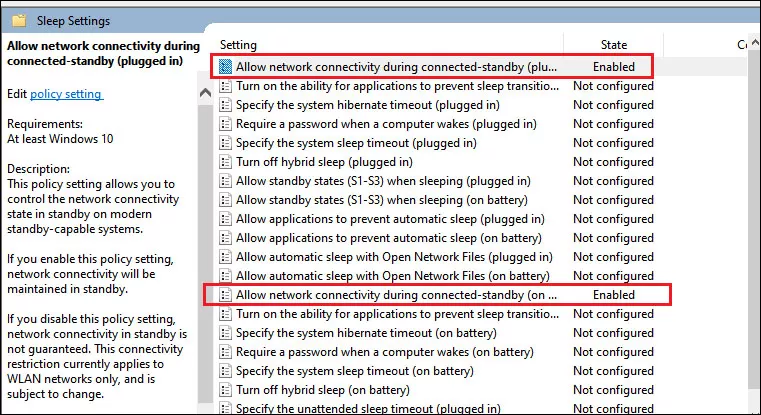
Step 2: In the pop-up window, head to Computer Configuration > Administrative Templates > System > Power Management > Sleep Settings.
Step 3: Double-click on the Allow network connectivity during connected-standby (plugged in) in the right pane, select Enabled in next window and click OK to apply the change.
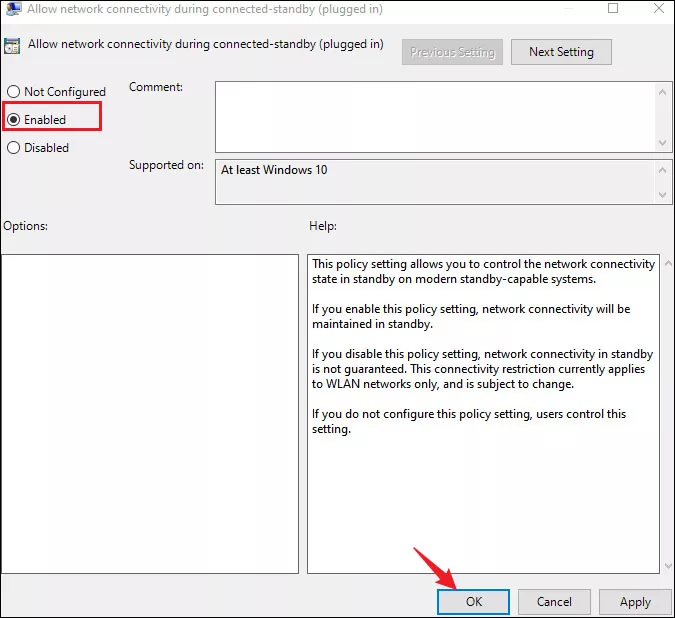
Step 4: Repeat the same operation to enable Allow network connectivity during connected-standby (on battery).
3. Maintain internet connection via Command Prompt
Step 1: Click Start menu, type cmd in the search box and hit Enter. Click Run as administrator to open Command Prompt.

Step 2: Type the following command in the window and hit Enter to execute it.
For On battery mode:
powercfg /setdcvalueindex scheme_current sub_none F15576E8-98B7-4186-B944-EAFA664402D9 1For Plugged in mode:
powercfg /setacvalueindex scheme_current sub_none F15576E8-98B7-4186-B944-EAFA664402D9 1


