How to Stop Windows 11 from Updating Automatically on PC
"I want to keep the original version of Windows 11 but it updates automatically. How to stop Windows 11 from updating automatically?"
Windows 11 will update automatically in order to update performance and speed up Windows system but some people are not willing to update Windows 11 automatically because they want to keep the original version instead of upgrading to the newest version. How to stop Windows 11 from updating automatically? Just follow this article and this post will introduce to you how to stop Windows 11 from updating automatically on PC.
Way 1: Disable Updating Service to Stop Updating Automatically
Windows 11 always updates the version for improving performance and adds virus protection to your PC but some people consider the original version is better and more convenient. If you have no idea about how to turn off automatic updates, just disable Updating Service can stop it from updating.
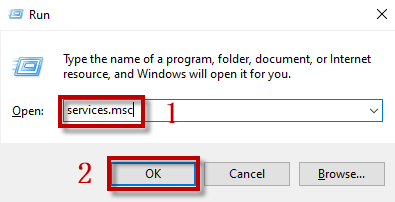
Step 1: Press Windows key and R key at the same time on the keyboard.
Step 2: Type services.msc and then hit OK button.
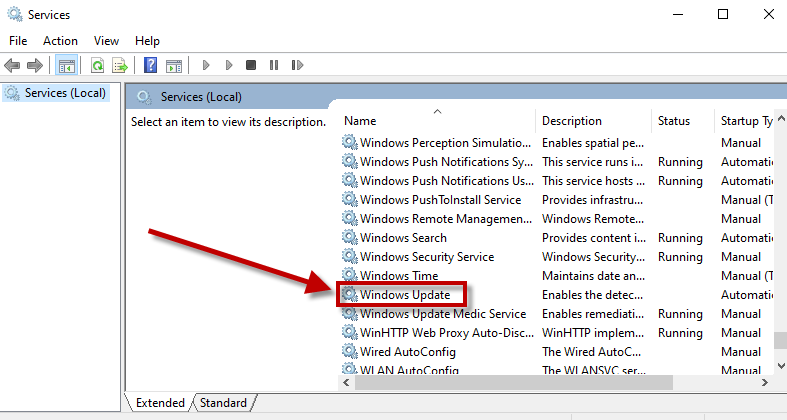
Step 3: Scroll down until you find Windows Update.
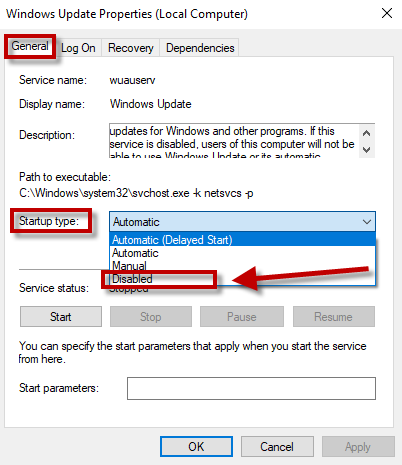
Step 4: Go to General option first then choose Disabled finally hit Enter key on the keyboard.
Way 2: Modify Pause Updates to Stop Updating Automatically
Modify Pause updates also enables you to stop Windows 11 from updating automatically.
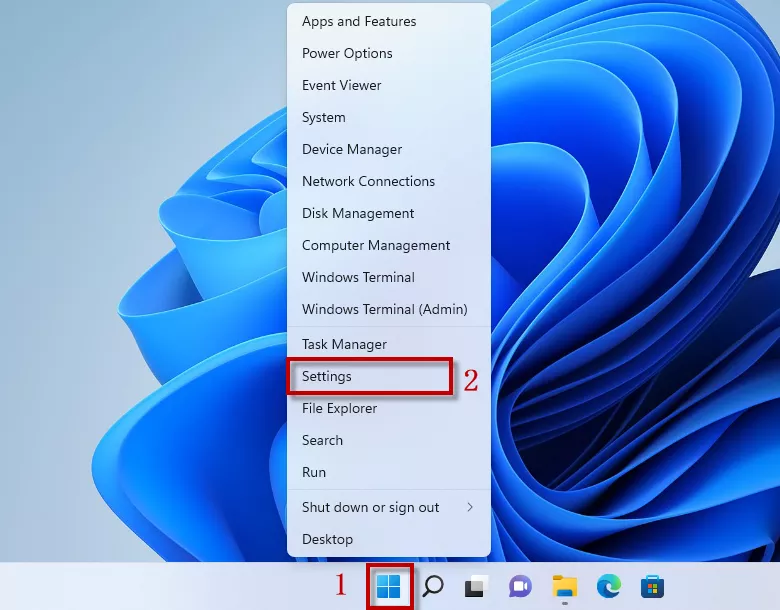
Step 1: Right click Start on the taskbar and then hit Settings.
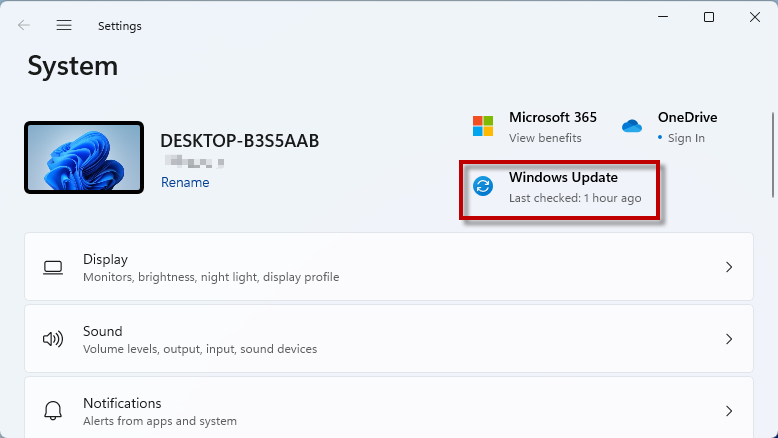
Step 2: Hit Windows Update to open it.
Step 3: Click Pause updates to open the dropdown menu of it.
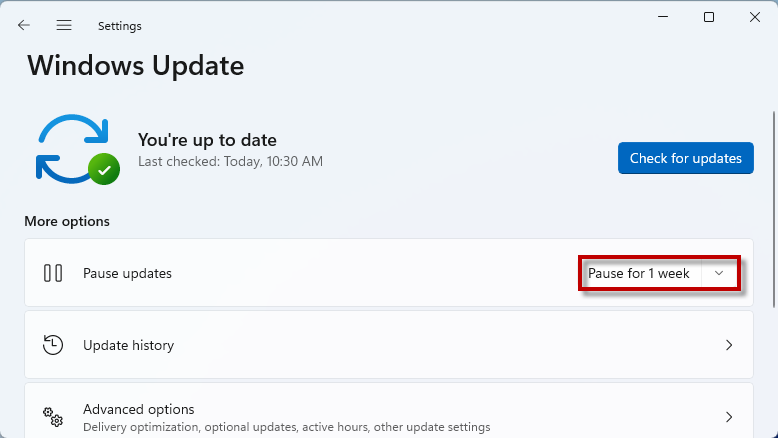
Step 4: Please choose Pause for 5 weeks option.
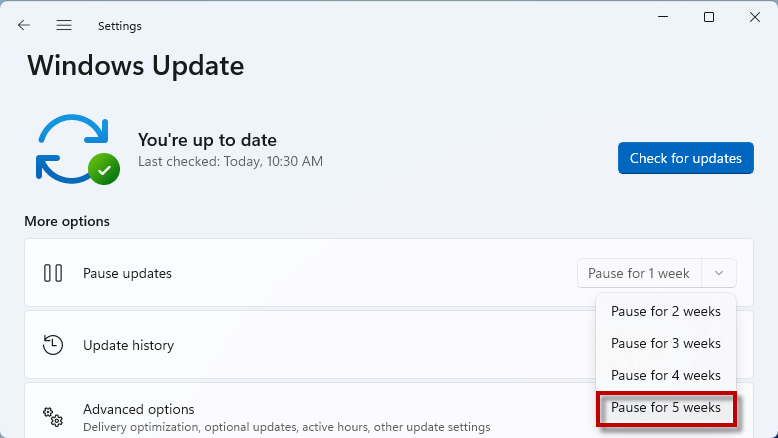
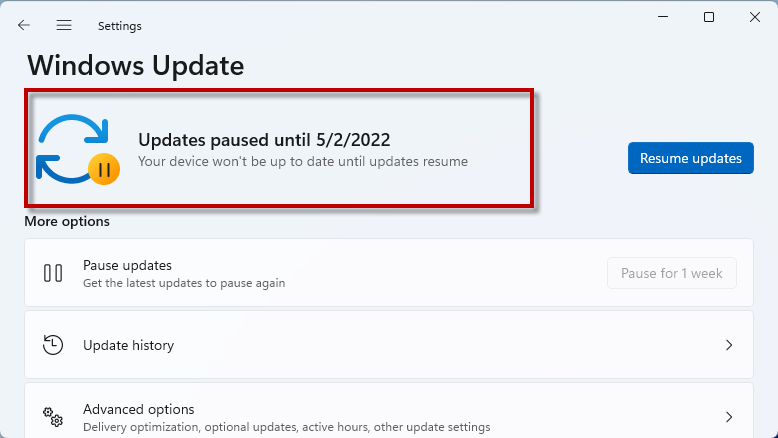
Step 5: It will remind you that updates paused. After 5 weeks, please do the same steps one more time. Then you can keep turning off automatic updates all the time.
Way 3: Stop Updating Automatically Via Registry Editor
A software on our PC, Registry Editor can also help us stop automatic updates on Windows 11. Just a few clicks, automatic updates can be stopped.
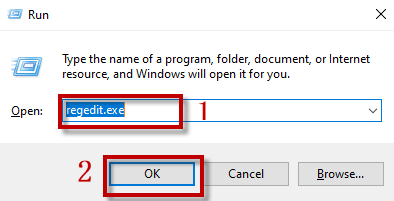
Step 1: Press Windows key and R key at the same time.
Step 2: Type regedit.exe then choose OK.
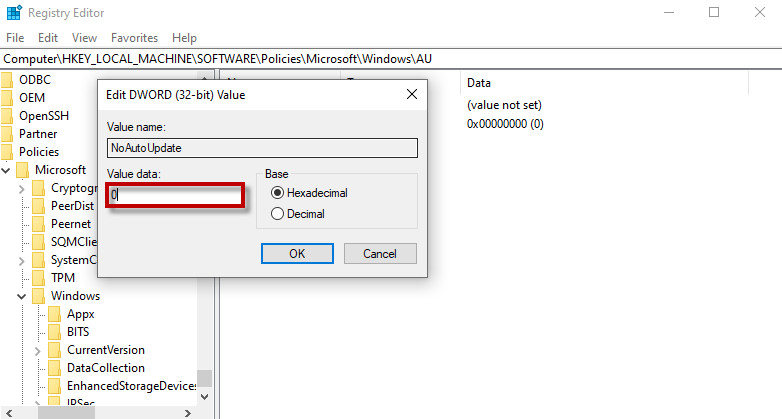
Step 3: Go to Computer\HKEY_LOCAL_MACHINE\SOFTWARE\Policies\Microsoft\Windows first. Scroll down until you find Windows folder. Right click on it and choose New finally hit Key.
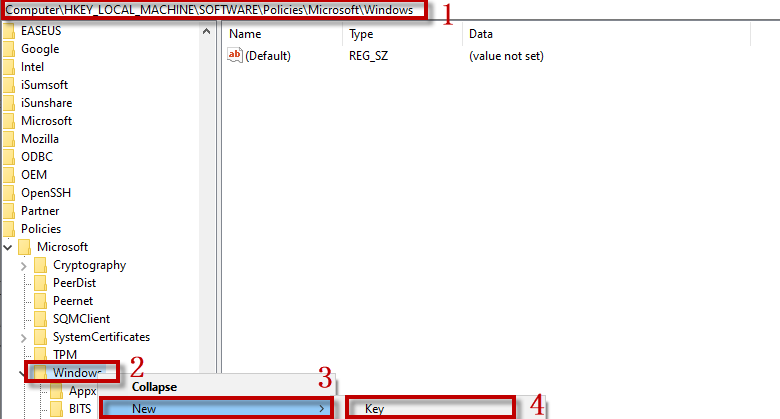
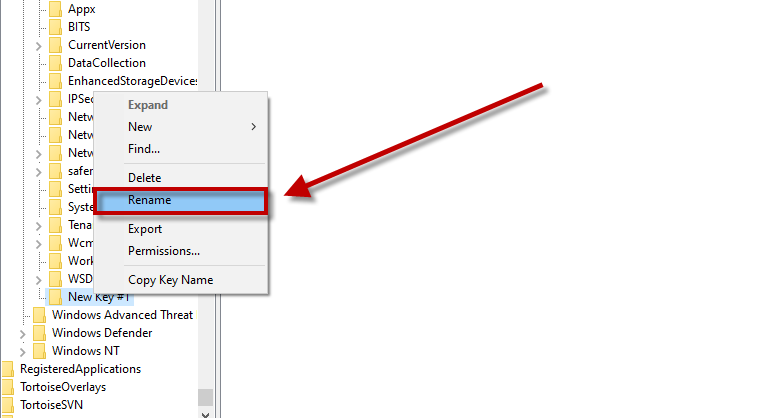
Step 4: Right click on New Key and rename it to AU.
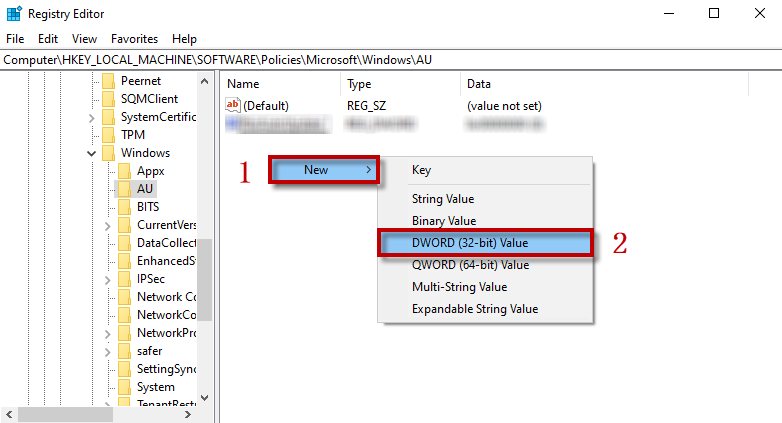
Step 5: Click New then choose DWORD (32-bit) Value after right clicking in the right pane.
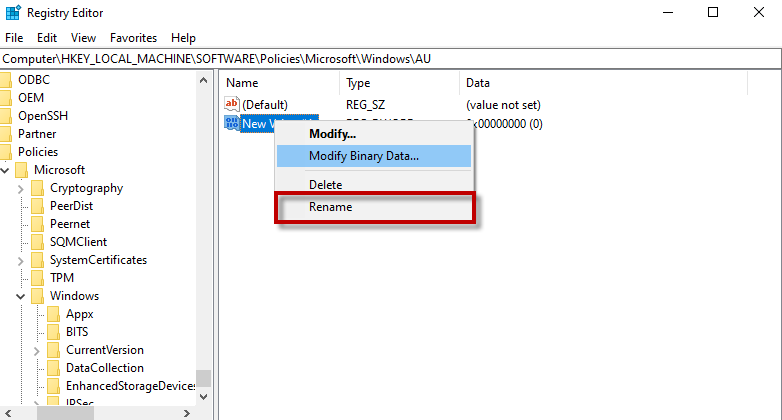
Step 6: Right click and change its name to NoAutoUpdate.
Step 7: Please double-click it and then change Value data from 0 to 1 and then click Enter key.
