How to Use Dev Drive on Windows 11?
Windows 11 has introduced a powerful new feature for developers called Dev Drive. This innovative storage volume is designed to streamline the workflow by providing a trusted and optimized environment for storing development-related files. In this article, we will explore what Dev Drive is, how to set it up, and how to delete it when no longer needed.
1. Introduction to Dev Drive
Dev Drive is a new form of storage volume specifically designed for developers. It operates under the trust of the Windows Security application, eliminating the constraints of security checks that can slow down performance. This ensures that Dev Drive partitions are automatically considered trusted by Windows security software, providing a significant performance boost.
Dev Drive is best used for:
Dev Drive Usage Scenarios
- Source code and project files: Keep your codebase and related files on Dev Drive for faster access.
- Software package caches: Store package dependencies to improve build times.
- Build output and intermediate files: Use Dev Drive to manage build artifacts efficiently.
2. Set Up a Dev Drive
Prerequisites
To set up a Dev Drive, ensure you meet the following requirements:
Windows 11: Requires build #10.0.22621.2338 or later.
Disk Space: At least 50GB of free space.
Memory: 16GB recommended (minimum 8GB).
It's worth mentioning that "Dev Drive" cannot be used on removable drives or the C drive. And existing storage volumes cannot be converted to "Dev Drive". It must be designated during the original format time.
Setup Steps
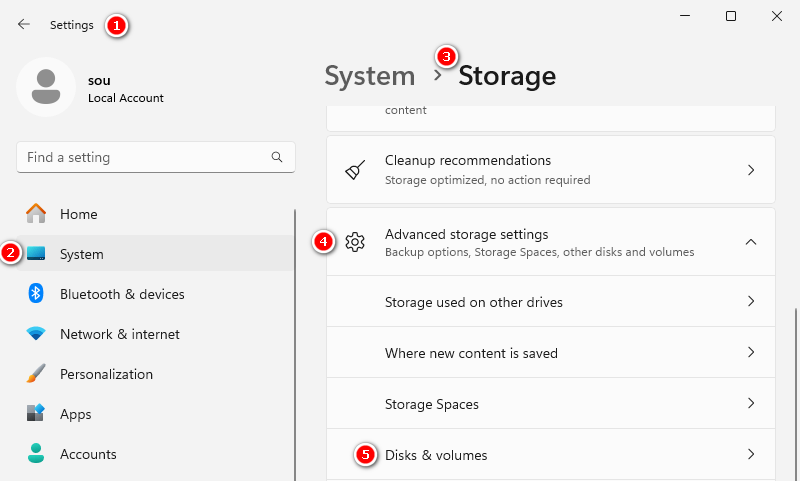
Step 1: Open the Settings by pressing Windows logo key + I.
Step 2: Navigate to System > Storage > Advanced storage settings > Disks & volumes.
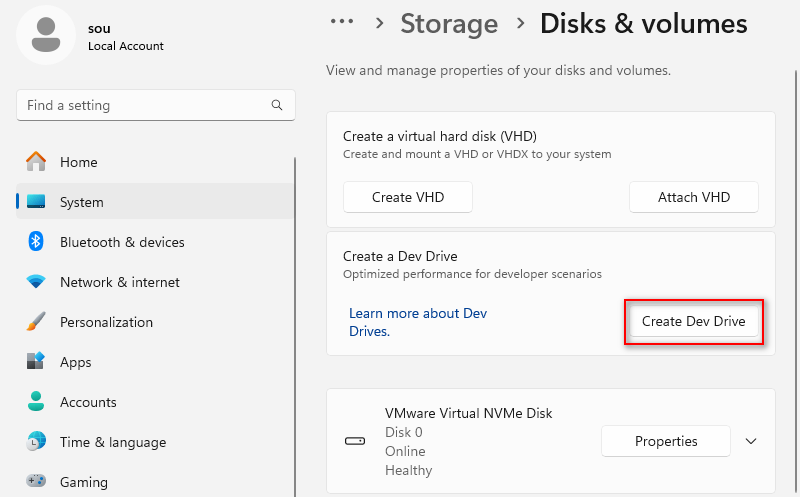
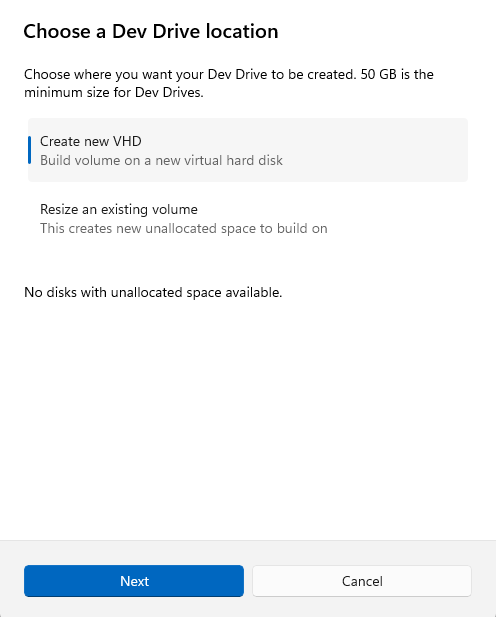
Step 3: Click on the "Create Dev Drive" button and follow the prompts to create a Dev Drive. There are three options: create new VHD, resize an existing volume and use unallocated space.
I will use "create new VHD" as an example to demonstrate the creation operation.
3.1 Select "Create new VHD" in "Choose a Dev Drive location" window, then click "Next".
3.2 Type a name, specify a location and assign disk space for this virtual hard disk. Then, click "Create" button.
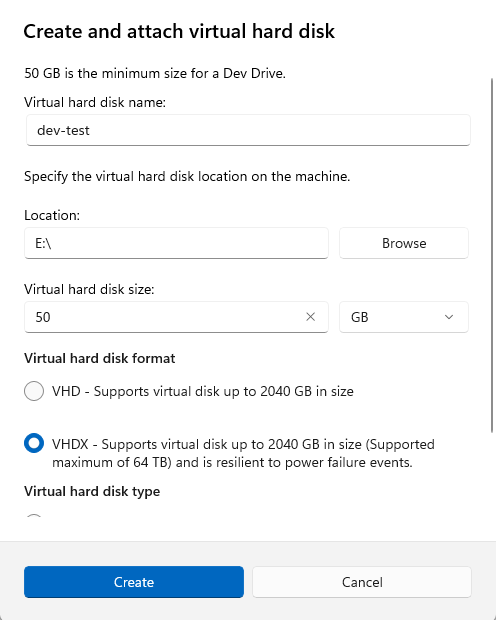
Note: The location must have more than 50 GB free space.
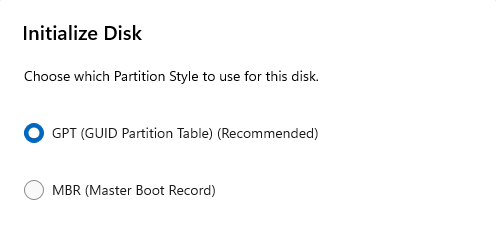
3.3 Select "GPT" to initialize Disk.
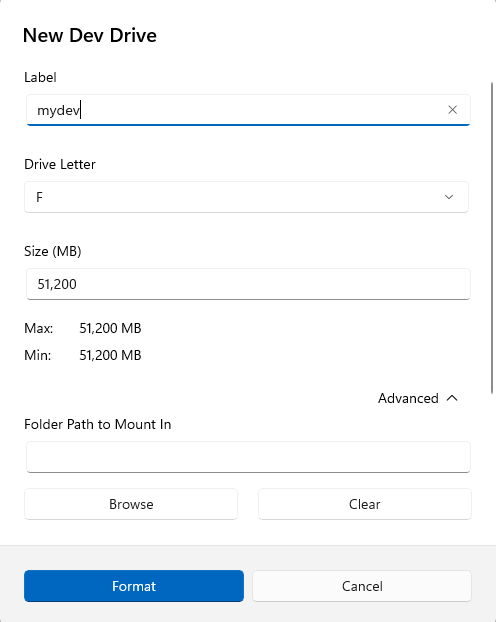
3.4 Designate a Label, modify the drive letter and size for this dev drive, then click "Format" button.
Tip: You can select a folder path to mount under Advanced option.
3.5 Now, you can find the dev drive and the corresponding "dev-test.vhdx" file on Windows Explorer.
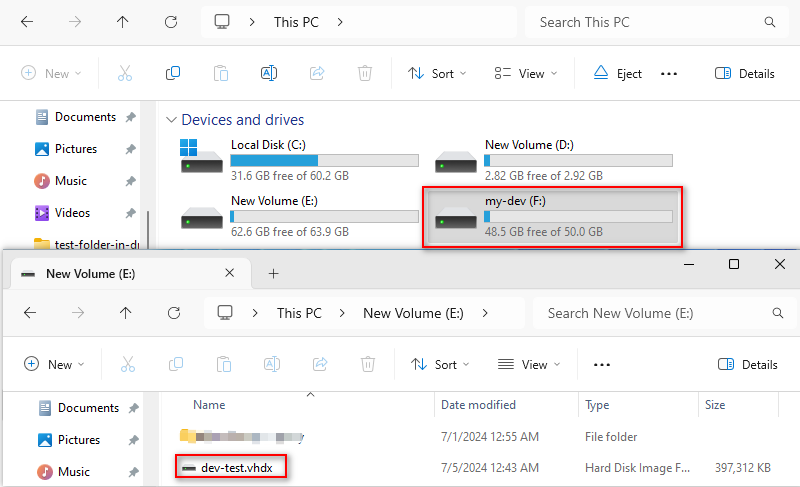
The operations of other creation methods are similar.
3. Delete a Dev Drive
Deleting a Dev Drive will either free up the virtual hard disk (VHD) file or revert the space to unallocated, depending on the creation method.
For Dev Drives Created Using Create a VHD
Step 1: Open Command Prompt as an administrator.
Step 2: Enter the following commands:
diskpart
select vdisk file="The path of the virtual hard disk file"
detach vdisk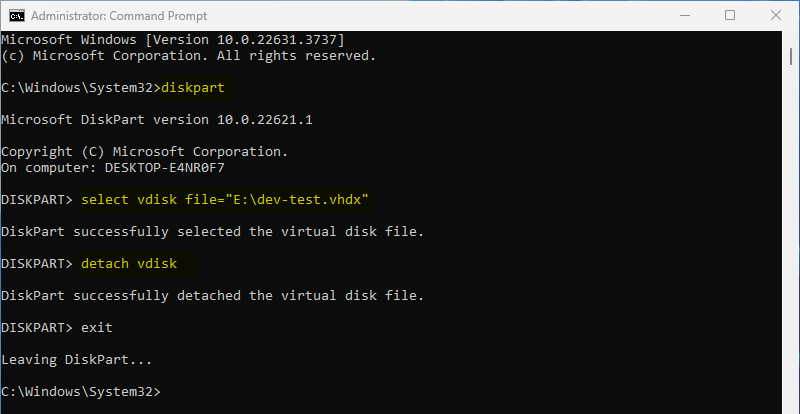
Tip: Alternatively, you can also eject the Dev Drive directly from the Windows Explorer.
Step 3: Delete the corresponding VHD file from File Explorer.
For Dev Drives Created by Other Methods
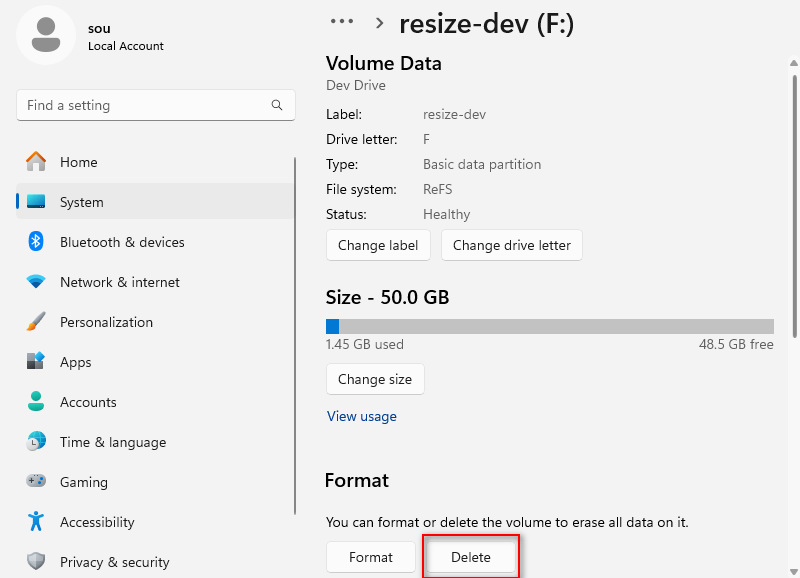
Step 1: Go to Settings > System > Storage > Advanced storage settings > Disks & volumes.
Step 2: Find the Dev Drive, go to its Properties, and select Delete.
Note: The space will become unallocated, which can be reassigned via Disk Management.
4. Conclusion
Dev Drive is a valuable addition to Windows 11, providing developers with an optimized, secure, and efficient storage solution. By setting up Dev Drive, developers can enjoy improved performance and better organization of their development files. Deleting a Dev Drive is straightforward, ensuring that you can manage your storage resources effectively.
For further information, refer to Microsoft's official documentation.


