Windows 11 23H2 Update Not Showing up? Here Are 5 Ways!
The Windows 11 23H2 update has brought various features: Copilot, AI-enhanced paint, the new volume mixer, taskbar ungrouping, and so on. However, some users are unable to access these features as the Windows 23H2 update is still not showing up. So, how to update to Windows 11 23H2 if your computer hasn’t received an official release? Here are 5 ways to update.
- Why Does the Windows 11 23H2 Update not Show up?
- How to Get the Windows 11 23H2 Update?
- 1. Turn on Receive Windows Updates
- 2. Run the Windows Update Troubleshooter
- 3. Start the Windows Update Services
- 4. Get Windows 11 23H2 with the Installation Assistant
- 5. Use Windows 11 23H2 ISO to Upgrade (Suitable for Unsupported PCs)
Why Does the Windows 11 23H2 Update not Show up?
There are a few reasons why you cannot receive the 23H2 update:
1. Microsoft still has not pushed the latest version 23H2.
2. Your computer doesn’t meet the minimum system requirements.
3. The "Get the latest updates as soon as they’re available" notification is turned off.
4. Windows update services are disabled.
Microsoft will push the latest Windows 23H2 to you if your computer meets the requirements of TPM and CPU. So, you should check if your devices meet the requirements with PC Health Check tool. And be patient to wait for the official push. If you want to get the Windows 11 23H2 update as soon as possible. Try the following methods!
How to Get the Windows 11 23H2 Update?
1. Turn on Receive Windows Updates
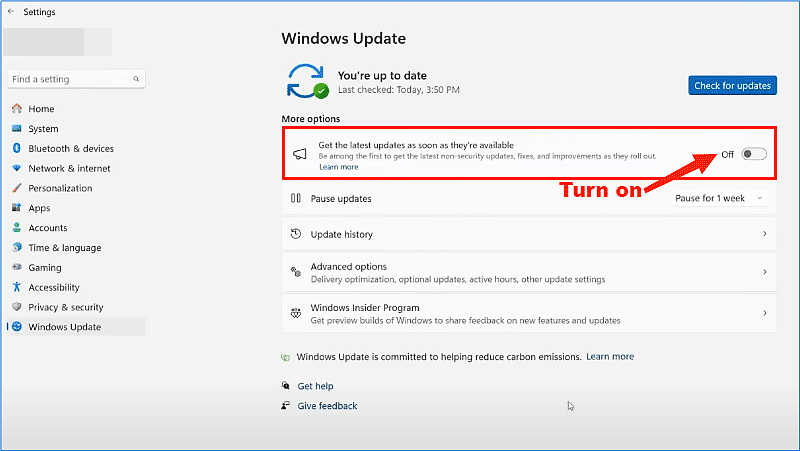
You may not receive version 23H2 because you do not open the receive Windows updates.
Steps: Press Win + I to open the Settings window > Select Windows Update > Turn on "Get the latest updates as soon as they’re available" > Check for updates. Once you switch on it, wait for the official release to update.
2. Run the Windows Update Troubleshooter
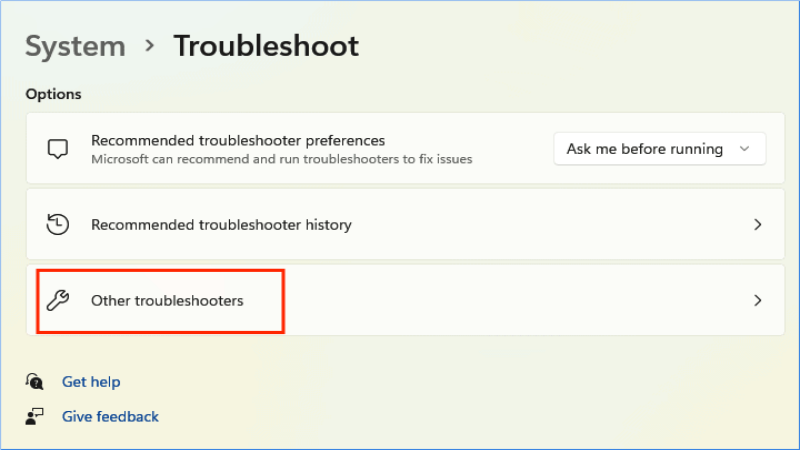
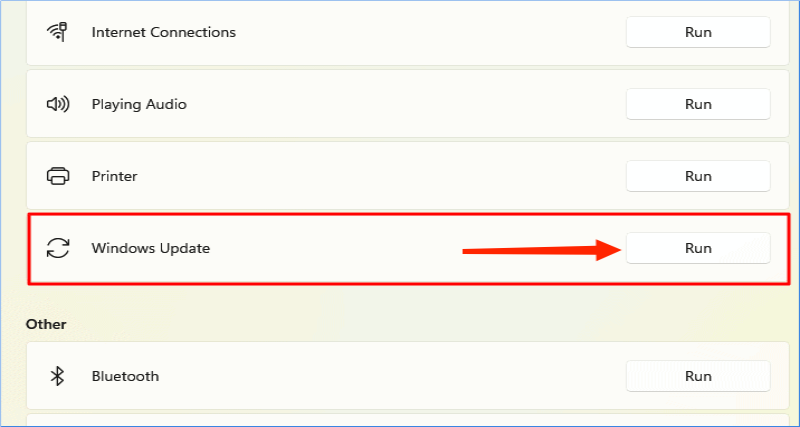
Windows update troubleshooter can help you solve most update errors, so, run the troubleshooter to remove update obstacles.
Steps: Press Win + I > System > Troubleshoot > Other troubleshooters > Windows Update > Run.
3. Start the Windows Update Services
Step 1: Press Win + R > Type "services.msc" > Click OK.
Step 2: Find and right-click the Windows Update service > Properties > Change Automatic in Startup type > Apply > OK.
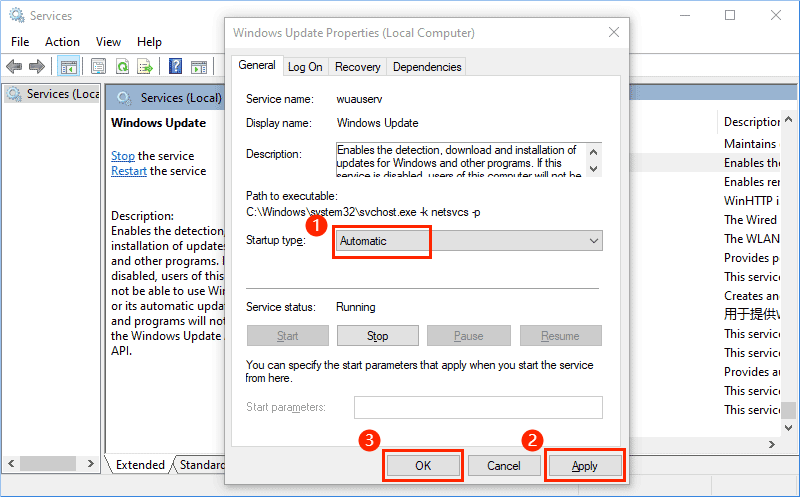
Perform the same steps above as the following three services: Background Intelligent Transfer Service, Cryptographic Services, and Windows Installer.
4. Get Windows 11 23H2 with the Installation Assistant
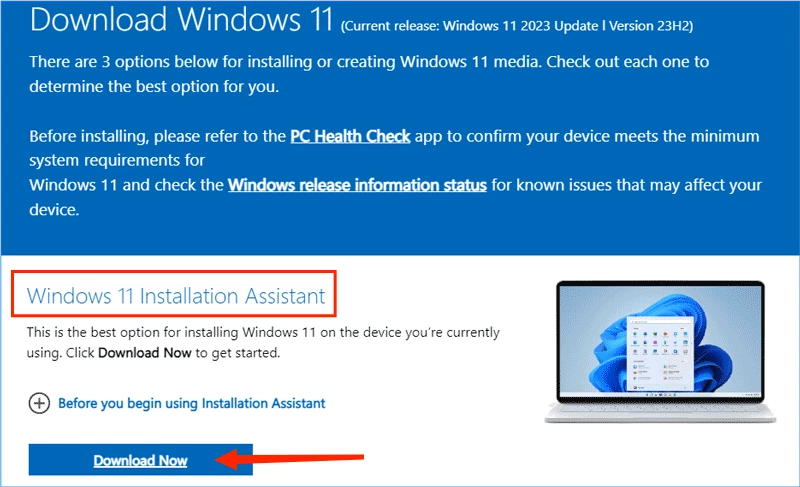
Windows 11 Installation Assistant can help your supported PC update to the latest version. Meanwhile, all files and apps from the previous system will be retained.
Steps: Download and run the Windows 11 Installation Assistant. Then follow the instructions to finish the installation.
5. Use Windows 11 23H2 ISO to Upgrade (Suitable for Unsupported PCs)
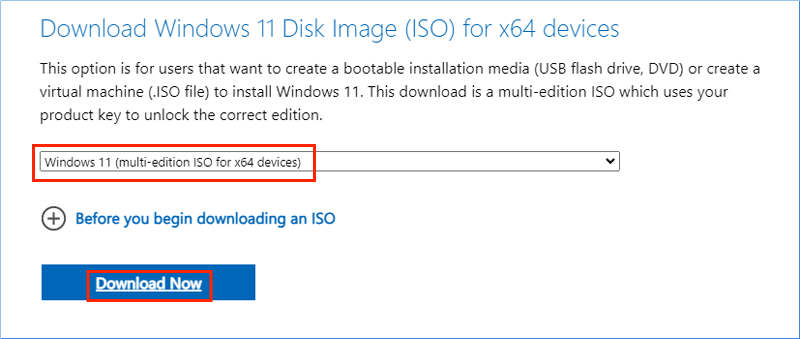
Step 1: Visit the Download Windows 11 webpage > Scroll down to find "Download Windows 11 Disk Image (ISO) for x64 devices" > Select "Windows 11 (multi-edition ISO for x64 devices)" > Click Download Now.
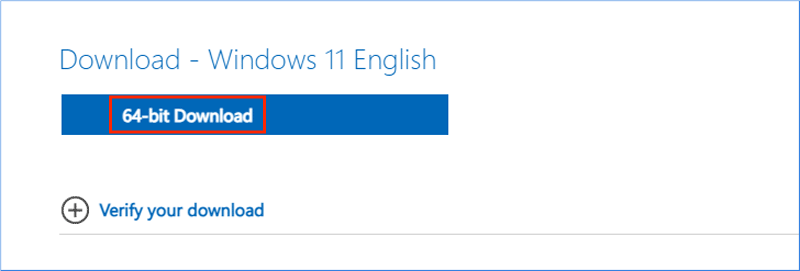
Step 2: Select the product language > Confirm > Click 64-bit Download.

Step 3: Right-click the ISO > Mount > Double-click setup.
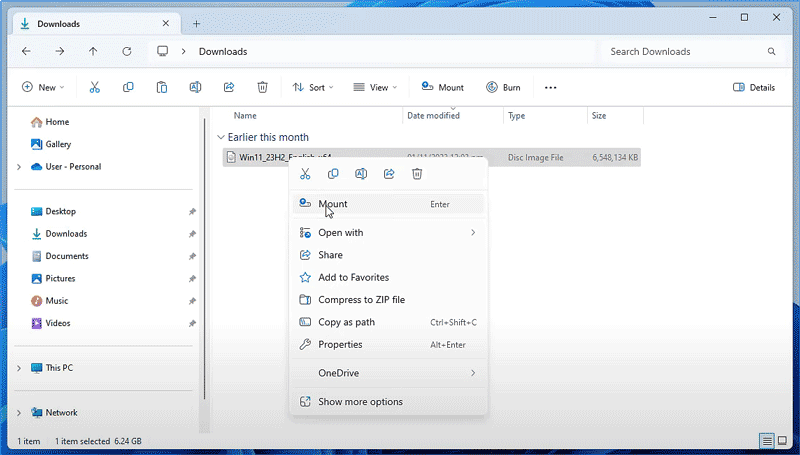
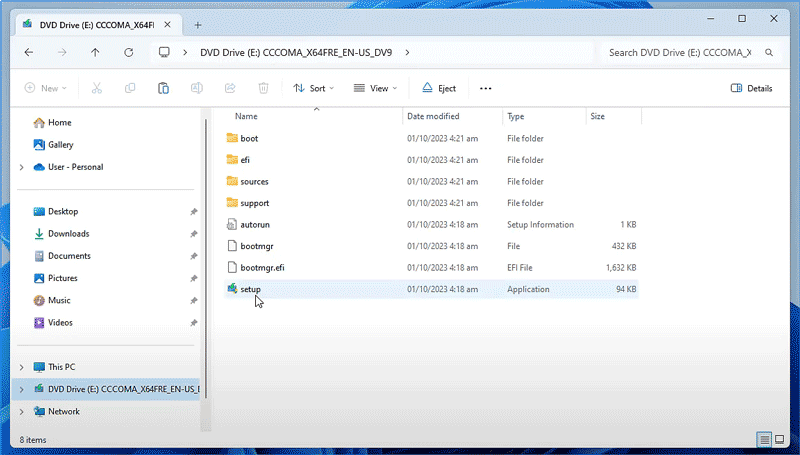
Then follow the instructions to install Windows 11 23H2.
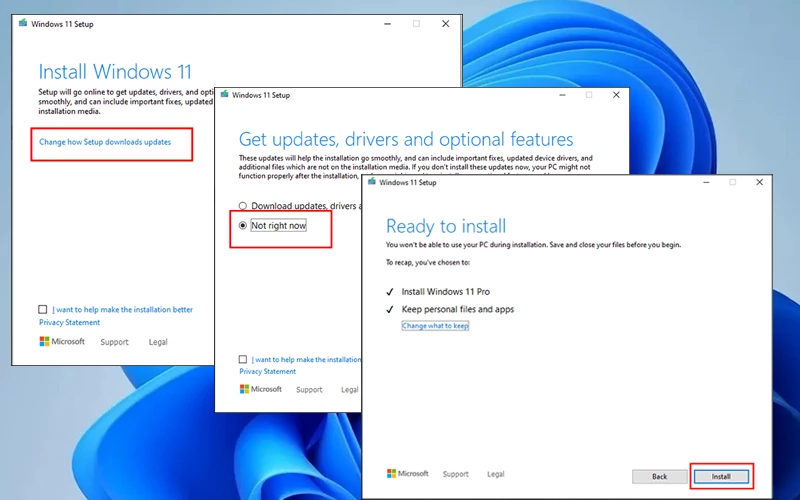
The method of using Windows 11 23H2 ISO to install is also suitable for those systems that cannot meet the requirements of TPM and CPU. Details please read: How to Bypass Windows 11 TPM/CPU Check (Unsupported PCs Are Available).


