Windows Libraries vs. Folders: How to Efficiently Manage Your Libraries Folder

August 20, 2024
Windows Libraries is a powerful feature in Windows Explorer that brings together files from multiple locations—both local and remote—into a single, unified view. Unlike regular folders, Libraries offer a dynamic and flexible approach to file management, making it easier to keep your files organized, no matter where they are stored. But what exactly sets Libraries apart from ordinary folders, and why should you consider using them? In this post, we'll explore the key differences and the steps of using Windows Libraries efficiently
Part One: Differences Between Libraries and Regular Folders
Libraries may appear similar to regular folders at first glance, but they function quite differently. A Library can be thought of as a special folder that holds references to files stored in various locations. However, this is not the same as a folder filled with shortcuts.
1. Content Retrieval:
When you search within a Library, Windows retrieves files from all locations included in that Library. This allows you to search across multiple folders at once without needing to know exactly where a file is stored.
2. File Interactions:
When you interact with files in a Library, such as copying, moving, or deleting them, you are directly affecting the original files—not shortcuts or copies. This direct interaction ensures that any changes you make are immediately reflected across all locations.
These distinctions make Libraries a powerful tool for organizing and managing files that are spread across different drives or network locations.
Part Two: How to Efficiently Manage Your Libraries
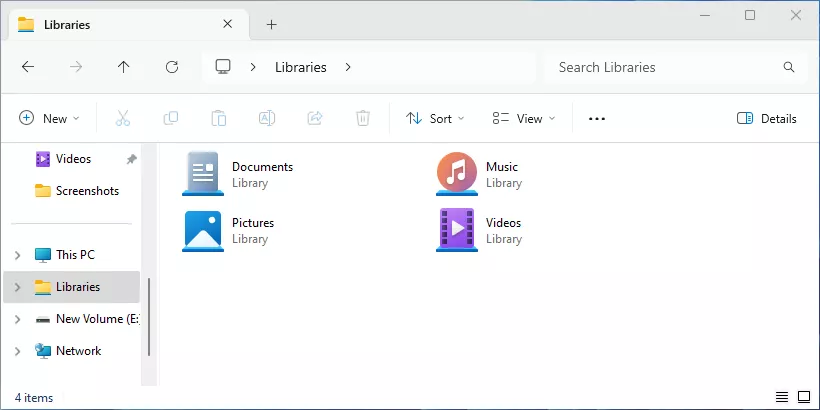
1. Displaying Libraries
By default, Libraries might not be visible in Windows Explorer, especially in newer versions of Windows. To enable and manage Libraries, follow these steps:
Step 1: Open Windows Explorer. Click the three dots icon at the top right of it. Then select "Options" to open the "Folder Options" window.
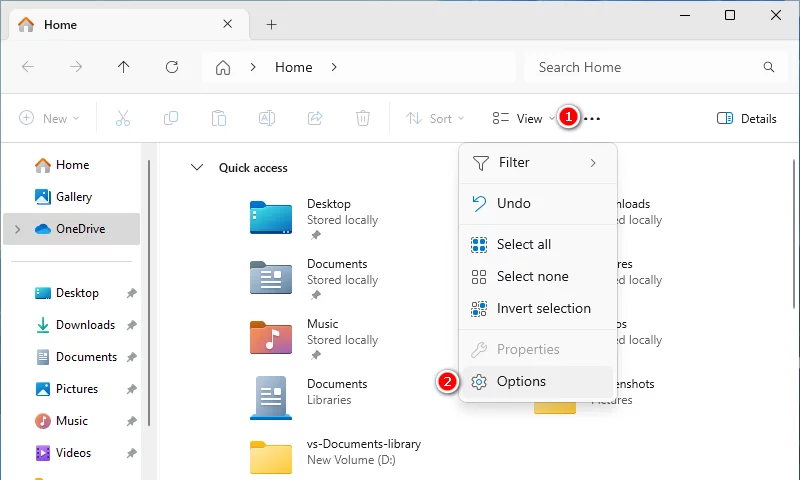
Step 2: Switch to "View" tab under the "Folder Options" window.
Step 3: Scroll down to find the "Show libraries" item and check it.
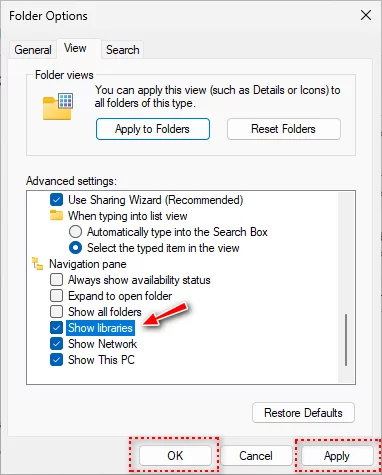
Step 4: Select "Apply" button to apply the settings. Then, click "OK" button to exit this window.
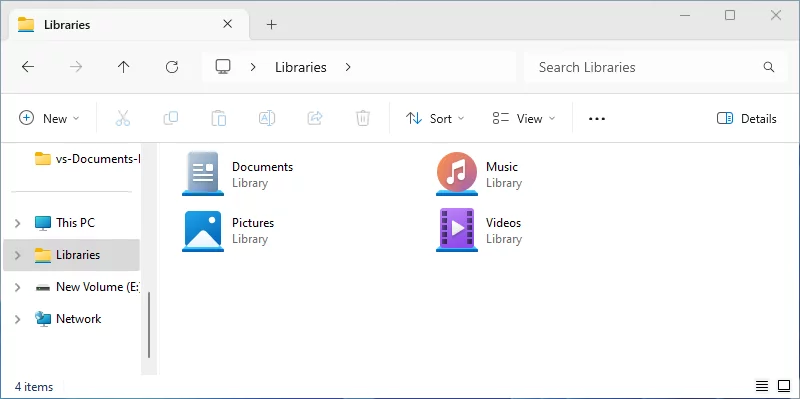
Step 5: Now, you can see the Libraries in Windows Explorer.
2. Creating and Managing Libraries
Creating a new Library and managing the folders included within it is straightforward:
Creating a New Library:
Step 1: Press and hold the Shift key, then right-click within the Libraries section and select "New > Library."

Step 2: Name your Library and start adding folders to it.
Adding/Removing Folders:
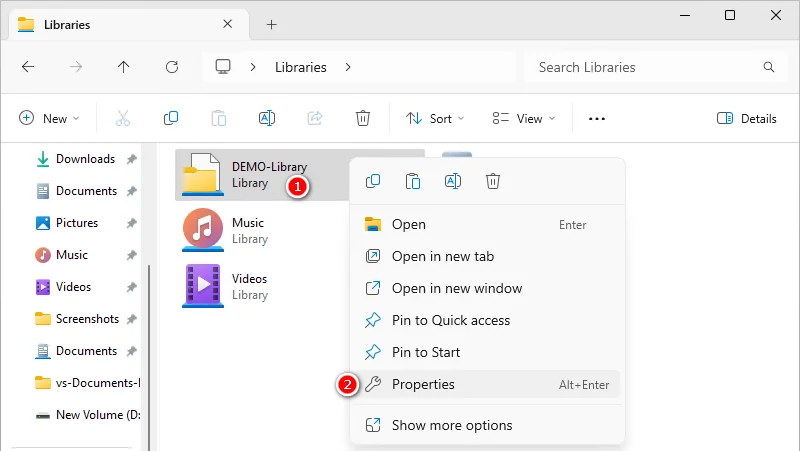
Step 1: Right-click on the Library and select "Properties."
Step 2: In the pop-up properties window, click "Add" to include folder in Library.
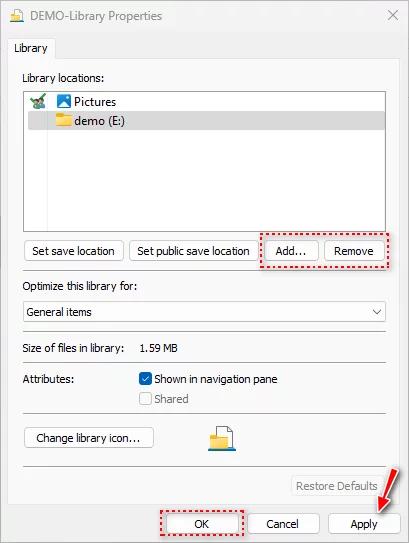
Step 3: After selecting, clik "Apply" and "OK" to save changes and exit the window.
Note: You can include other library in your library. What's more, the same folder can be included in different libraries simultaneously.
Step 4: If you want to remove the specific folder later, select it and click "Remove" to remove it from the Library.
Managing File Default Save Locations
One of the key benefits of Libraries is the ability to manage where files are saved by default:
Step 1: Open the Library properties window.
Step 2: Under the "Library locations" section, you'll see all included folders. You can set one of these folders as the default save location by selecting it and clicking "Set save location."
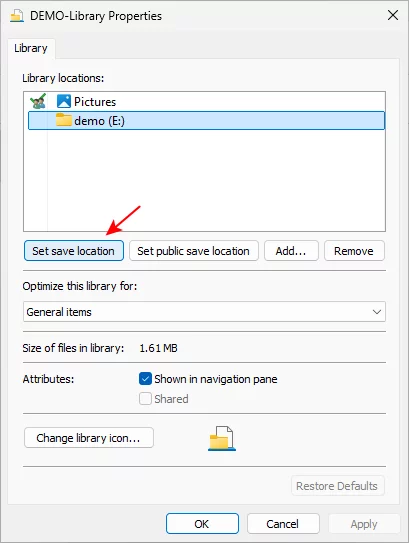
This ensures that whenever you save a new file in that Library, it will be saved to your preferred location automatically.
Hiding Default Libraries
Windows comes with several default Libraries, such as Documents, Music, Pictures, and Videos. If you find these default Libraries unnecessary, you can hide them:
Step 1: Open the Command prompt by pressing Windows + R.
Step 2: Type the following command in turn.
%systemdrive%
cd \
cd %appdata%\Microsoft\Windows\Libraries
attrib +h Music.library-ms
Note: Replace the "Music" with actual Library name you want to hide.
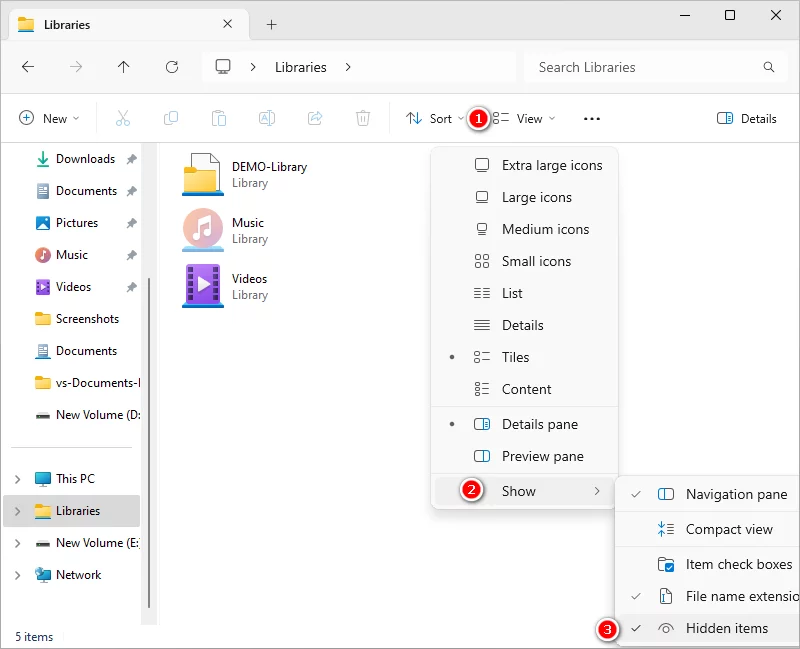
Tip: If you want to hide it thoroughly, uncheck "Show hidden items" option in the Windows Explorer.
FAQs
1. If I move a folder included in a Library to a different location, do I need to re-include it?
No, you do not need to re-include the folder. Windows automatically tracks the folder's new location and updates the Library accordingly. This ensures that your folders remain accessible even if they are moved across different drives.
2. Can I back up files stored in Libraries automatically?
Yes, if you have enabled the File History feature in Windows 11, files within your Libraries will be automatically backed up. This adds an extra layer of security to your important documents.
3. Where are Library containers stored, and can they be edited?
Library containers in Windows 7 and later versions are stored in the "%USERPROFILE%\AppData\Roaming\Microsoft\Windows\Libraries" location. Advanced users can edit these files by opening them with Notepad, allowing for more granular control over Library settings.
For further reading, check out Microsoft's documentation on Windows Libraries.
In summary, Libraries offer a flexible and powerful way to manage files across different locations, providing a more efficient alternative to regular folders. By following these steps and understanding the differences between Libraries and regular folders, you can improve your file management efficiency and make the most out of Windows Libraries.