Detailed Tutorial for Creating a Windows 11 Backup Image

June 12, 2023

Why is essential to create a system image backup? Creating a Windows 11 backup image is designed to create a copy of data so that it can be recovered in the event of primary data failure. A master data failure can be caused by a hardware or software failure, data corruption or a human error, such as a malicious attack (virus or malware) or accidental deletion of data. Additionally, all your data and settings can be transferred from an old computer device to a new one if you purchase a new computer.
Thus, in this article, a new and easy method will be introduced to you to back up your Windows 11 system.
Part 1: Rename volume label
Rename volume label of C disk and one of other partitions in this operation.
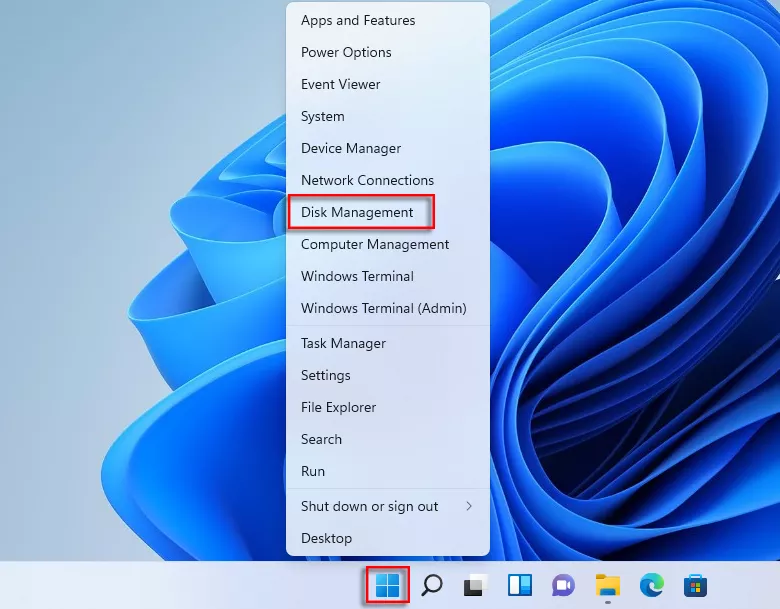
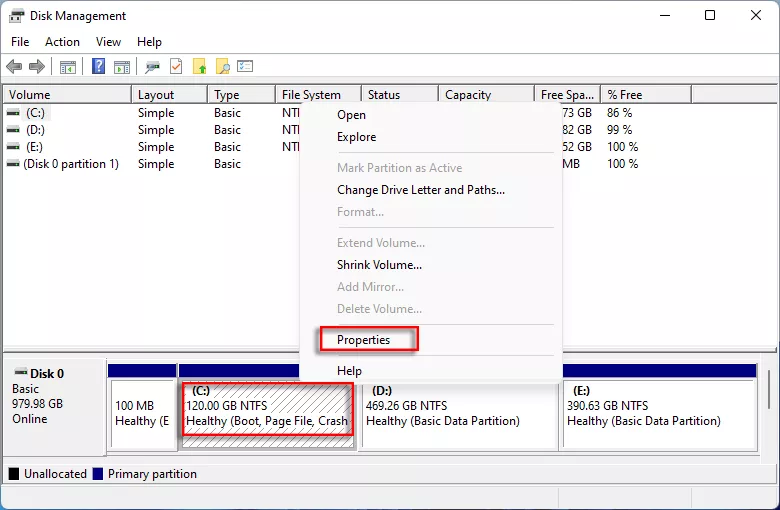
Step 1: Right-click Start icon on taskbar, and then click Disk Management, entering a new page.
Step 2: Right-click C drive and select Properties.
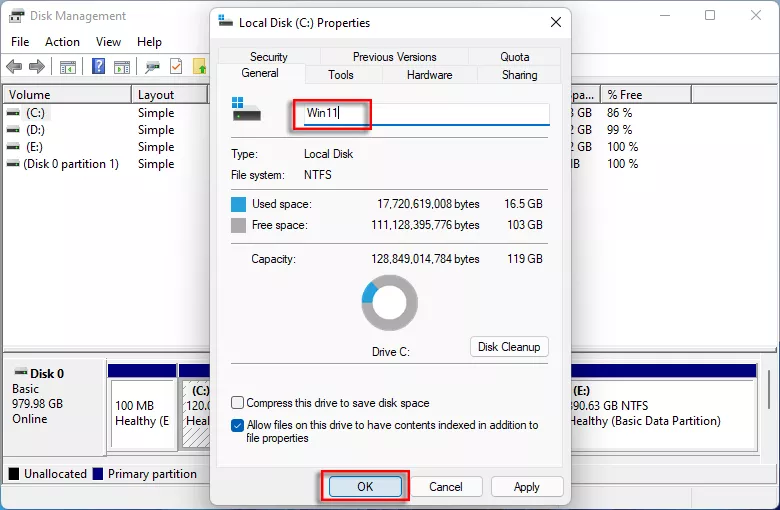
Step 3: In Properties card, switch to General tab, then rename this volume label as Win 11 and click on OK button to continue.
Step 4: Right-click on D partition (or any other partitions) and choose Properties.
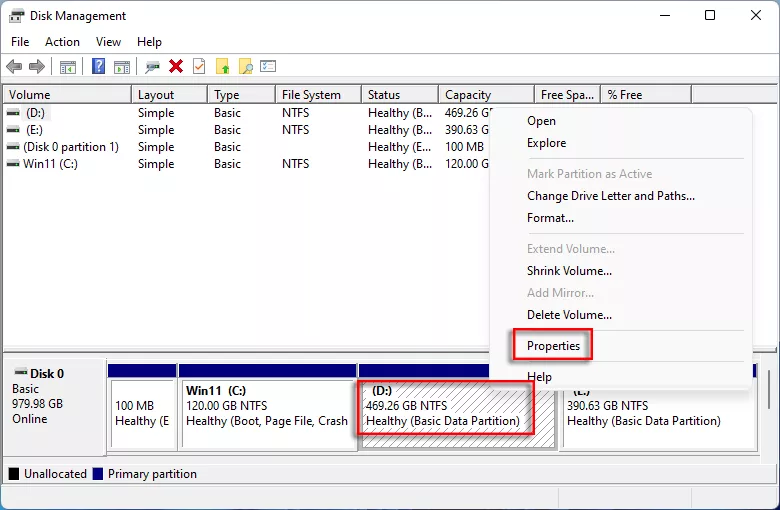
Step 5: Toggle to General tab and rename the volume as BackUp, then click OK.

Part 2: Back up Windows system image
To create a Windows 11 backup image, access Windows Recovery Environment (WinRE) in Advanced startup mode, then use DiskPart command to assign a drive letter for D partition, after that, back up the system image in Windows 11 with DISM command line.
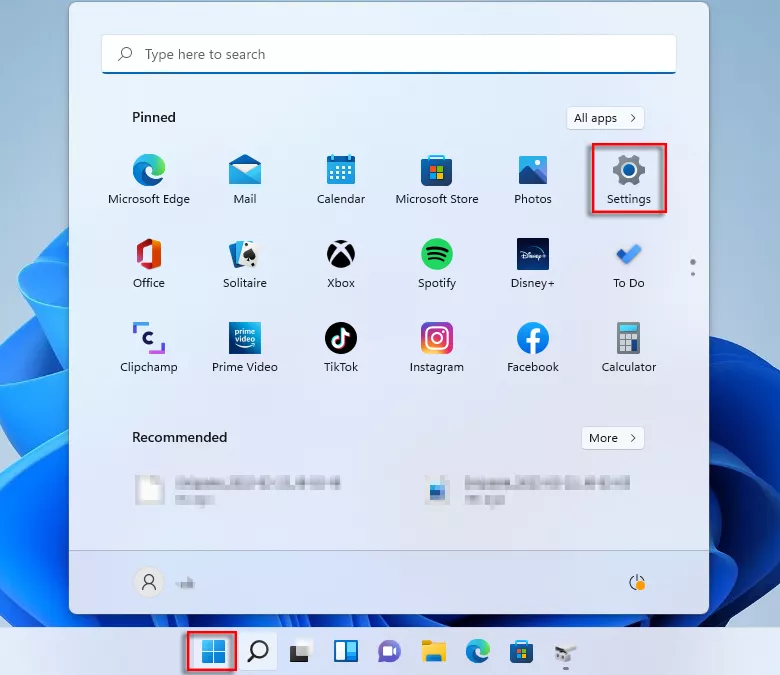
Step 1: Click Start on taskbar and then choose Settings.
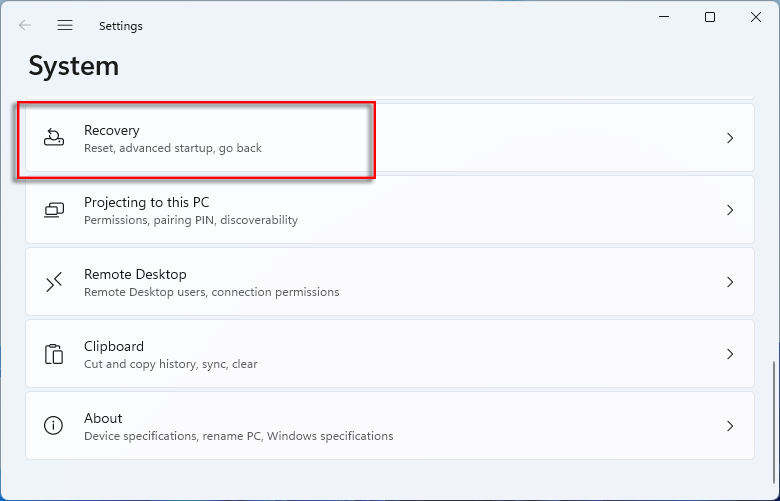
Step 2: Scroll mouse wheel to find Recovery option, then click it.
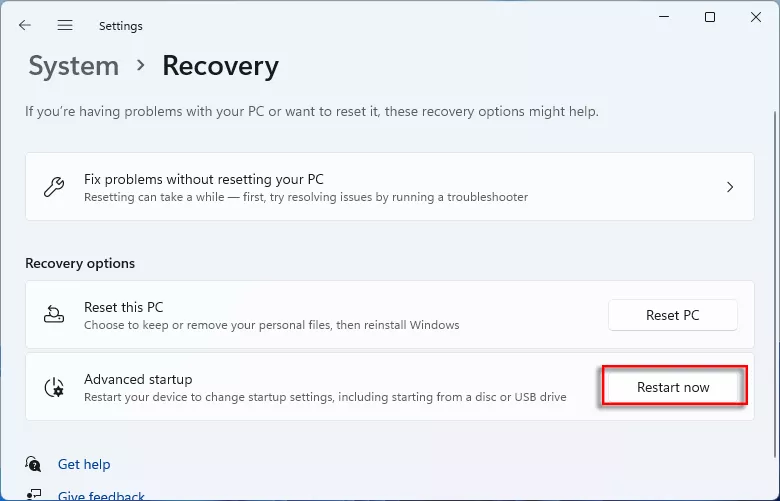
Step 3: Click on Restart now.
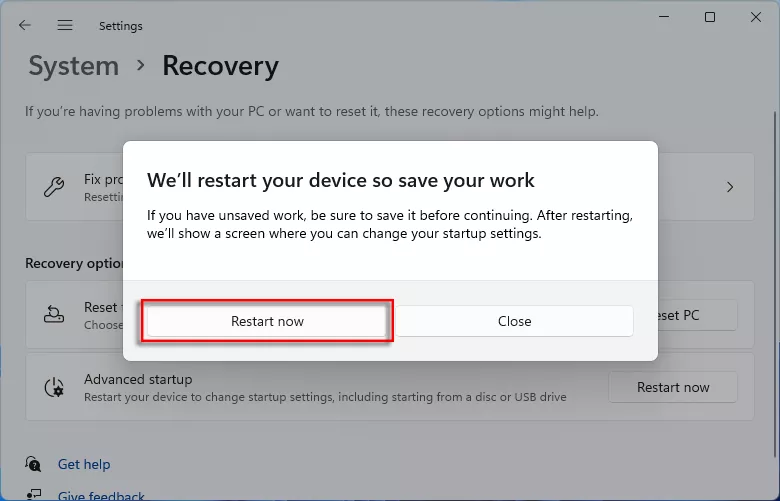
Step 4: Click Restart now again if pops out a prompt window.
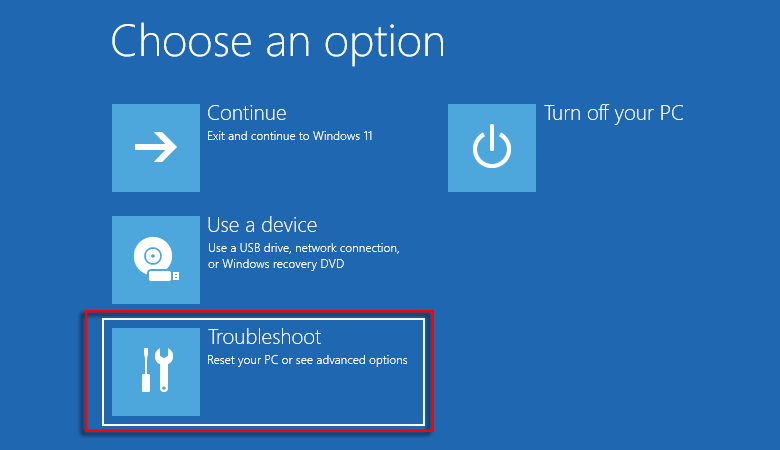
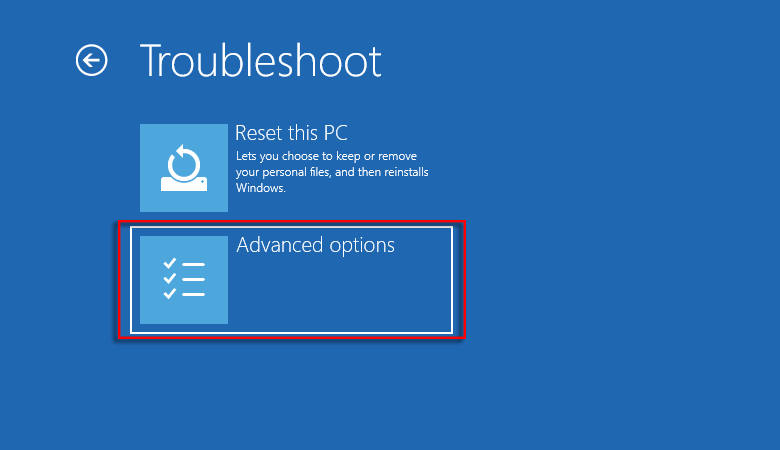
Step 5: In WinRE, choose TroubleShoot.
Step 6: Click Advanced options.
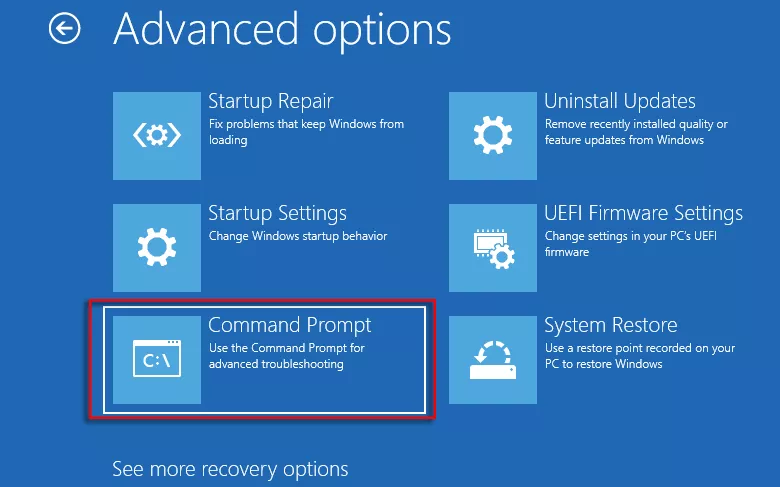
Step 7: Select Command Prompt, entering CMD panel.
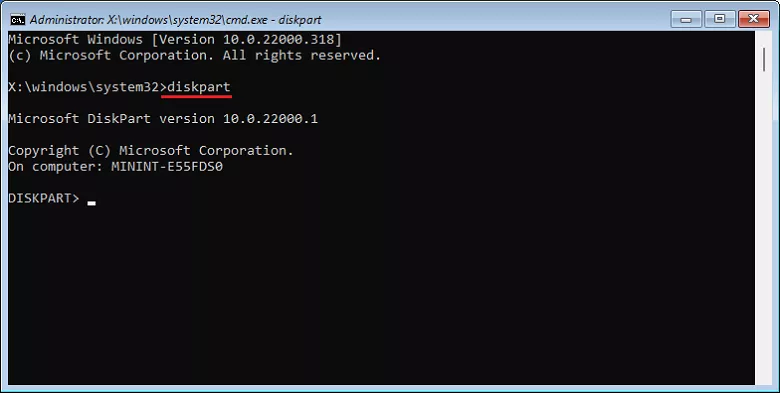
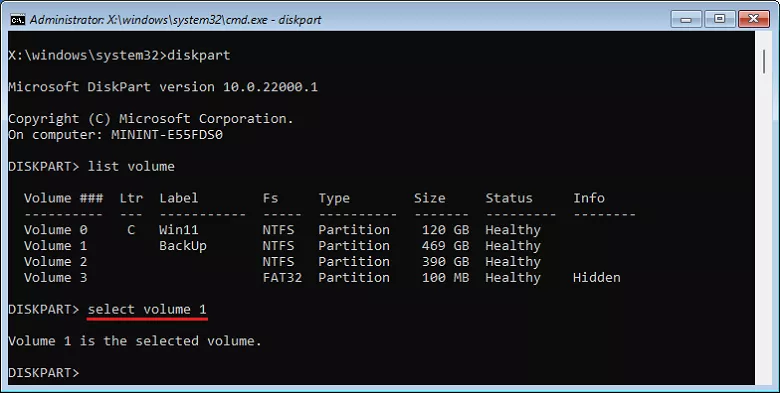
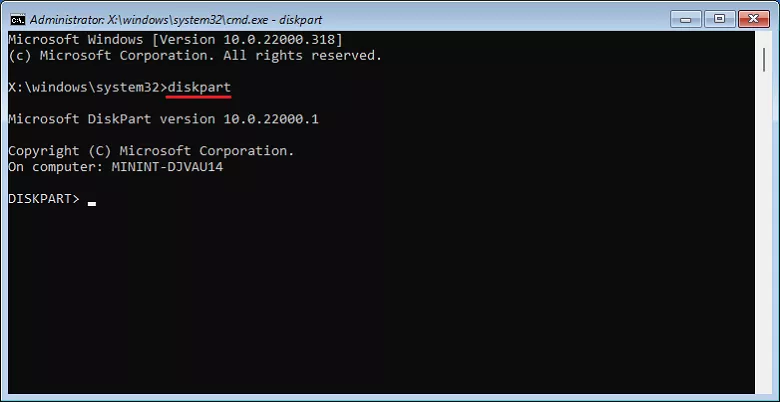
Step 8: Type diskpart and then hit Enter key.
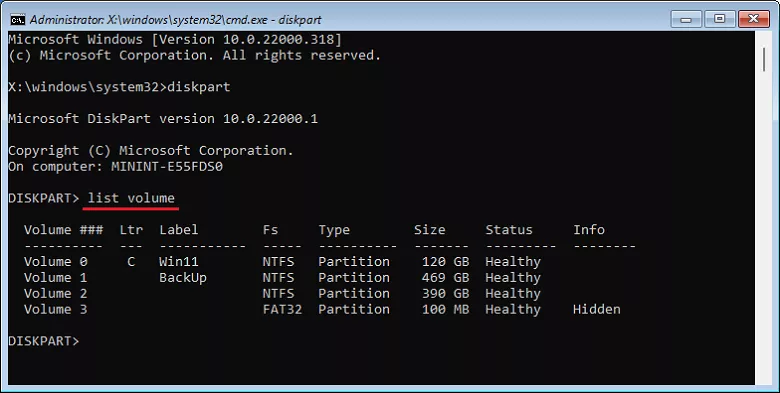
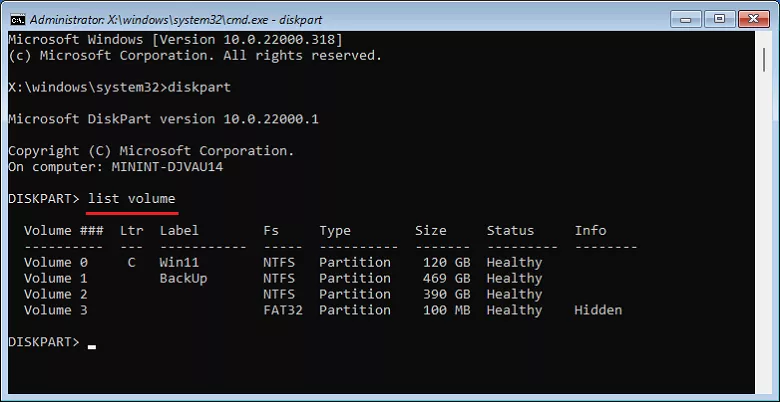
Step 9: Then utilize list volume command and hit Enter key to obtain information for all disks.
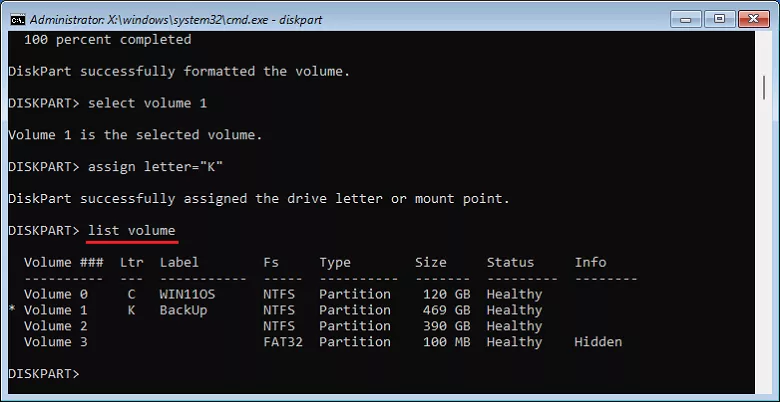
Step 10: Type select volume 1 and press Enter.
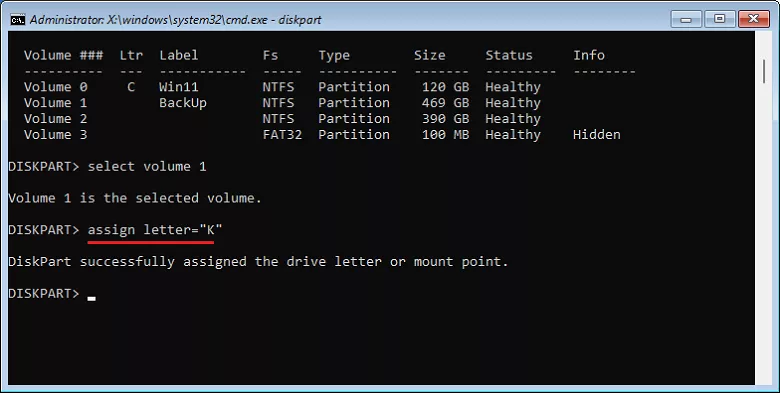
Step 11: Assign a drive letter for current volume with the command of assign letter="K", and then hit Enter.
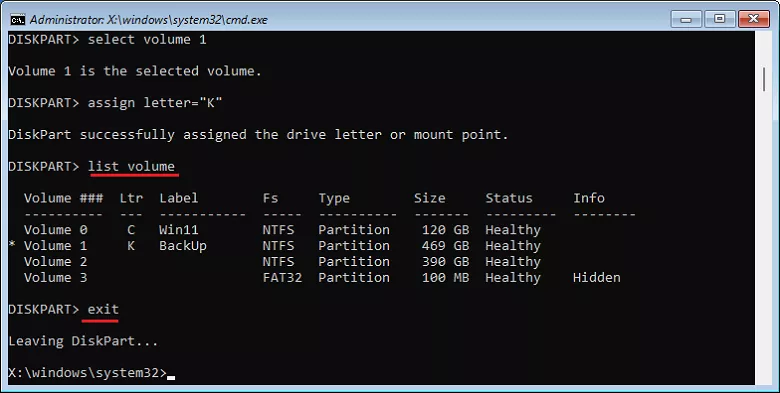
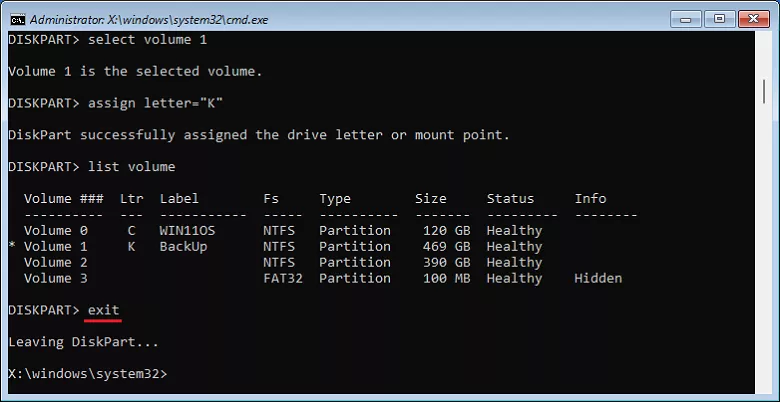
Step 12: Type list volume to get all drives' information, then input exit command to quit DiskPart.
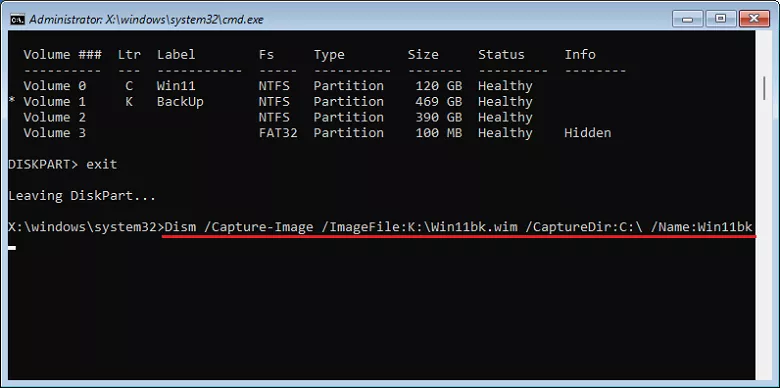
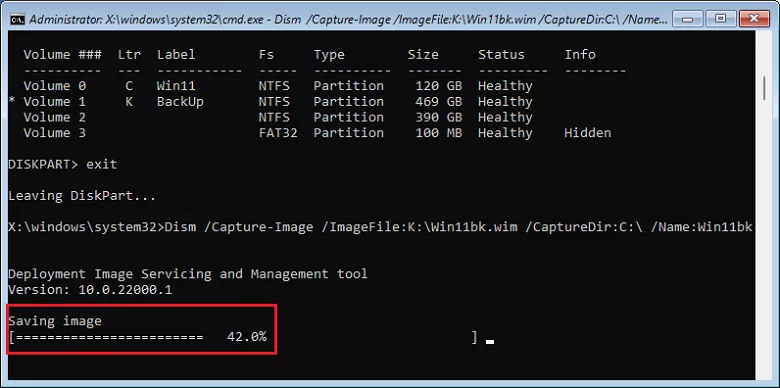
Step 13: Enter command "Dism /Capture-Image /ImageFile:K:\Win11bk.wim /CaptureDir:C:\ /Name:Win11bk", which means the backup system of C drive is saved in the root directory of K drive and the name of backup image is Win11bk.wim.
Step 14: After pressing Enter key, you will be given the progress of Saving image.
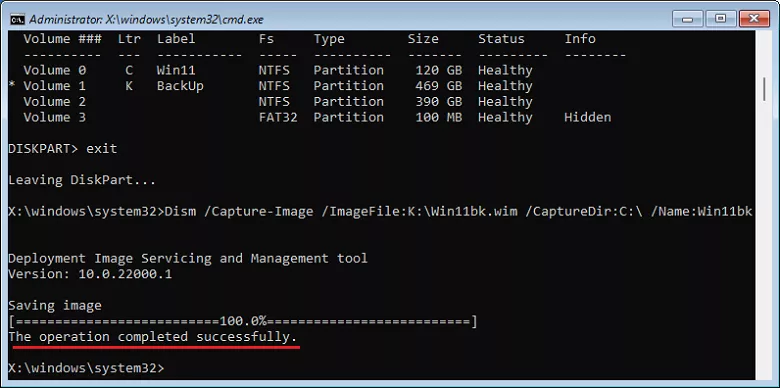
Step 15: If the following message shows up, the backup image of Windows 11 system has been completed.
Part 3: Restore Windows 11 System
Please ensure to restore system with DISM command after using DiskPart command, or you will no longer be able to access previous system.
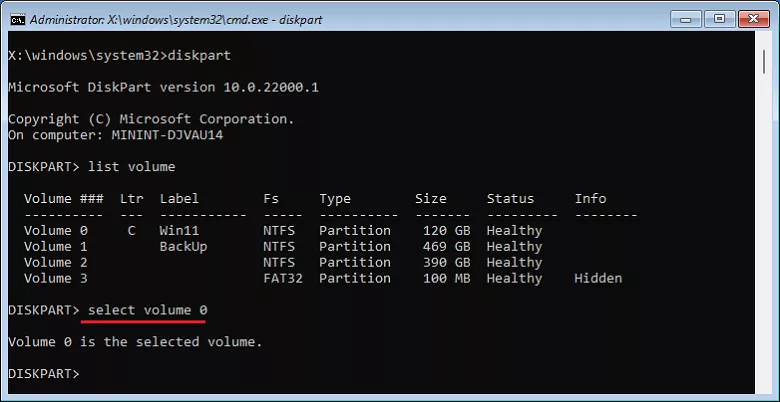
Step 1: Type diskpart and press Enter key to access DiskPart.
Step 2: Obtain volume message with list volume command.
Step 3: Type select volume 0 and hit Enter.
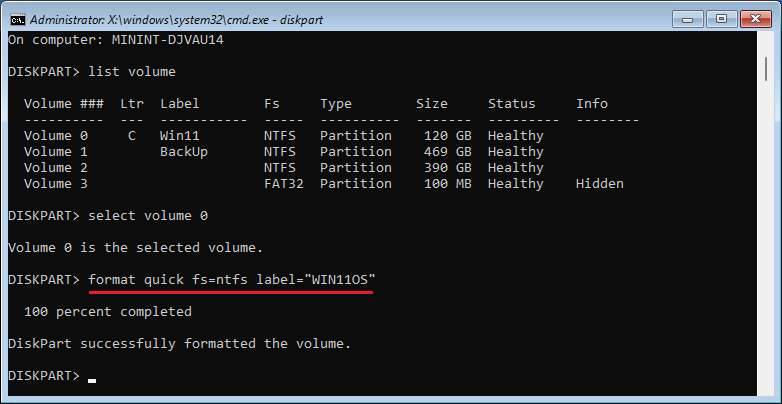
Step 4: Type "format quick fs=ntfs label='WIN11OS'" and press Enter to continue.
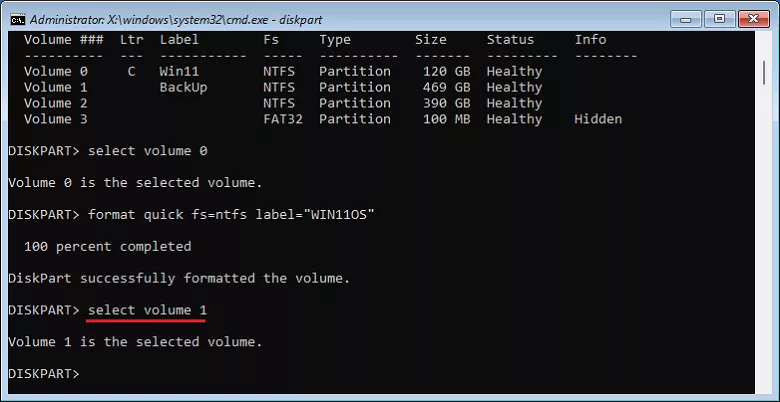
Step 5: Input select volume 1 and type Enter.
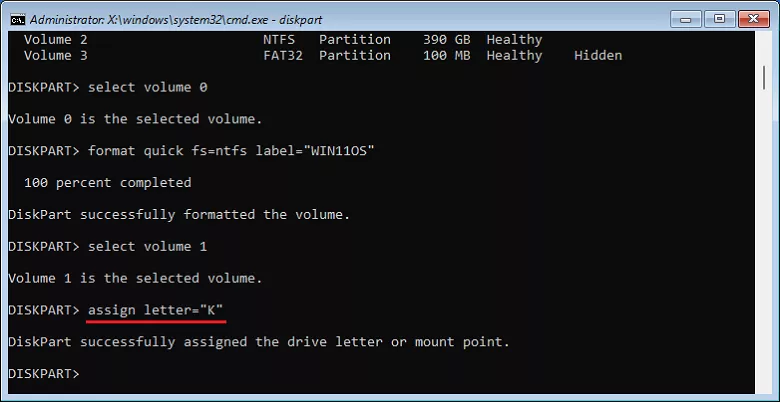
Step 6: Input assign letter="K" and press Enter.
Step 7: Type list volume, then hit Enter.
Step 8: Type exit and press Enter to terminate DiskPart command.
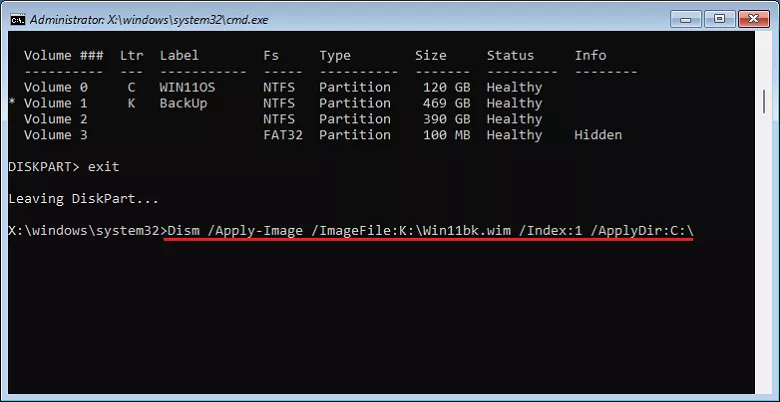
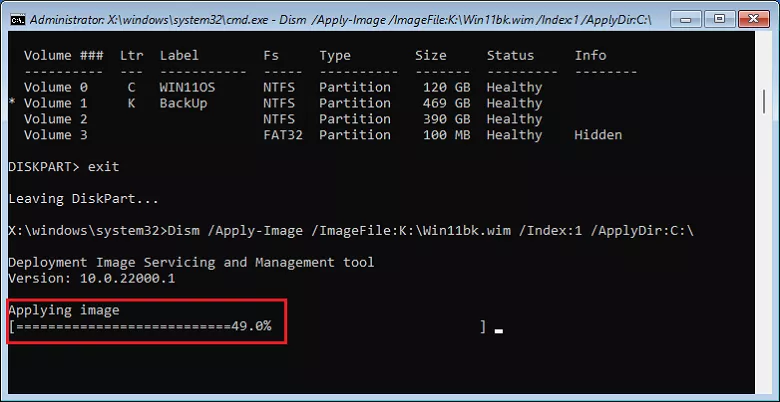
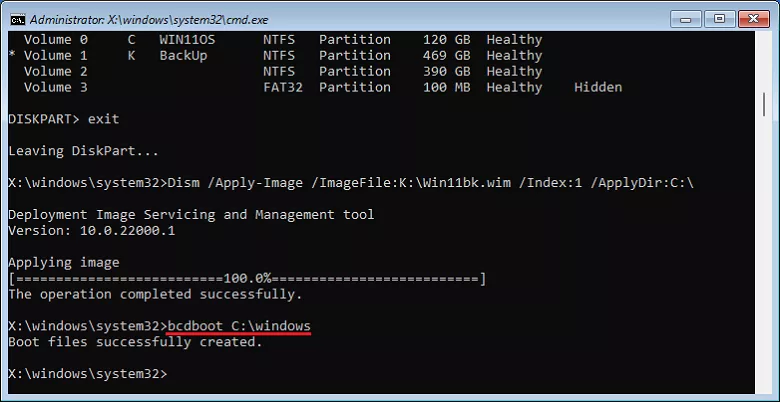
Step 9: Type "Dism /Apply-Image /ImageFile:K:\Win11bk.wim /Index:1 /ApplyDir:C:\" and hit Enter, recovering Win11bk.wim to C drive.
Step 10: The progress of Applying image will be displayed on the panel.
Step 11: After restoring successfully, type "bcdboot C:\windows" to add bootstrap file and hit Enter.
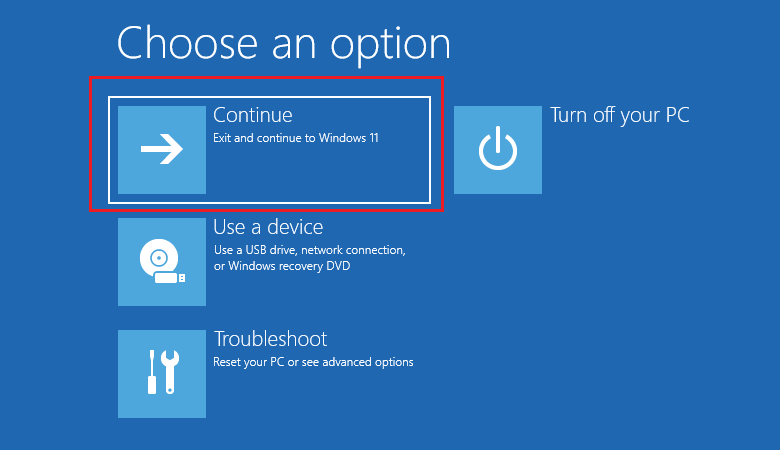
Step 12: Close CMD window and click Continue to access system.
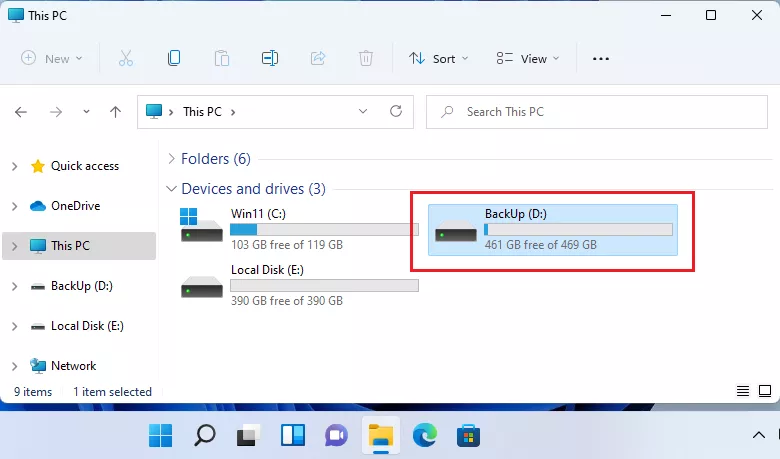
Step 13: Click on This PC, target to the BackUp drive (D drive) and open it.
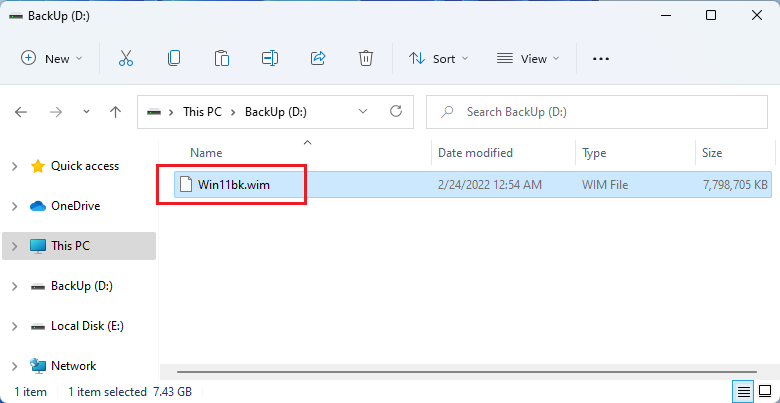
Step 14: The backup system image, Win11bk.wim, is stored in D disk.
Watch the Video Tutorial
Creating a Windows 11 backup image step by step - Watch the video now!