How to Optimize PC for Gaming in Windows 10

You're ready to start playing. But that doesn't mean that your computer is necessarily performing at its best. There are still a few that you can do to optimize your Windows 10 for better gaming performance. Just a few tweaks to your Windows settings can make all the difference. Here are some tips to optimize Windows 10 for gaming:
Way 1: Disable Background Processes
Disable any unnecessary background processes to free up system resources and optimize PC for gaming. To disable background processes, you can follow these steps:
Step 1: Right-click on the taskbar to open the Task Manager. Or just press Ctrl+Shift+Esc.

Step 2: Go to the Processes tab and look for processes that use a lot of CPU, memory, or disk resources. Right-click on the process you want to end and select End task.
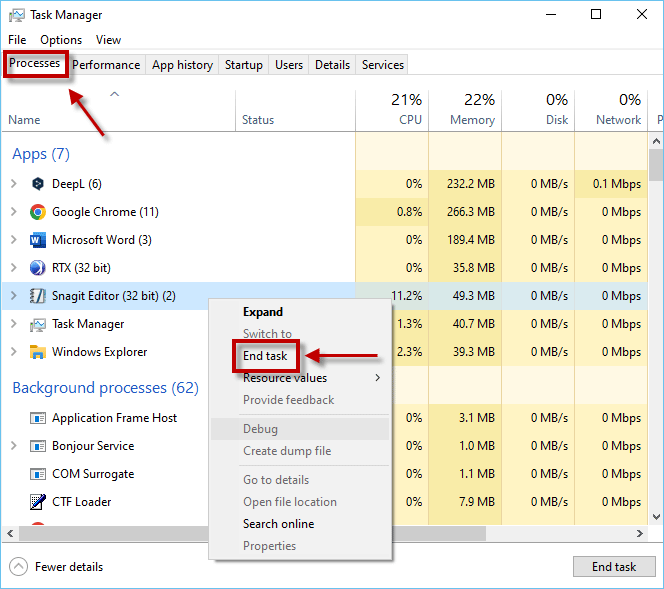
Step 3: Go to the Startup tab and click Disable tab to disable programs that you don't need to start automatically when you turn on your computer. This can help reduce the number of background programs running on your computer.
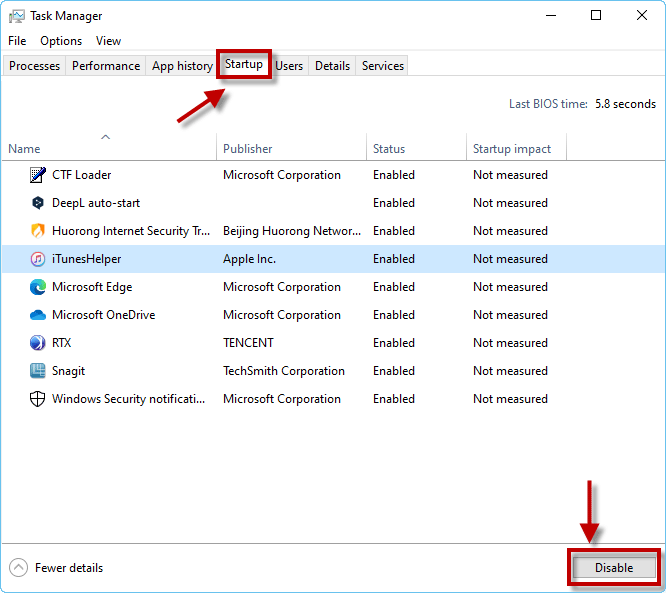
Note: Be careful when ending or disabling processes, as some of them may be necessary for your computer to function properly. If you are not sure if a process is necessary, it is best to leave it alone.
Way 2: Adjust Power Settings
Set your power settings to High Performance to ensure your system is running at its maximum potential. This method can optimize your PC for gaming effectively, you can follow these steps:
Step 1: Press the Windows key + X and select Power Options from the menu.

Step 2: Open the Additional power settings on related settings.
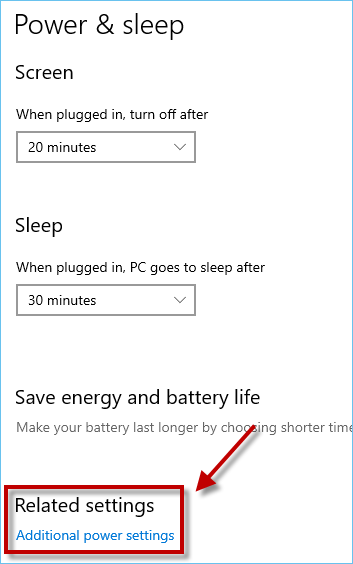
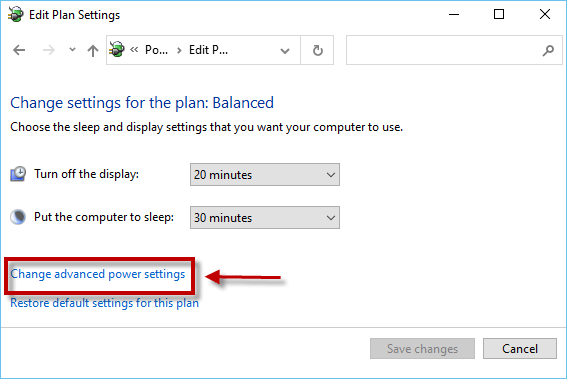
Step 3: You can choose from Balanced or Power saver plans that suit your needs. The Balanced plan is recommended for most users as it balances performance and power consumption. Then click on the Change plan settings link next to the power plan you have chosen.
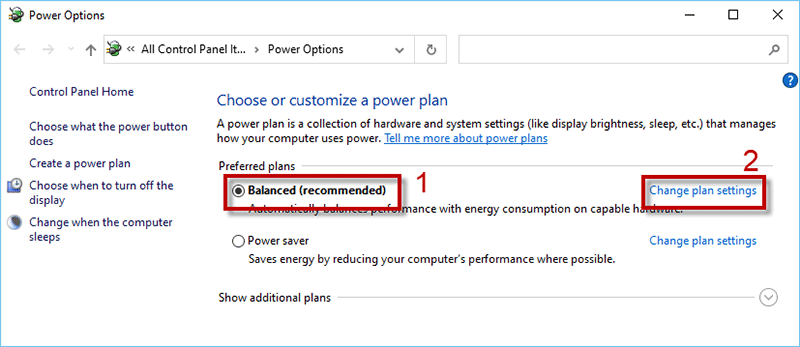
Step 4: Click on the Change advanced power settings link.
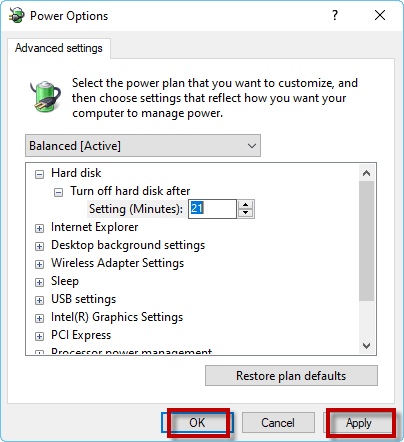
Step 5: In the Advanced settings tab, you can adjust various power settings according to your needs. Once you have adjusted the power settings, click on the Apply and OK button to save the changes.
Way 3: Disable Background Windows Services
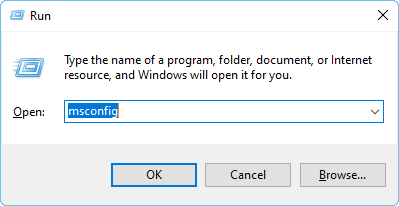
Step 1: Press the Windows + R to open the Run prompt. Then type “msconfig” in and click OK.
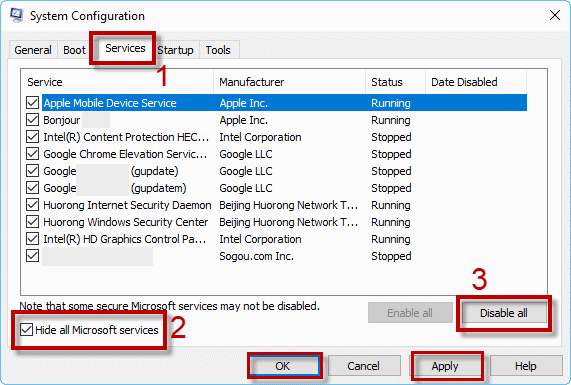
Step 2: On the system configuration, choose the Services tab. Then check the Hide all Microsoft services box. And select Disable all, then click Apply and OK to save the change.
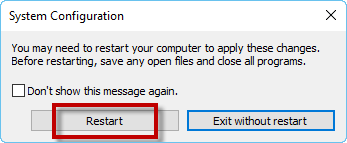
Step 3: Select Restart on the dialog box that opens.
Way 4: Disable Unnecessary Visual Effects
Disable any unnecessary visual effects also can optimize PC for gaming in Windows 10, you can follow these steps:
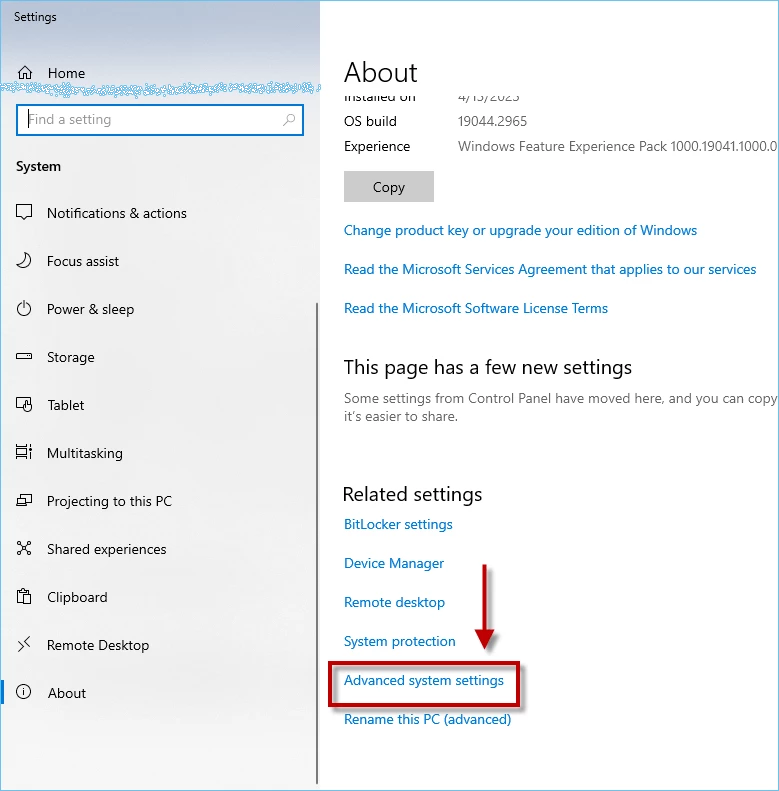
Step 1: Press the Windows key + Pause/Break to open System Properties. Then click on the Advanced system settings.
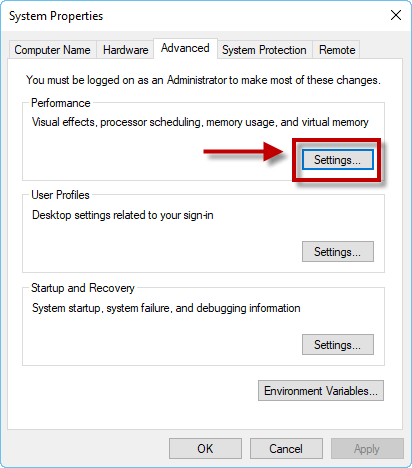
Step 2: In the System Properties window, click on the Settings button under the Performance section.
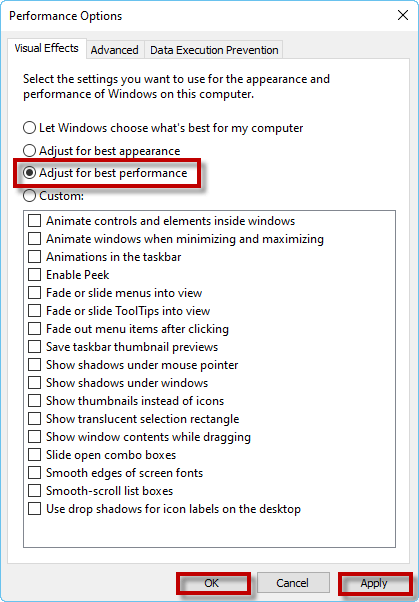
Step 3: In the Performance Options window, select the Adjust for best performance settings, then click on the Apply and OK button to save the changes.
Way 5: Keep Your System Up to Date
Regularly updating your system with the latest Windows 10 updates can ensure the best performance and stability. So, you can optimize your PC for gaming by keeping your system up to date, and you can follow these steps:
Step 1: Open Settings then click Update & Security.

Step 2: Click on the Check for updates button. Once updates are available, you can install them by clicking on the Install now button.

Step 3: Select Advanced options to open the additional update control and settings.

Step 4: Open all the update options for automatic updates.
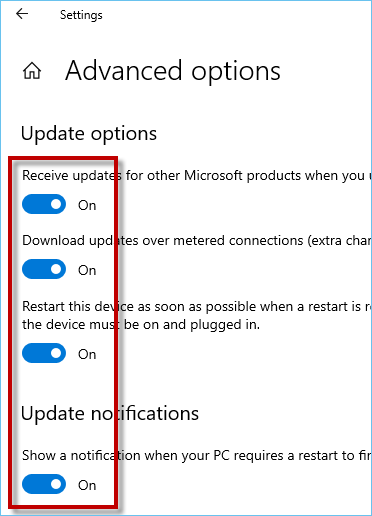
Step 5: Restart your computer, some updates may require you to restart your computer, so make sure to save any unsaved work before restarting.
Way 6: Use a Gaming Mode
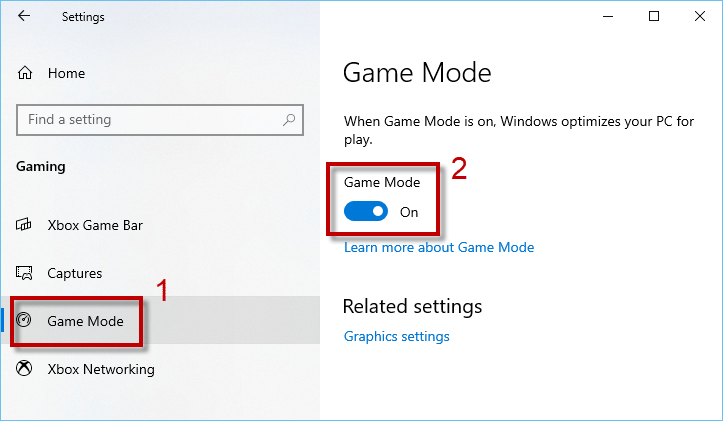
Using a gaming mode can help optimize your computer's performance for gaming by allocating more system resources to the game and reducing background processes and notifications. To use a gaming mode, you can follow these steps:
Step 1: Open the Windows 10 settings and click on Gaming.
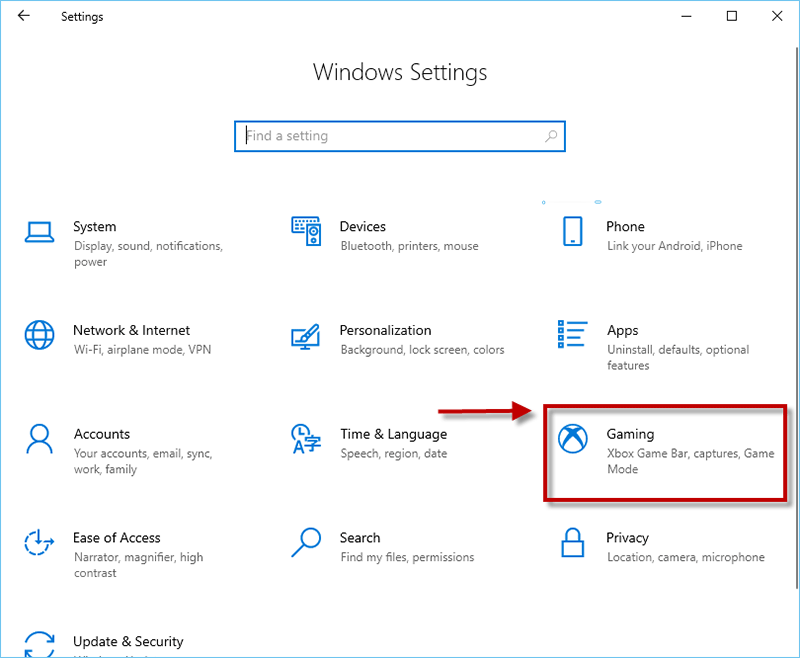
Step 2: Click on Game Mode from the left panel and toggle the switch under "Game Mode" to turn it on.
Way 7: Disable SysMain
SysMain is a built-in Windows feature that improves startup times for apps and Windows itself. Turning it off can optimize PC for gaming and improve gaming performance on your Windows 10. The following are the steps to disable SysMain in Windows 10:
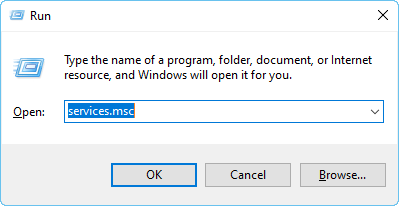
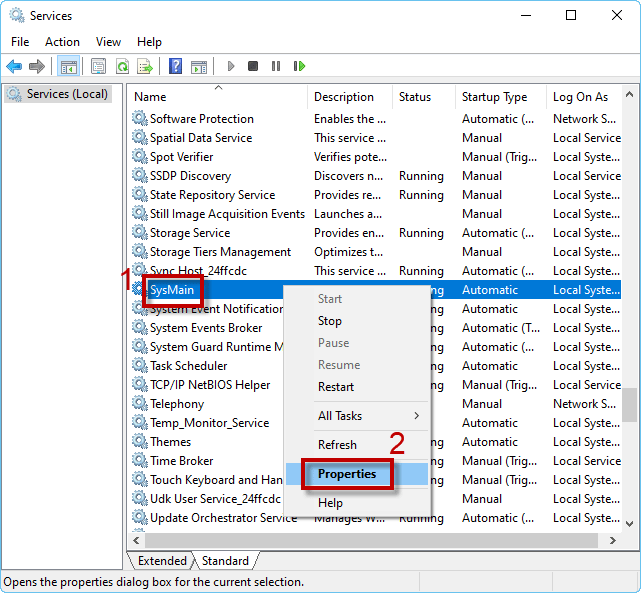
Step 1: Press the Windows key + R to open the Run dialog box. Then type " services.msc " and click OK to open the Services window.
Step 2: Scroll down and find " SysMain " from the list of services. Then right-click on it and select " Properties ".
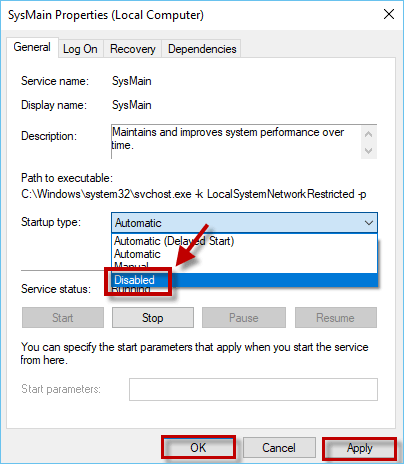
Step 3: In the Properties window, select " Disabled " from the "Startup type" drop-down menu. Then click " Apply " and " OK " to save the changes.
Conclusion
This article explains seven ways to optimize your PC for gaming in Windows 10, you can choose the one that suits you best, or try them all in turn. In short, take the time to optimize your PC, make sure your PC is performing at its best to get the best gaming experience, reduce frustration, enjoy your favorite games to the full, and get the most out of your gaming PC.


