How to Enable and Use Google Lens in Chrome

August 27, 2024
Google Lens is a powerful tool that allows users to search the web using images instead of text. Integrated into Google Chrome, this feature enhances your browsing experience by providing visual search capabilities directly from the browser. Whether you want to identify objects in images, translate text, or explore similar visuals, Google Lens makes it easier. This guide will walk you through the steps to enable and use Google Lens in Chrome.
Part 1: Enable Google Lens in Chrome for Desktop
Before using Google Lens in Chrome, you need to ensure that Google is set as your default search engine. If it's already your default, you can skip to the next section. Here's how to set it up:
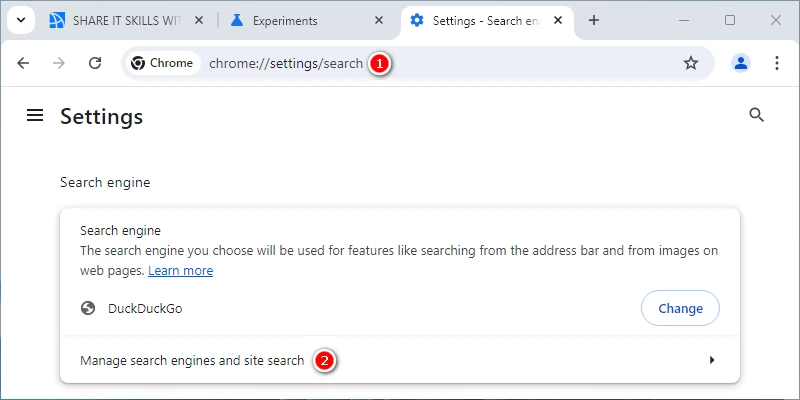
Step 1: Open Chrome and type chrome://settings/search in the address bar, then press Enter.
Step 2: In the settings page, find and click on "Manage search engines and site search".
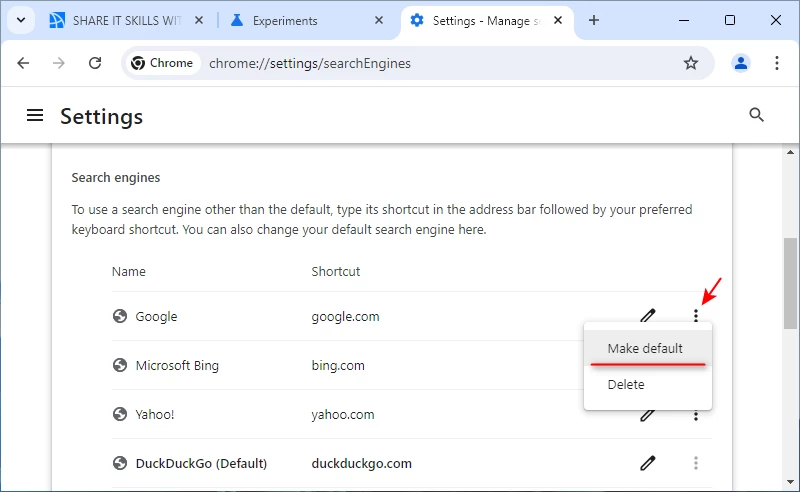
Step 3: Locate the Google search engine in the list. Click the three vertical dots next to it and select "Make default".
Once Google is set as your default search engine, the "Search with Google Lens" option should appear in your right-click menu, toolbar, and omnibox (address bar). If you don't see it, updating your Chrome browser to the latest version might solve the issue.
Alternatively, you can enable Google Lens through Chrome's "Experiments" page by following these steps:
Step 1: Type chrome://flags in the omnibox and press Enter.
Step 2: In the Experiments page, use the search bar to type "lens".
Step 3: Find the "Lens overlay" option and select "Enabled" from the drop-down menu.
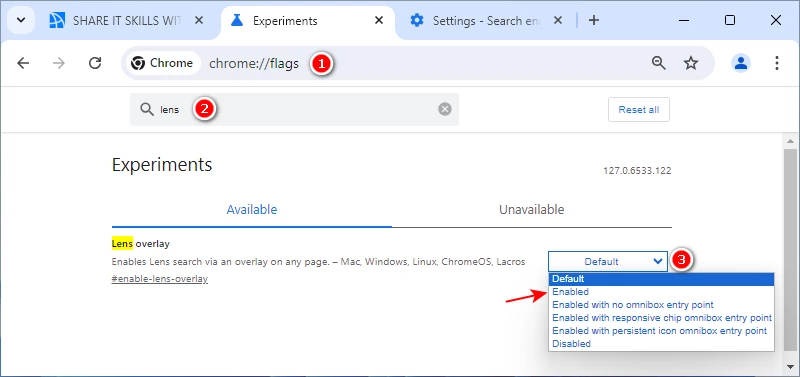
If you prefer not to have the Lens icon in the omnibox, choose "Enabled with no omnibox entry point."
To pin the Lens icon in the omnibox, select "Enabled with persistent icon omnibox entry point."
Step 4: Relaunch the browser to apply changes.
With these steps, Google Lens should now be fully functional in your Chrome browser.
Part 2: Use Google Lens in Chrome for Desktop
Using Google Lens in Chrome is straightforward and can significantly enhance your browsing experience by allowing you to search the web visually. Here's how to do it:
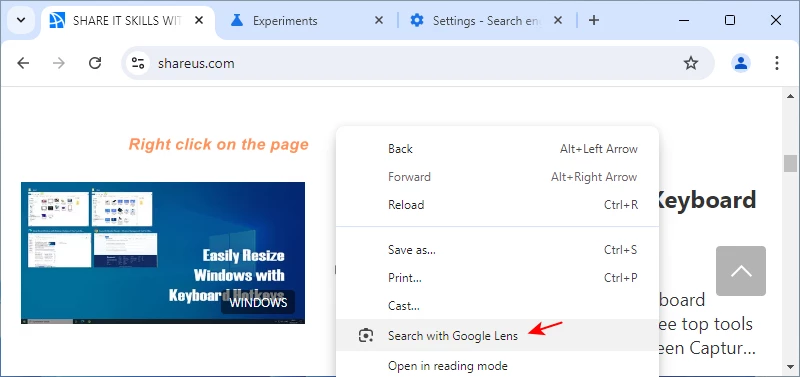
Step 1: Open the webpage or local file that contains the image or text you want to search with Google Lens.
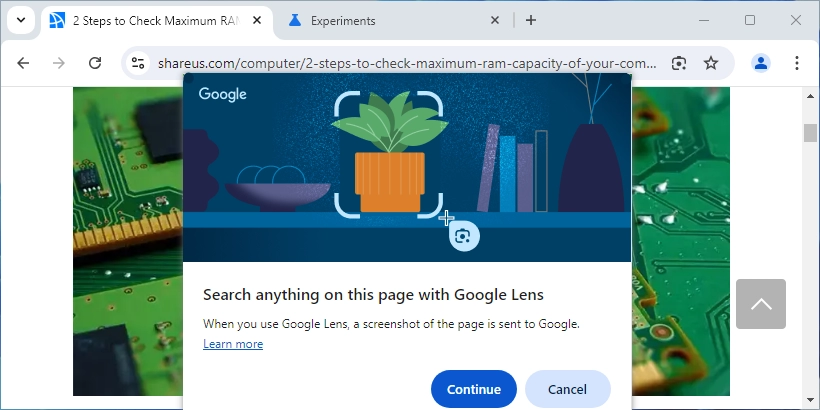
Step 2: Right-click on the image or text you are interested in and select the "Search with Google Lens" option from the context menu.
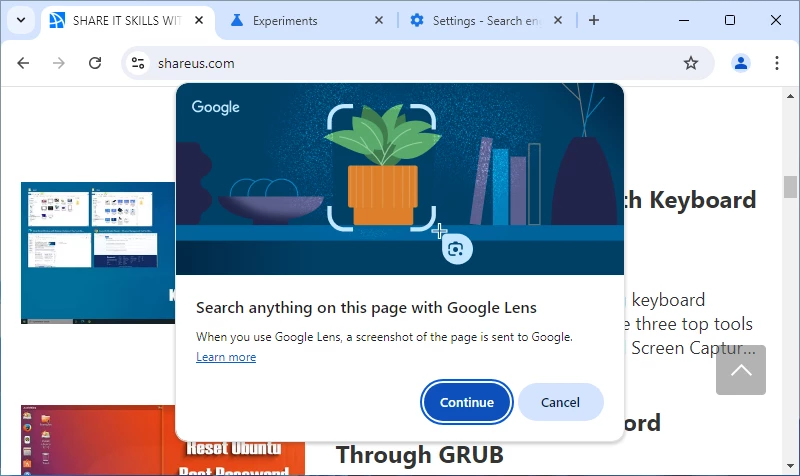
Step 3: A pop-up window will appear (when you first use it), notifying you that a screenshot of the page will be sent to Google. Click "Continue" to proceed.
Step 4: Use your mouse to drag and frame the area you wish to search. Google Lens will then analyze the selected area, and you'll see the search results displayed on the right panel of your screen.
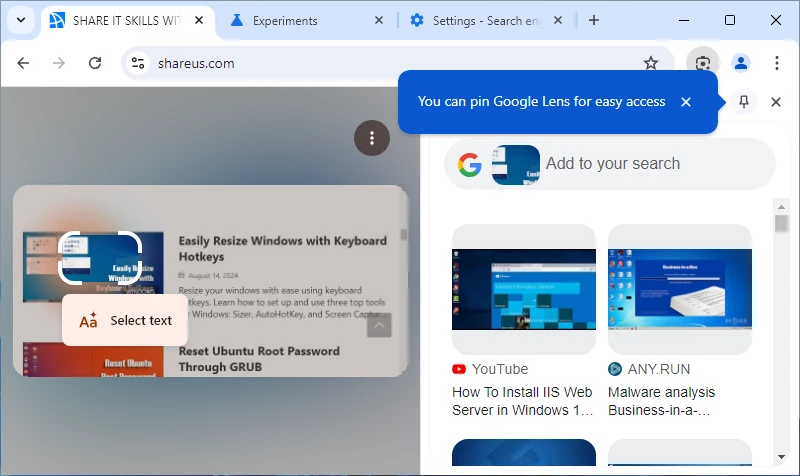
Note: You can select and copy text, translate it into different languages, or perform a reverse image search to find similar images.
For quicker access next time, you can pin Google Lens to the Chrome toolbar.
Summary
Google Lens in Chrome is a simple and efficient way to enhance your browsing experience. By allowing you to perform visual searches directly from the browser, you no longer need to switch tabs or rely solely on text-based queries. Once enabled, Google Lens becomes a powerful tool at your fingertips, perfect for identifying objects, translating text, and exploring images in greater detail.
If you're interested in trying Google Lens but don't want to set Google as your default search engine, consider creating a new Chrome profile and setting Google as the default search engine in that profile. This way, you can enjoy the benefits of Google Lens without altering your main browsing settings.