Tab Management in Chrome: Practical Tips for Efficiency
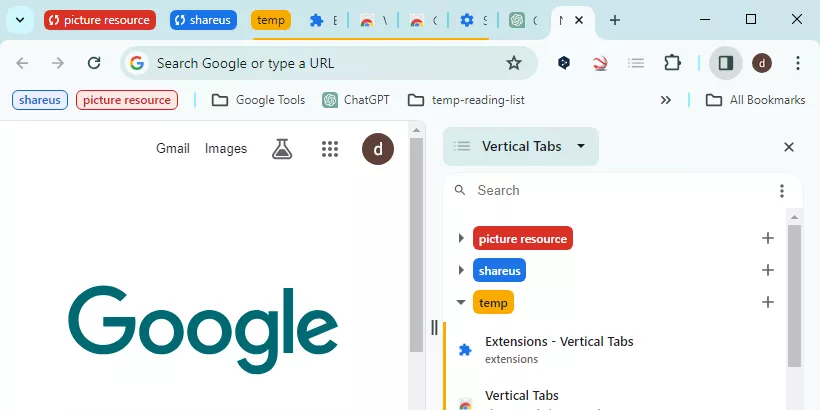
Streamline tab navigation in Chrome with quick switching methods for handling numerous open tabs. Organize your tabs effortlessly and explore the option to view them on the side. Unlock tips to elevate your browsing experience. If you've pondered these questions, how to organize tabs in Chrome is tailored for you.
Part 1: Using Built-in Chrome Features to Organize Tabs
Chrome continually evolves as a leading browser, introducing features that enhance user experience over time. One recent standout is Tab Groups, streamlining the organization of open tabs.
Caution: Before you explore these features, make sure to update Chrome first. Paste "chrome://settings/help" in the address bar to verify if your browser is the latest version.
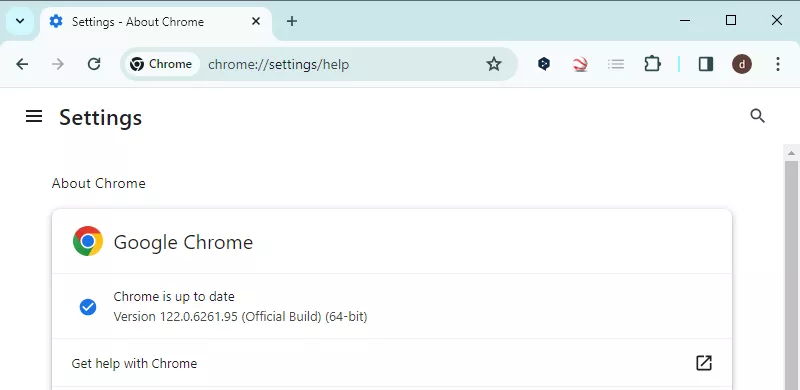
Here's a detailed walkthrough:
1. Explore the Tab Groups Feature
Step 1: Select the tabs you want to add a group.
Tip 1: Click a tab, then hold Shift and click another to select all tabs between them.
Tip 2: Hold Ctrl and click can select multiple discontinuous tabs.
Step 2: Right-click and select Add tabs to new group.
Step 3: Name the group and pick a color for identification.
Step 4: Click the name to expand or collapse this group.
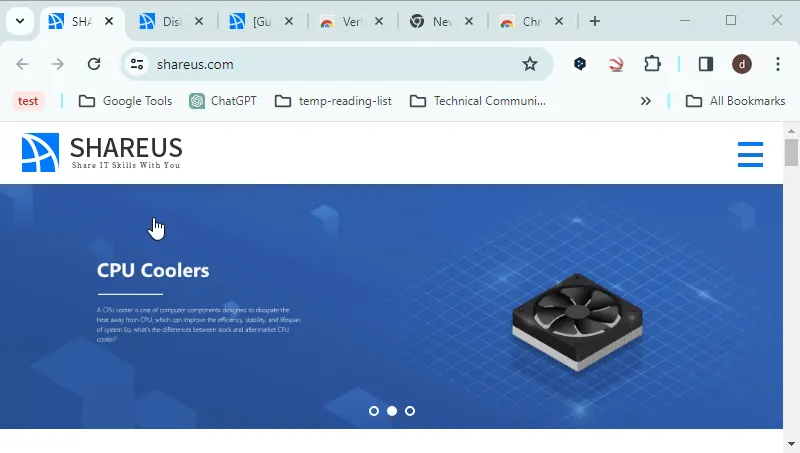
Step 5: To ensure the group is retained after restarting your browser, save it by right-clicking on the group name and choosing Save group.
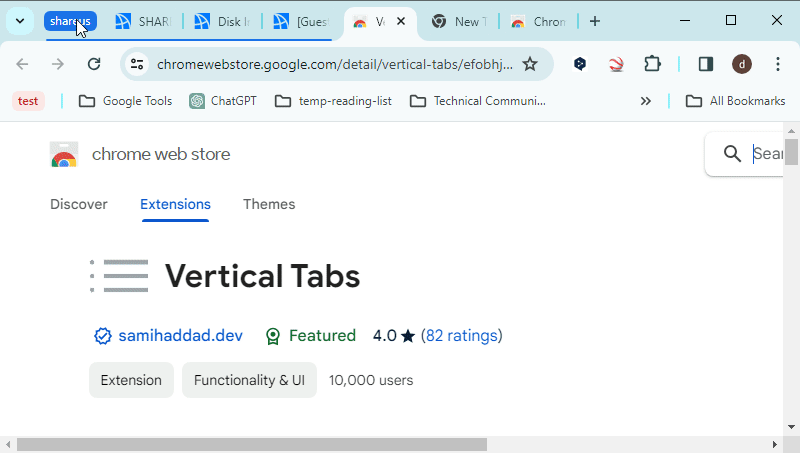
Note: The saved group will appear on the left side of the bookmark bar. If your bookmark bar is not visible, you can show it by pressing Ctrl + Shift + B.
Tips: You can close the entire group using the Hide group or Delete group options.
2. Uncover Other Practical Tab Management Features
Chrome offers additional tips to enhance your browsing experience, including Pin tabs, Move tabs to new window, and Reading list.
Pin tabs feature: Ensure specific tabs automatically load on browser startup. Right-click a tab, choose Pin to fix it, and when no longer needed, select Unpin to release.
Move tabs to new window feature: Effortlessly relocate tabs to other windows by dragging them directly. Note that this action is restricted to windows created by the current user.
Reading list feature: To save tabs for future reference, utilize the Reading List. Add tabs by right-clicking and selecting "Add tabs to reading list". Access them conveniently through the Side panel icon in the top-right corner.
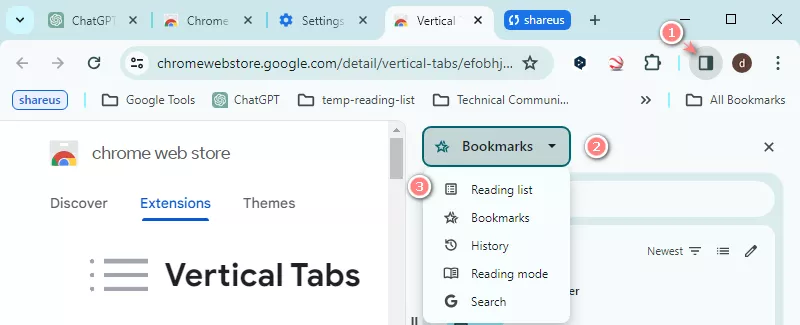
Chrome boasts more features, but the ones highlighted above generally suffice. Give them a try for an enhanced browsing experience.
Part 2: Using Keyboard Shortcuts to Manipulate Tabs
Here are some handy keyboard shortcuts for organizing tabs. Get acquainted with these shortcuts to enhance your efficiency:
Ctrl + T: Open a new tab in the current window.
Alt + Left Arrow: Navigate to the previous webpage in the current tab.
Alt + Right Arrow: Navigate to the next webpage in the current tab.
Ctrl + W or Ctrl + F4: Close the current tab; if it's the sole tab, the entire window will close.
Ctrl + Shift + T: Reopen recently closed tabs.
Ctrl + Tab or Ctrl + Page Down: Switch to the next tab.
Note: If the current tab is the last, it will automatically switch to the first tab.
Ctrl + Shift + Tab or Ctrl + Page Up: Switch to the previous tab.
Note: The same logic applies as switching to the next tab.
Ctrl + 1 to Ctrl + 8: Switch to a specified tab in the current window.
Ctrl + 9: Switch to the last tab in the current window.
Ctrl + N: Open a new window.
Ctrl + Shift + N: Open a new incognito window.
Ctrl + Shift + B: Hide or display the bookmark bar.
Ctrl + D: Add the current tab to bookmark.
Ctrl + Shift + D: Add all open tabs to a bookmark folder.
Ctrl + H: Open history tab.
Ctrl + J: Open the Download tab.
If you encounter issues with certain keyboard shortcuts, inspect other application shortcuts to prevent conflicts. Keep in mind that some applications may use keyboard shortcuts globally.
Part 3: Other Tips to Optimize Your Browse Experience
Furthermore, for a more personalized browsing experience, consider configuring your startup page. If you aspire to emulate Microsoft Edge's Vertical Tabs, "Vertical Tabs" extension can be quite useful.
1. Set an Appropriate Startup Page
Step 1: Paste "chrome://settings/onStartup" into the address bar to access the corresponding settings.
Step 2: Choose the "Open a specific page or set of pages" option from the available choices.
Step 3: Opt for "Add a new page," then paste "about:blank" into the Site URL section in the opened window.
Step 4: Click the Add option and restart your browser.
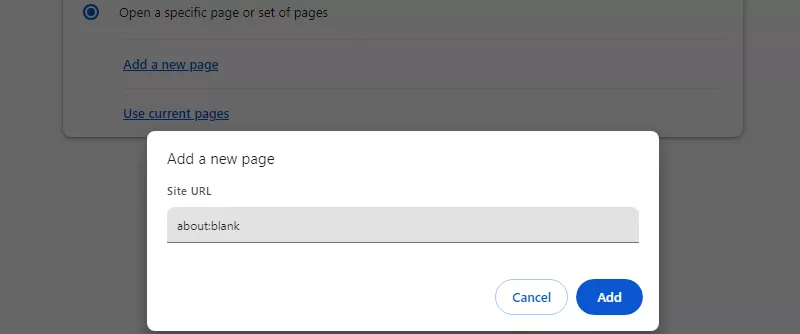
Step 5: The startup page will now be a blank page.
Note: You can restore it by carrying out similar operations whenever you desire.
2. Unlock Vertical Tabs in Chrome
While Chrome offers the Tab Search feature, it has limitations such as the inability to expand, and it disappears when clicking on a tab. This makes it challenging to simultaneously view all tabs and the selected tab. To overcome this, I will use an extension to enable a vertical tabs display.
Step 1: Install the "Vertical Tabs" extension from the Chrome Web Store.
Step 2: Click on the extension icon to use it.
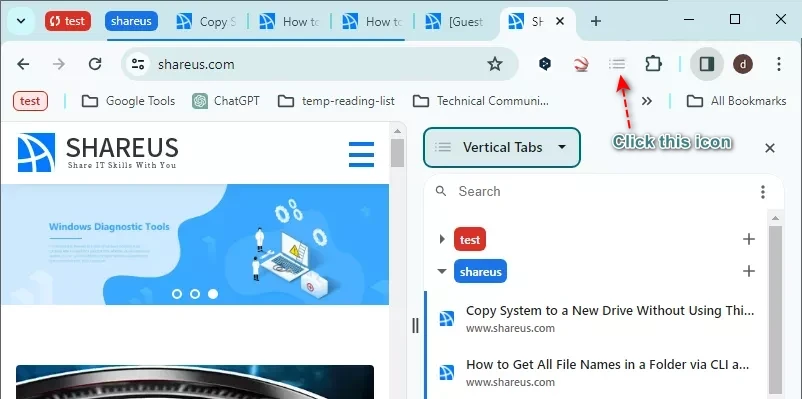
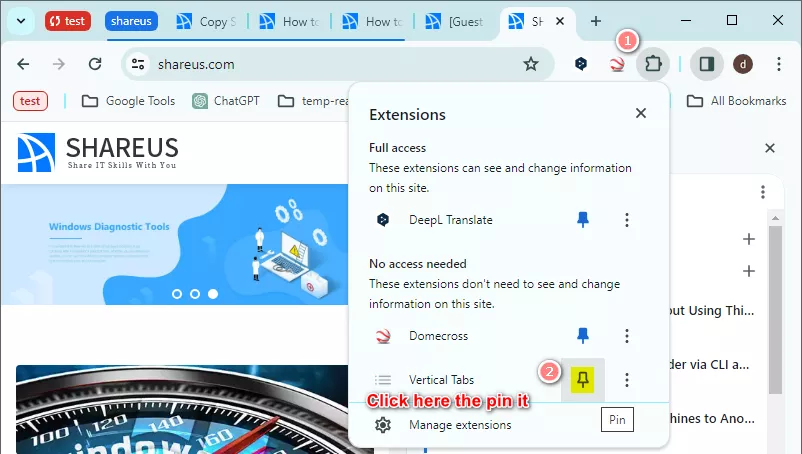
Tip 1: If the icon is not visible, please pin it as illustrated in the picture below.
Tip 2: To display it on the left, navigate to Settings -> Appearance, and select "Show on left" in the "Side Panel" section of this page.
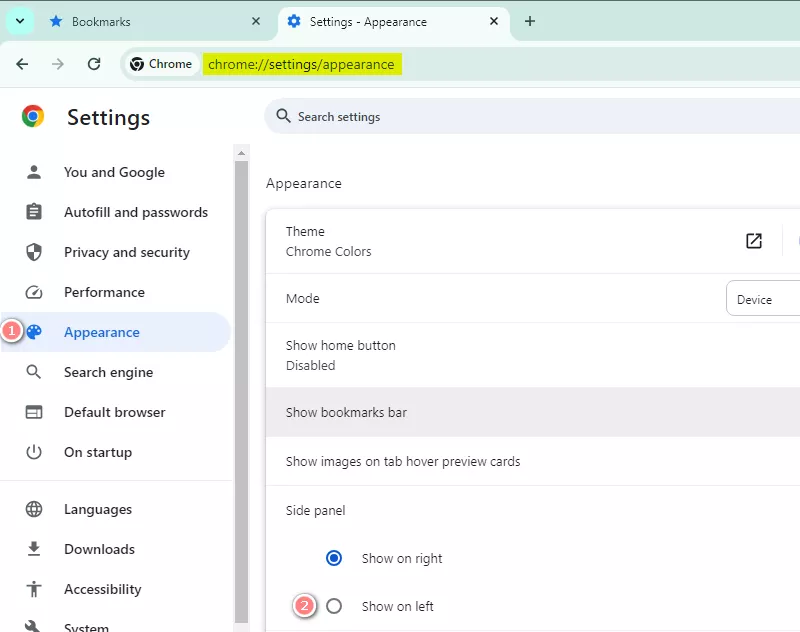
Step 3: You will now enjoy a vertical tabs view. It's worth noting that this extension also supports Tab Groups.
Note: Although this allows you to view tabs vertically, the original tabs view remains present. And the save group feature currently lacks robust support.
Tips: Alternatively, you can explore Tab Search by pressing Ctrl + Shift + A or clicking the top-left downward arrow in the browser.
Closing Words
This article provides practical tips for organizing your tabs. While these methods are available, it is advisable to keep the number of open tabs to a minimum, considering your device's hardware performance. Experiment and determine the optimal number that suits your needs.


