3 Easy Ways to Run Application As Different User in Windows 11/10
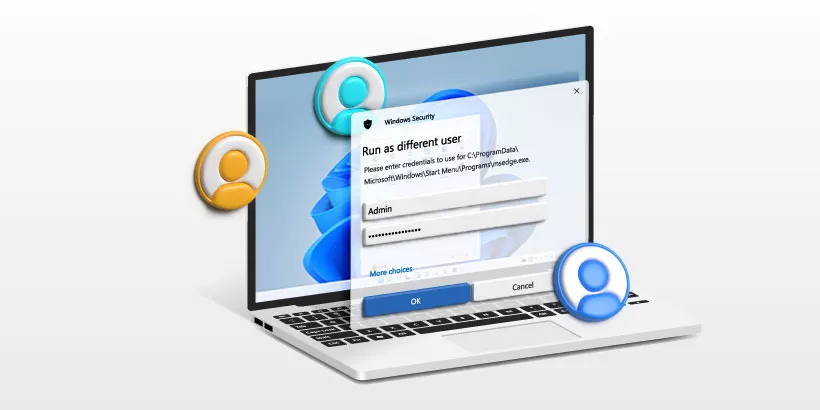
Windows comes with the feature to run an application under different users, therefore, without installing extra software, you can easily switch to other accounts and run a program on behalf of another user. Here we will discuss how to run a program under a different user account? Since this feature is supported in all of the Windows versions, the methods listed below are not only available for Win 11 and 10, but also for other versions of Windows.
How to run applications as different user?
1. Run as different user from context menu
Step 1: Press and hold Shift key, then right-click on the application you want to run under additional account, either the executable file in the File Explorer or the shortcut on your desktop.
Step 2: Select Run as different user from the context menu.
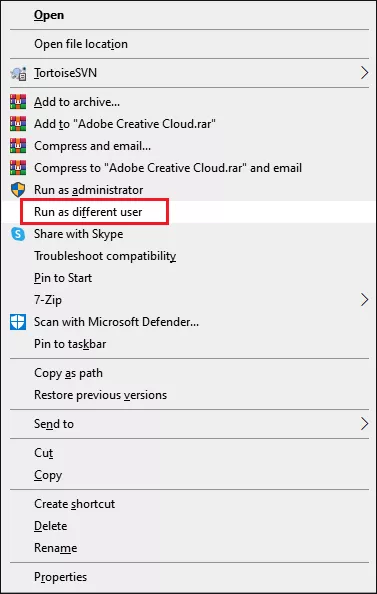
Step 3: Then Windows Security prompt will pop up, enter your user name and password of another user account.
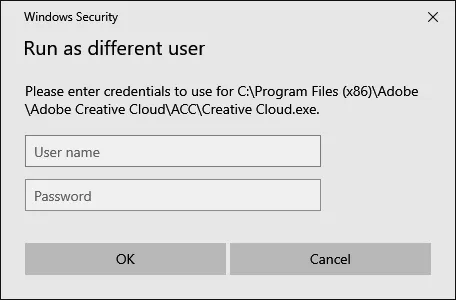
Step 4: Click OK and you can now start the application under different credentials.
Note: This only works on the application set up files (.exe files) or the shortcut of an application.
2. Run as different user from Command Prompt
Step 1: Press Windows + R to open Run dialog and type cmd in the box. Then press Ctrl+Shift+Enter to open Command Prompt as administrator.
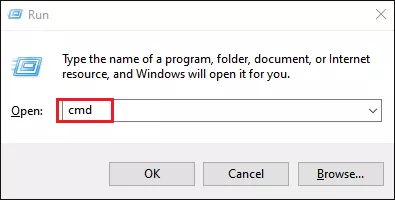
Step 2: Input a command line following this syntax :
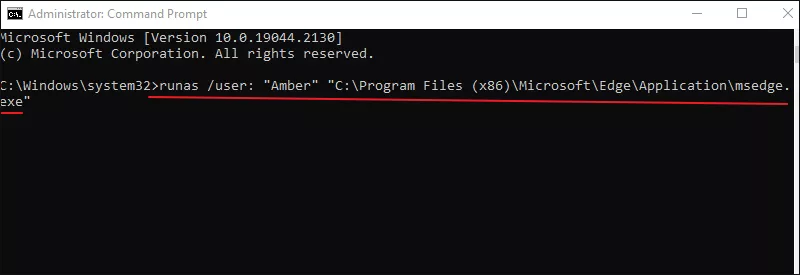
runas /user: "username" "Location path of the exe file"Step 3: You must find where the application stores on your computer and get a full path of the exe file. If you have already created a shortcut for the app, things will become quite simple. Just right-click on the shortcut and select Properties. Then choose Shortcut tab and copy the path from the Target section.
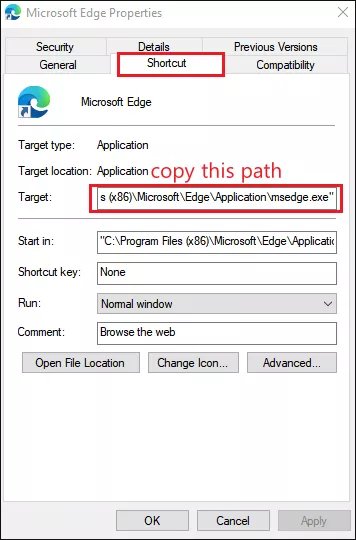
Step 4: Replace the "username" with another account name. Then you can hit Enter to launch the command line.
3. Run as different user from Start menu
The option "Run as different user" is not pre-enabled in Start menu. You need to enable this option by editing group policy and once it is done, you will see "Run as different user" contained in the right-click menu for all apps listed in Start menu.
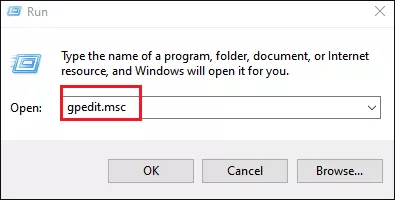
Step 1: Press Windows + R to open the Run dialog, type gpedit.msc in the box and press Enter to open Local Group Policy Editor.
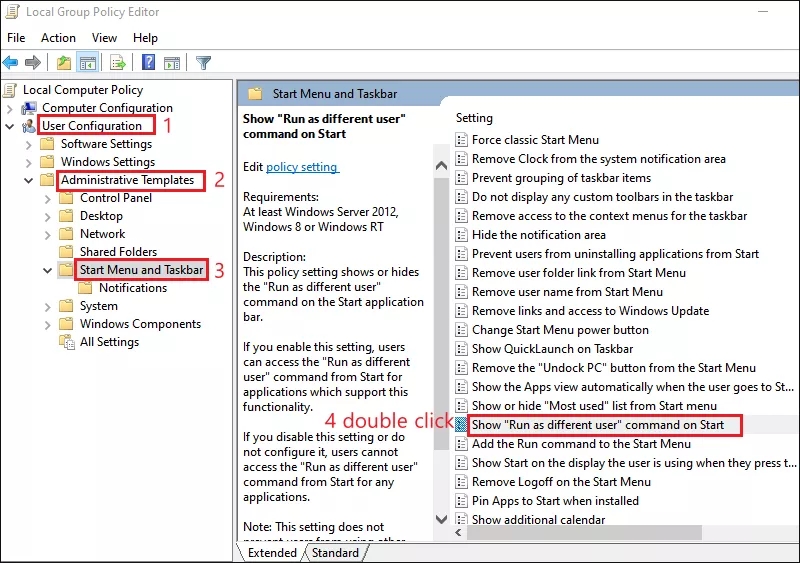
Step 2: Head to User Configuration > Administrative Templates > Start Menu and Taskbar.
Step 3: Locate Show "Run as different" command on Start and double-click on it.
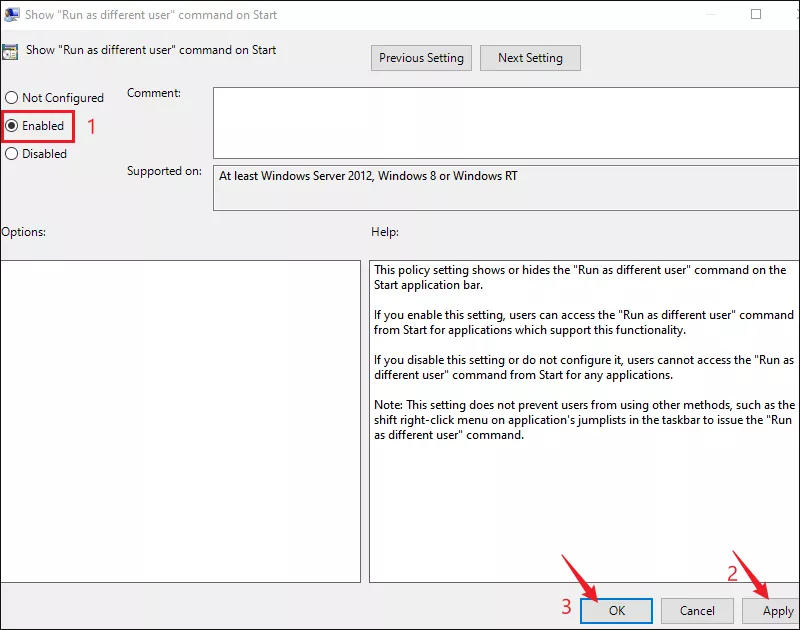
Step 4: Choose Enabled option, then click Apply and OK.
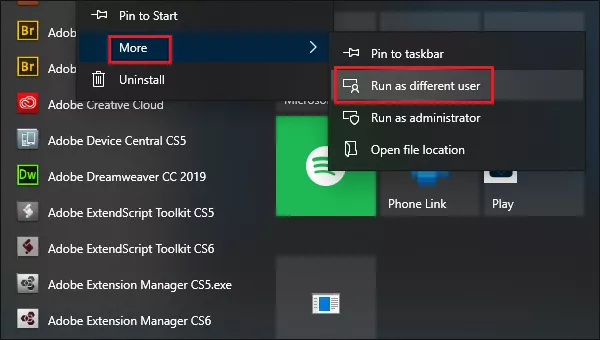
Now, restart your system to apply the changes. Go to the Start menu and right-click on an app, choose More to check if the "Run as different user" option appears. Then you are able to start an application under another account from Start menu.
Part 2: How to always show Run as different user in context menu
If you want to have the "Run as different user" option be displayed in the context menu without holding the Shift key, it's possible to get it done, by editing the registry file. Before we start, it's advised to back up the registry in case anything goes wrong.
Step 1: Open Registry Editor.
Step 2: Navigate to the following path:
HKEY_CLASSES_ROOT\exefile\shell\runasuserStep 3: Delete the empty value Extended on the right pane.
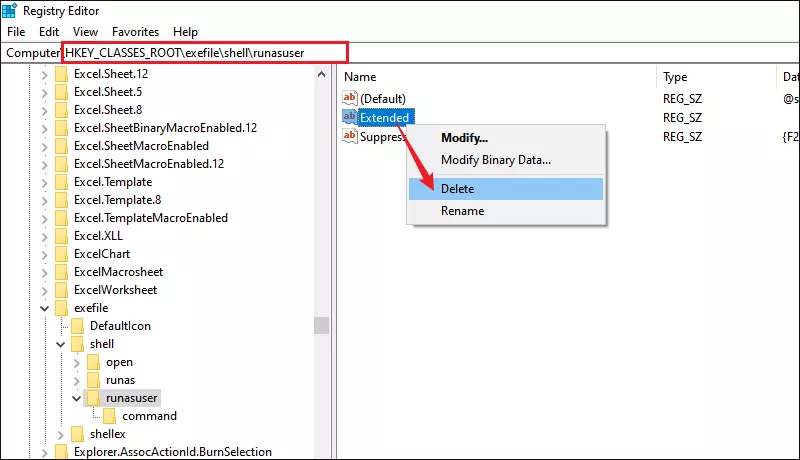
Step 4: Then delete the Extended value under those paths:
HKEY_CLASSES_ROOT\cmdfile\shell\runasuser
HKEY_CLASSES_ROOT\batfile\shell\runasuser
HKEY_CLASSES_ROOT\mscfile\shell\runasuser
HKEY_CLASSES_ROOT\Msi.Package\shell\runasuser
Once finished, the "Run as different user" item will always be displayed in the right-click context menu. To undo the changes, you can restore the deleted Extended value under the same paths.


