Fix: Local Group Policy Editor Missing from Windows 11 or 10

Group Policy Editor (generally referred to as GPE) is a feature limited to Windows Pro and Enterprise editions. Through the Local Group Policy Editor, administrators can edit GPOs to disallow computer or user settings through Local Group Policy as well as disallow the use of scripts for certain tasks, including startup and shutdown. However, in a few cases, users will see this error message "Windows cannot find gpedit.msc. Make sure you enter the correct name". No need to worry, even if an existing system file may be corrupted, you can easily repair it. The followings are four ways to fix the missing Local Group Policy Editor in Windows 11 or 10.
Fix 1: To check which version of Windows you are working with
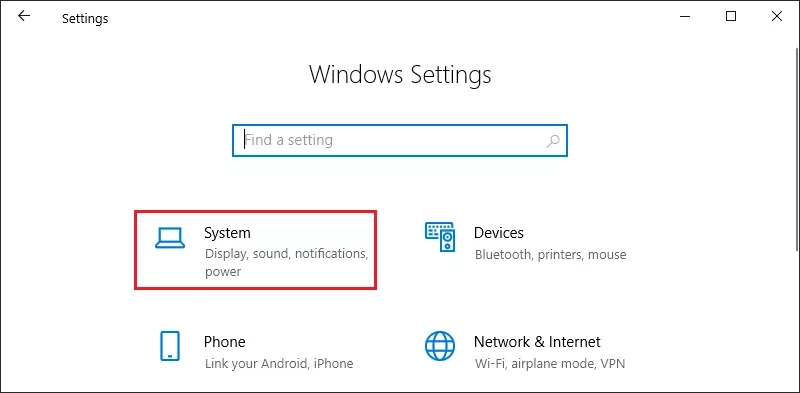
Step 1: Use the WIN+I shortcut key to open the Windows settings, and click "System".
Step 2: Swipe down to find "about" in the left pane, find the "Edition" under Windows Specifications in the right pane, and you can view the Windows version.
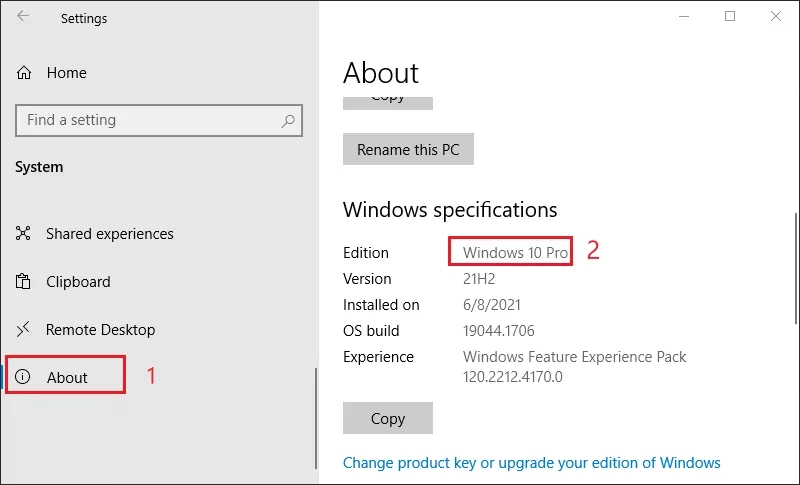
Step 3: If you are using Windows Home Edition, you can upgrade to Pro or Business Edition. Alternatively, if you wish to use the Group Policy Editor tool in the Home Edition, try Fix 2.
Fix 2: Installing gpedit.msc from a batch file
Step 1: Download the enable_gpedit file.
Step 2: After downloading, decompress it to a location on your system. For example, you can put this zip file on the E drive.
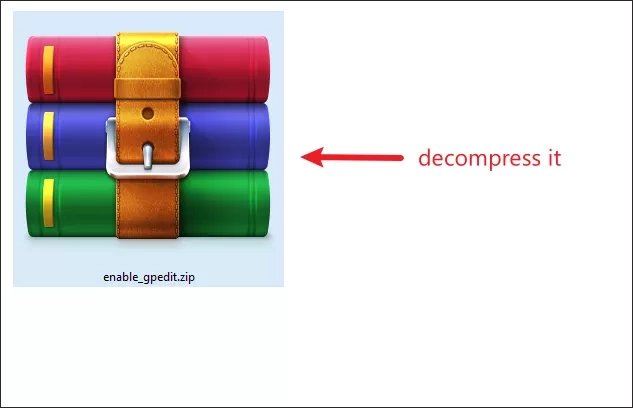
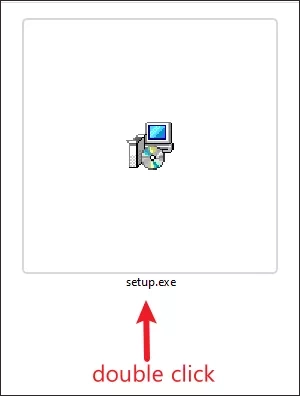
Step 3: After unzipping the zip file, double click on "setup.exe".
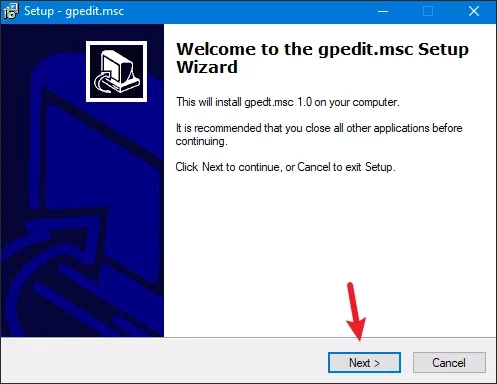
Step 4: On the Setup-gpedit.msc screen, click "Next" to continue.
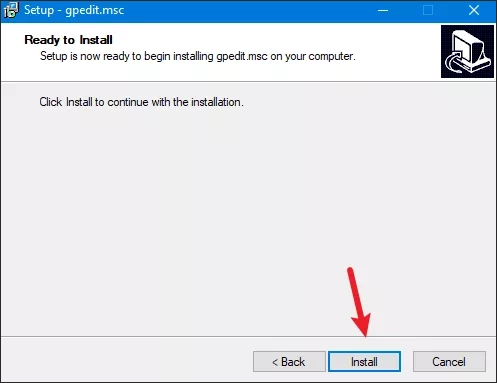
Step 5: Click "Install" to install gpedit.msc on your computer.
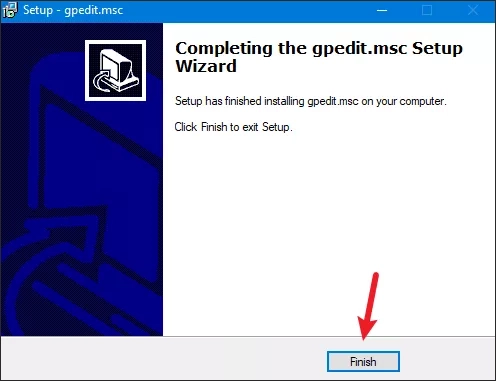
Step 6: When finished, click "Finish" to complete the installation process.
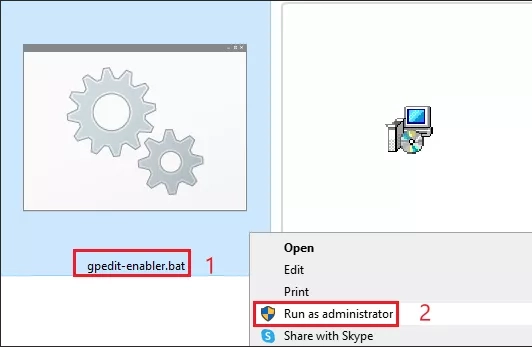
Step 7: Return to the extraction directory, right-click on the "gpedit-enabler" batch file, and click "Run as administrator". Batch files will be run with administrative privileges, This batch file will also add certain Group Policy features to your system.
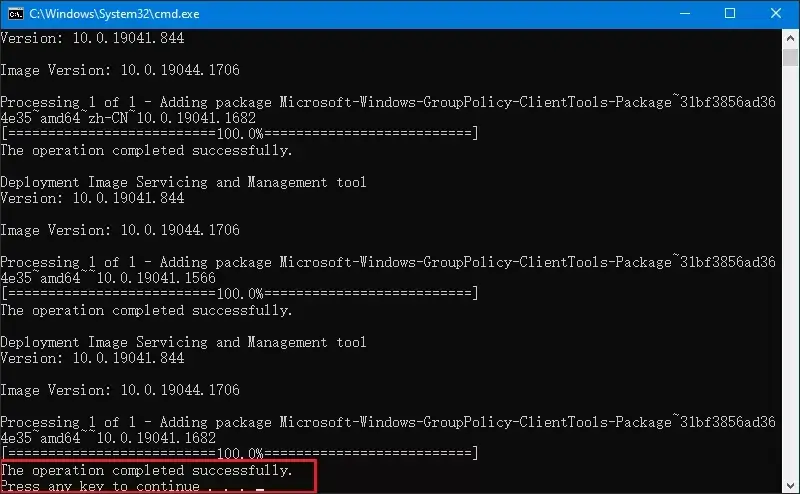
Step 8: Wait a few moments and you will see the message "The operation was completed. Press any key to continue..." message on the terminal. All you have to do is press enter to complete the operation.
Step 9: Close all the other content and reboot the window once. After restarting the system, try opening the Group Policy Editor again.
Fix 3: Copying files and folders
Step 1: Press the Windows + E keys at the same time. After opening File Explorer, navigate to this directory.
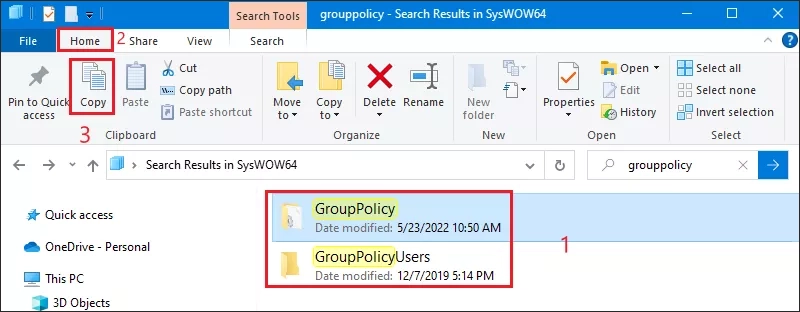
C:\Windows\SysWOW64Step 2: Find these folders and the management unit console files.
GroupPolicyGroupPolicyUsersgpedit.mscChoose these files and tap the copy icon on the menu bar to copy them.
Step 3: Then navigate to this location and simply paste the copied content into this directory.
C:\Windows\System32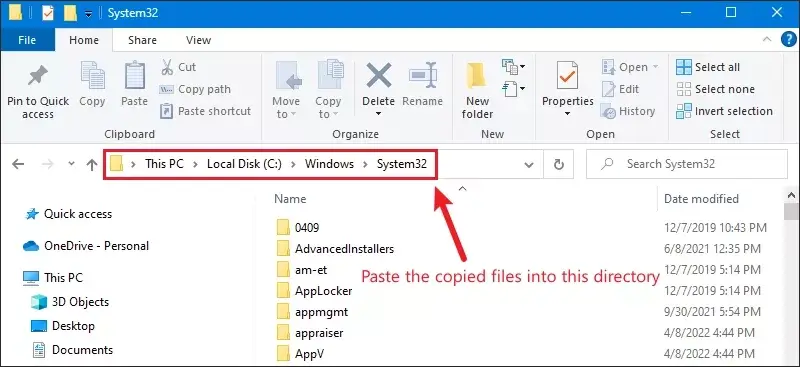
Step 4: Once you've done this, close File Explorer, and reboot the Windows system. After the system boots, try to access the Local Group Policy Editor.
Fix 4: Create a batch file and run it as administrator
Step 1: Create a new Notepad document. Copy and paste the following code into Notepad. Save this file.
@echo off
pushd "%~dp0"


dir /b %SystemRoot%\servicing\Packages\Microsoft-Windows-GroupPolicy-ClientExtensions-Package~3*.mum >List.txt
dir /b %SystemRoot%\servicing\Packages\Microsoft-Windows-GroupPolicy-ClientTools-Package~3*.mum >>List.txt


for /f %%i in ('findstr /i . List.txt 2^>nul') do dism /online /norestart /add-package:"%SystemRoot%\servicing\Packages\%%i"
pause
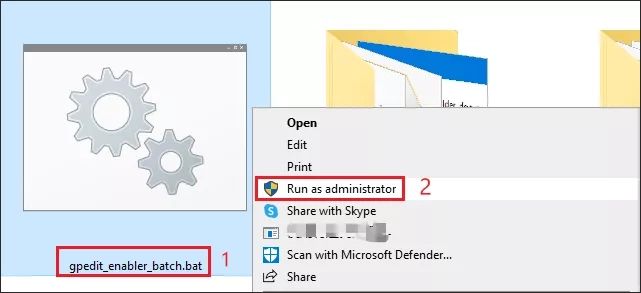
Step 2: Change the suffix of this file type to .bat, you can name it "gpedit_enabler_batch.bat". Right-click on the gpedit_enabler_batch and click "Run as administrator" to run the batch file.
Step 3: Wait a moment, this will execute the batch file and re-enable the gpedit.msc management unit console on your system.


