Fix: System Restore Failed to Extract the File in Windows 10 & 11

June 17, 2022

System Restore is an essential feature of Windows 10 & 11 that enables you to restore your PC to its previous state and can be used to recover from system malfunctions. Thus, it is like a previous backup point. Besides, it does not affect your personal files, but it removes updates & apps installed after the restore point is created. If the System Restore function on your PC does not work properly, you will see the error message "System Restore failed to extract the file from the restore point". Don't be too anxious. In this post, I will share you the top effective ways to fix system restore failure to extract the file in Windows 10 & 11.
Fix 1: Run the SFC scan tool
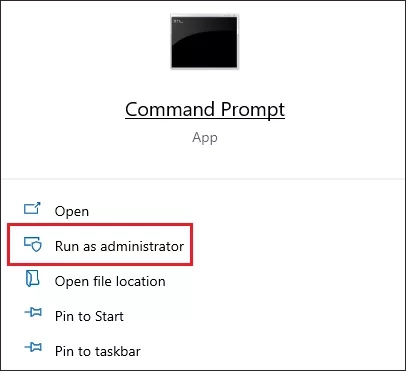
Step 1: Type CMD in the Start menu bar and click Run as administrator.
Step 2: For Windows 10, you need to run the DISM tool first. Run the following command, the process will take a few minutes to complete.
DISM.exe /Online /Cleanup-image /Restorehealth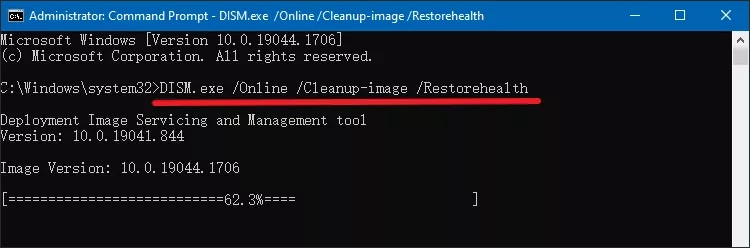
Step 3: Run the following commands to scan and replace corrupt files.
sfc /scannow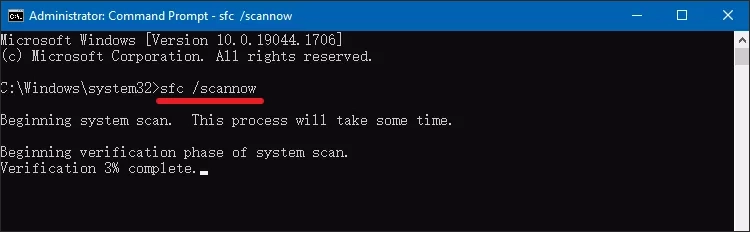
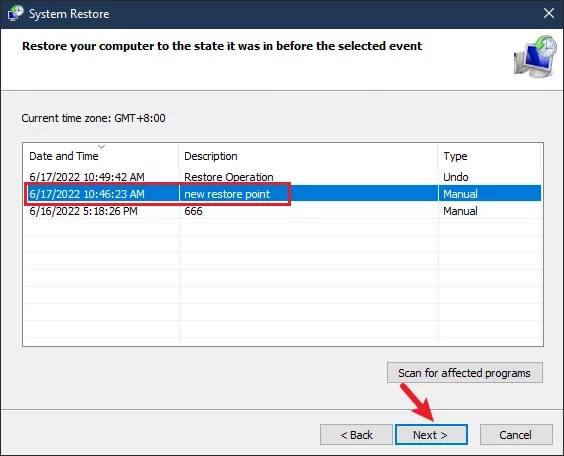
Fix 2: Create a new restore point
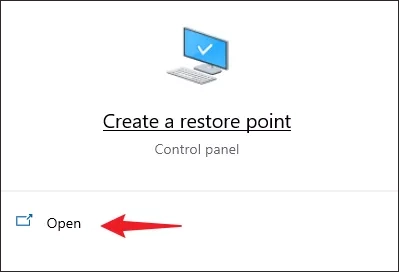
Step 1: Type "Create a restore point" in the search bar and click Open.
Step 2: In "System Protection" Window, click "Create" to create a restore point right now.

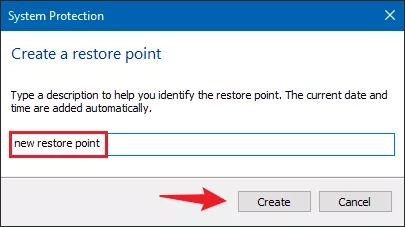
Step 3: Enter the name of the new restore point. Then click "Create".
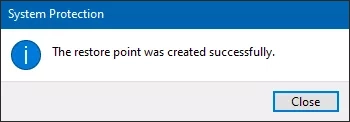
Step 4: Wait for a few seconds, and the following window pops up, indicating that the creation is successful.
Step 5: Perform a system restore with the newly created restore point. Click "Next" to continue. This process will take a little time, and when it is complete, check to see if the error still exists.

Fix 3: Run the disk check
Step 1: Repeat the fix 1 Step 1 above.
Step 2: In the command prompt, execute the following command. It will scan for logical errors and bad sectors. The letter "c:" is the name of the drive you want to scan. Type "Y" to continue the check.
chkdsk /r c: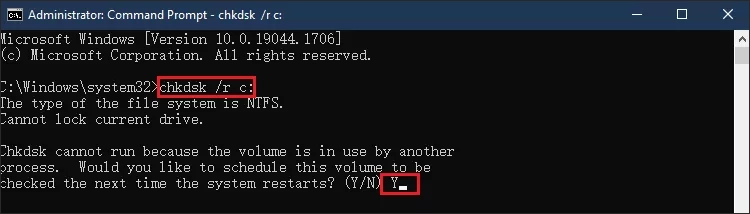
Step 3: Restart the system, after the scan is complete, try to perform a system restore again to see if the issue still persists.
Fix 4: Tweak Local Group Policy Settings
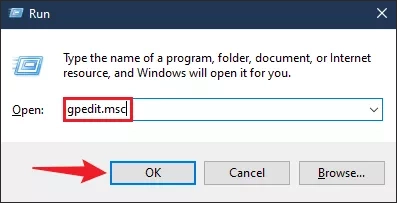
Step 1: Use the shortcut key WIN+R to open the Run dialog box, then type gpedit.msc and click OK.
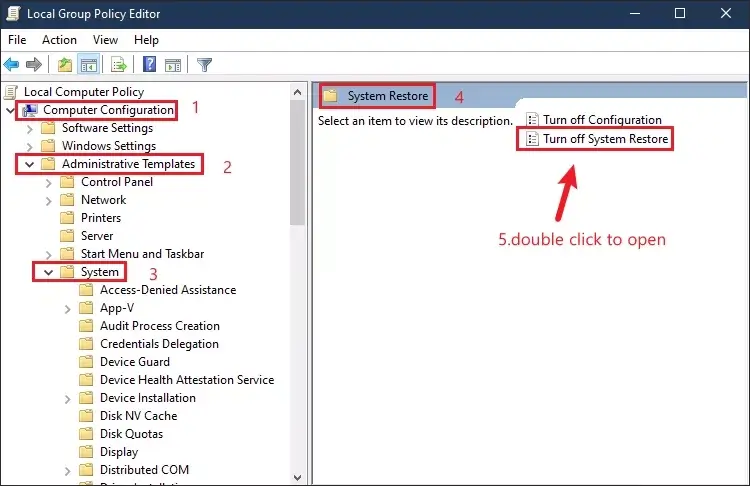
Step 2: In Local Group Policy Editor window, expand the following directory in the left side: Computer Configuration → Administrative Templates → System → System Restore. In the right side, double click "Turn off System Restore".
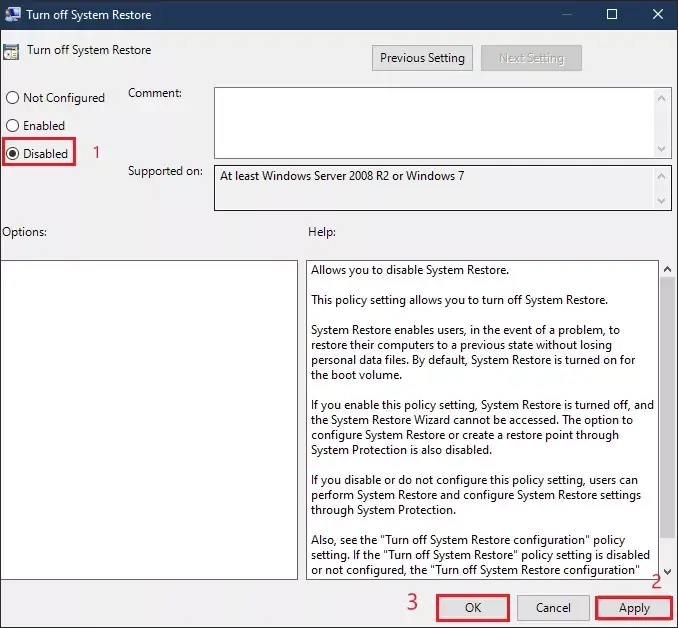
Step 3: In the Turn off System Restore window, check "Disabled". Then click "Apply" and "OK" to save the changes.
Fix 5: Enable System Protection
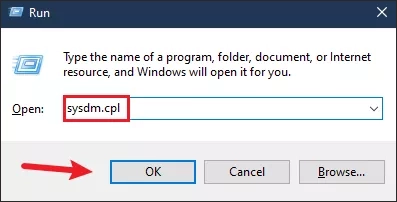
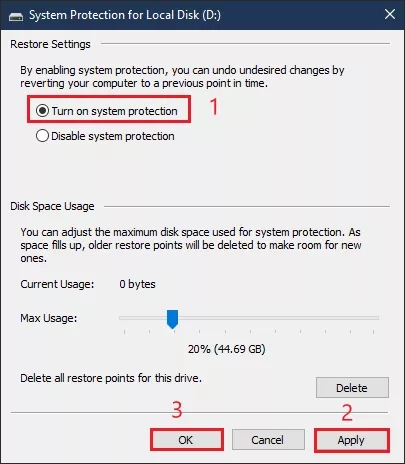
Step 1: Use Windows + R to open Run, type sysdm.cpl and click OK to open System Properties.
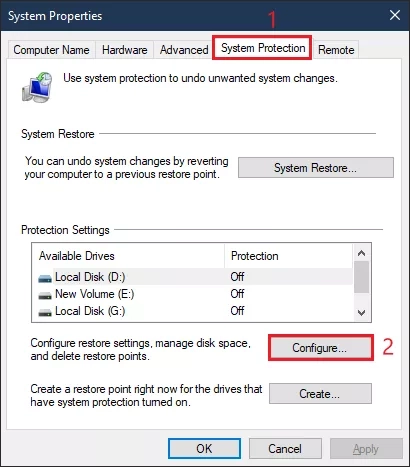
Step 2: Move to the "System Protection" tab and click on the "Configure" option.
Step 3: Select "Turn on system protection", then click "Apply" and "OK" to save this change.
Fix 6: Run System Restore from Windows RE
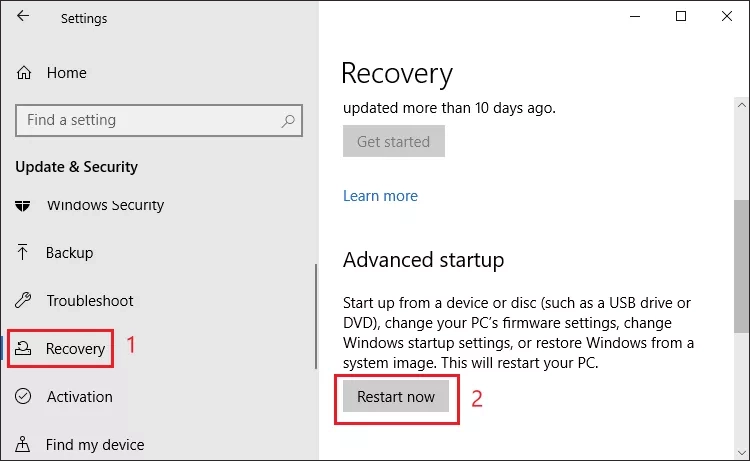
Step 1: Use WIN+I to open Windows Settings, find and click Update & Security.
Step 2: Select "Recovery" in the left window, and select "Restart now" in the right window under Advanced startup to enter Safe Mode.
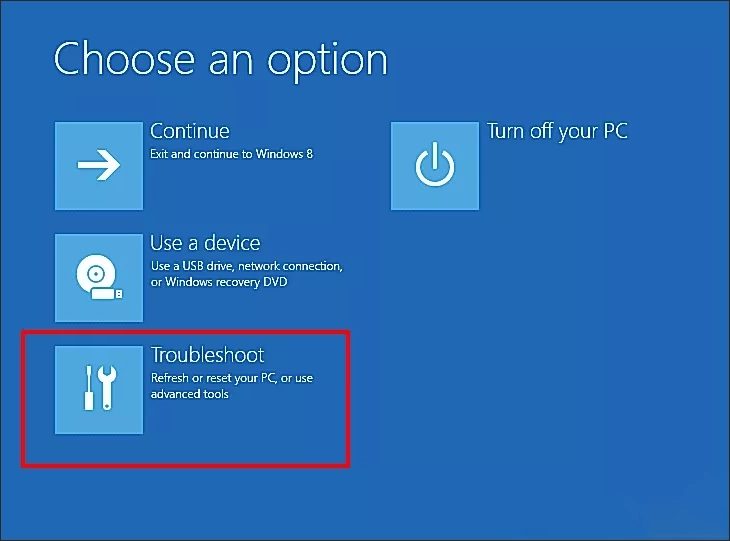
Step 3: In the Choose an option window, click "Troubleshoot".
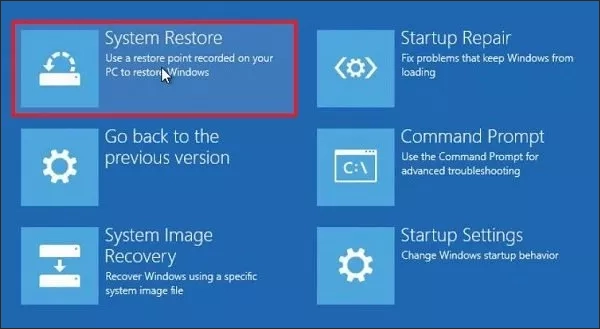
Step 4: In the Troubleshooting window, click on "Advanced options".

Step 5: In the Advanced options window, click "System Restore" to start the System Restore program on your PC. The System Restores the process will put your PC back to the state when it was working fine.
Step 6: In System Restore window, click on "Next". Select the latest restore point from the list, and then click "Next". Click "Finish" to complete the process. This will initialize your system's recovery process to the system restore point you selected. Be patient, as this process will take some time. Your system will be restored to the recovery point of your choice.