How to Clear File Explorer Search History in Windows 10 and 11
When you want to open a certain file or folder, but forget their exact location, you can type keywords in the search bar of the file explorer, then the search indexing will find your desired files and folders quickly, simultaneously, your search history will be restored. In some case when you search for a personal file, or use a shared PC, you may be reluctant your query to be seen by your colleagues. At this time you need to know how to delete or hide your search history in file explorer .
1. Delete search history from the File Explorer
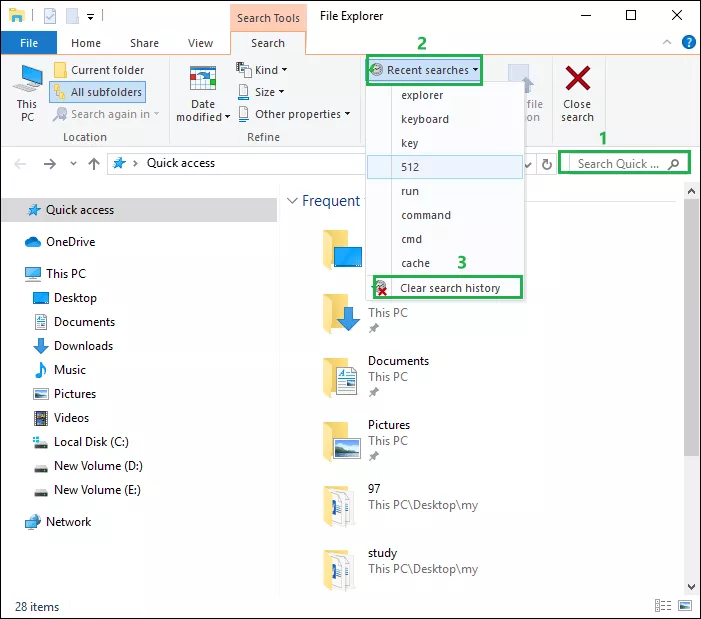
Step 1: Right-click the Start icon and click File Explorer.
Step 2: Click the search bar.
Step 3: In the Search Tools, click Recent searches, and choose Clear search history.
2. Delete search history using registry editor
Step 1: Press Windows + R to open Run dialog.
Step 2: Type regedit and hit Enter.
Step 3: Navigate to the following key:
HKEY_CURRENT_USER\SOFTWARE\Policies\Microsoft\Windows\ExplorerStep 4: If you don't find the Explorer key, then right-click Windows and select New > Key.
Step 5: Type the key name Explorer. Then hit Enter.
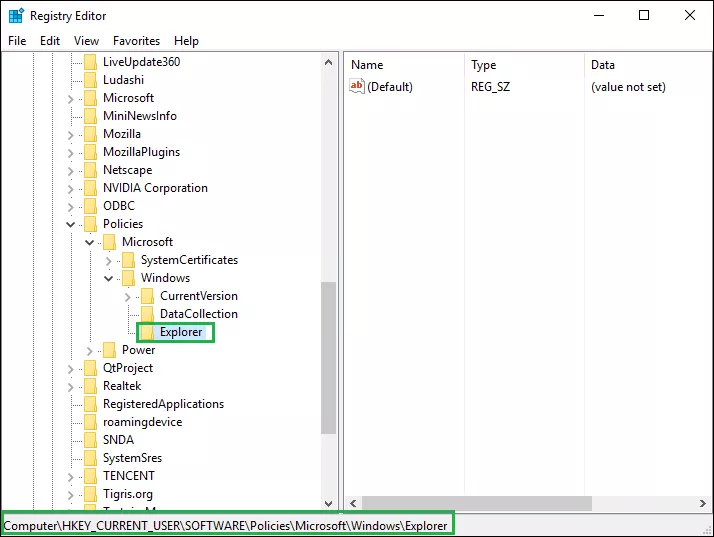
Step 6: In the Explorer key, right-click a blank space on the right side. Then select New > DWORD(32-bit)Value.
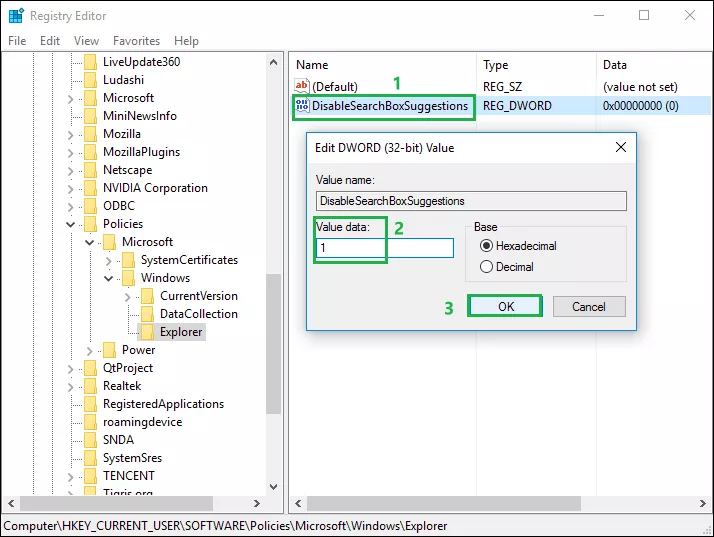
Step 7: Name the key DisableSearchBoxSuggestions and hit the Enter to save the key.
Step 8: Double-click the newly created key and set the value from 0 to 1.
Step 9: Click OK.
3. Delete search history using group policy editor
Step 1: Press Windows + R to open Run dialog.
Step 2: Type gpedit.msc and hit Enter.
Step 3: In the group policy editor, navigate to the following policy:
User Configuration > Administrative Templates > Windows Components > File Explorer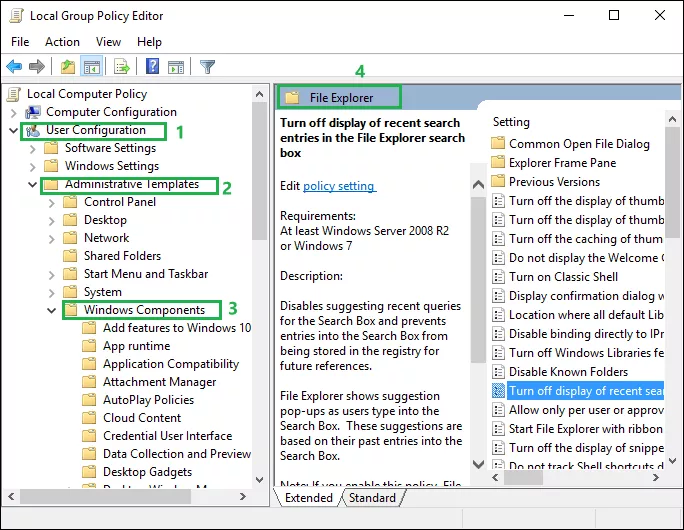
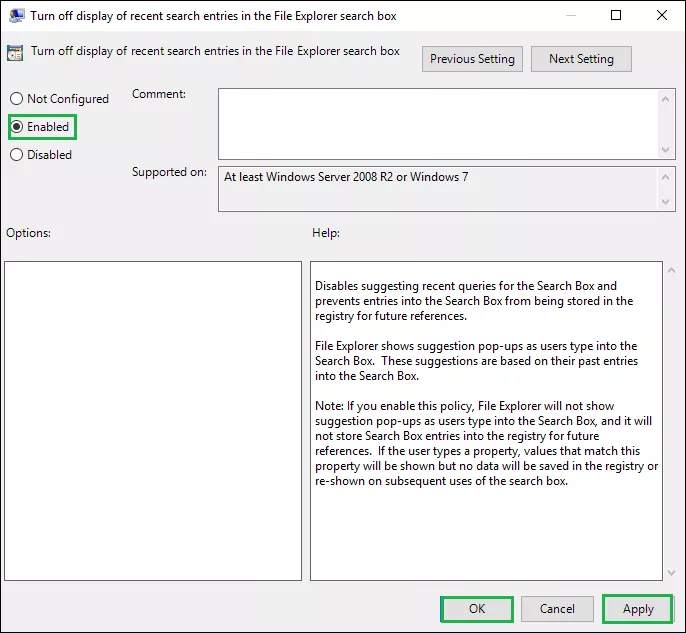
Step 4: Double-click the policy named Turn off display of recent search entries in the File Explorer search box.
Step 5: Select Enabled. Then click Apply and OK.
