How to Enable CPU Virtualization on Windows

I learned that I need to enable CPU virtualization before using a virtual machine. So, how can I enable CPU virtualization on my computer? This post provides a detailed guide. Let's take a look.
Part 1: Reasons to Enable CPU Virtualization
If we want to run a virtual machine on our computer, we need to enable CPU virtualization first. CPU virtualization is a basic technology that allows a single CPU to be divided into multiple virtual CPUs, which can be used by multiple virtual machines.
Furthermore, enabling CPU virtualization can improve the utilization of computer resources. It allows for the creation of multiple virtual machines on a single physical machine, each running its own operating system. This not only ensures reliability but also maximizes the utilization of the computing power of the physical hardware.
Part 2: Check the State of CPU Virtualization
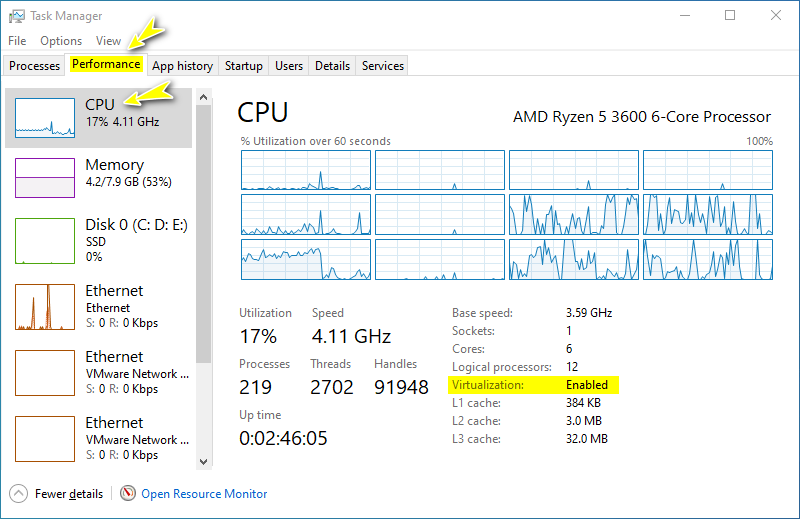
Step 1: Open Task Manager by pressing "Ctrl + Shift + Esc" shortcut key.
Step 2: Navigate to Performance > CPU, and the CPU virtualization information is displayed here.

Part 3: Method to Enable CPU Virtualization
Hardware information:
BaseBoard: ASUSTek COMPUTER INC.
CPU: AMD Ryzen 5 3600 6-Core Processor
Tips: You can check your BaseBoard information in System Information window. This window can be opened by running msinfo32 command in the Command Prompt.
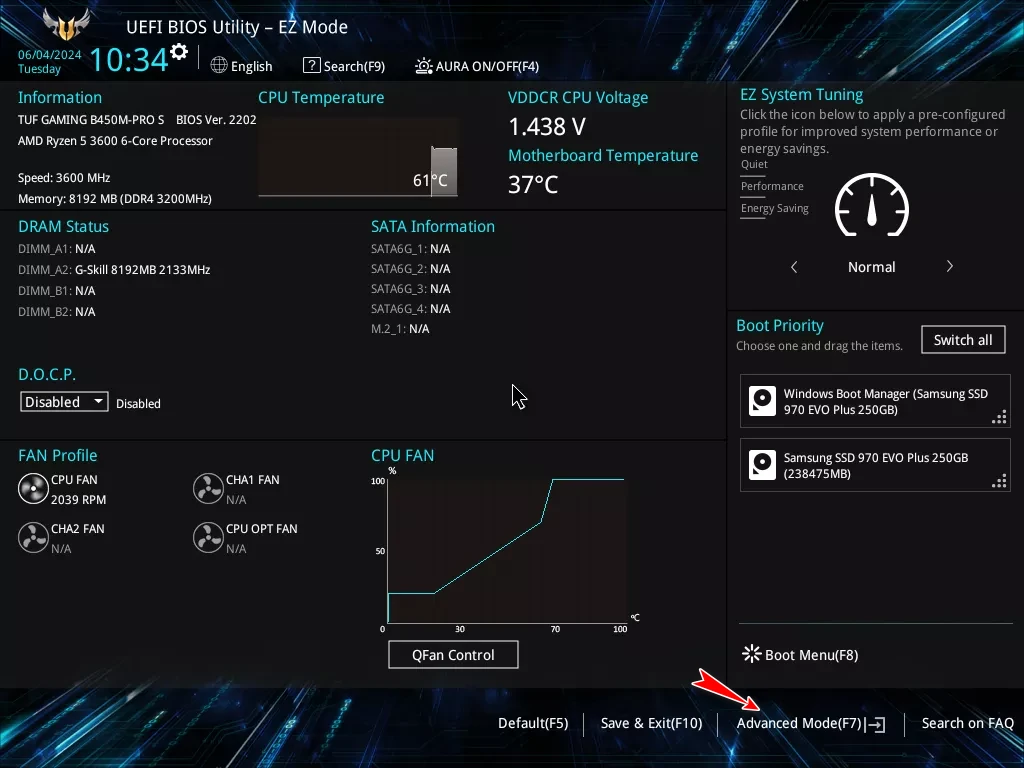
Step 1: Enter BIOS/UEFI mode by pressing the corresponding hot key on keyboard when computer starts.
Note: For my ASUS BaseBoard, the hot key is F2 or Del. Alternatively, if you have trouble in entering BIOS mode, you can solve this issue referring this article.
Step 2: Enter Advanced Mode by pressing F7.

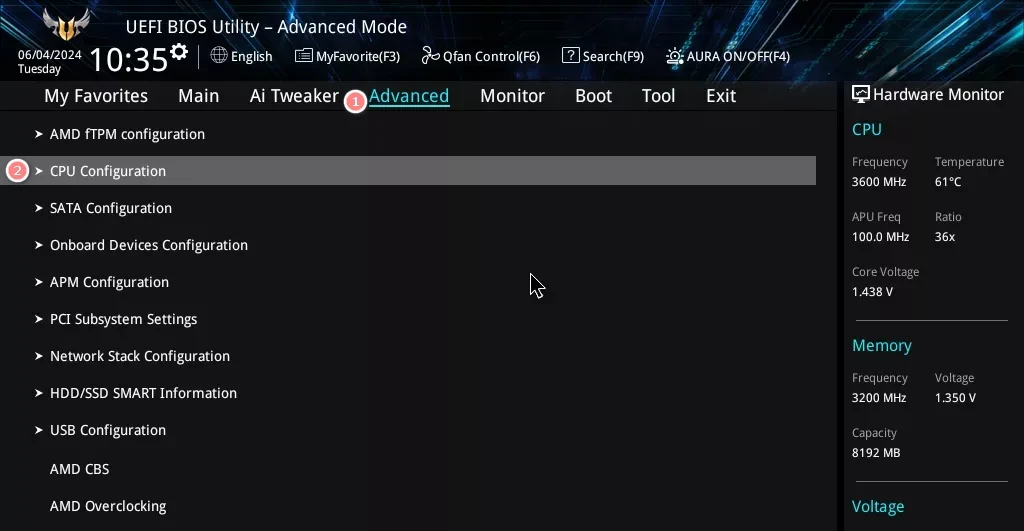
Step 3: Navigate to Advanced > CPU Configuration by using the arrow keys.

Step 4: Go to the configuration page by pressing "Enter" key.
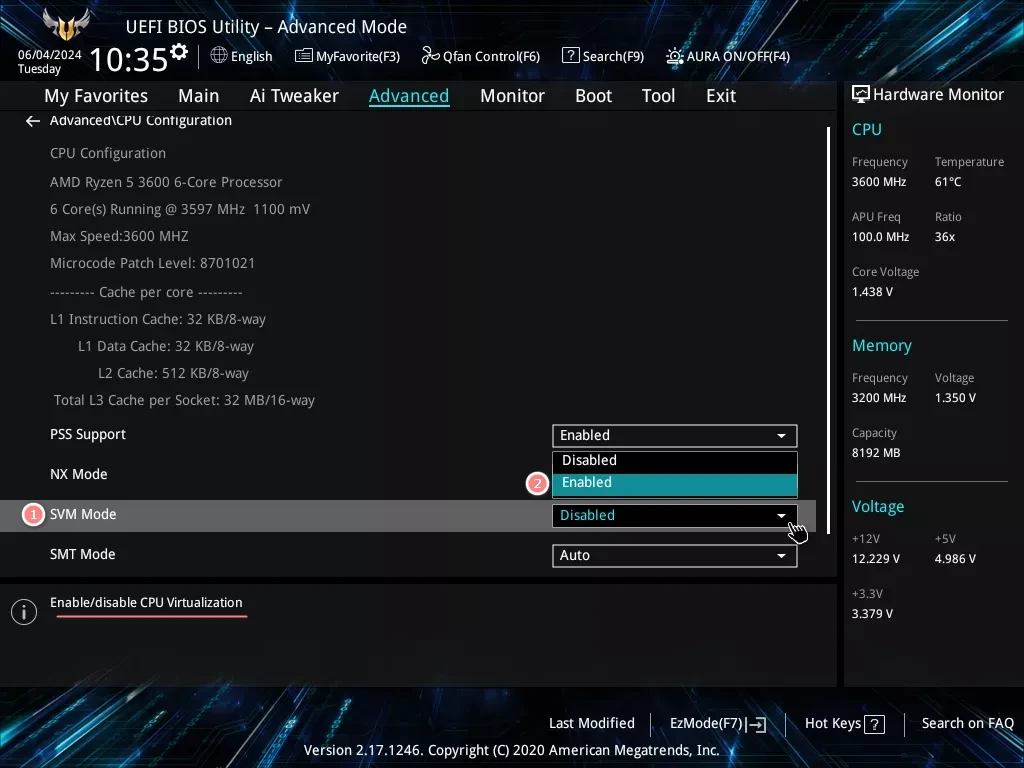
Step 5: Locate to the SVM Mode in this page and toggle Disabled to Enabled to enable CPU Virtualization.

Note: For other CPUs, the corresponding option may be different. Maybe it is VT-x, Vanderpool, and other names.
Step 6: Save changes by pressing F10 key or navigating to the corresponding option.

Step 7: The computer will restart and CPU virtualization is enabled now.
Note: The exact steps will vary depending on your processor, BaseBoard and BIOS version, but the general idea is same.
Conclusion
Follow the steps above to enable CPU virtualization on your computer and enjoy running multiple operating systems on one machine.


