How to Remove Lock and Login Screen on Startup and Wake Up

May 06, 2024
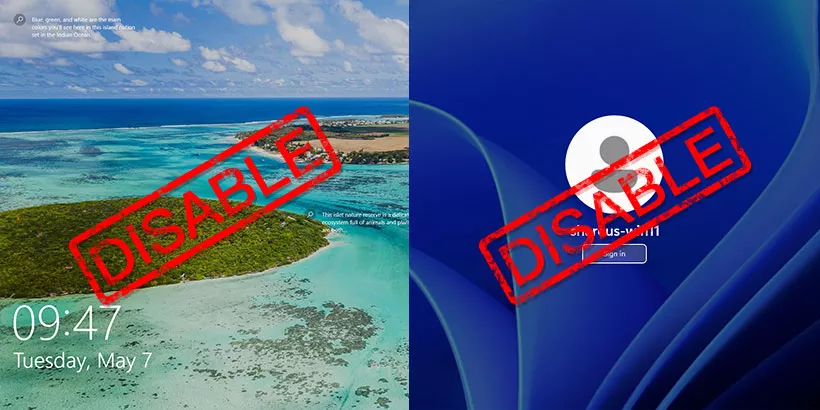
In some situations, we opt to remove the password for a smoother experience. However, even after disabling the password, the persistent presence of the lock screen and login screen can disrupt our workflow. If you have encountered this issue or simply seek tips on removing the lock and login screens upon startup and wake-up, continue reading. This article is tailored just for you.
Part 1: Disable the Lock Screen
We can disable the lock screen through editing local group policy. It's worth mentioning that the Windows Home edition doesn't include the Local Group Policy Editor, so you may need to explore alternative methods to disable the lock screen. Perhaps installing gpedit.msc from a batch file could be helpful.
Step 1: Open the Local Group Policy Editor via running gpedit.msc command in the Run dialog.
Step 2: Navigate to Computer Configuration > Administrative Templates > Control Panel > Personalization.
Step 3: Double click the "Do not display the lock screen" item in the right panel of this page.
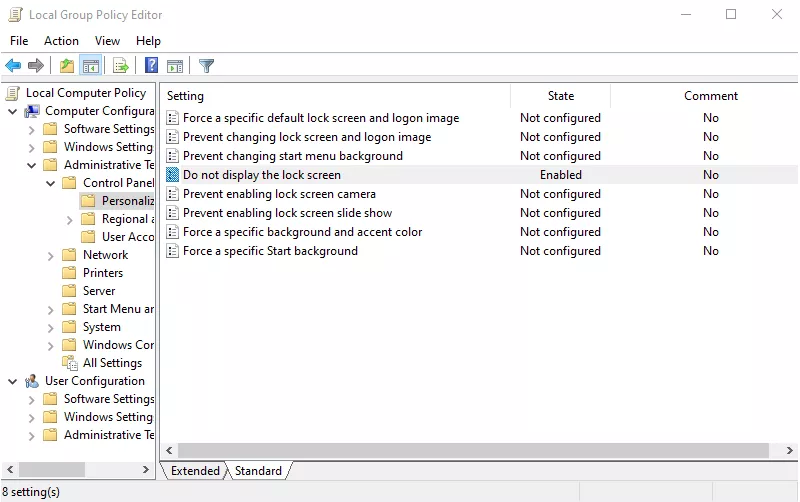
Step 4: Select the "Enabled" radio button in the pop-up window.
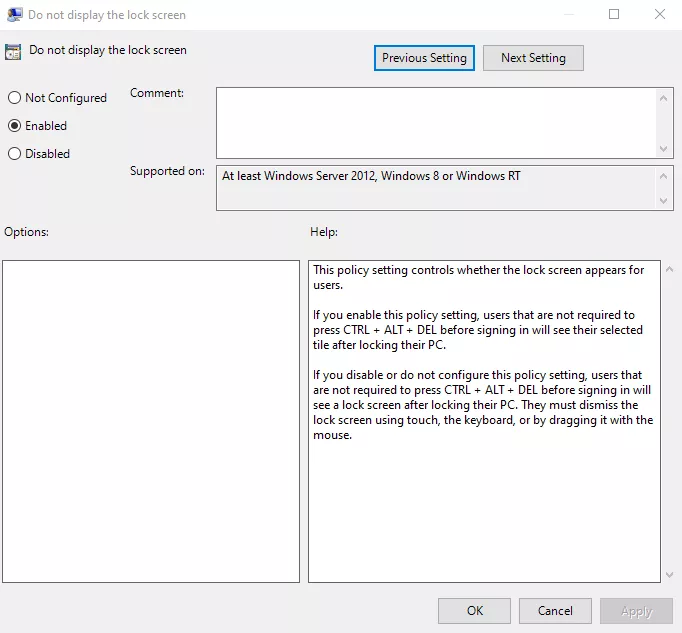
Step 5: Click "Apply" then "OK" to save changes and exit.
Step 6: The lock screen is disabled now.
Alternatively, you can refer this article to disable lock screen using Registry Editor.
Part 2: Disable the Login Screen
Disable the Login Screen Upon Resuming From Sleep
When we resume our computer from sleep, the login screen prompts even if we don't configure a login password. This is ridiculous. To solve this problem, follow the steps below.
Step 1: Create a password.
Note: If you already have a password, navigate to step 2 below.
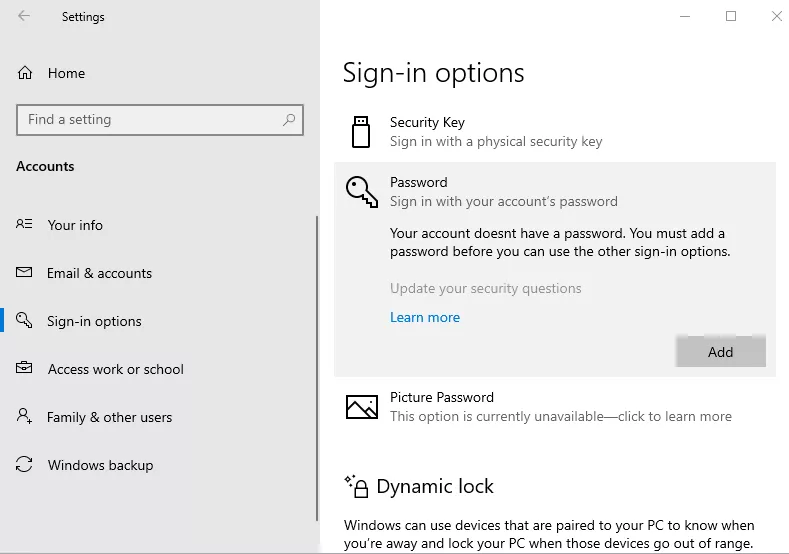
1.1: Navigate to Settings > Accounts > Sign-in options.
1.2: Locate the "Password" in this window then click it.
1.3: Click "Add" button and set a password following the prompts.
Step 2: In the Sign-in options window, scroll down to find the "Require sign-in" option. Then select "Never" from the drop down list.
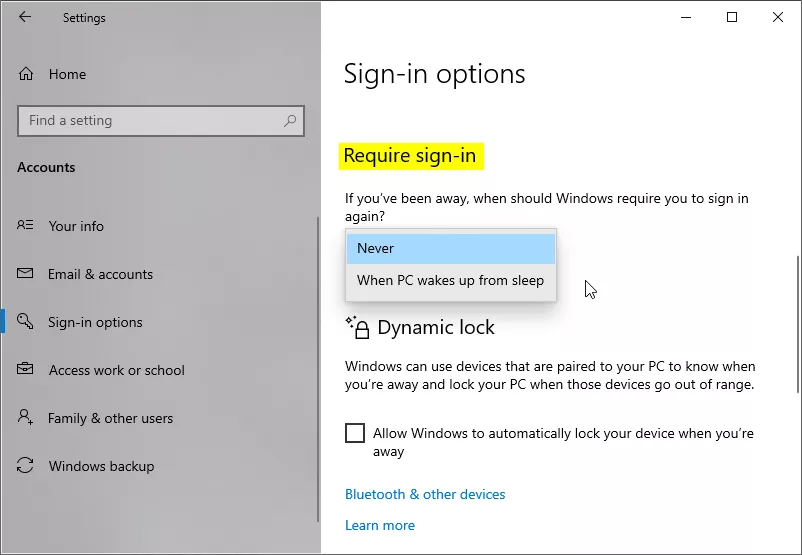
Note: The "Require sign-in" option only appears when you have set a password.
Step 3: To remove the password, Click "Change" button in the Password field on this window. Then input current password and click "Next" button twice to remove it.
The login screen will not prompt again when you resume your computer from sleep mode next time.
Disable the Login Screen on Startup
If you need to disable the login screen on startup, follow the steps below to configure it.
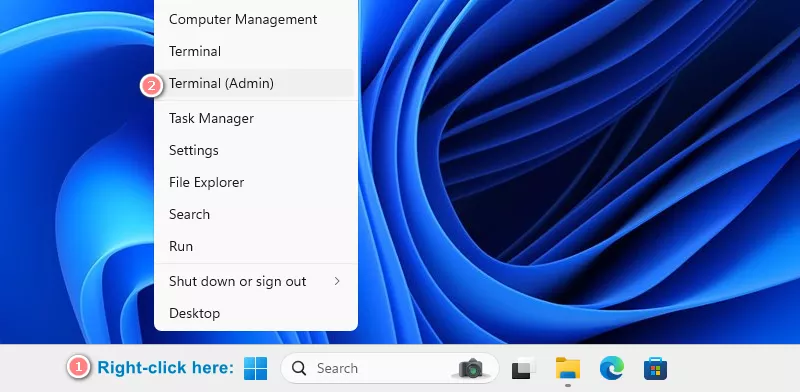
Step 1: Open Command Prompt as administrator or use other command line tool.
Tip: Right-click the start menu and select corresponding option from the context menu to open the tools.
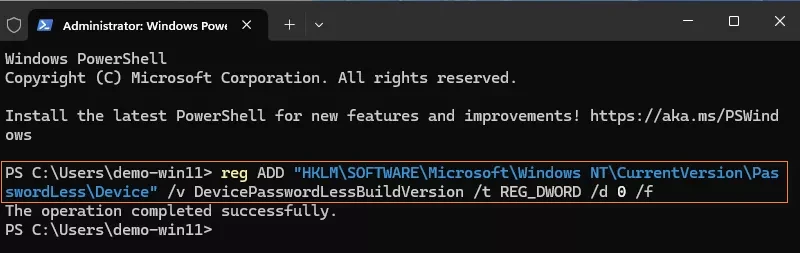
Step 2: Type reg ADD "HKLM\SOFTWARE\Microsoft\Windows NT\CurrentVersion\PasswordLess\Device" /v DevicePasswordLessBuildVersion /t REG_DWORD /d 0 /f command and hit enter.
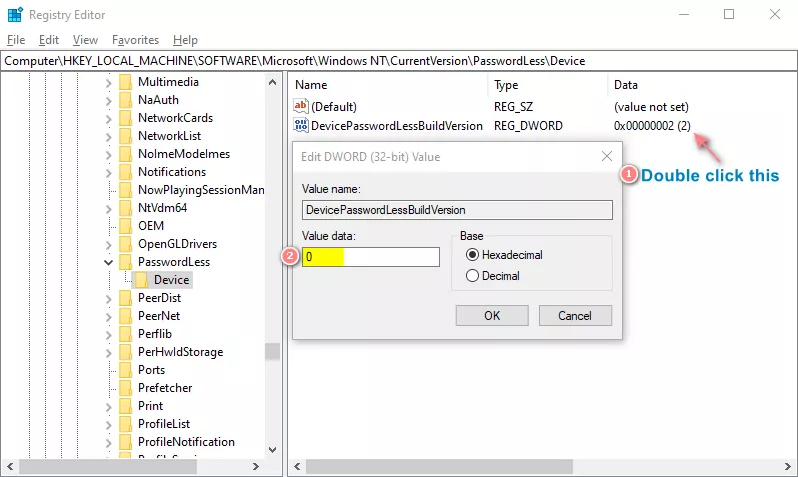
Alternatively, you can directly edit the corresponding key in the Registry Editor.
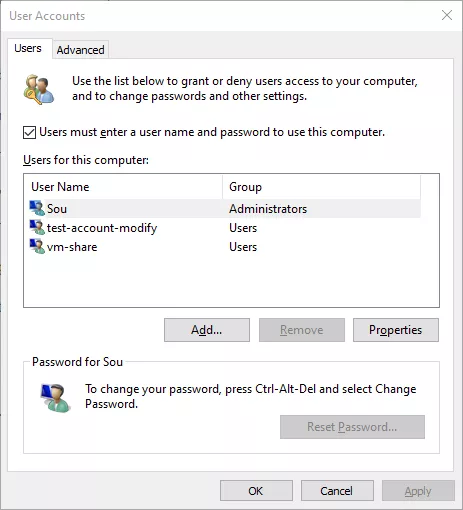
Step 3: Search "netplwiz" in the search bar and run it as administrator.
Step 4: Untick the "Users must enter a user name and password to use this computer" checkbox in the pop-up User Accounts window.
Step 5: Click "Apply" then type your password to confirm in the pop-up Automatically sign in window.
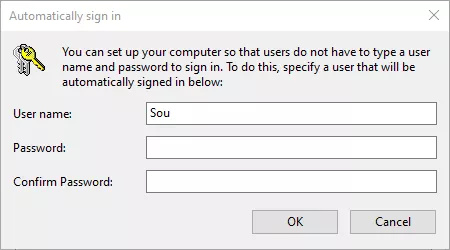
Note: If you don't have a password, just click the "OK" button.
Step 6: Click "OK" in the User Accounts window to exit.
Next time, the login screen will not be displayed when you boot your computer even if you set a password.
Conclusion
This article outlines how to remove the lock screen and login screen when booting up or waking up your computer. If you find this issue distressing, follow the methods outlined in the article to achieve a smoother user experience on your Windows computer.
Watch the Video Tutorial
Prefer visual guidance? Watch our step-by-step video to see how to disable the lock and login screens on your Windows computer.